Getting Started
Rentpro - Admin Panel
- Uploaded Date: 10-August-2025
- Project: Rentpro
- Author: Acnoo
- Email: acnooteam@gmail.com
Thank you for purchasing our product. If you have any questions that are beyond the scope of this documentation file, please feel free to email us via our user page contact form or directly to email at acnooteam@gmail.com
Requirements
- PHP >= 8.2
- Ctype PHP Extension
- cURL PHP Extension
- DOM PHP Extension
- Fileinfo PHP Extension
- Filter PHP Extension
- Hash PHP Extension
- Mbstring PHP Extension
- OpenSSL PHP Extension
- PCRE PHP Extension
- PDO PHP Extension
- Session PHP Extension
- Tokenizer PHP Extension
- XML PHP Extension
For more information about deployment see the Laravel documentation here https://laravel.com/docs/10.x/deployment
Download Project from Envato
After successfully purchase Rentpro, download the project from Envato download page
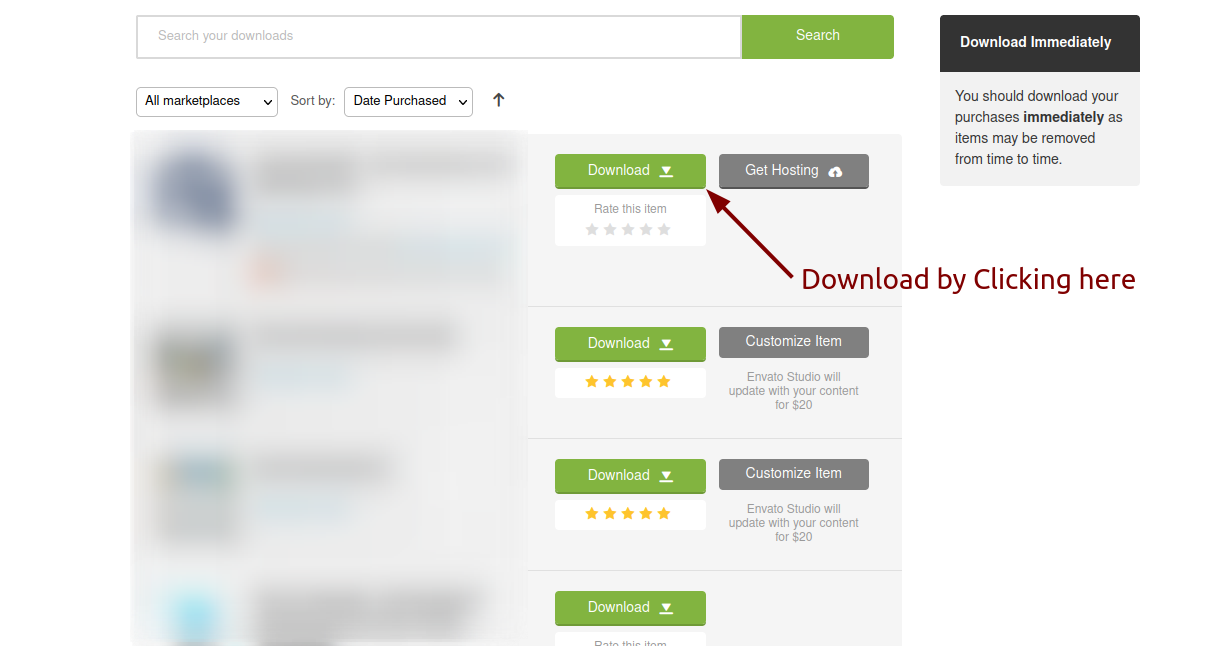
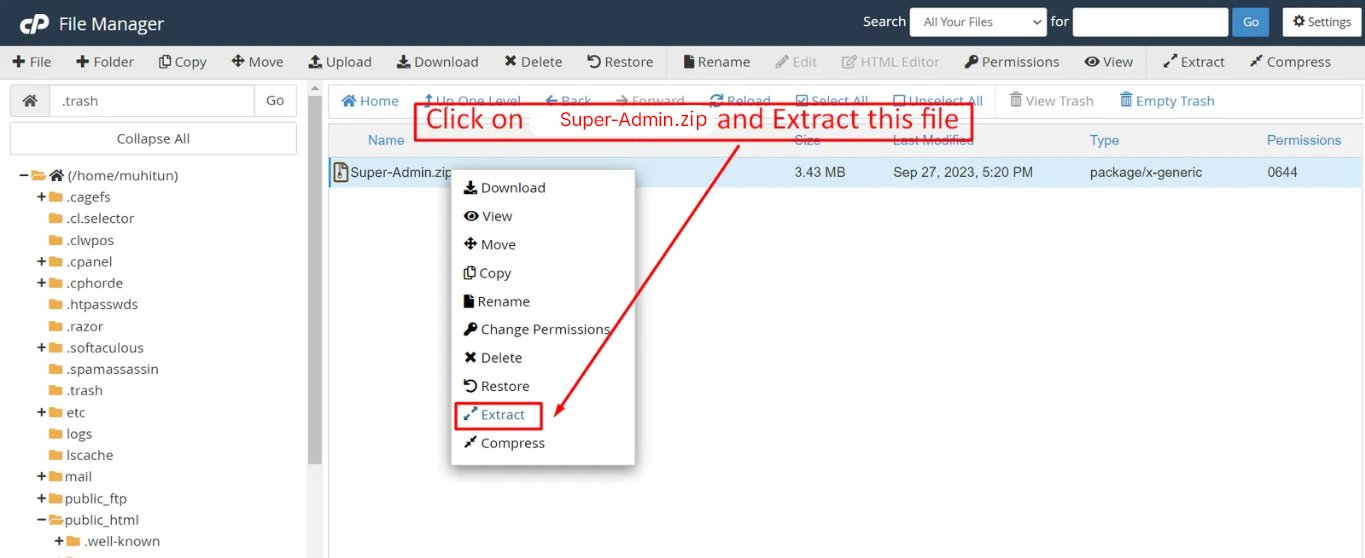
Extract the downloaded file. You will have another zip file named Super-Admin.zip containing the main project's files and a documentation folder. You are reading this documentation, that means you already have theme both.
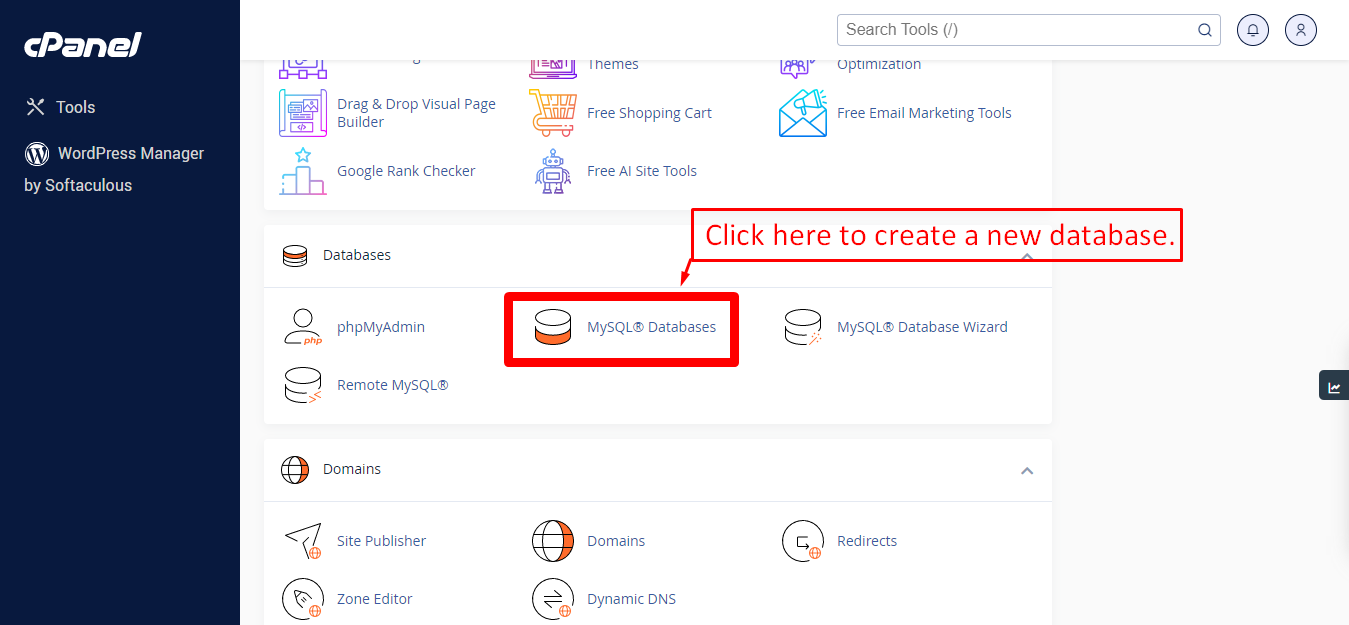
Creating Database
Before installing, you will need to create a new database. If you already know how to do this or have already created one, skip to the next step.
Note: Please use empty database. In most cases you should be able to create a database from your cpanel.
Login to your cPanel by entering this in your browser url
yourdomian.com/cpanel

Step: 1
Step: 2
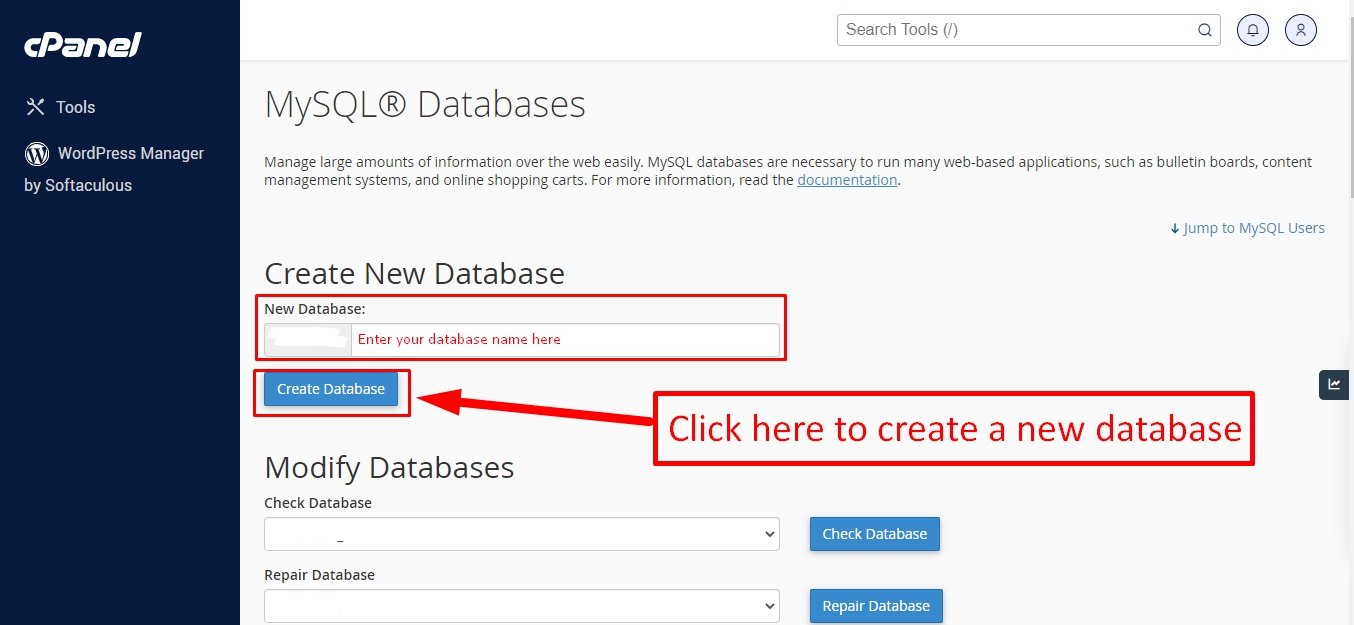
Step: 3
Now you need to create a new user. On the same page go to create a new database user
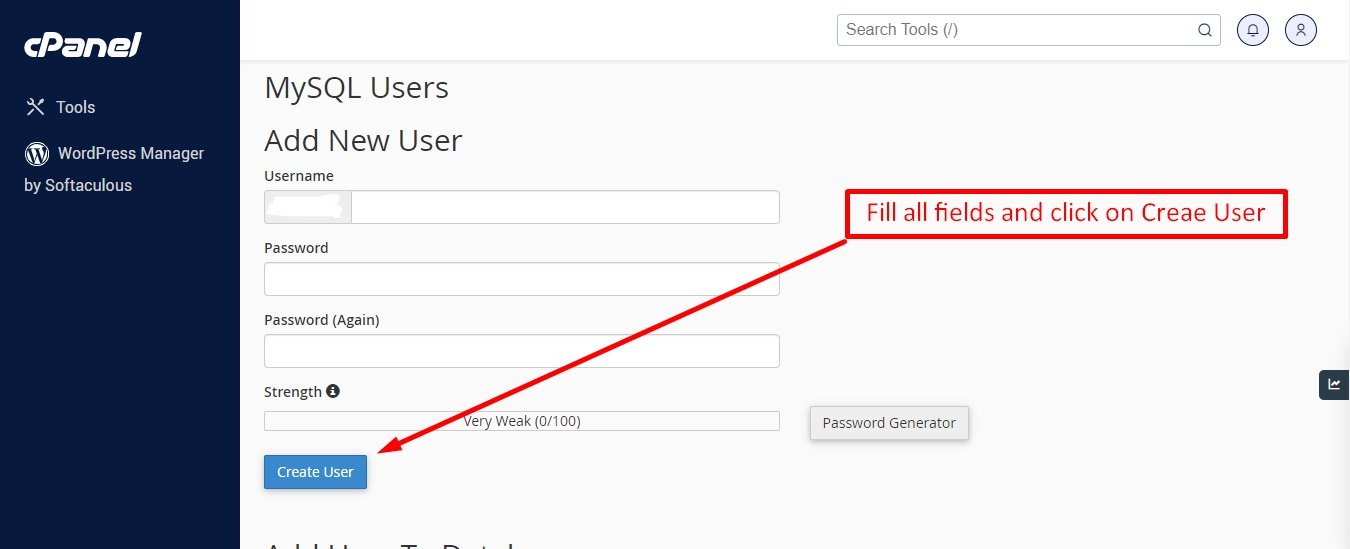
Step: 4
Now add the user to the database
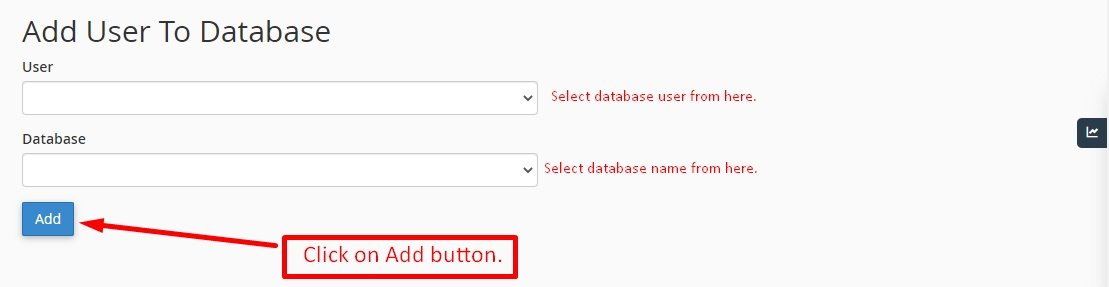
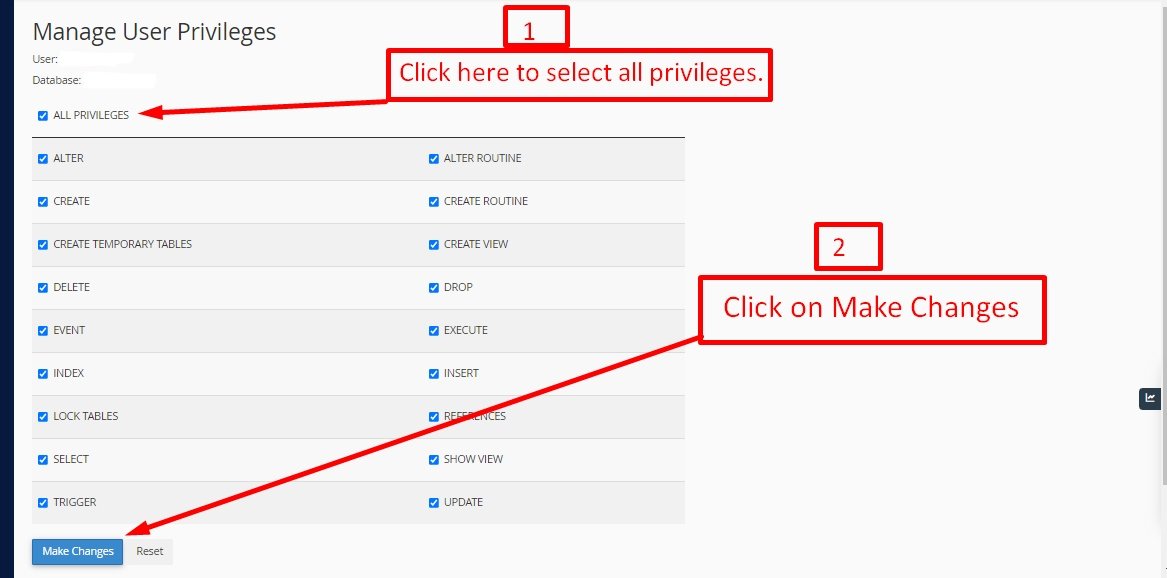
Step: 5
And select full permissions on the database to that user
Uploading Files
On some operating systems, the dotfiles are hidden by default. Before starting to upload the files, please make sure your file explorer has the option to view hidden files turned on.
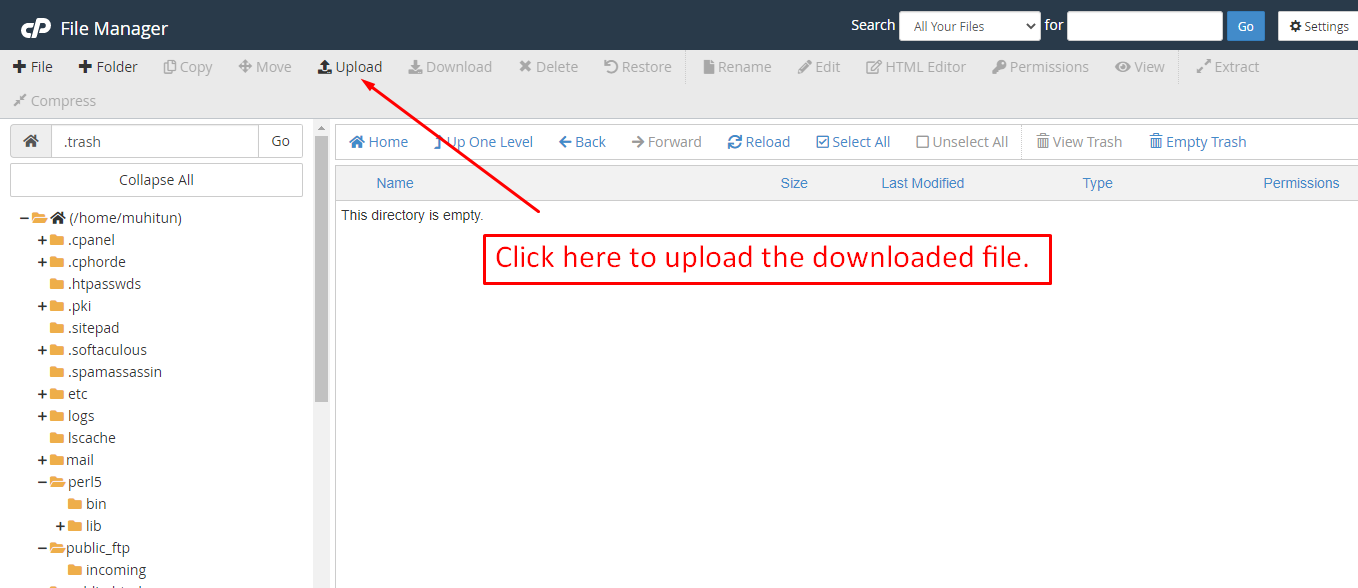
After creating a database, Upload the Super-Admin.zip file on the web root folder of your domain. This folder is generally called public_html, html, or example.com, but depending on your server's configuration, it might be named differently.
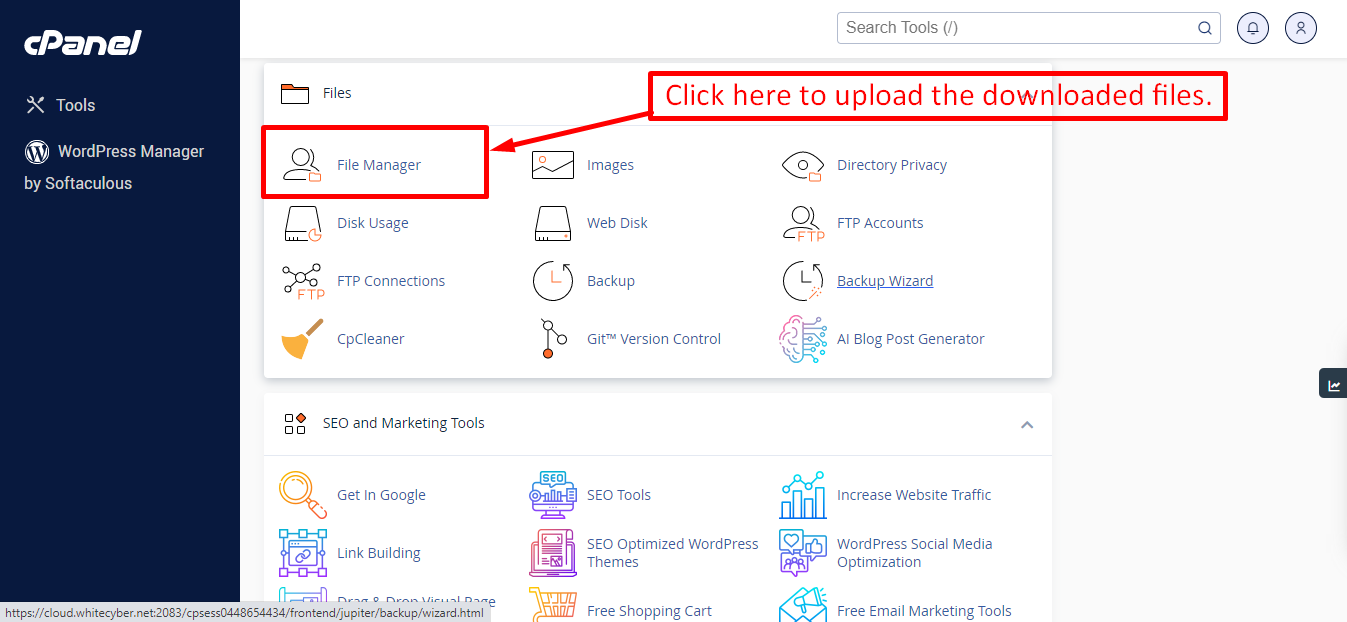
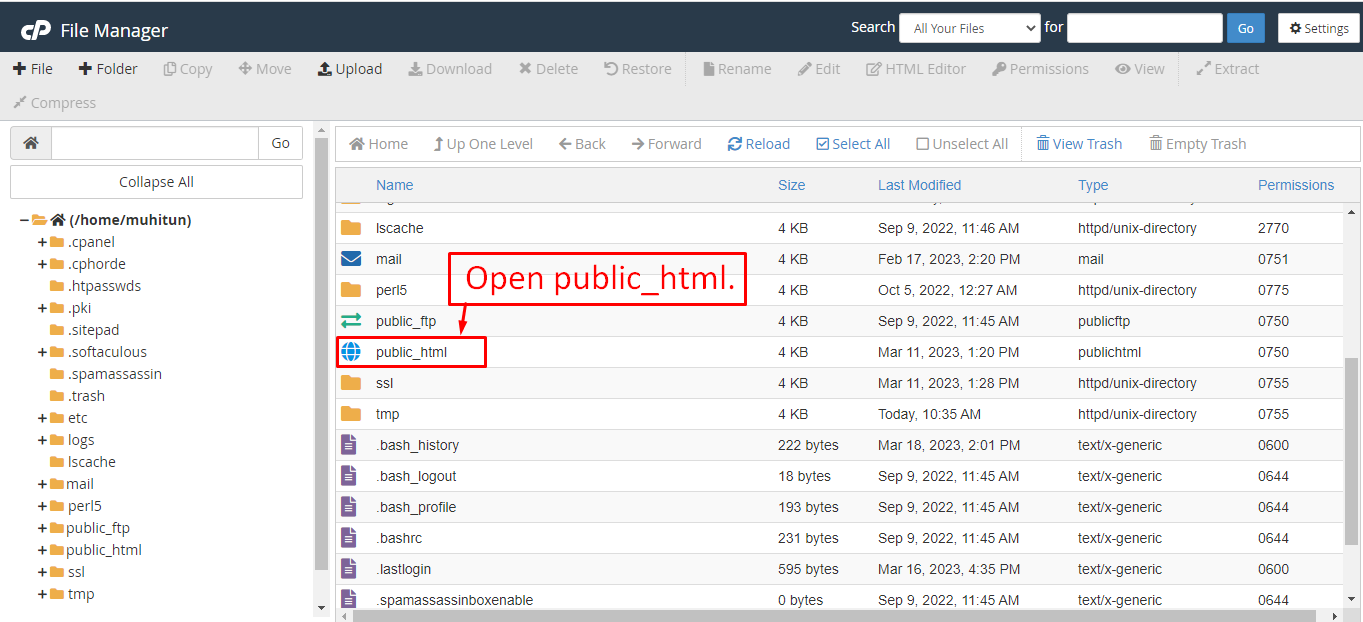
After that in the public_html directory upload the downloaded file.
Note: Important Make sure that you have .env file in your folder.
Note: Make sure that .htaccess file got copied properly from the download to your server.
Installation Wizard
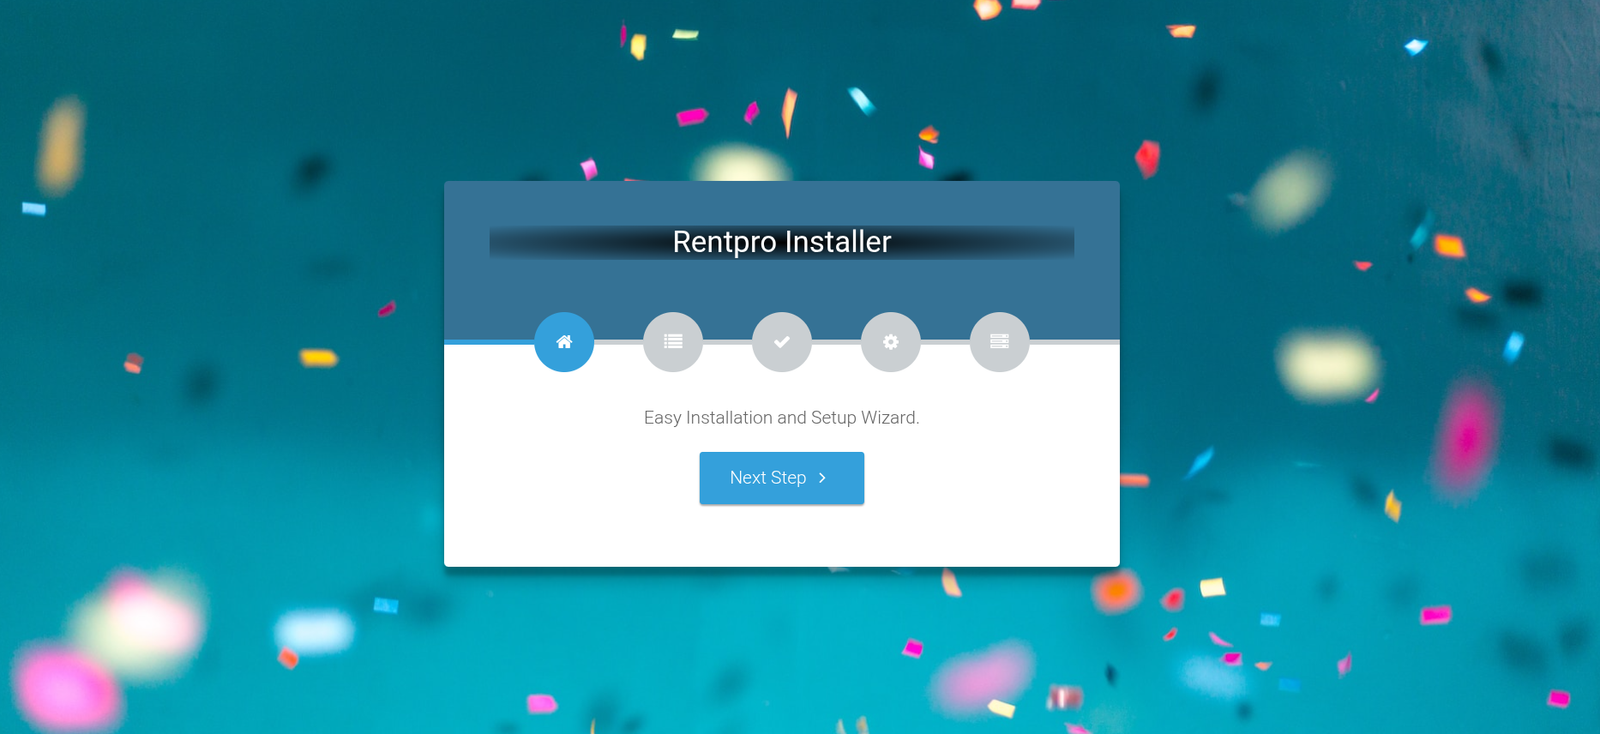
Go to your website address, then you'll see an installation wizard. To open the installer. Visit
yourdomain.com/install
Now the installer will show up.The First screen will be Welcome Screen
Note : If you are not able to access the website by accessing yourdomain.com/install, but you are able to access it via yourdomain.com/index.php/install, this means that you probably don't have Apache mod_rewrite installed and enabled.
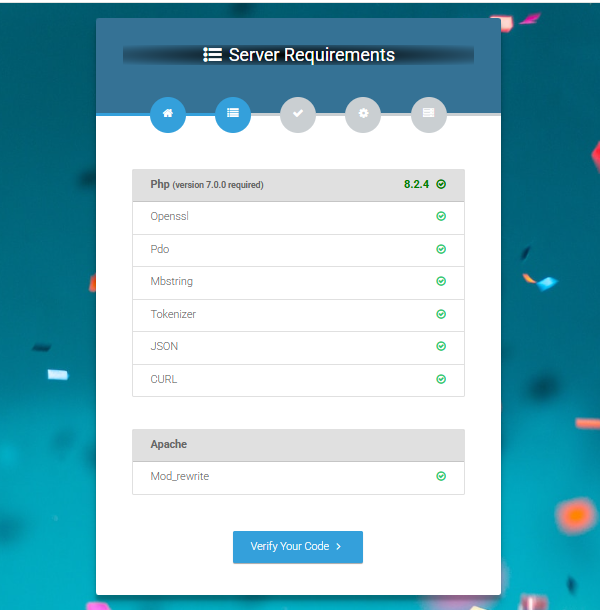
Server Requirements
After clicking on "Check requirement" button, you will be redirected to System Requirements step during the installation wizard, System Requirements.
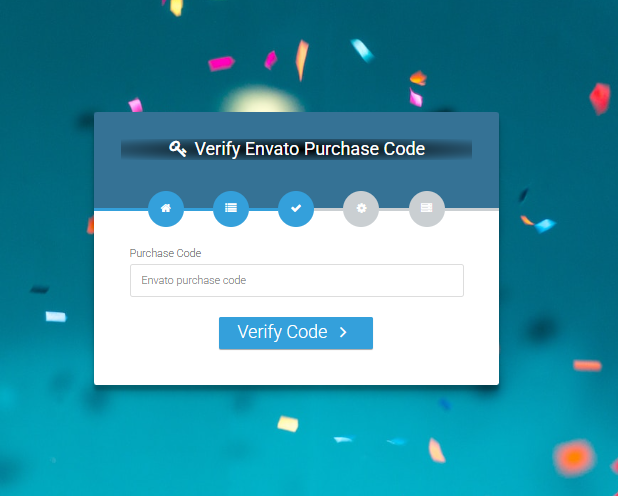
Verify Code
Here enter your Envato Purchase Code to proceed.
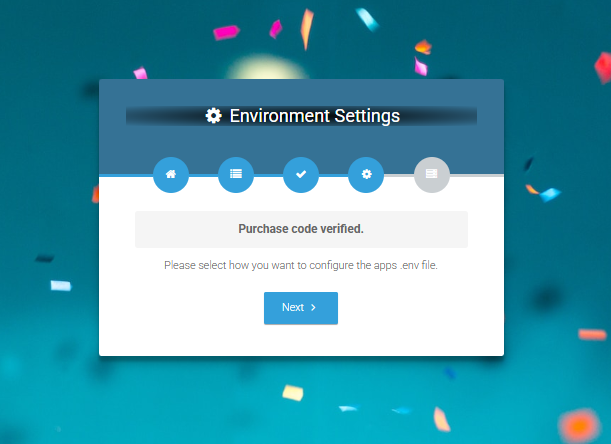
Database/Environment Setting
If your code is verified, simply click 'Next' to proceed to the next step.
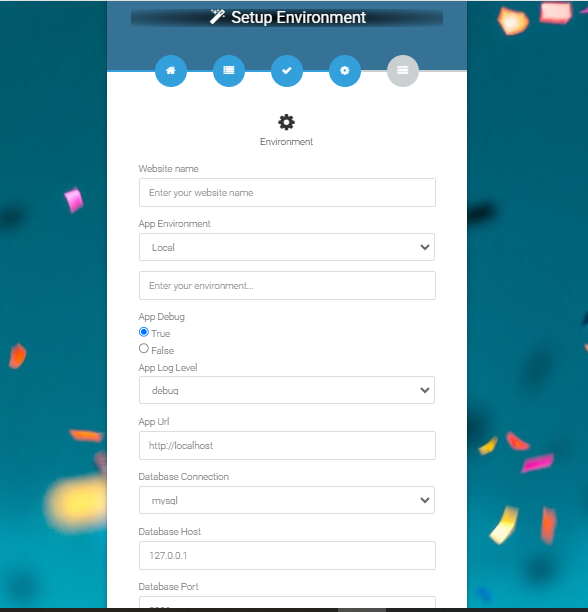
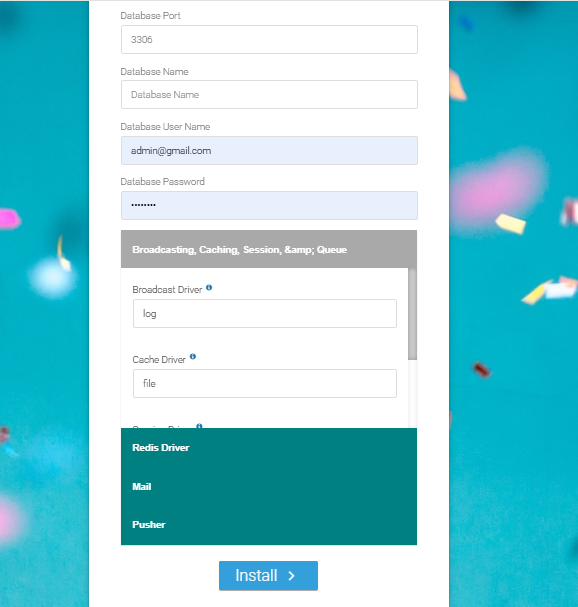
Please enter your database credentials and click 'Install' to continue.
Exit
The last step is exit step.
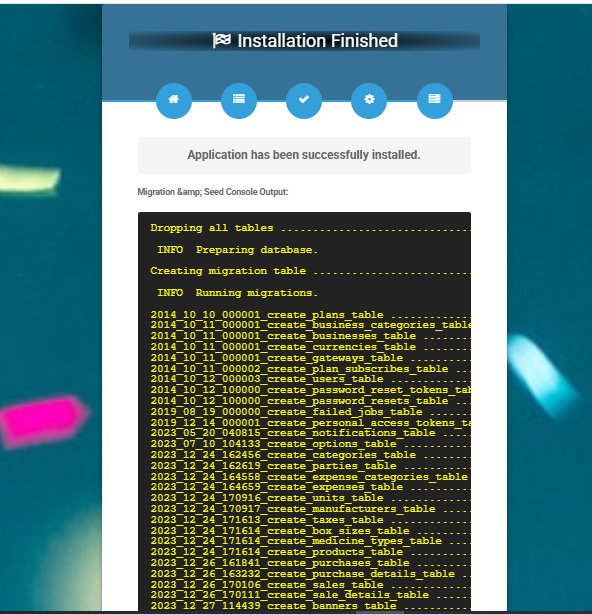
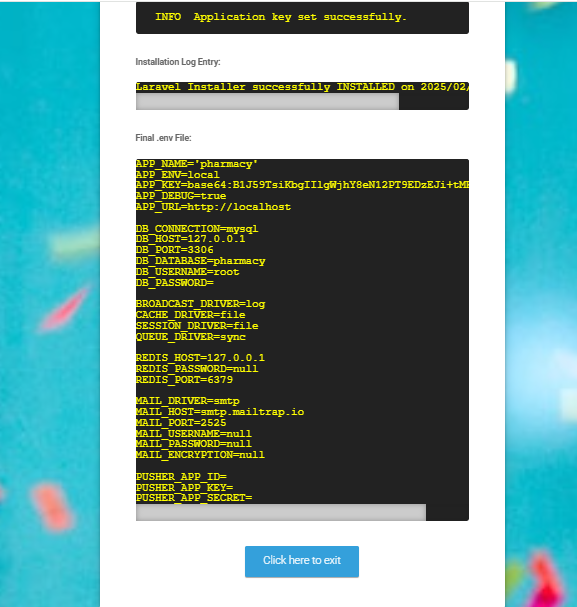
Congratulations you have successfully installed this project on your server. 😀
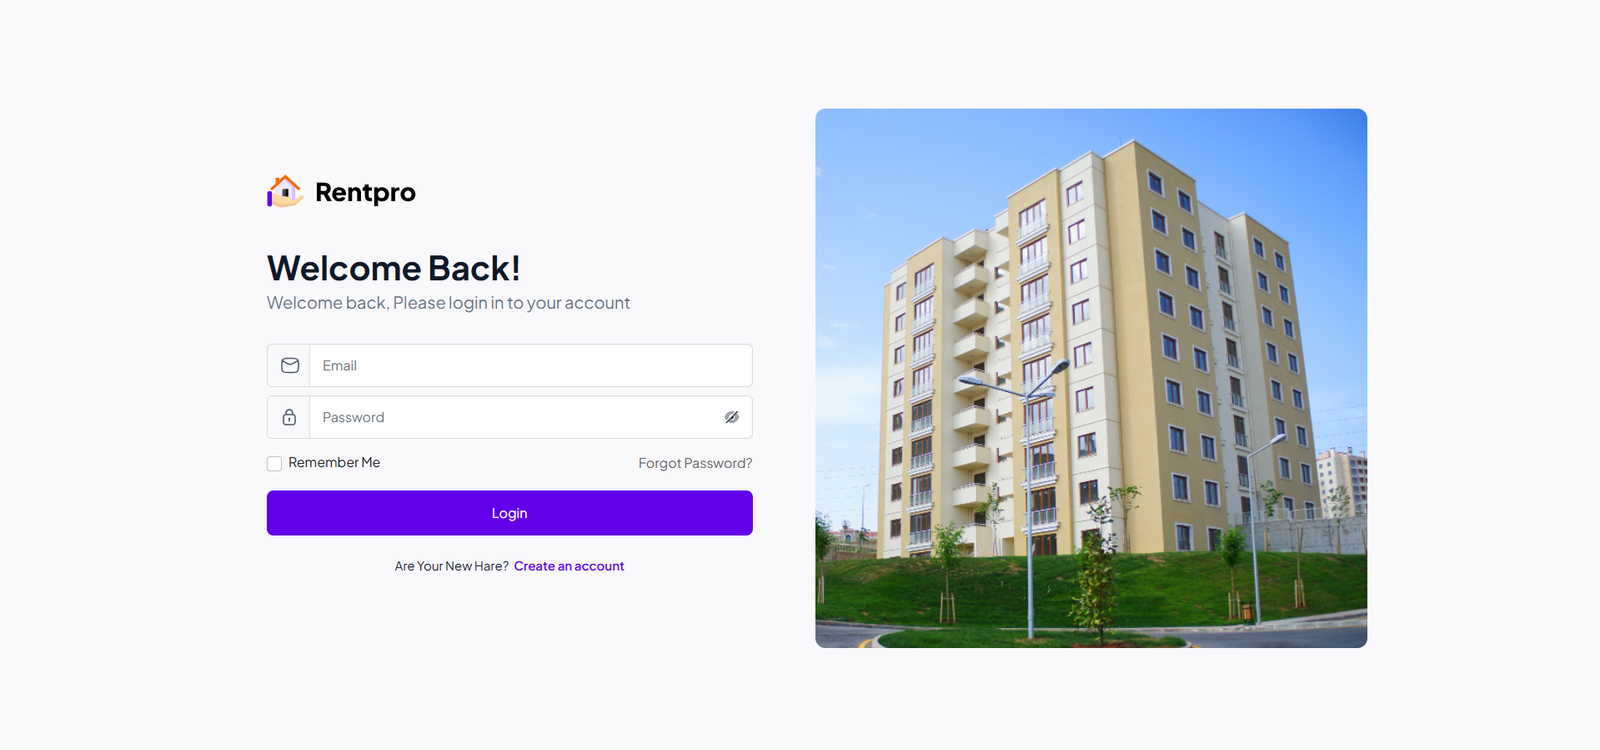
Default Password
You can login using several methods depending on your role.
Super Admin
superadmin@acnoo.com
superadmin
Admin
admin@acnoo.com
admin
Landlord
landlord@acnoo.com
landlord
In this project, different modules are assigned based on user roles: Super Admin, Admin, Manager. Each role has distinct responsibilities tailored to their specific tasks and permissions. Below, we will discuss how each user role operates within the system.
Dashboard
The top section of the dashboard presents a high-level summary of user accounts. It shows the total number of landlords, tenants, and subscribers. This provides a quick snapshot of the platform's user base and growth.
Earning Statistics: This section visualizes the platform's financial data. A line graph displays income trends over the course of the year, and a summary box shows the current total balance, total income, and total expenses. This gives administrators a clear picture of the platform's profitability and financial performance.
Property Overview: A visual summary of all properties is displayed here. A donut chart indicates the total number of properties, and a numerical breakdown shows how many are currently pending approval, approved, or rejected. This helps manage the property onboarding process.
Pending Actions: At the bottom, a table lists critical pending tasks. This includes landlord withdrawal requests and refund requests. For each request, details such as the date, landlord name, amount, and payment status are provided. This table acts as a task list for administrators to process important financial actions.

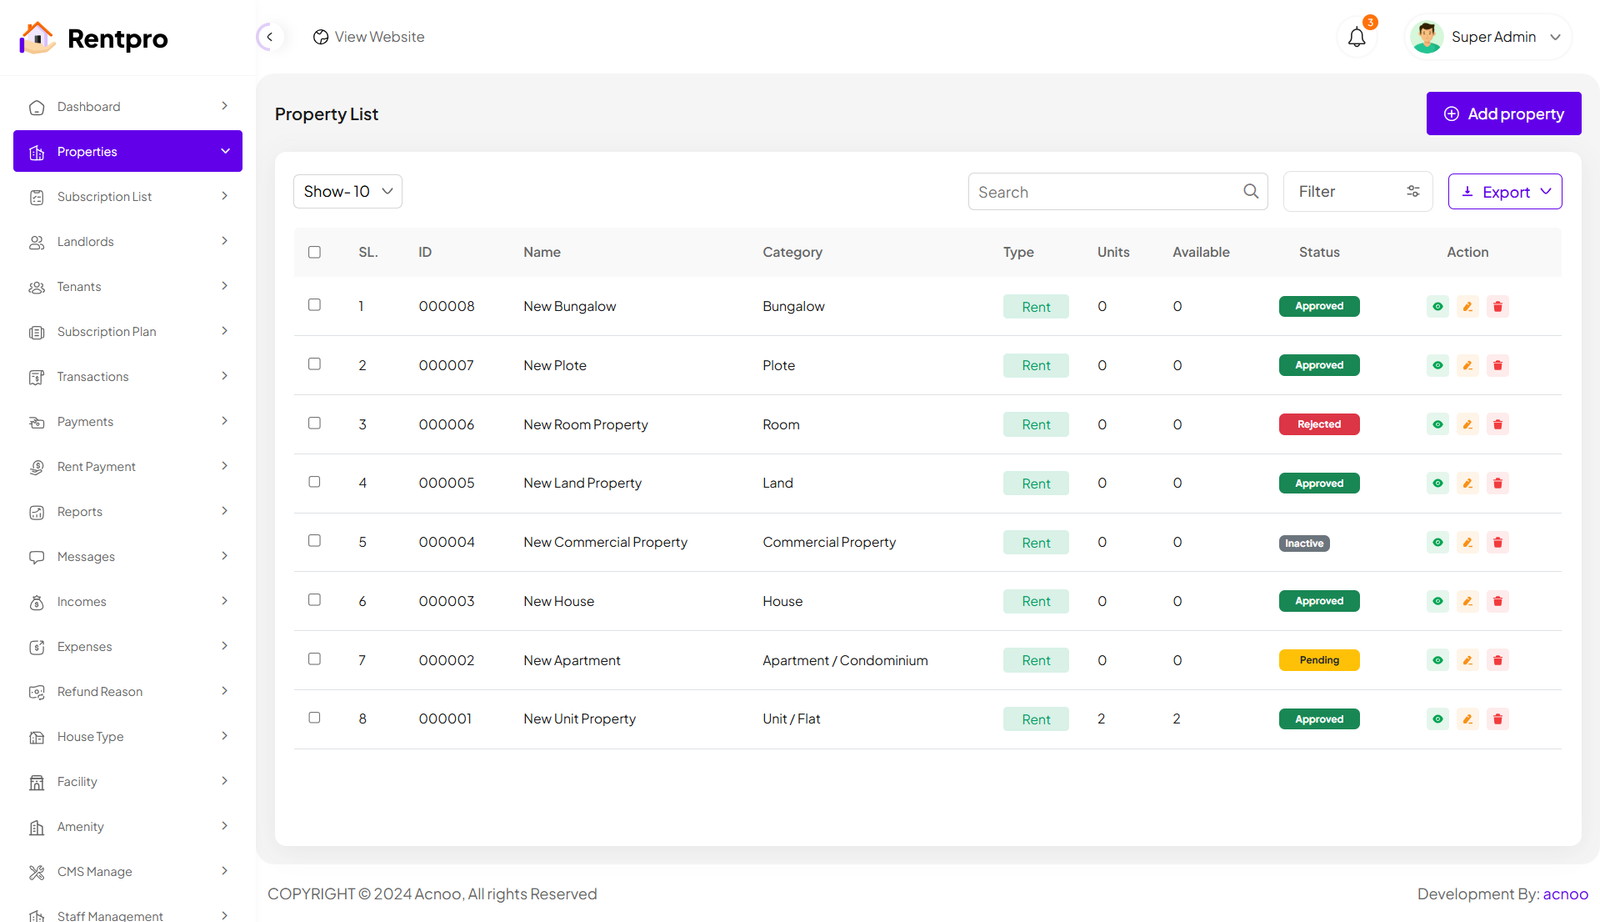
Property List
The "Properties" page in the Rentpro admin panel provides a centralized view and management interface for all properties listed on the platform. This page allows administrators to monitor property details, status, and perform administrative actions. By clicking the "View" button, you can see the details of each property. You can also create a new property by clicking the "Add Property" button. Below, we'll describe how you can create a new property.
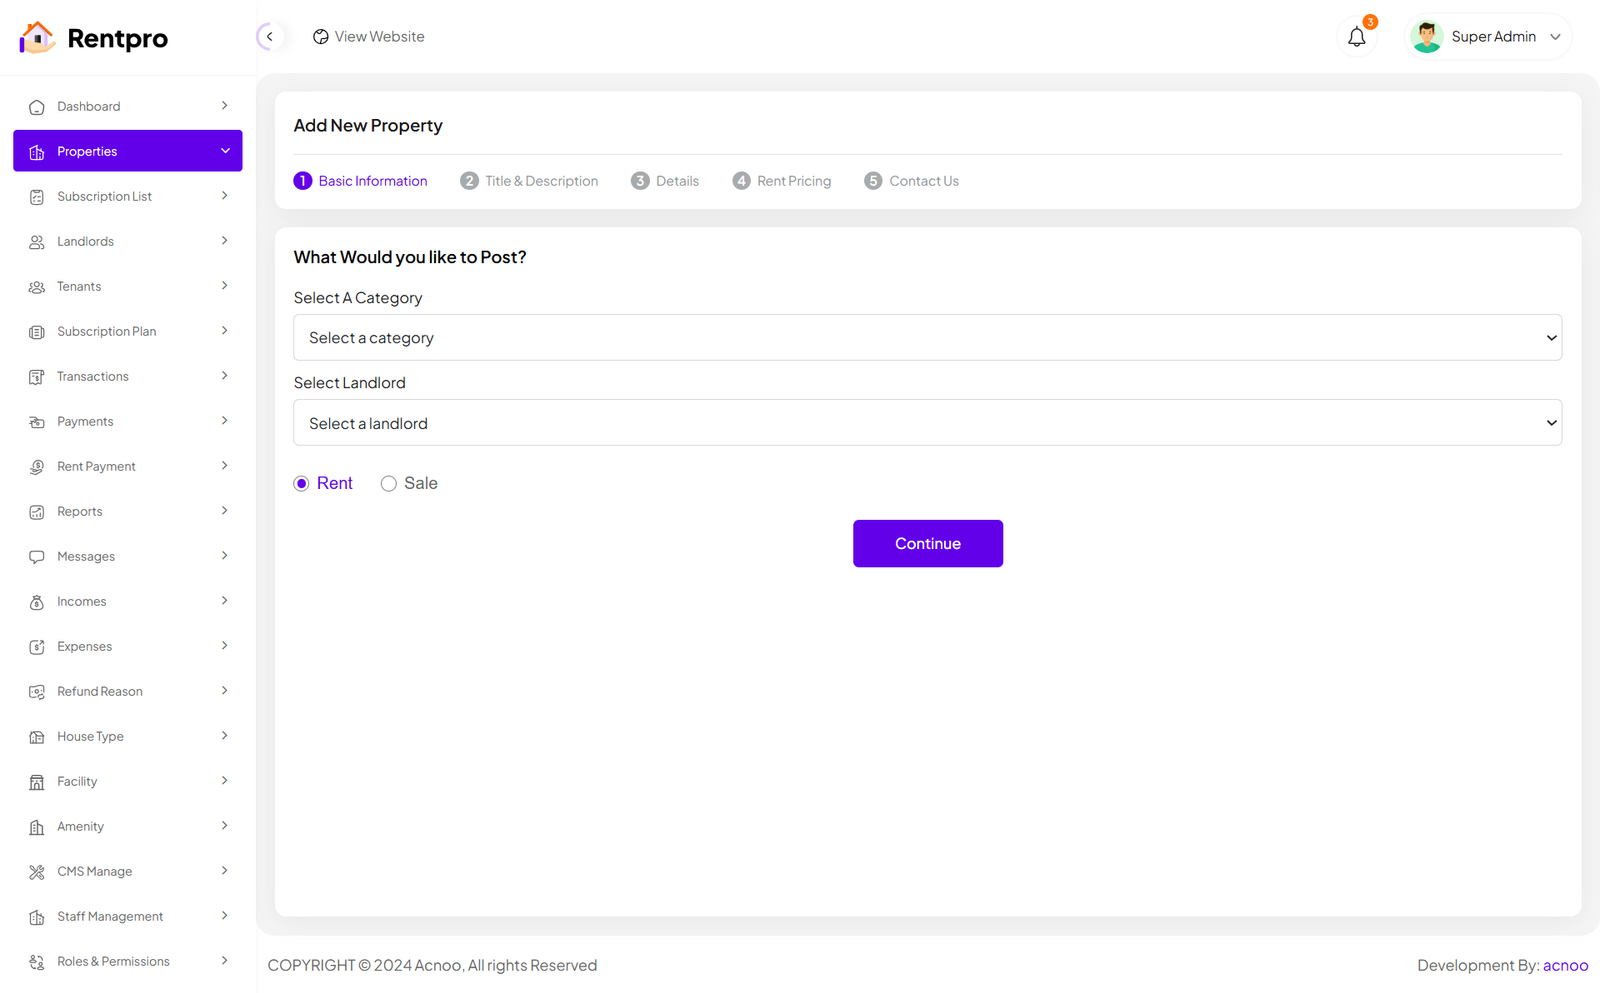
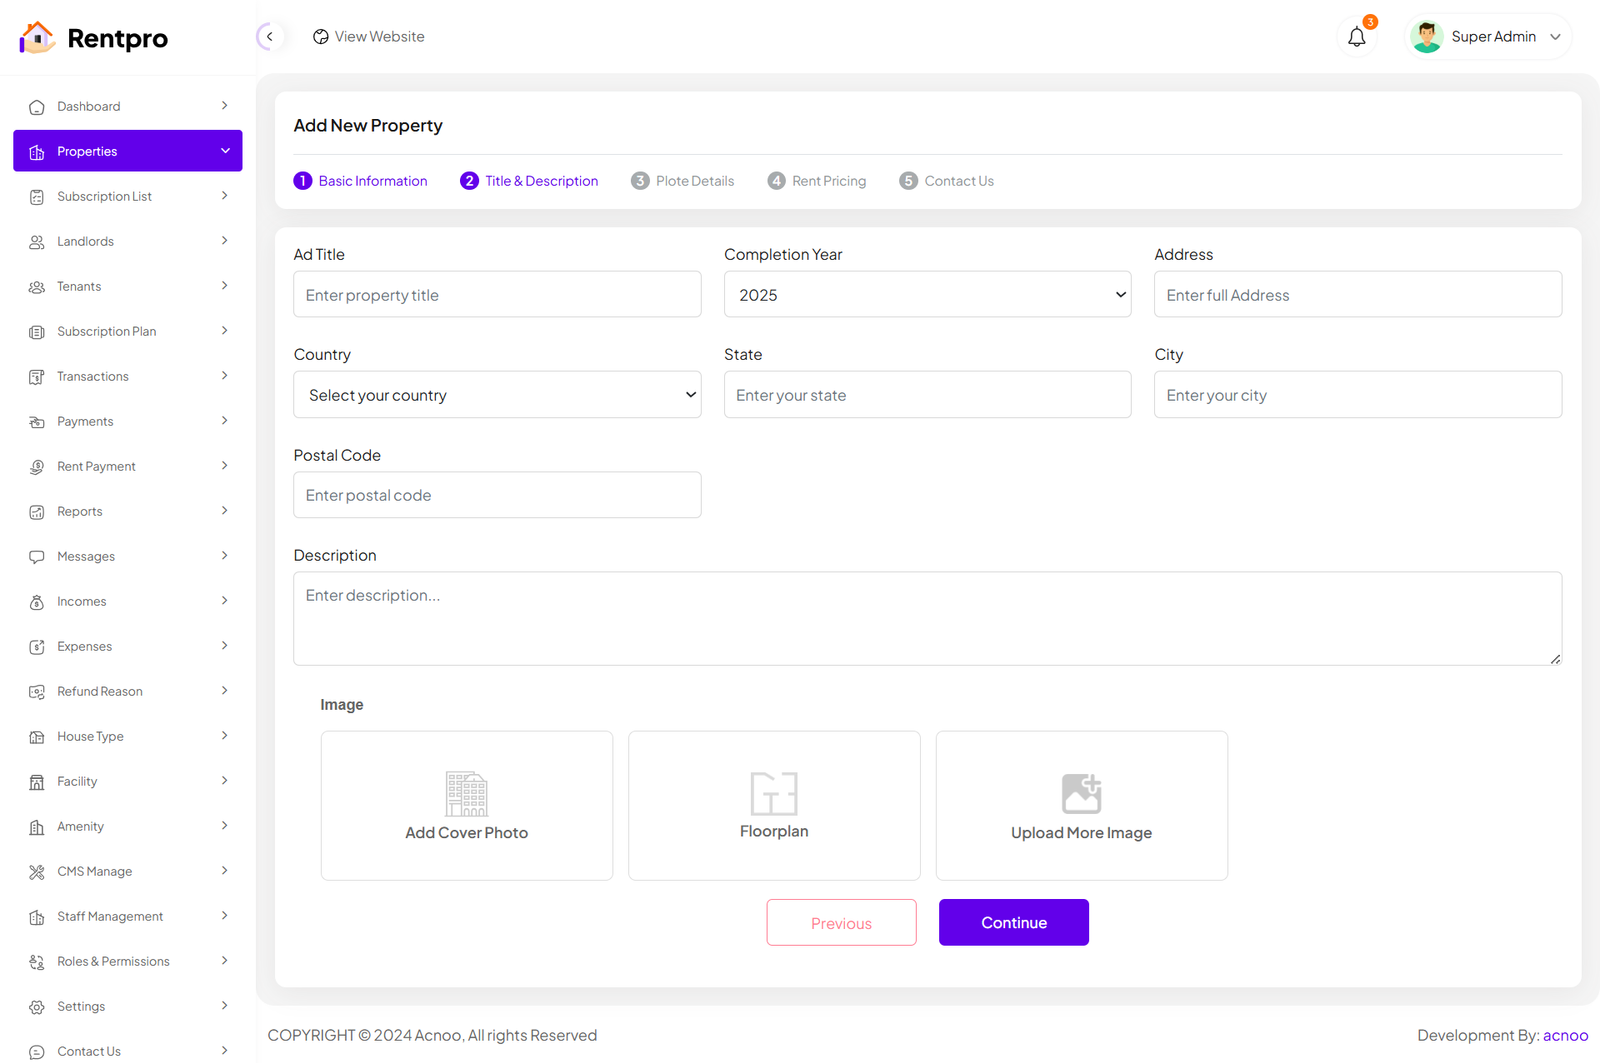
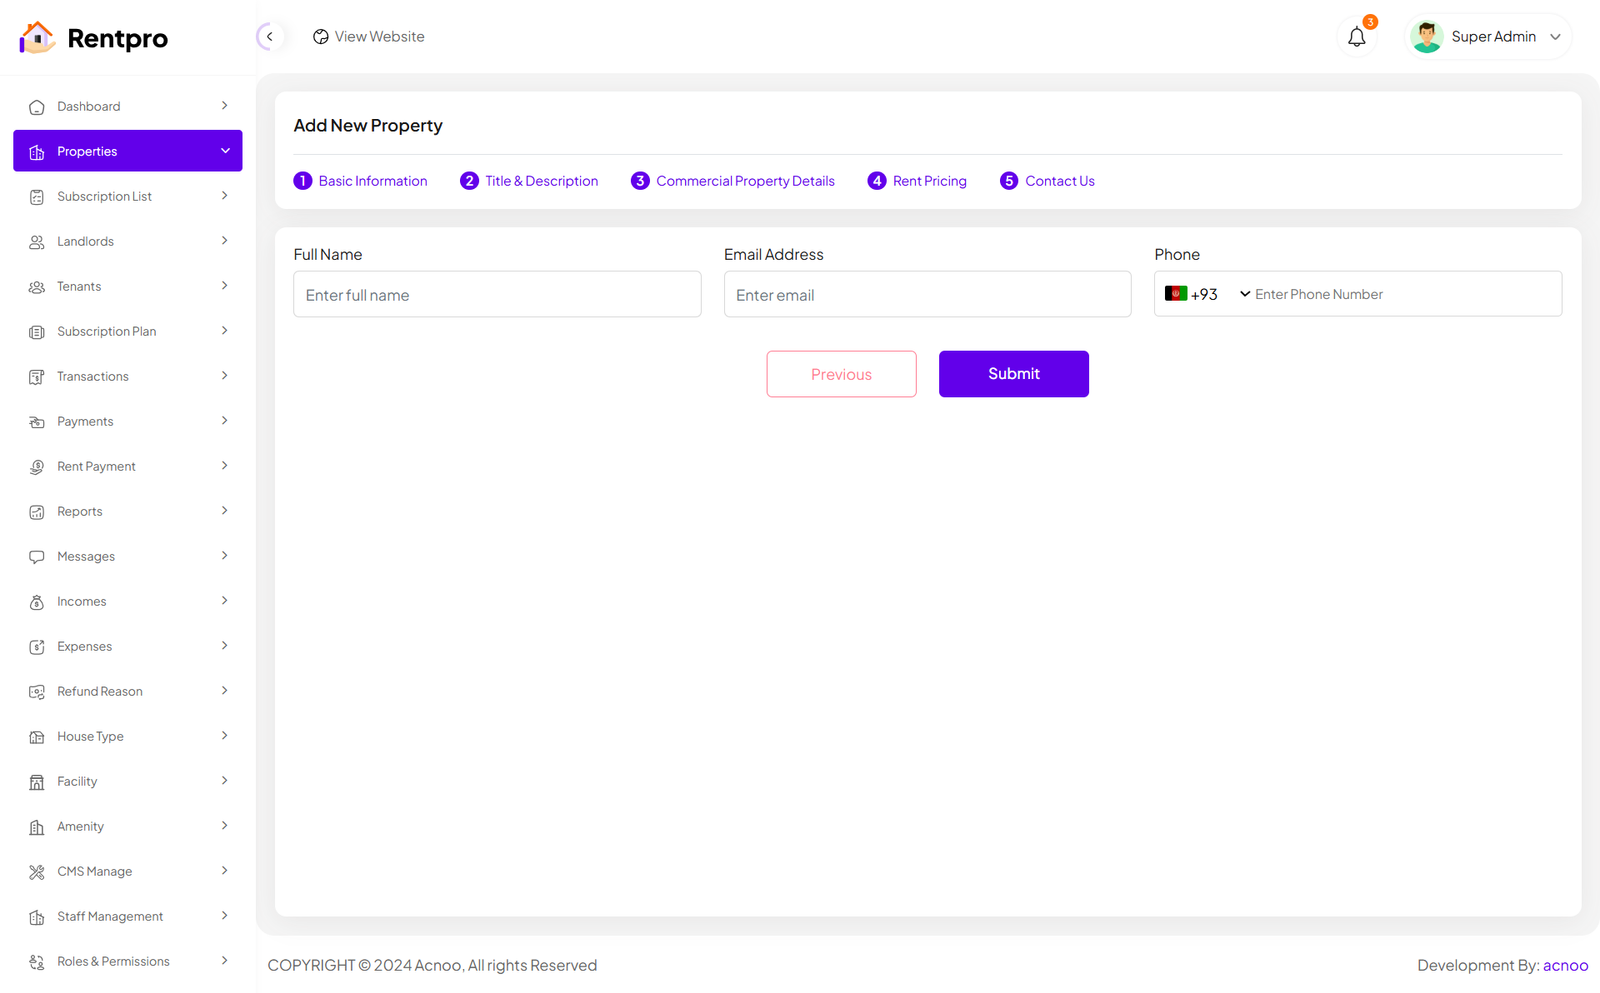
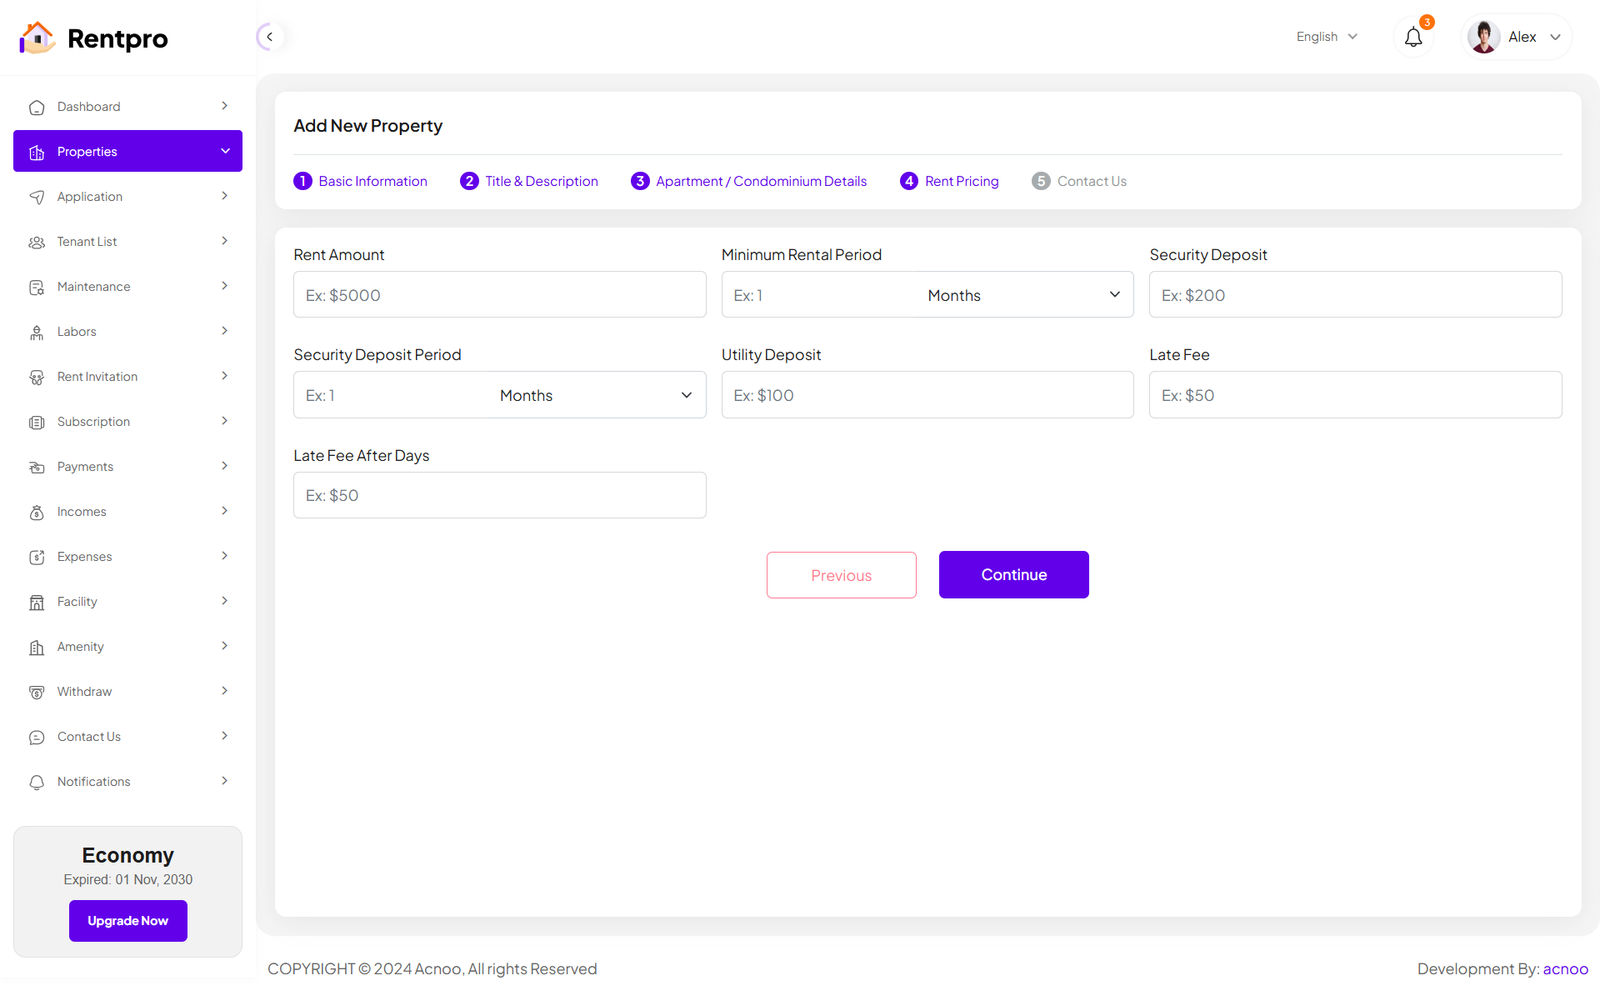
Add New Property
By clicking on the "Add property" button, you can create a new property. You will need to fill in the necessary fields. Here is the screenshot of the Create Property page. In the first screenshot, the input fields will change according to the selected category. Specifically, if you select the "Unit/Flat" category, the input fields will change significantly. Additionally, in the first screenshot, there is a "Type" field with options "Rent" and "Sale." Selecting either of these will only affect the Rent Pricing section, while the rest of the fields will remain unchanged.
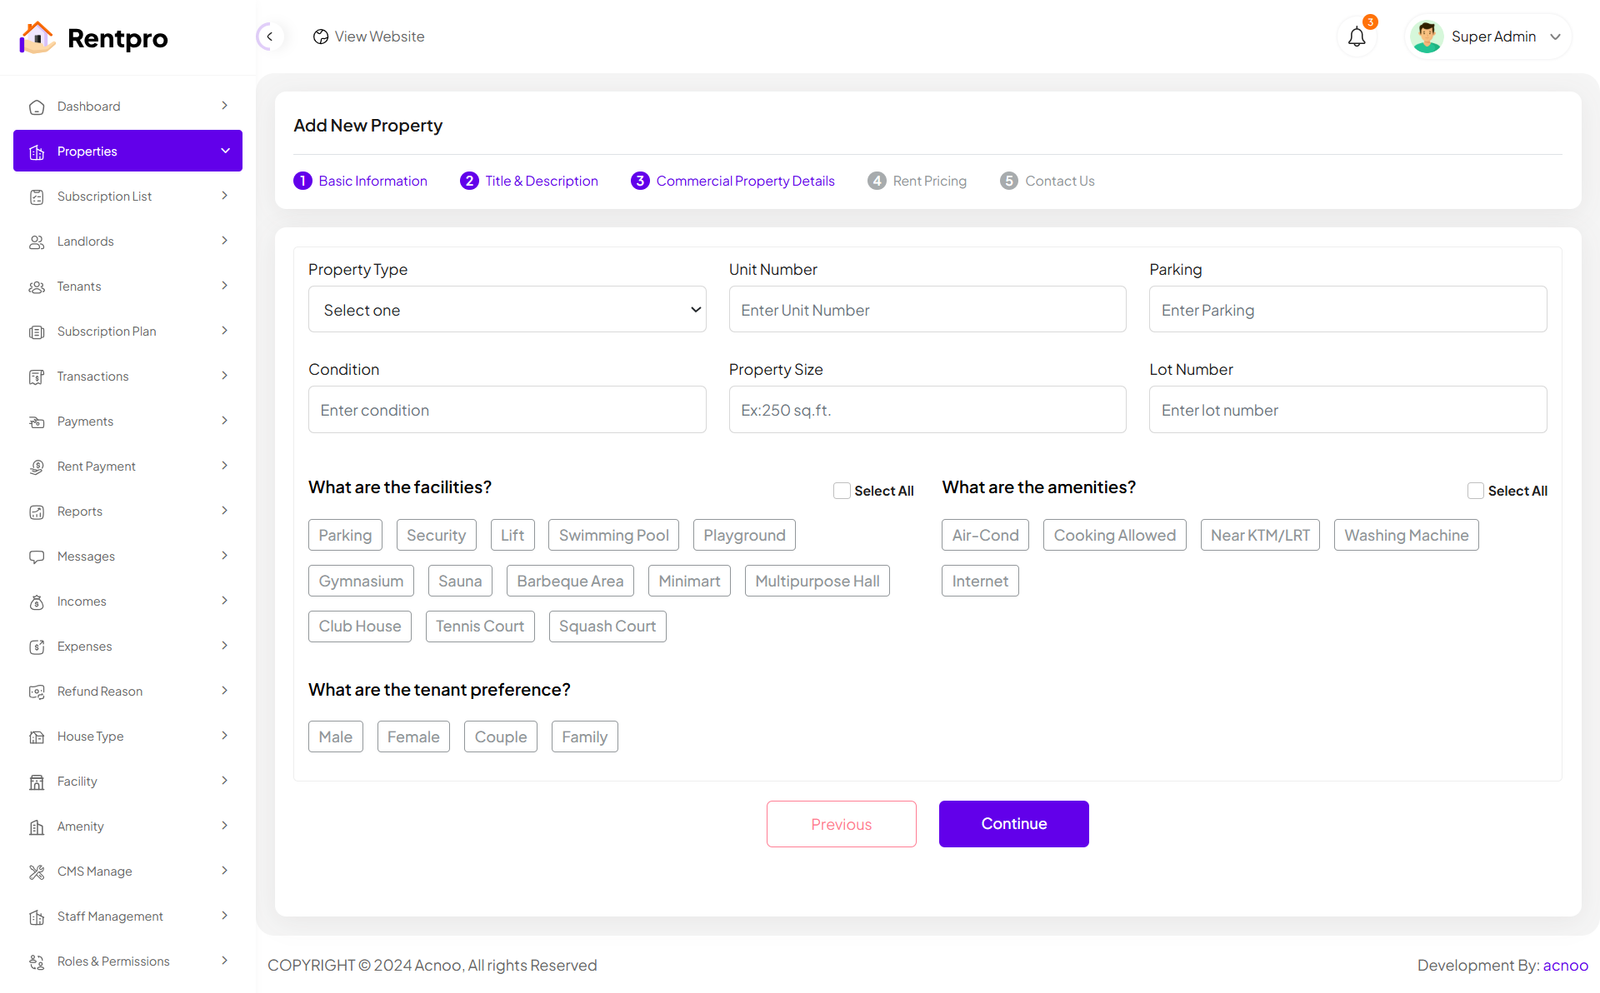
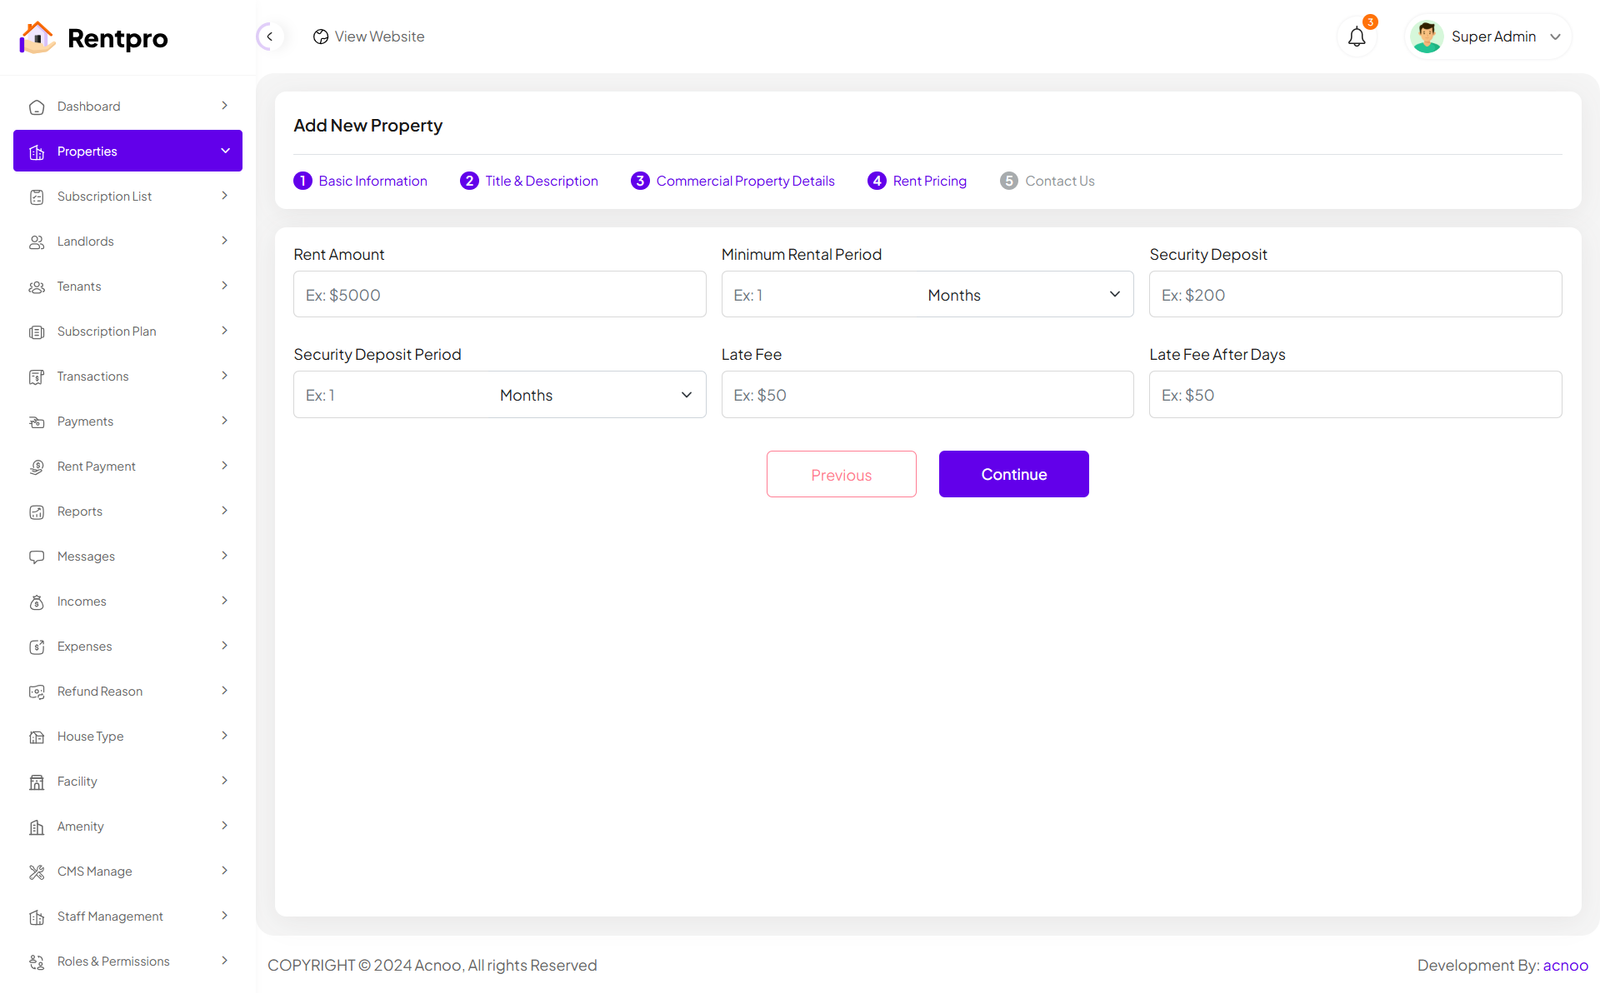
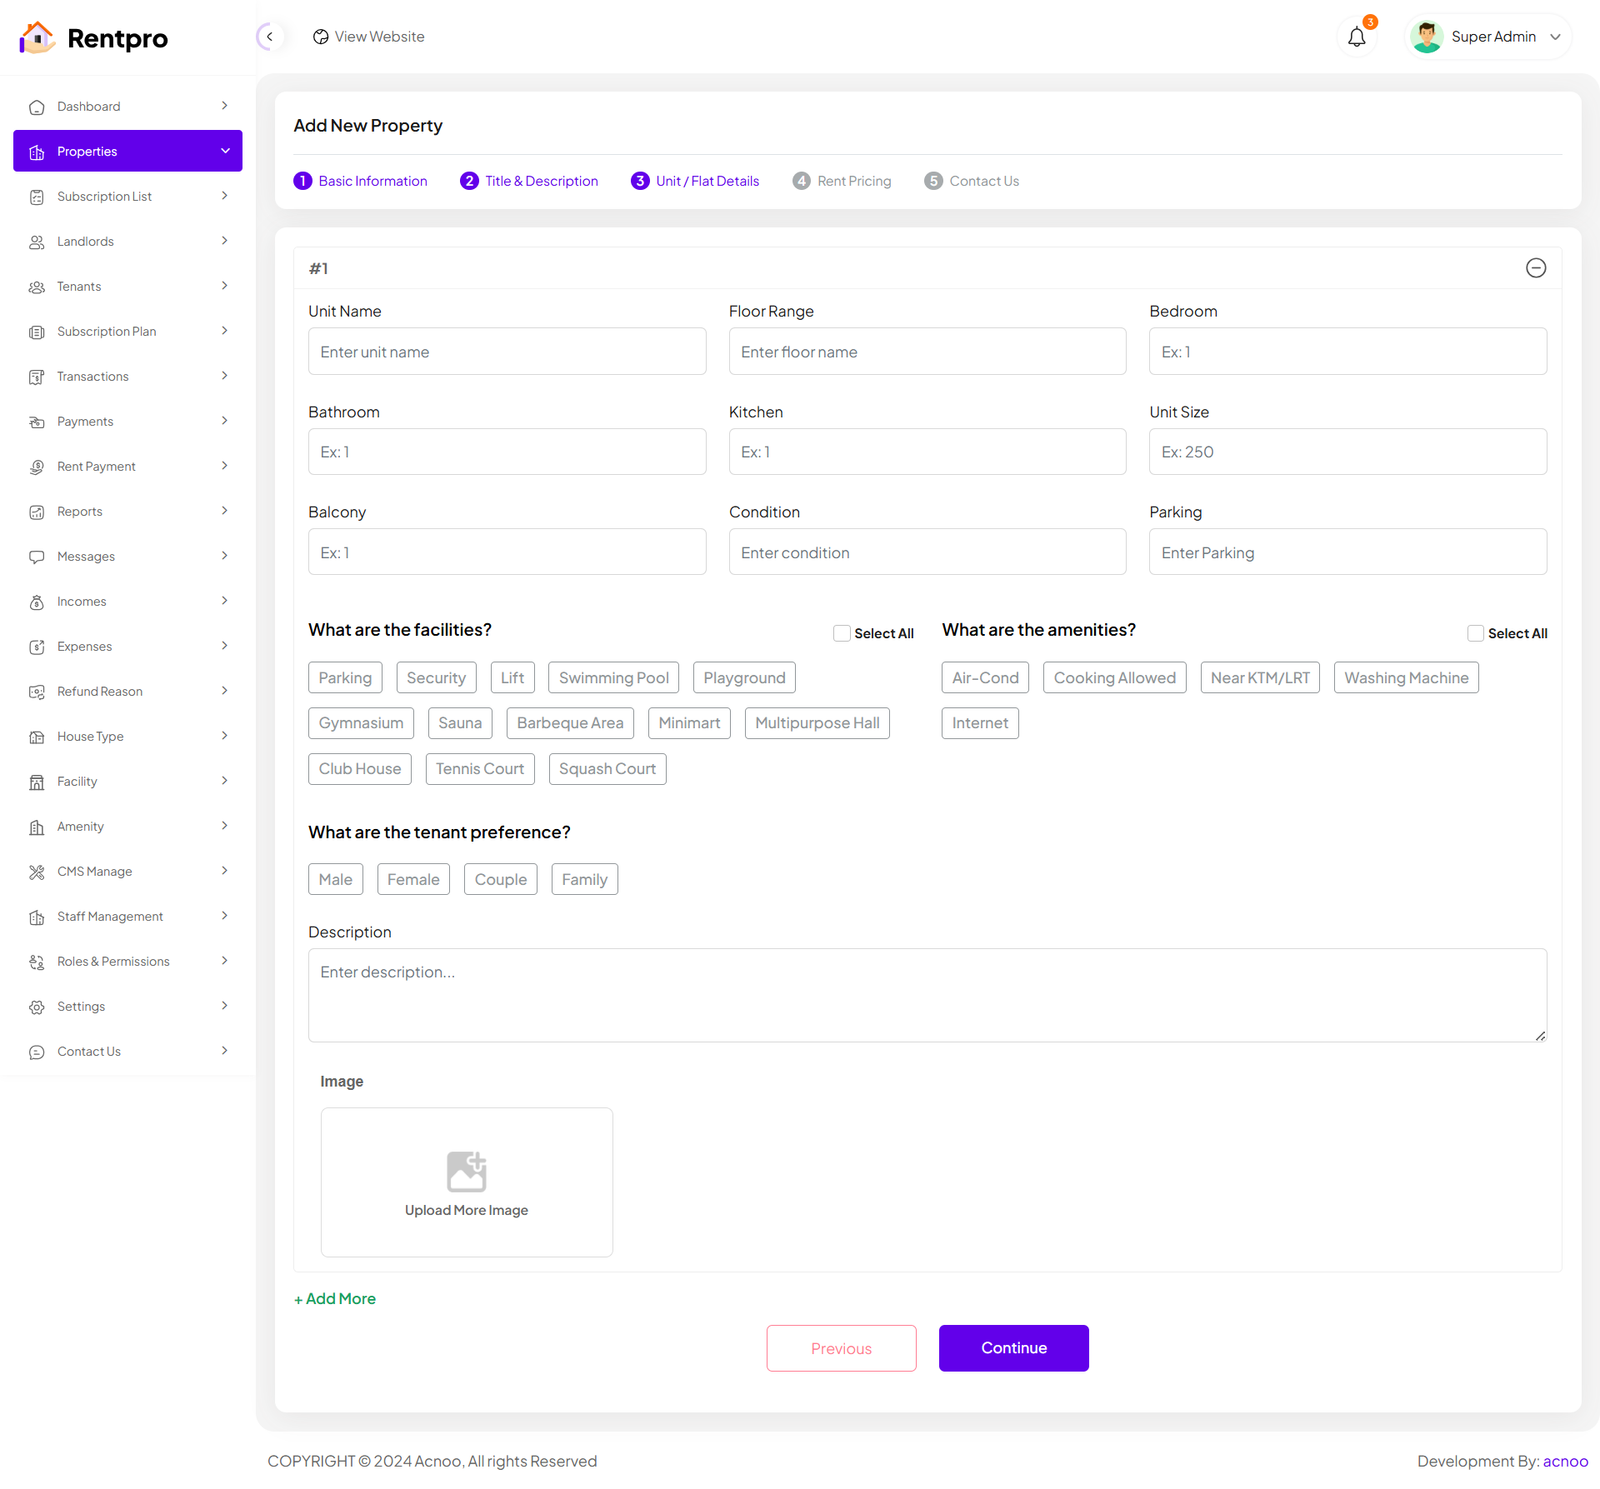
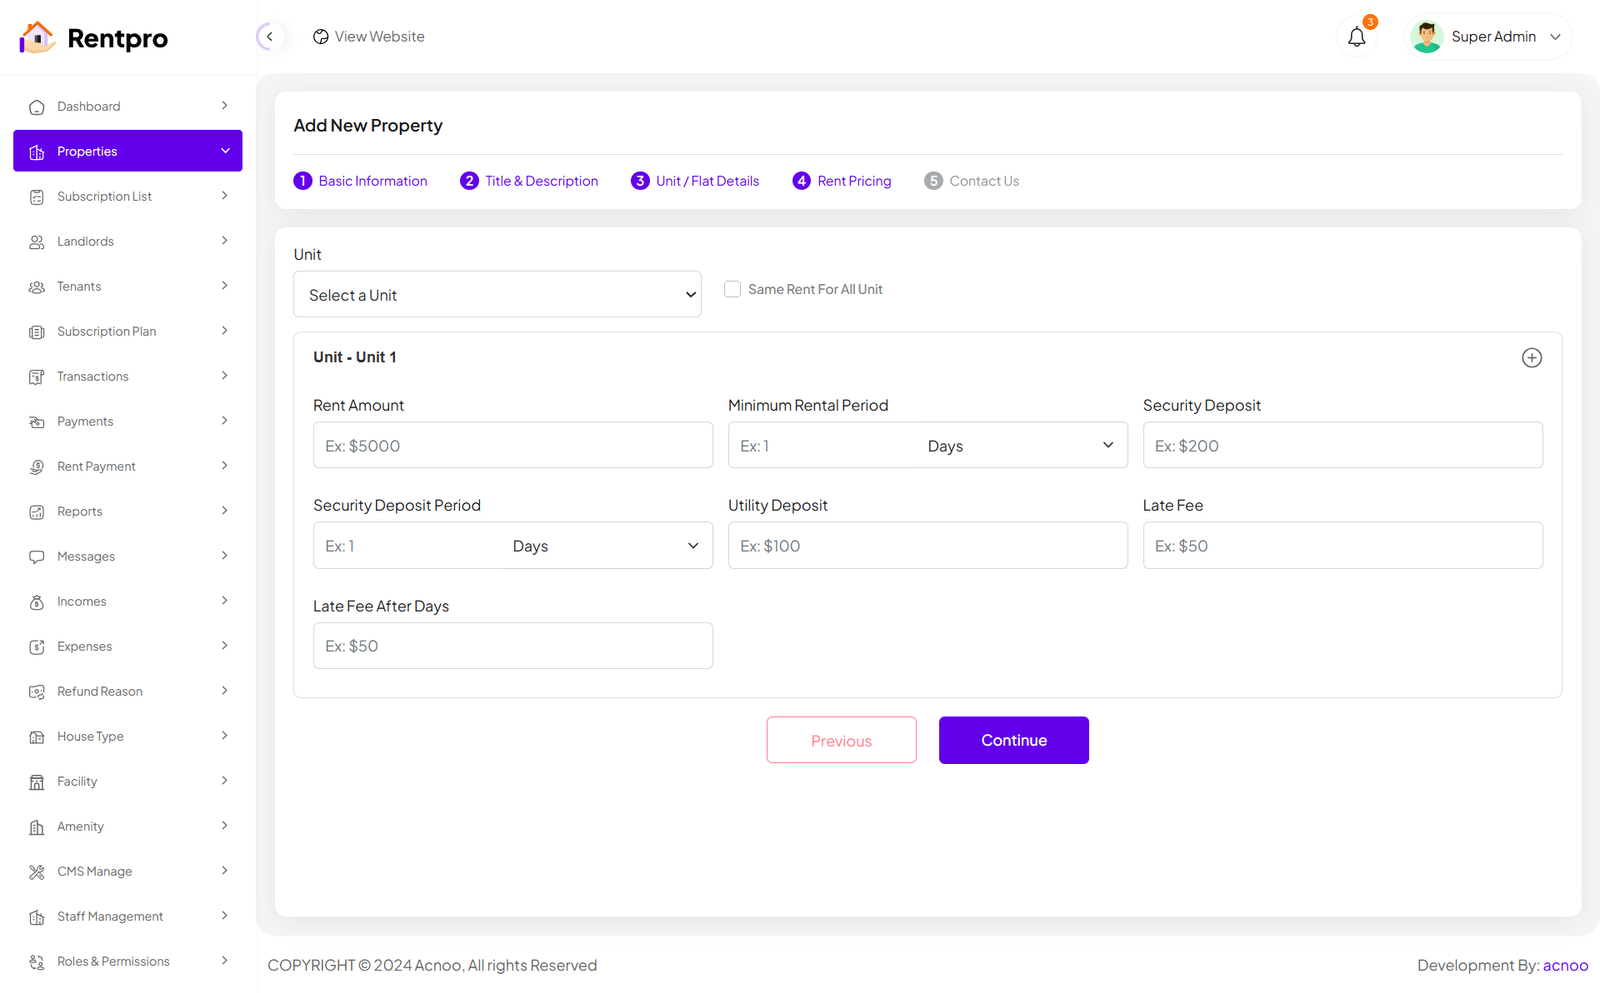
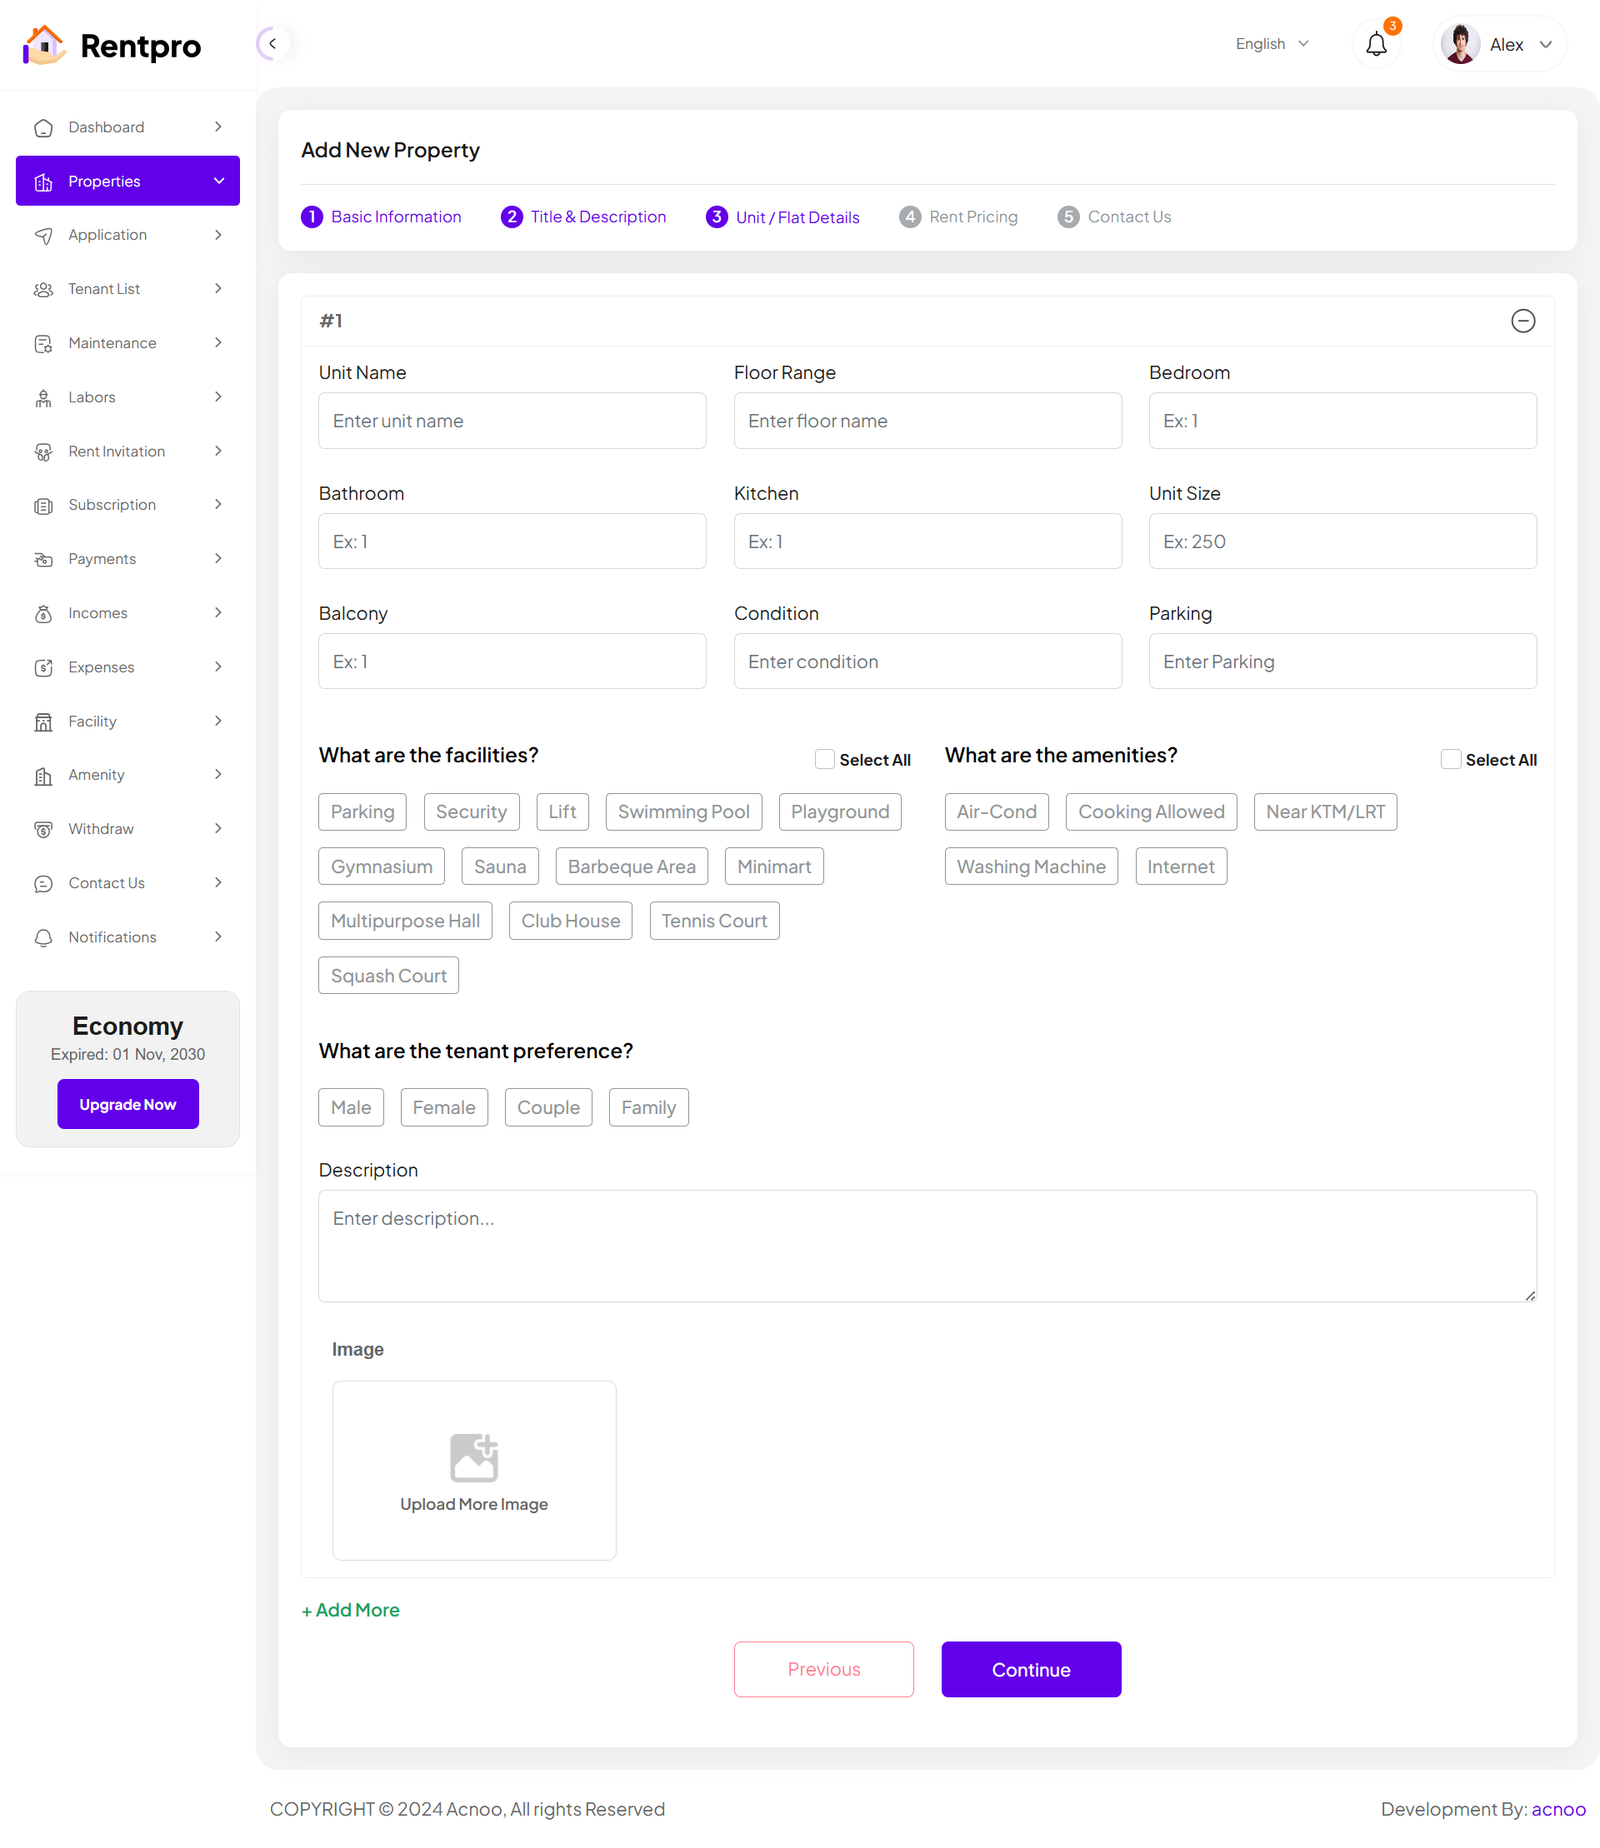
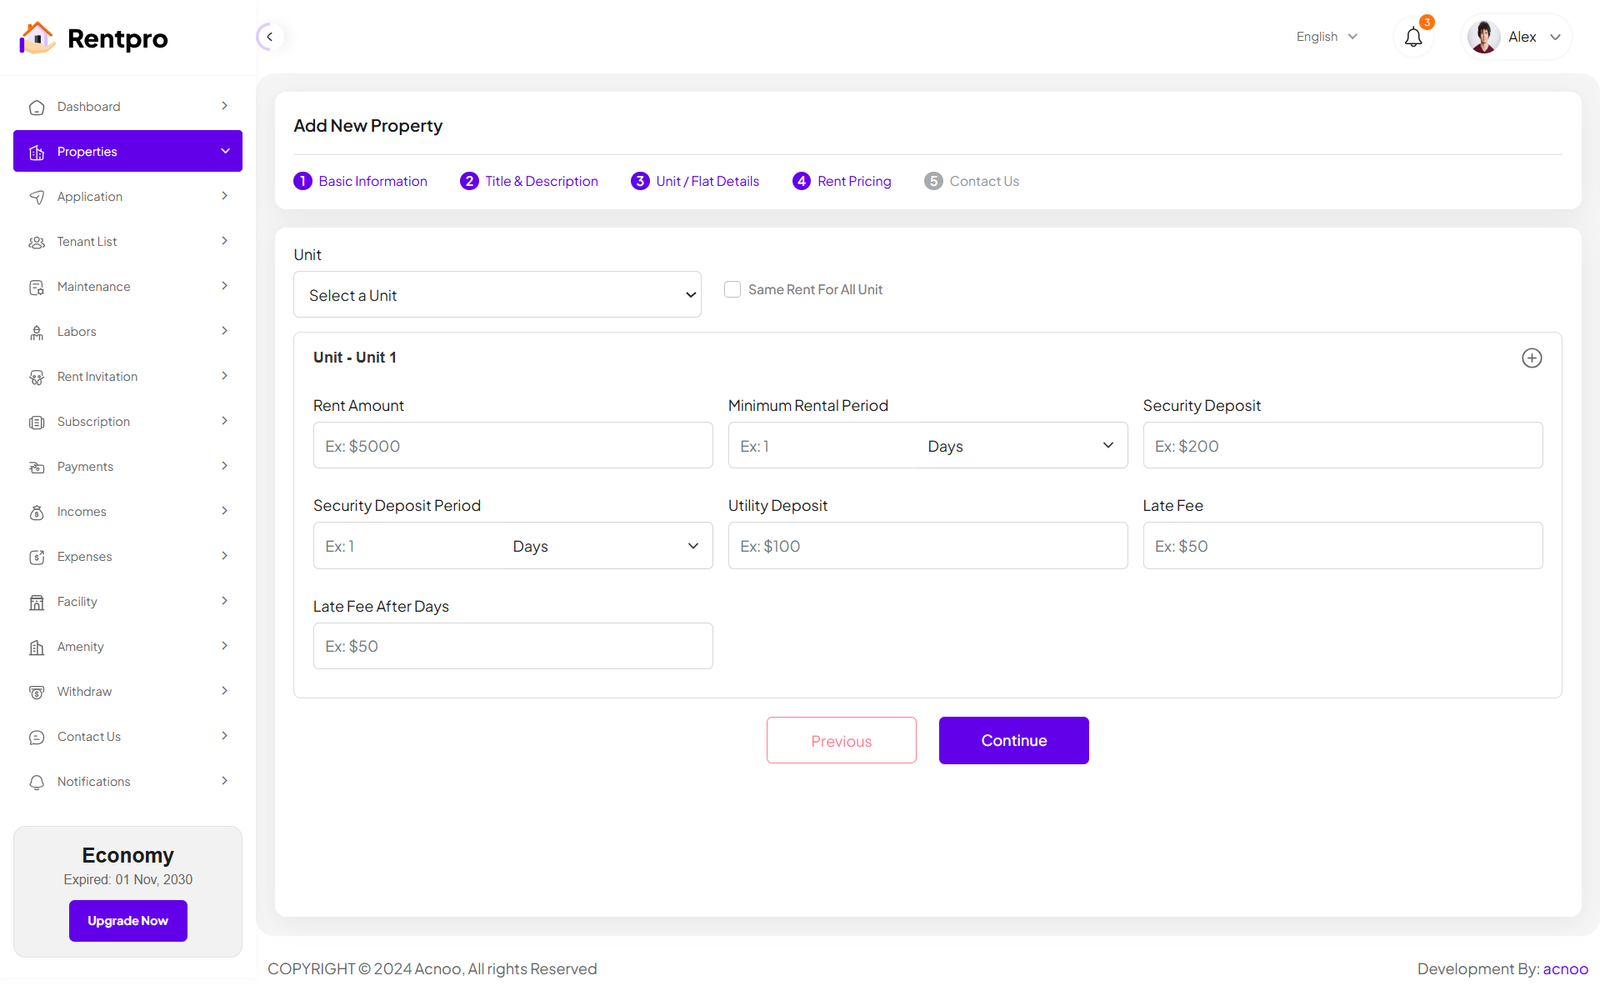
When the category is "Unit/Flat," the input fields on the Details and Pricing pages will update accordingly. Additionally, you can click the green "Add More" button to add more units as needed, according to your preference.
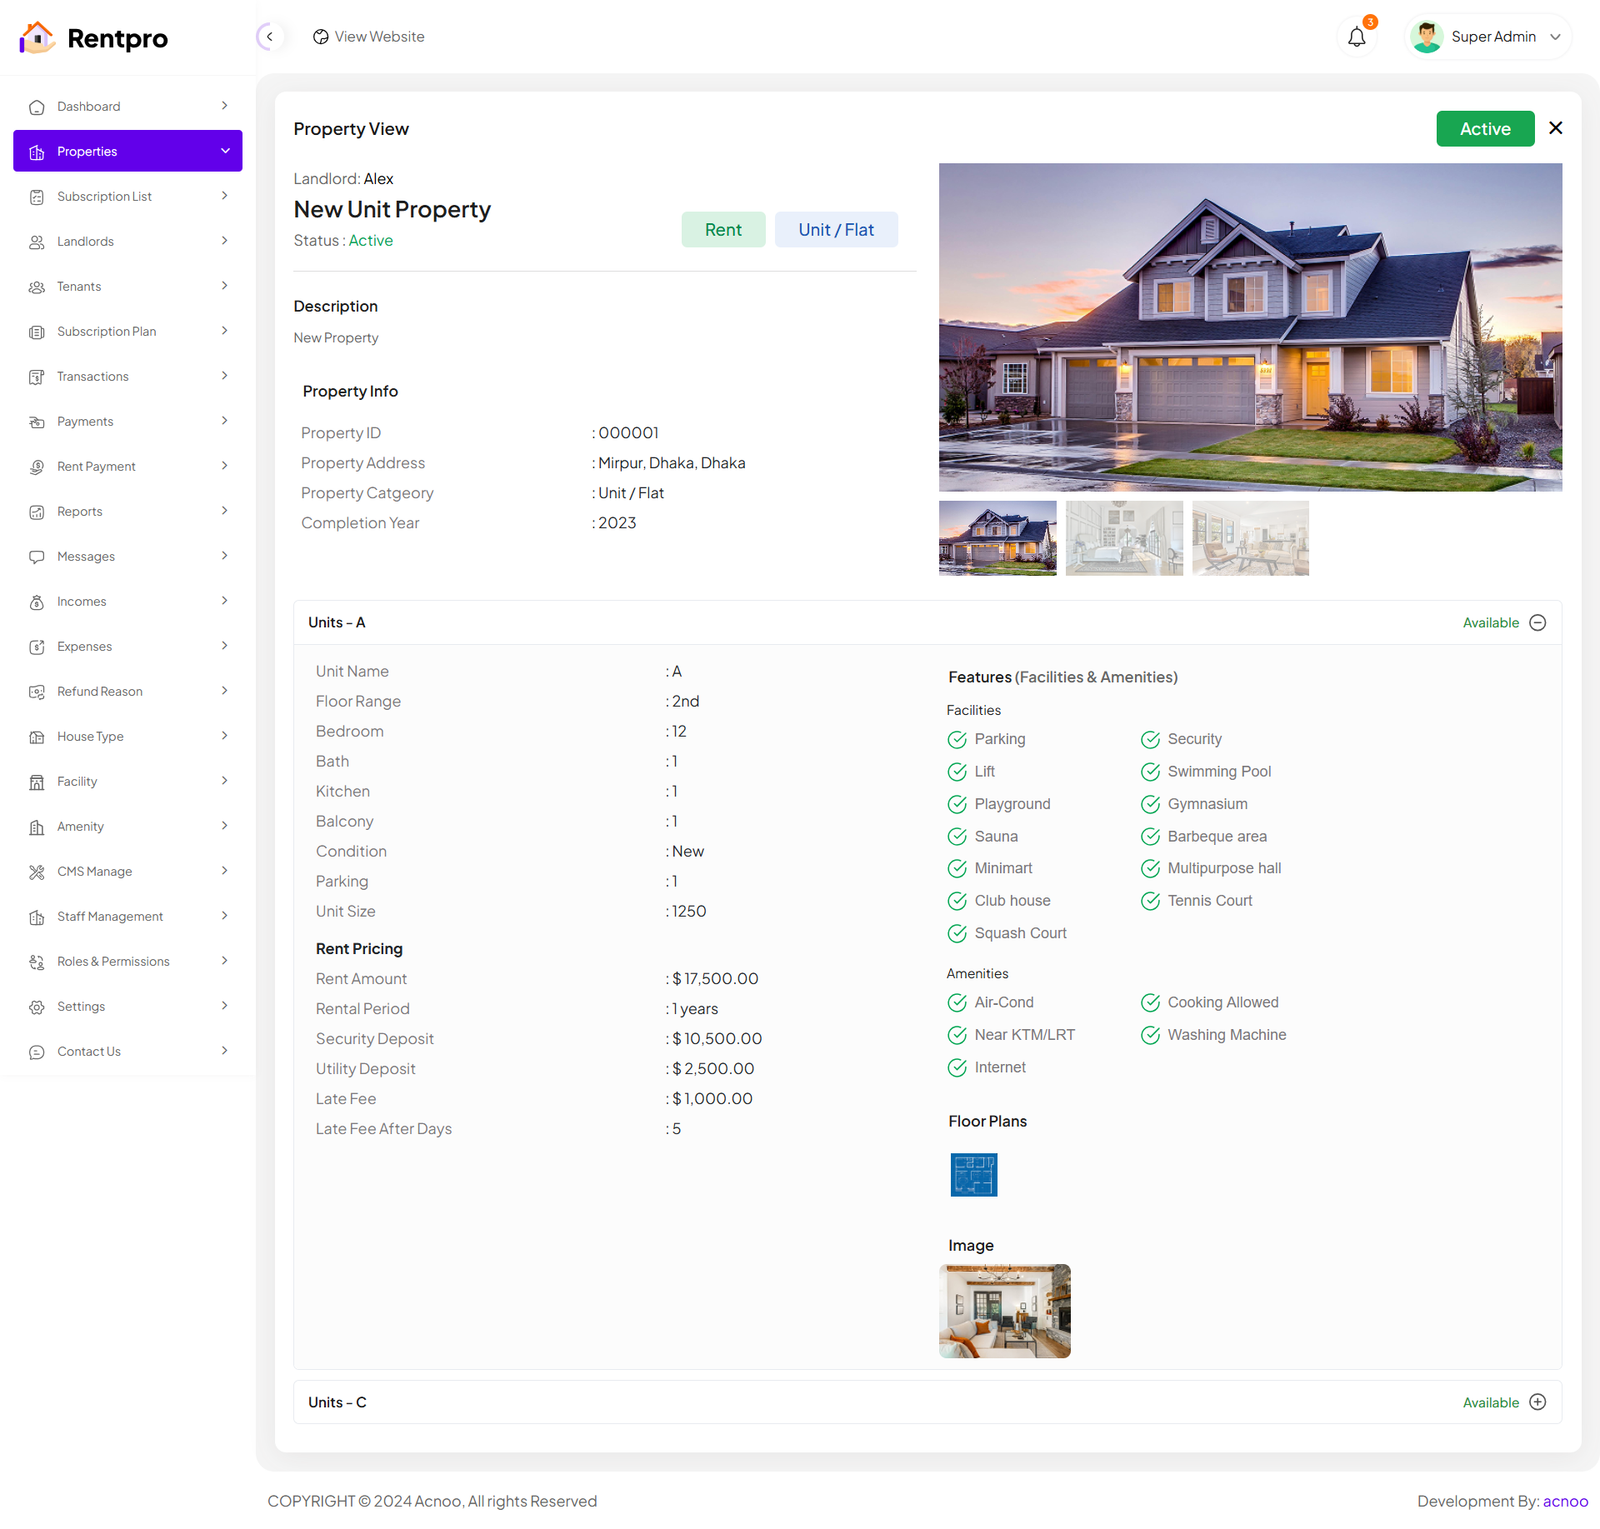
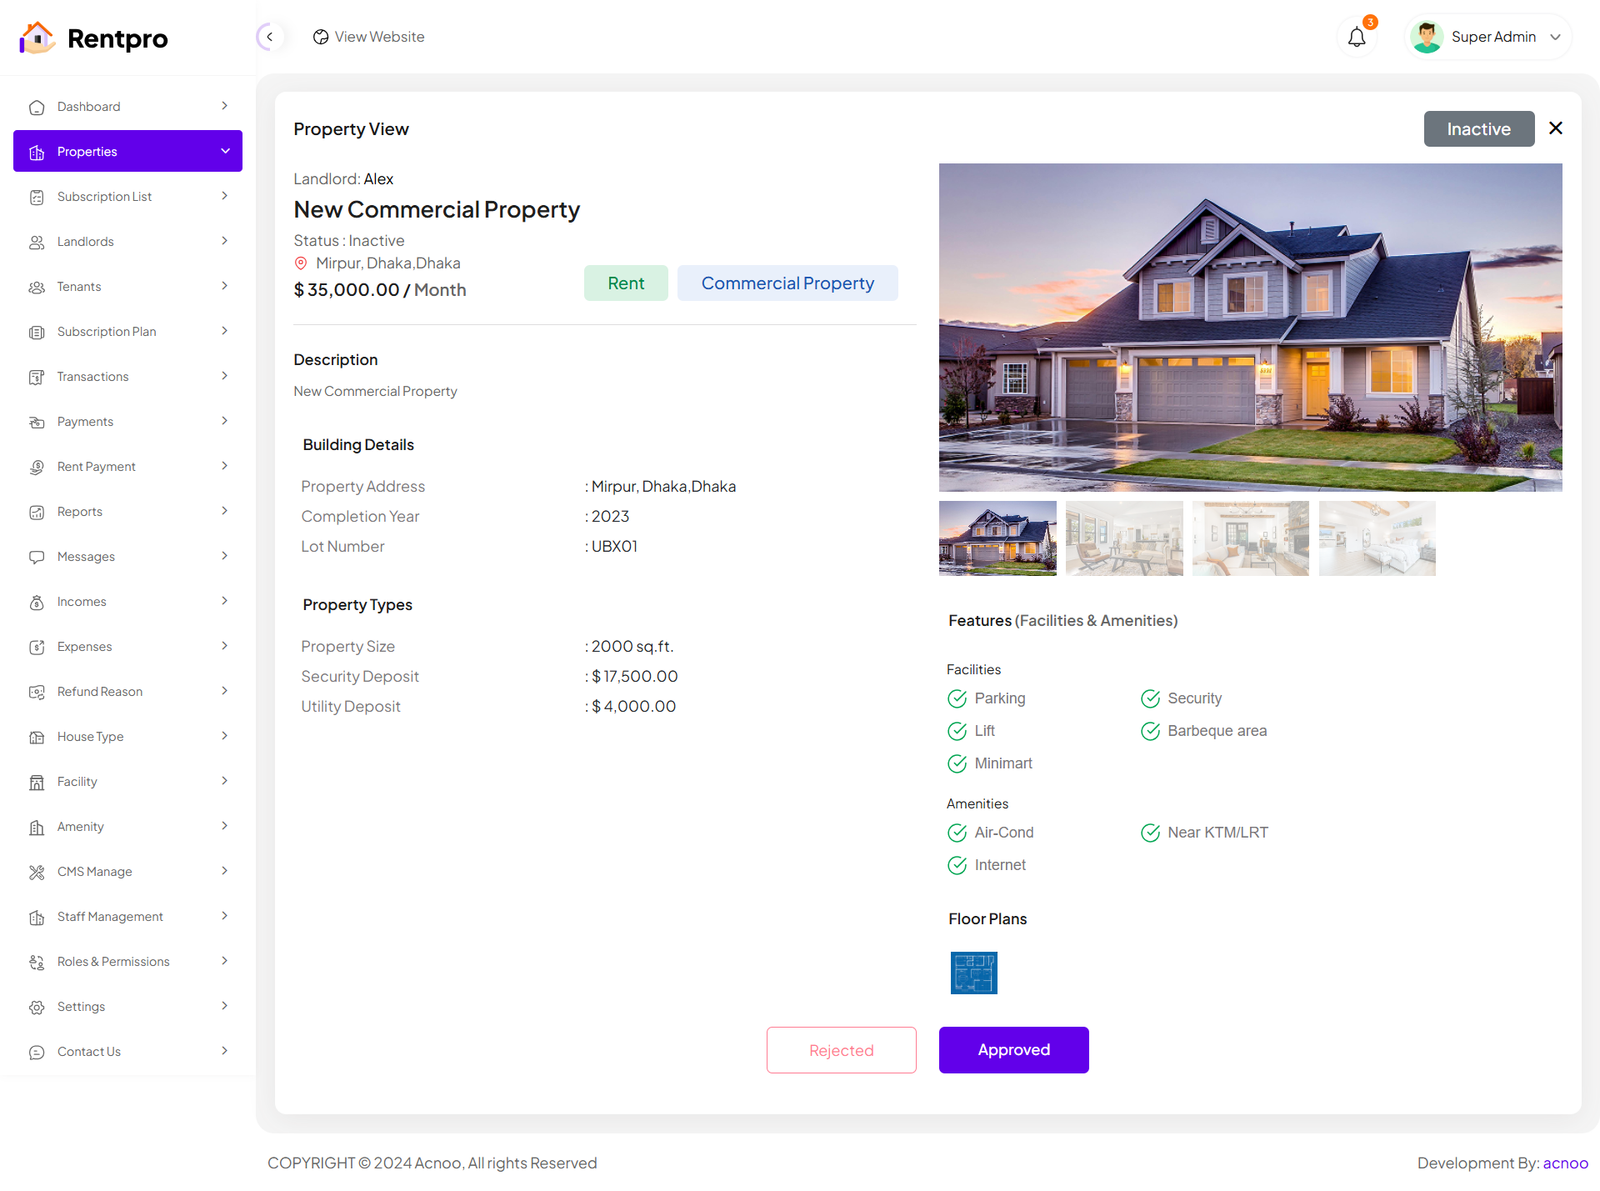
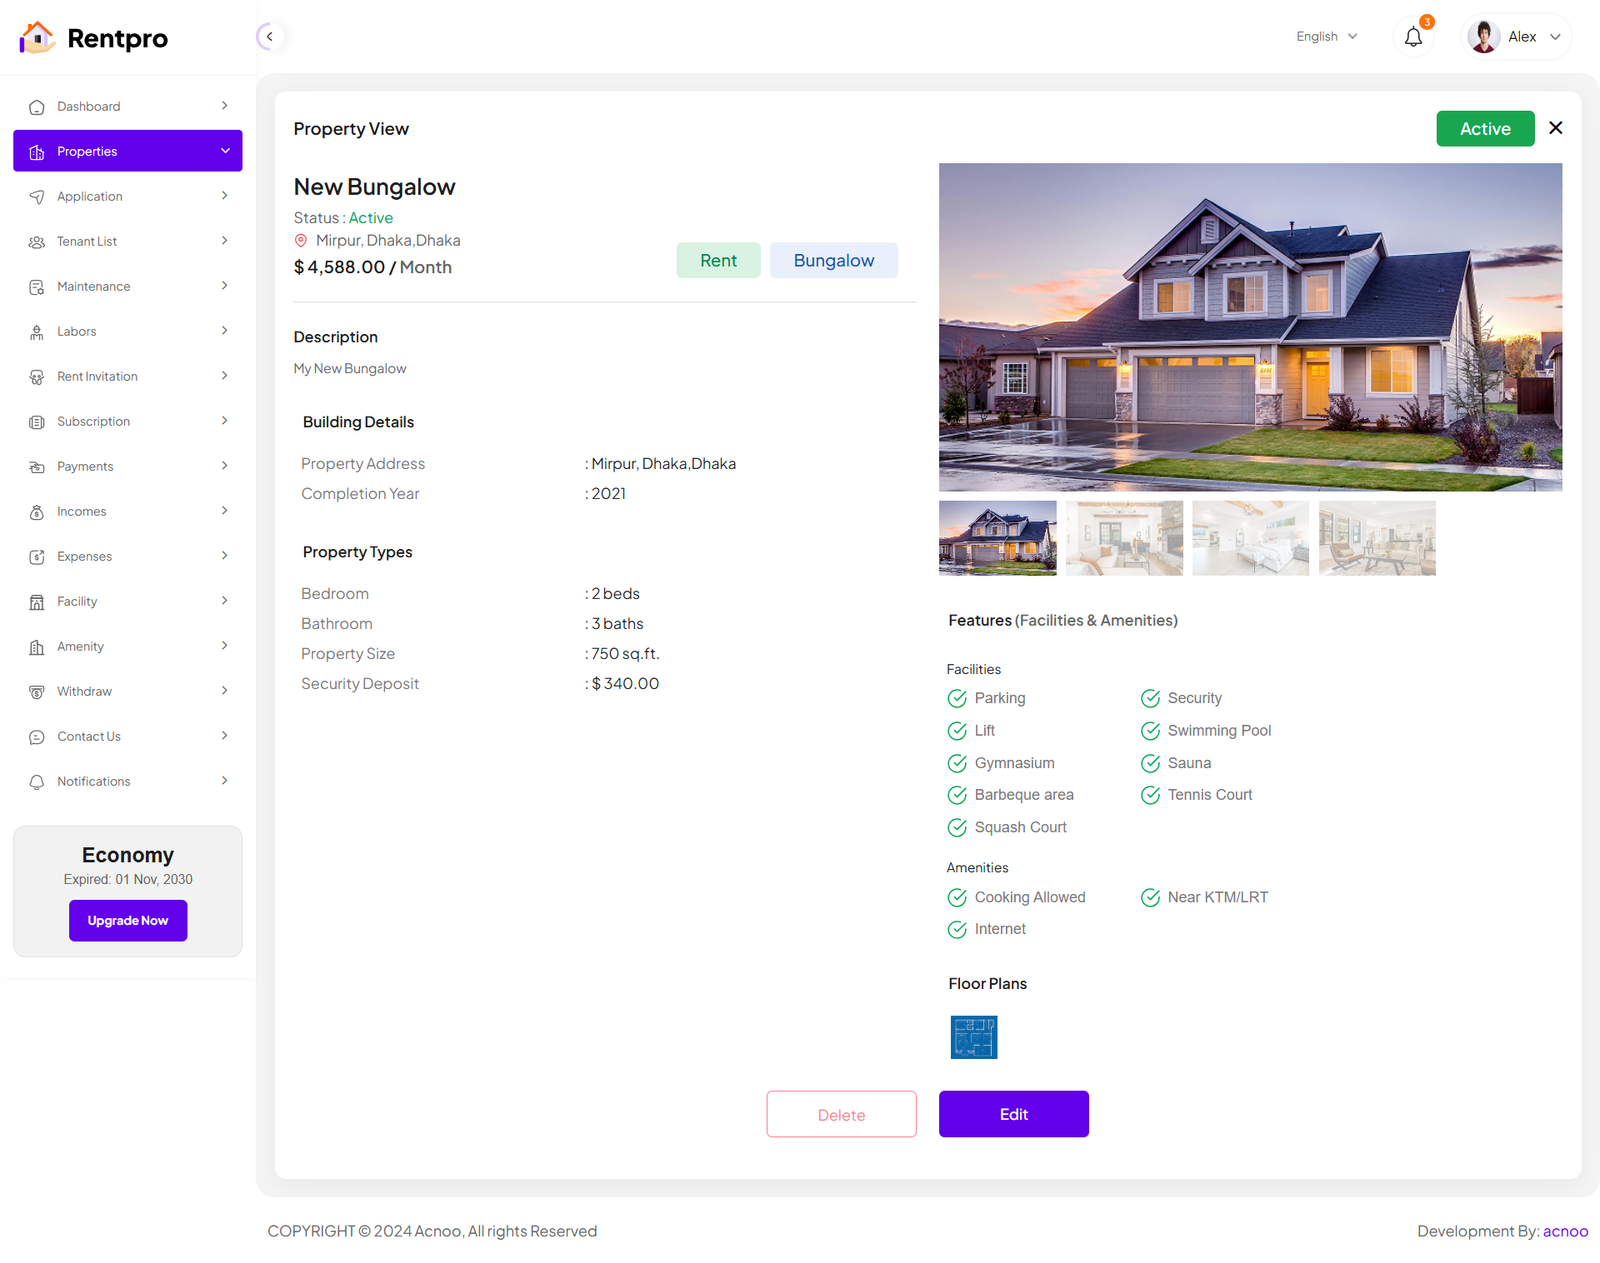
View Property
There are two types of Property View pages. The view for properties with the category set as "Unit/Flat" is slightly different. In the screenshot below, I am showing both pages for comparison.
Schedule
Step 1: Access Server Cron
crontab -e
Step 2: Add Cron Entry
Add this single line (replace /path-to-your-project with your actual Laravel project path):
* * * * * cd /path-to-your-project && php artisan schedule:run >> /dev/null 2>&1
Step 3: Save and Exit
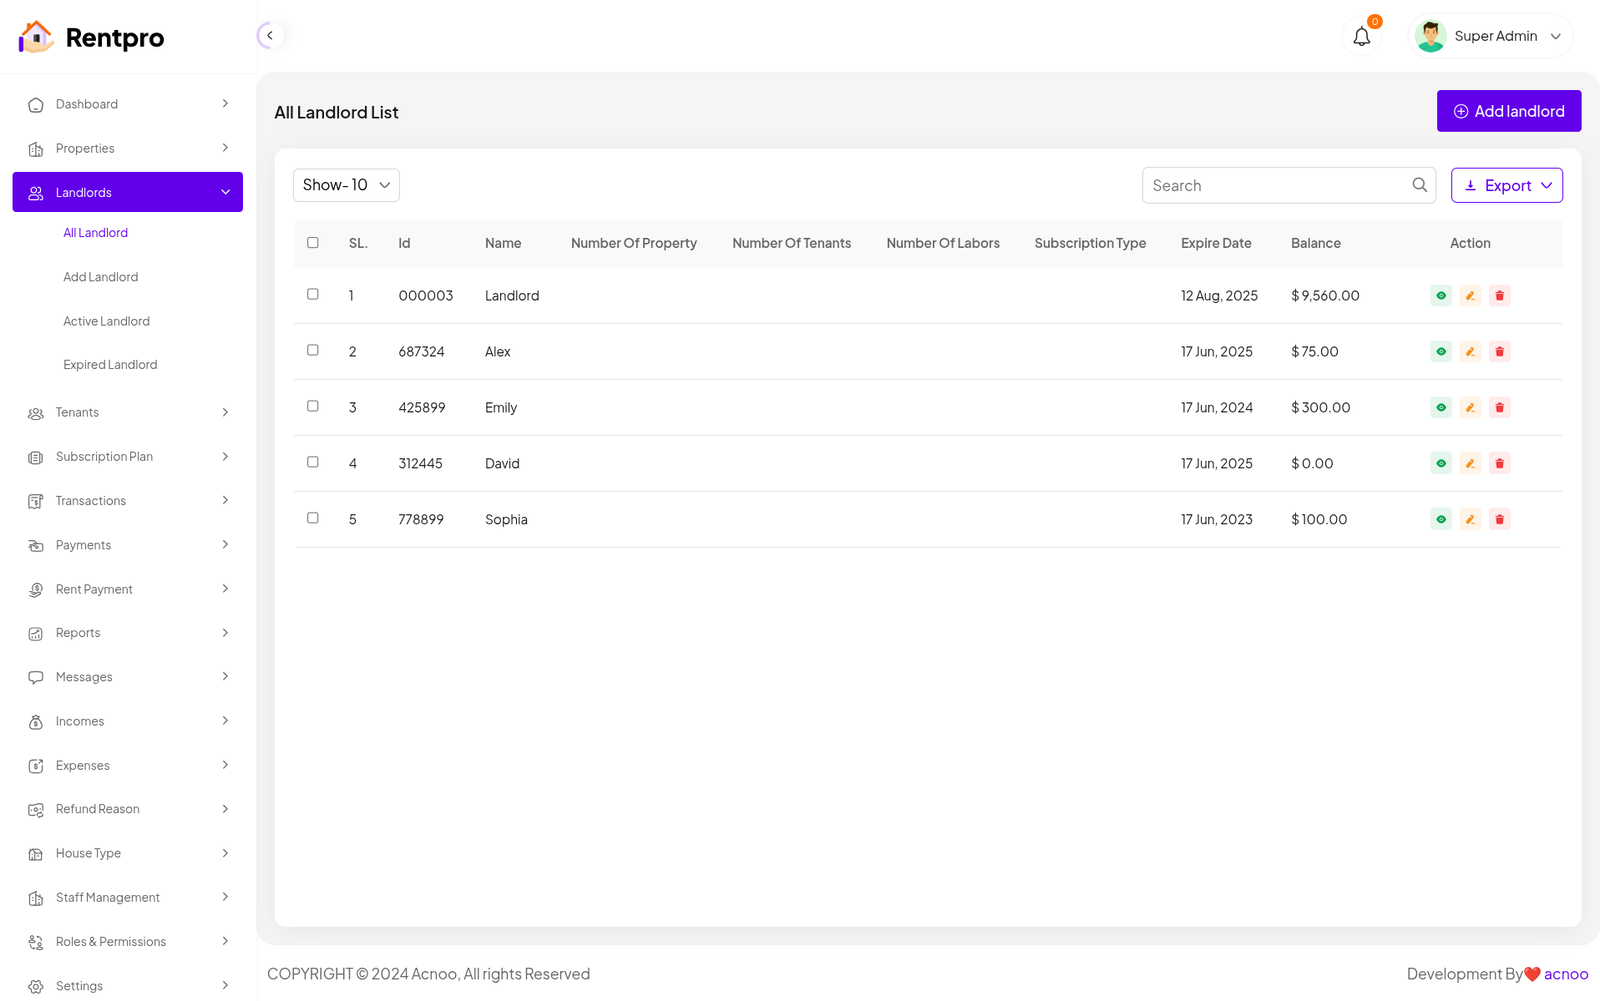
Landlord List
This appears to be a screenshot of a landlord list. Here, you can filter business categories, as well as edit, delete, or multi-delete them. There is also an "Add landlordg" button for adding new landlord. To add a new landlord, fill in the necessary fields.
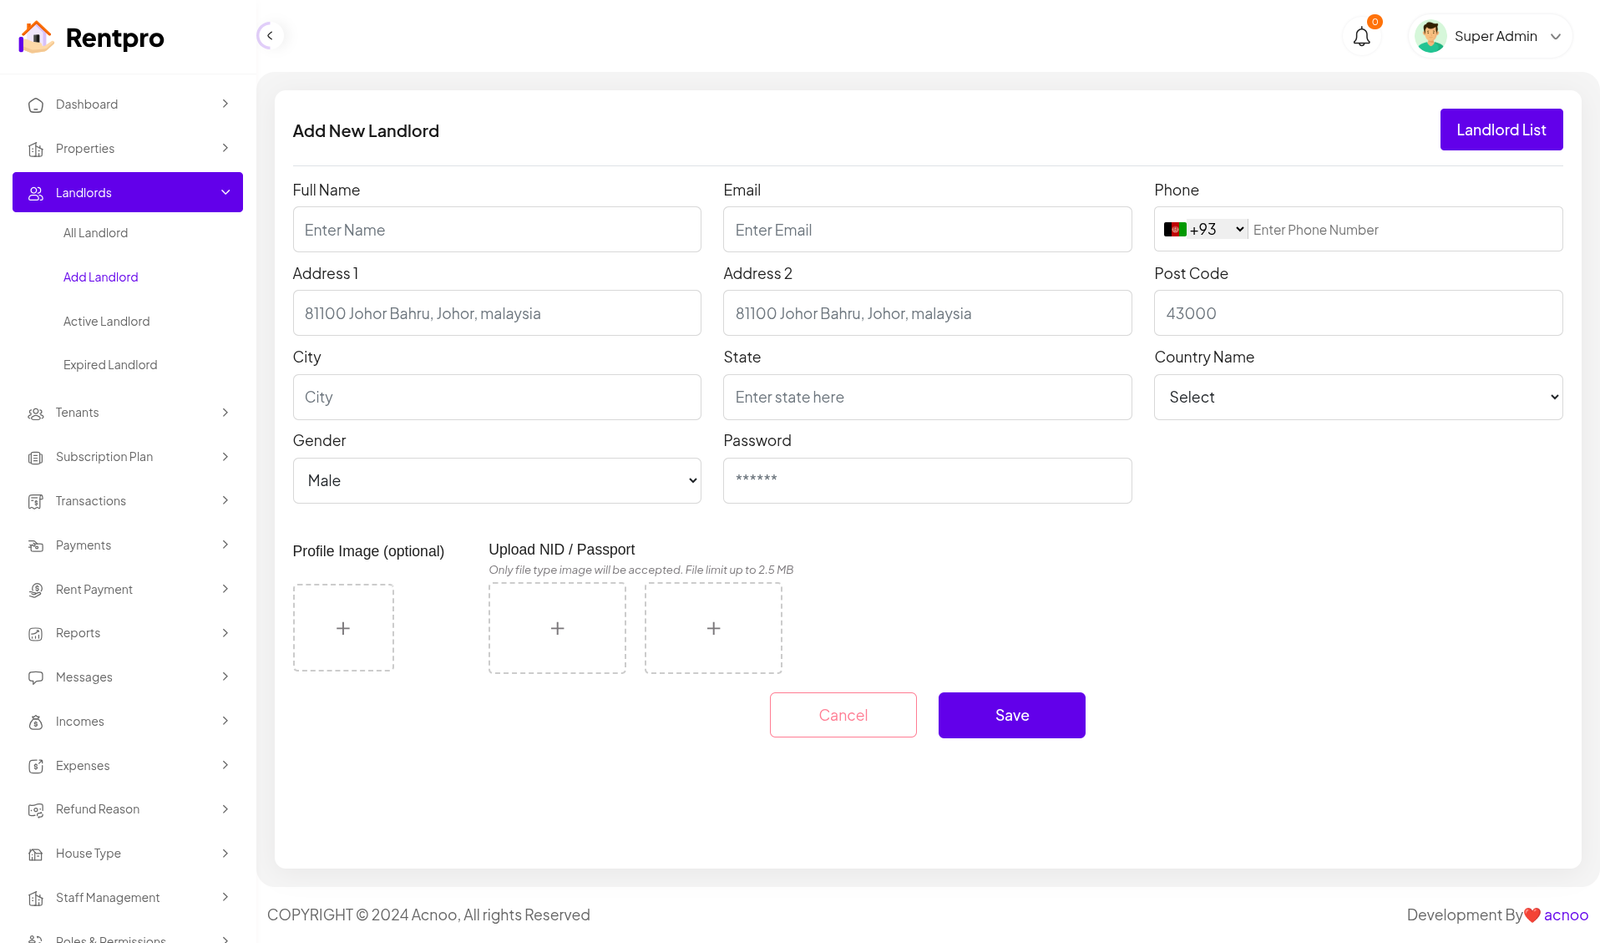
Add New Landlord
The "Add New Landlord" page in the Rentpro admin panel is used by administrators to manually create a new landlord account. This is a secure and controlled way to onboard a new user who will list properties on the platform.
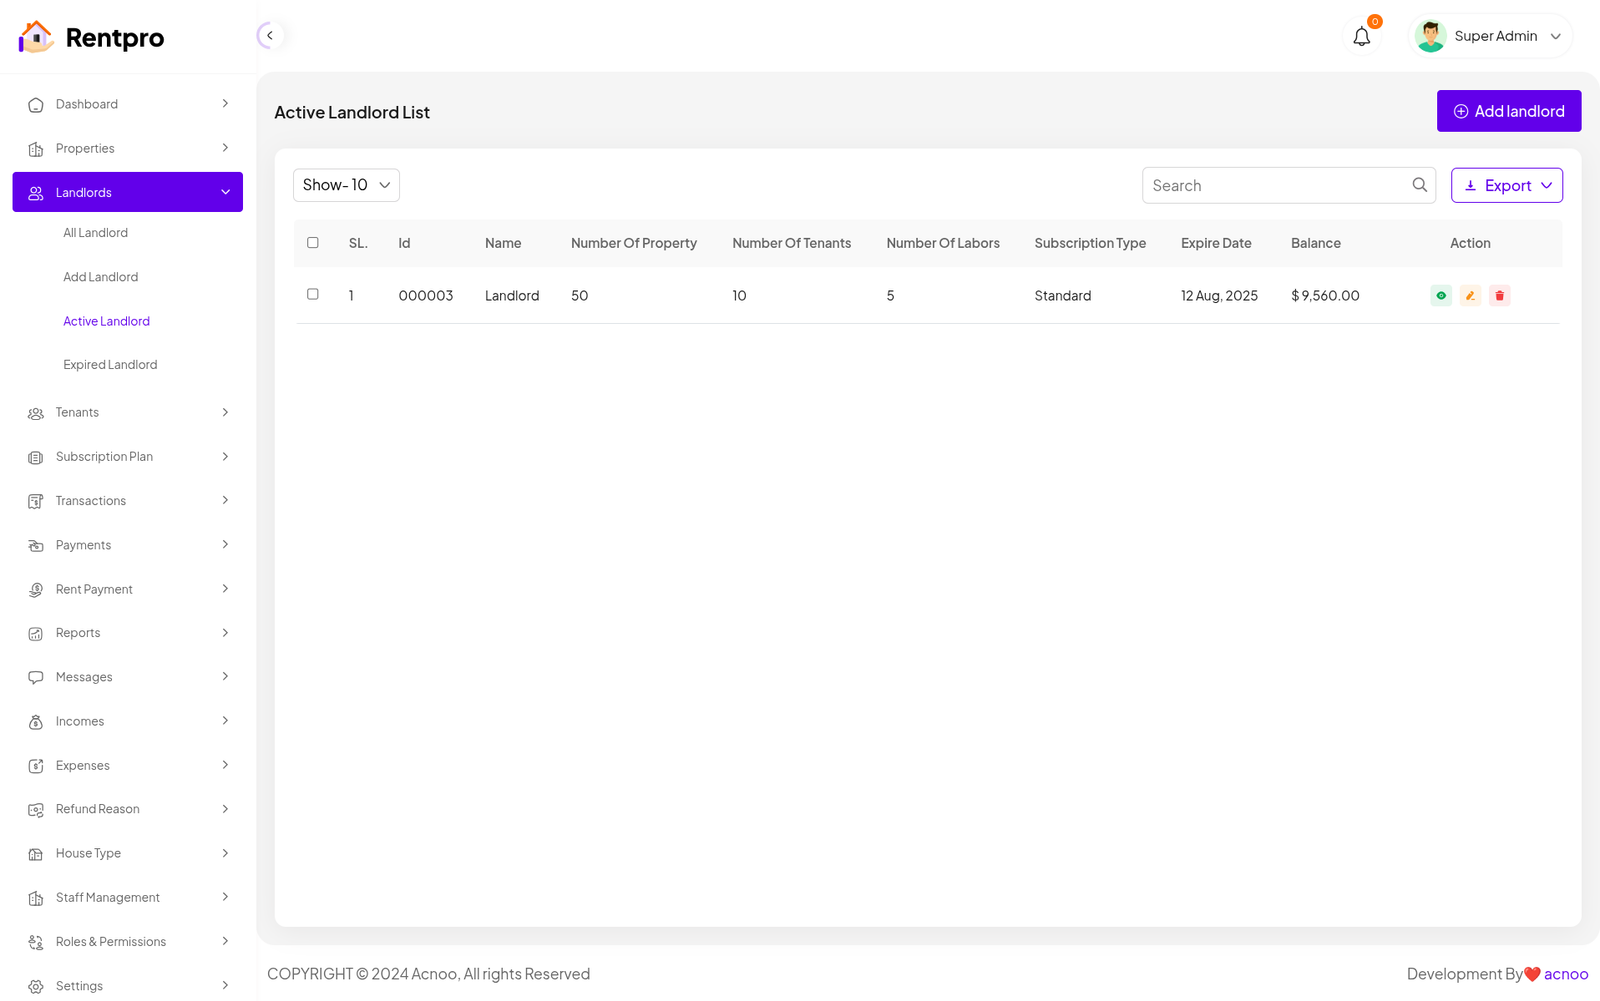
Active Landlord
The "Active Landlord List" page displays all landlords who have a current and valid subscription plan. This is the list of landlords who are actively using the platform to list properties.
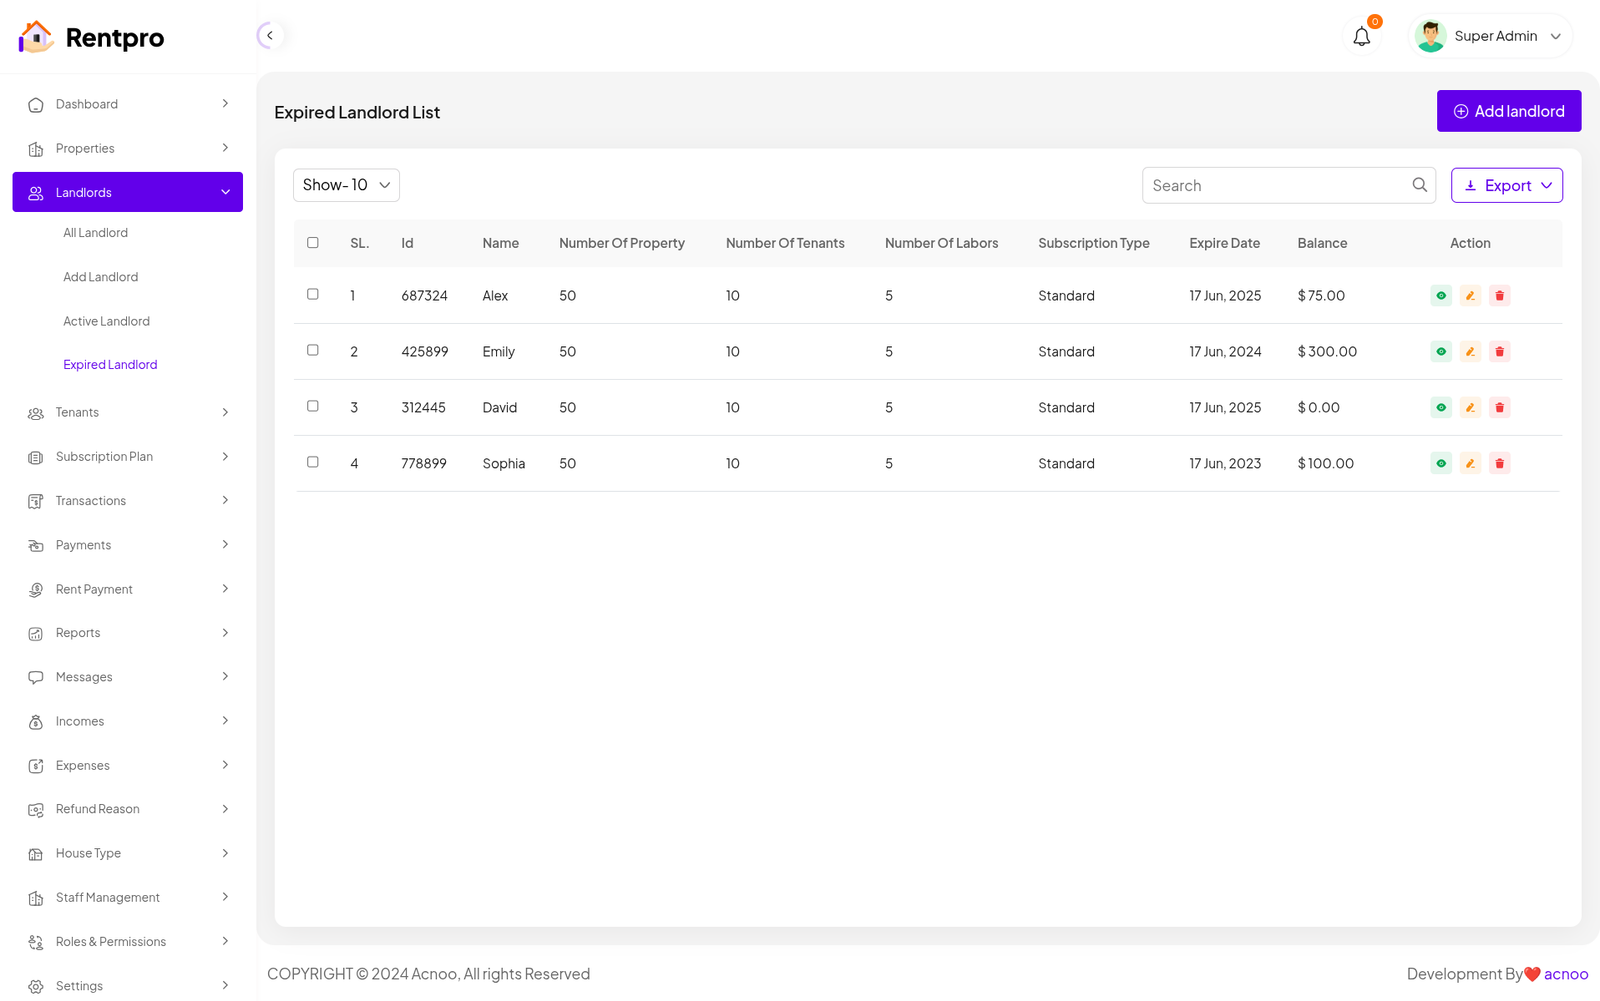
Expired Landlord
The "Expired Landlord List" page is dedicated to landlords whose subscription plans have ended. These landlords are no longer actively using the platform and may have limited functionality.
Tenant
The "All Tenant" page in the Rentpro admin panel provides a comprehensive list of all tenant accounts registered on the platform. This centralized view enables administrators to manage tenant details, monitor their account status, and perform necessary actions.

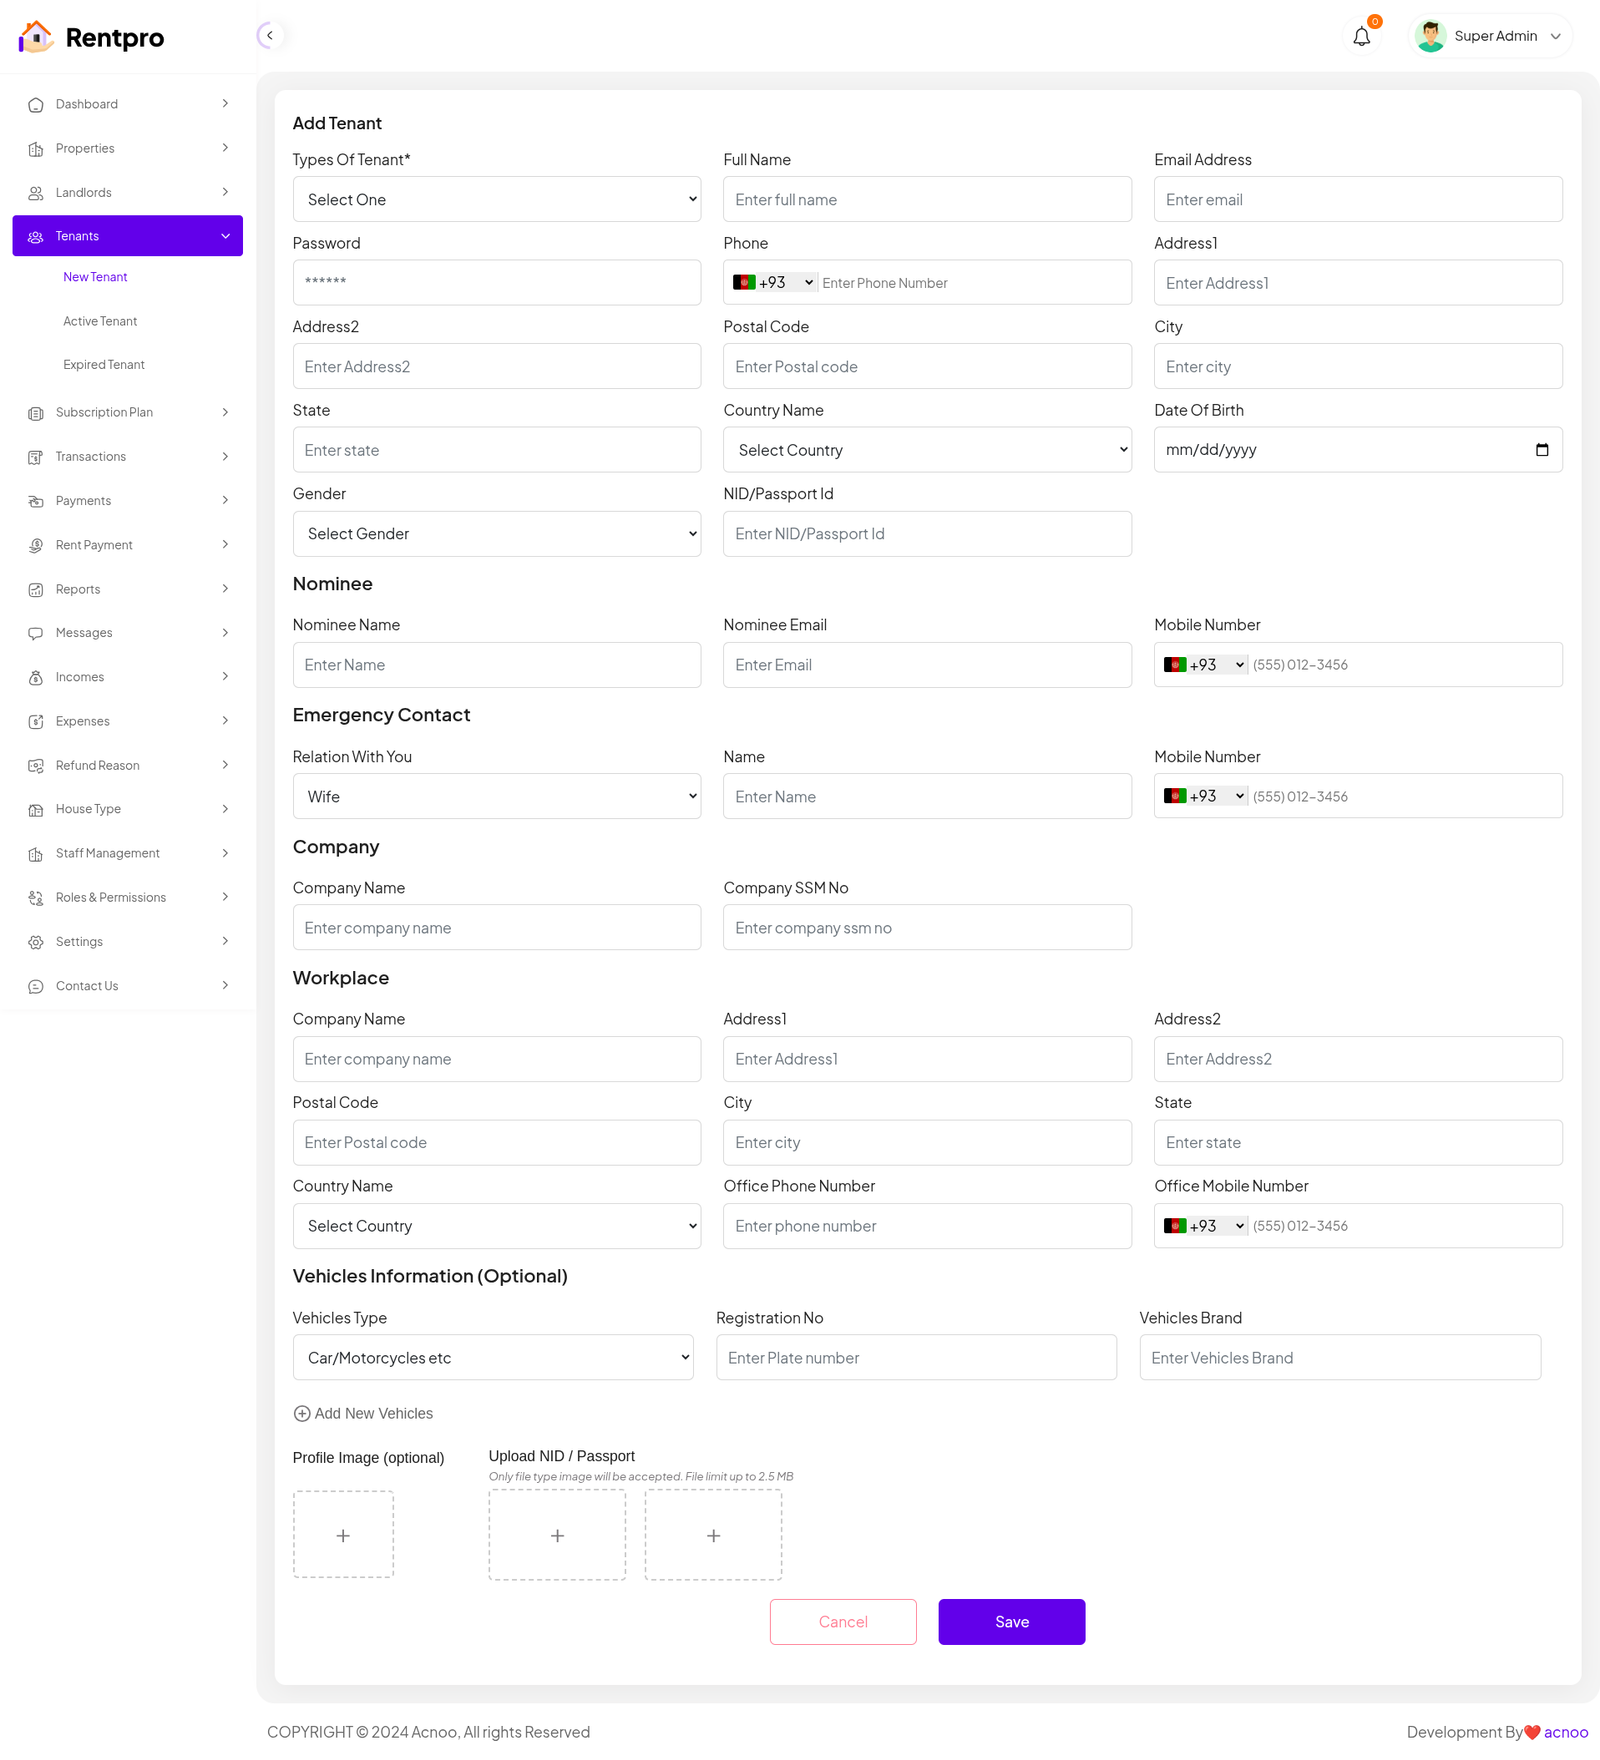
Add New Tenant
The "Add New Tenant" page in the Rentpro admin panel is used by administrators to manually create a new Tenant account. This is a secure and controlled way to onboard a new user who will list properties on the platform.
Active Tenant
The "Active Tenant" page displays a list of all tenants who currently have an active rental agreement and are using the platform.

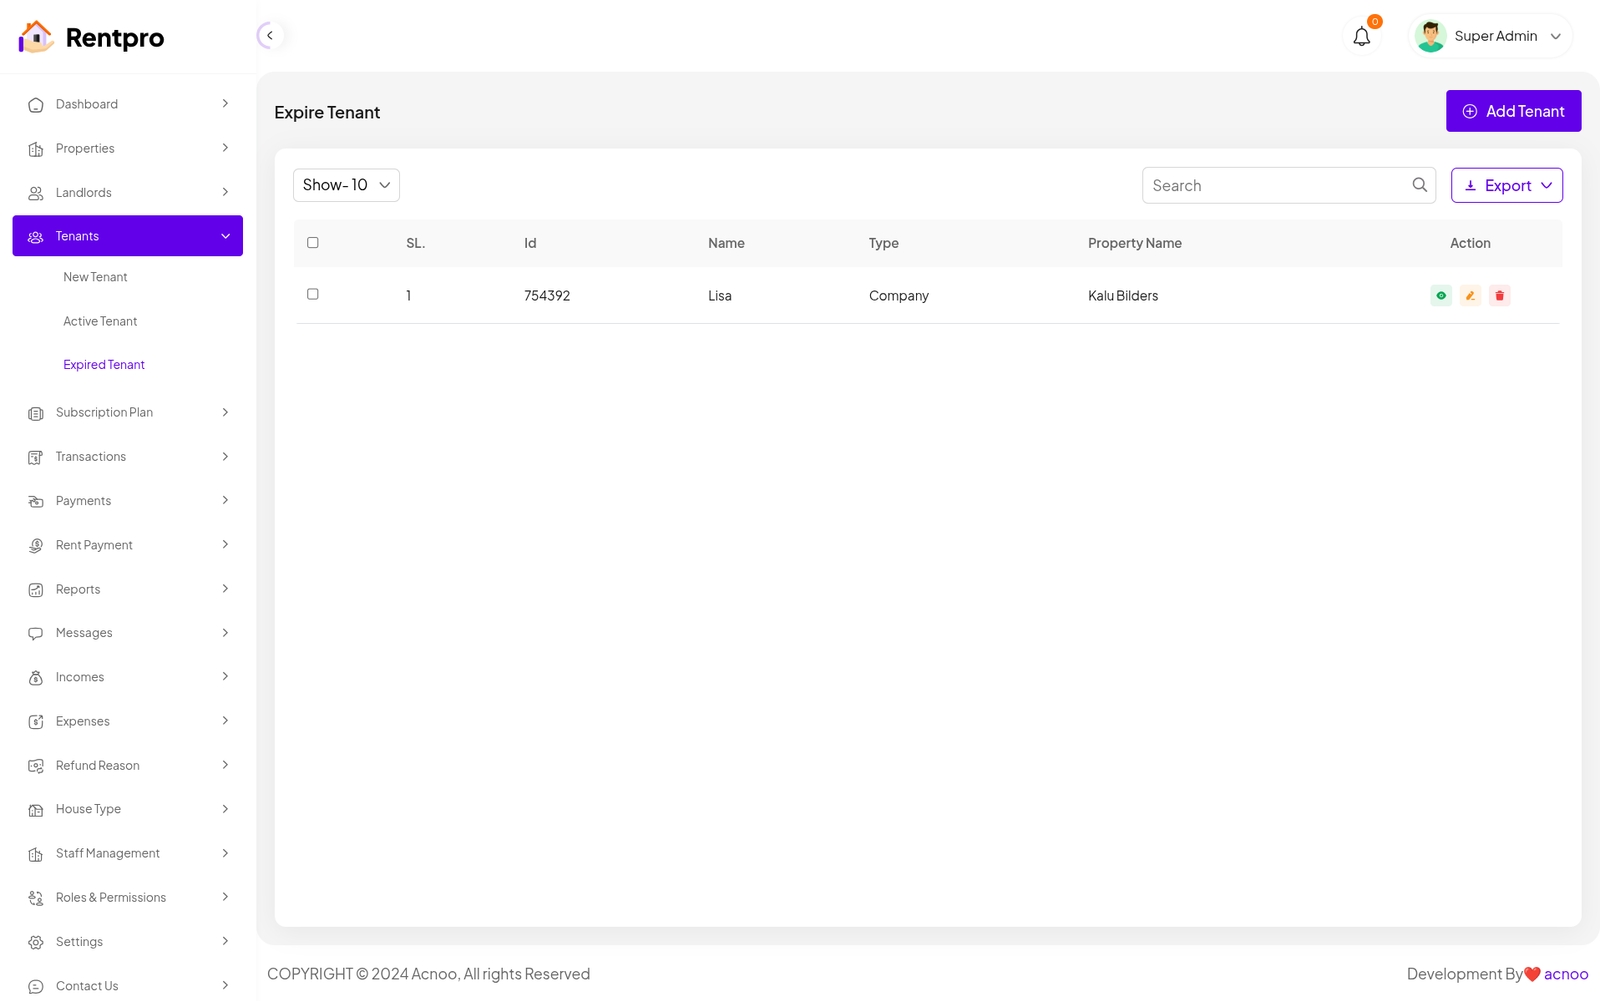
Expired Tenant
The "Expired Tenant" page lists tenants whose rental agreements have ended or whose accounts are no longer active. This list helps in tracking former tenants.
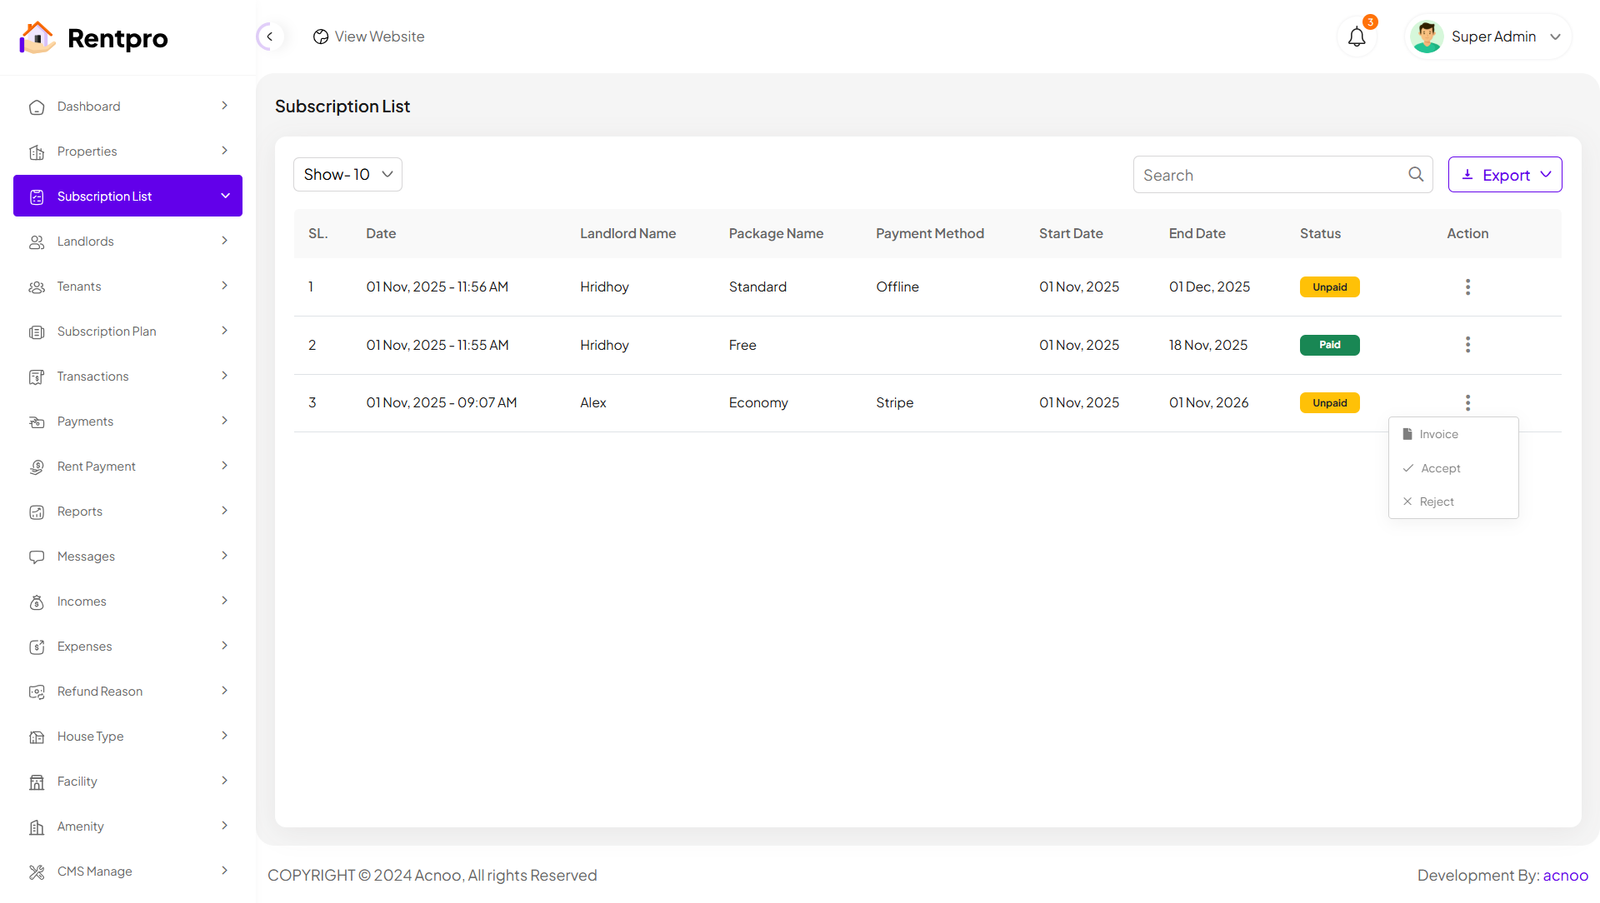
Subscription List
The Subscription list section allows users to track their current subscriptions.In the action column, clicking on the Three Dots (...) will display options to mark as "Accept" or "Reject". Clicking either option will allow you to change the status accordingly. Provides access to the invoice associated with the subscription.
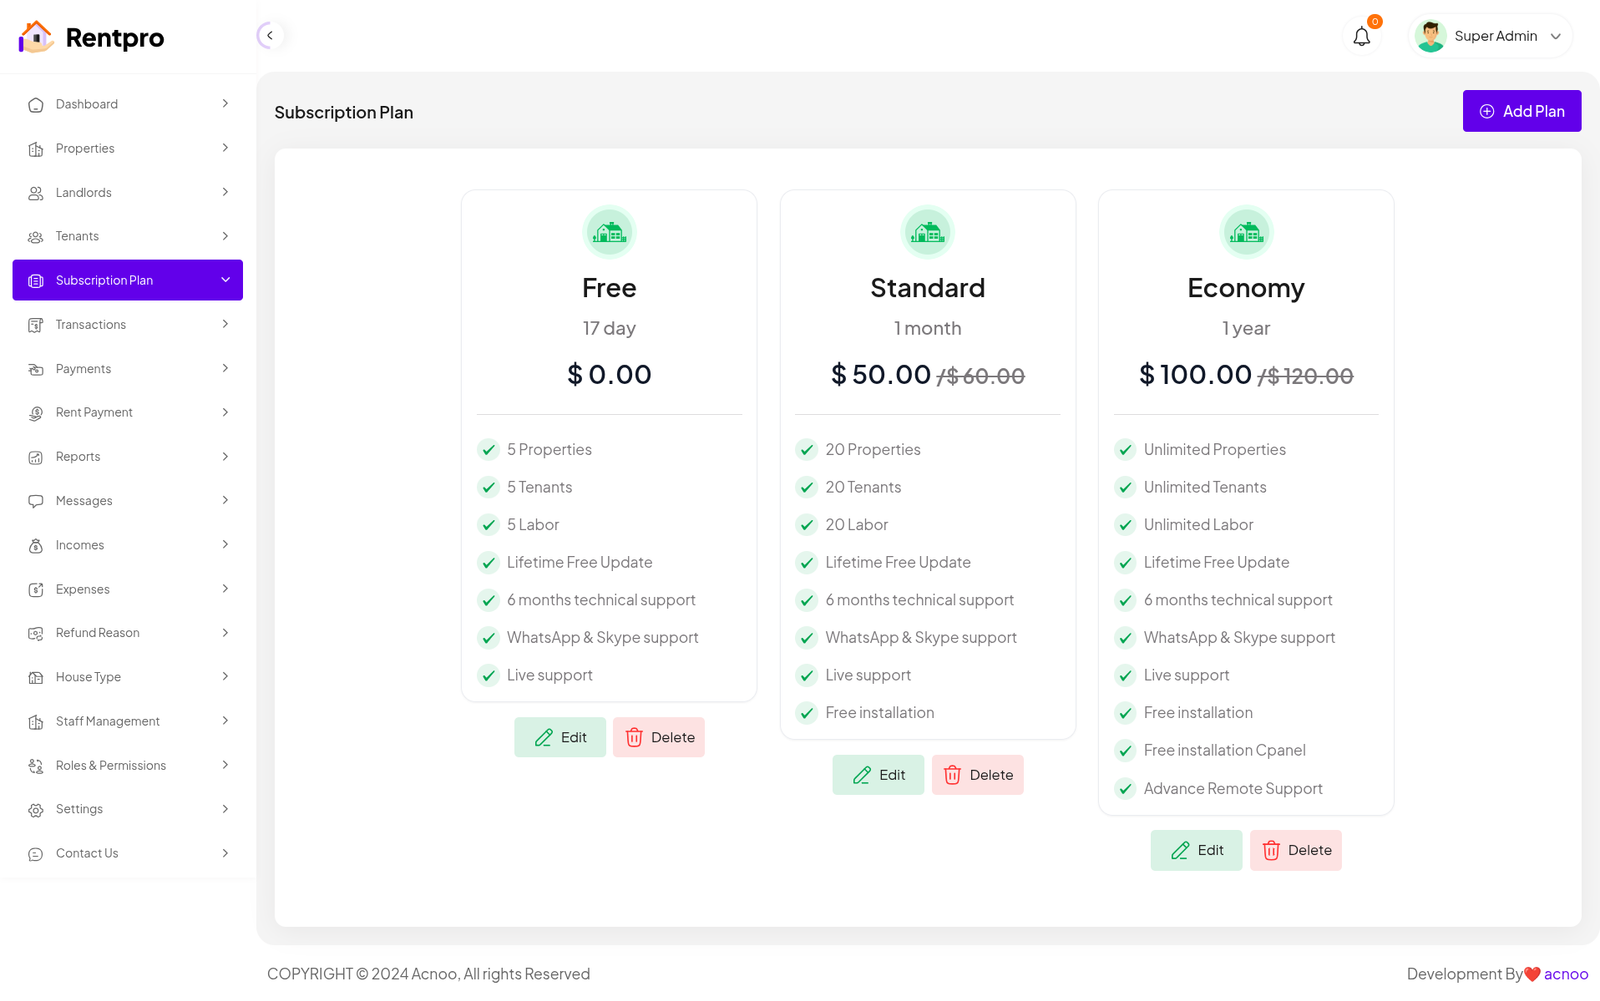
Plan List
Here, you can view a list of available plans with filtering options. You can also change the plan status from this page. Additionally, options to edit, delete are available.
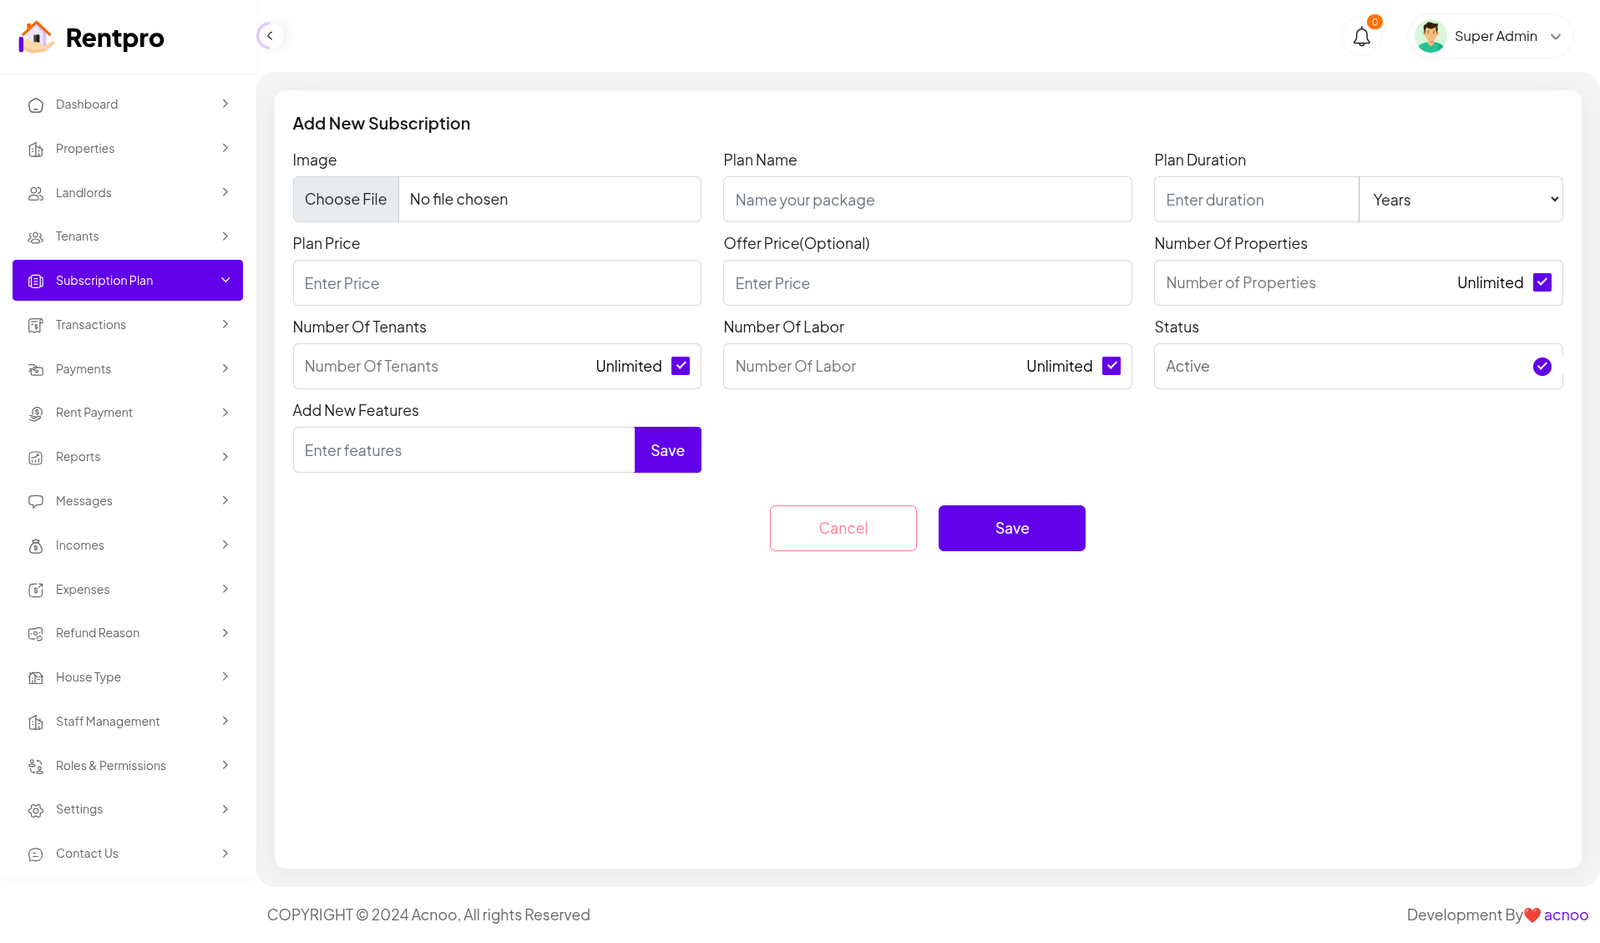
Add New Plan
Here, you have the option to create a plan according to your preferences. You can also add multiple features using the "Add Plan" input field. Once you have completed filling out the form, simply click the "Save" button.
Transaction
The "Transaction History" page in the Rentpro admin panel provides a chronological record of all financial transactions that occur on the platform. This page is essential for financial oversight and auditing.
"Export" Button: A button that allows the user to export the current list of transactions, likely into a file format such as CSV or Excel for financial reporting.
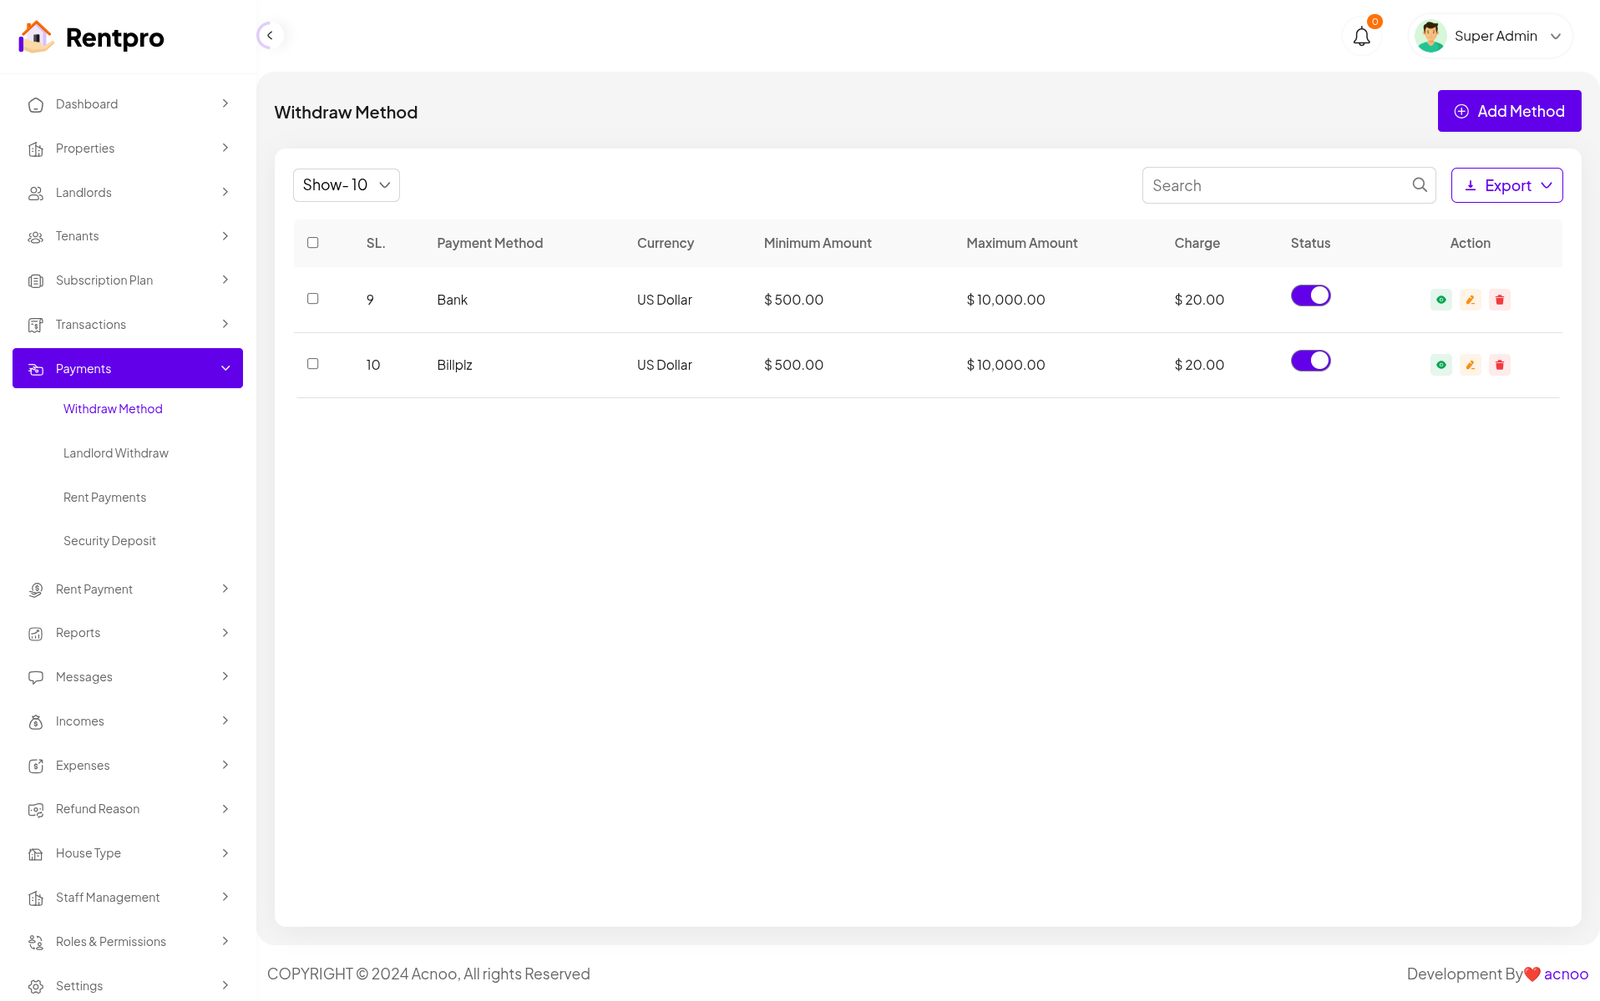
Withdraw Method
The "Withdraw Method" page in the Rentpro admin panel is used to manage the various withdrawal methods available to landlords and tenants for receiving payments. This page allows administrators to define, configure, and enable/disable these methods.
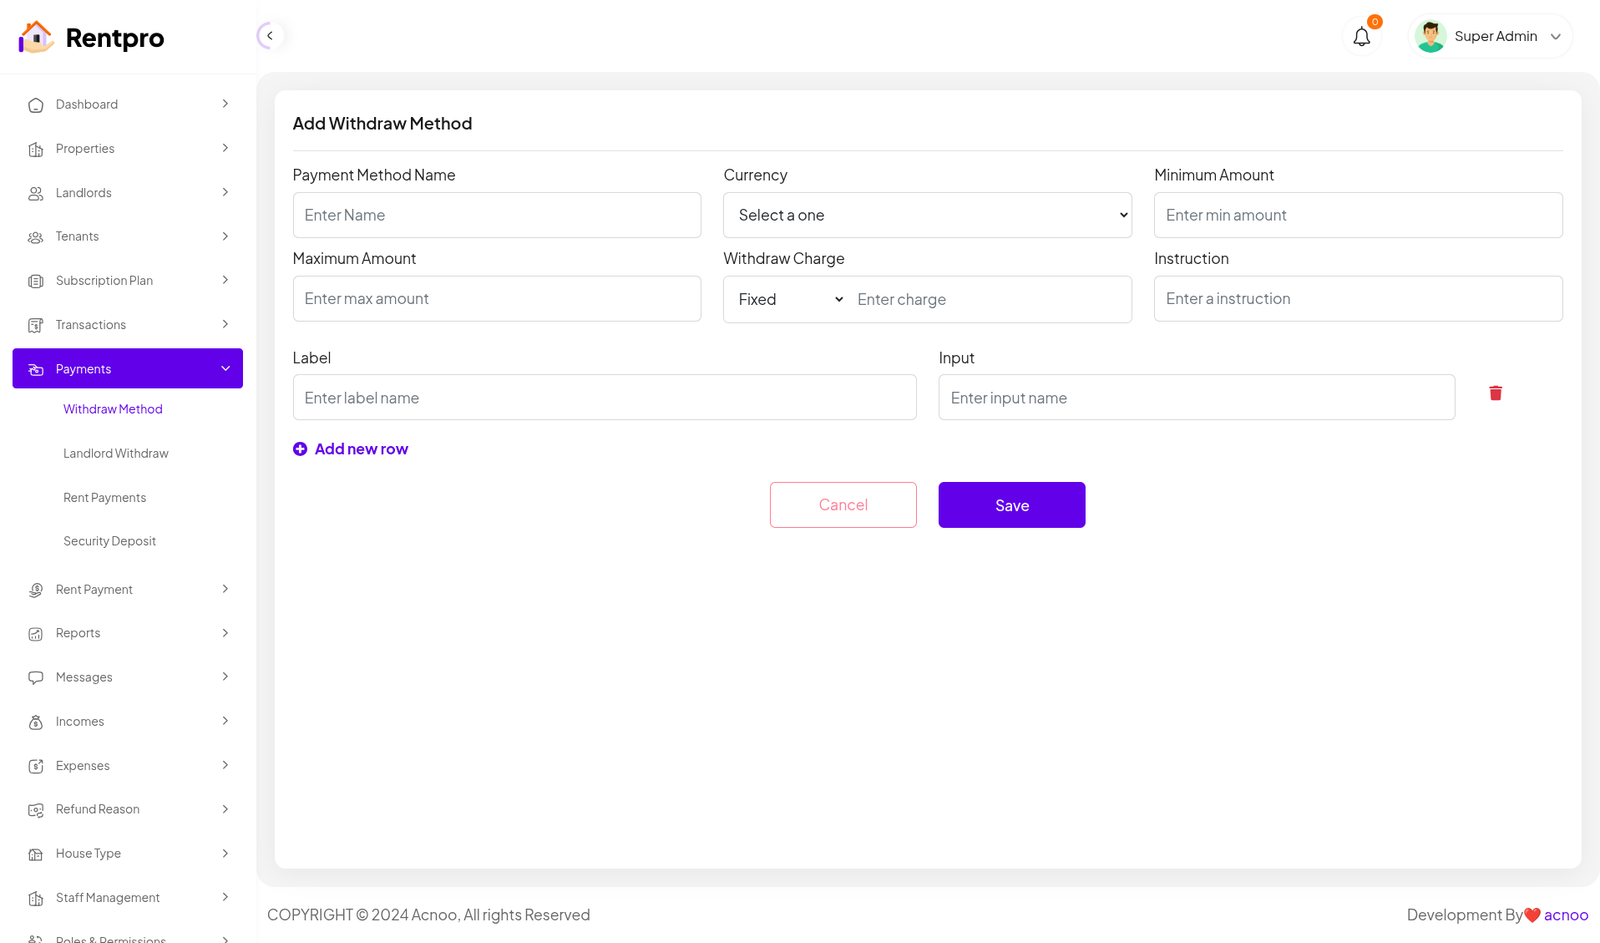
Add New Method
Here, you have the option to create a withdraw method according to your preferences. Once you have completed filling out the form, simply click the "Save" button.
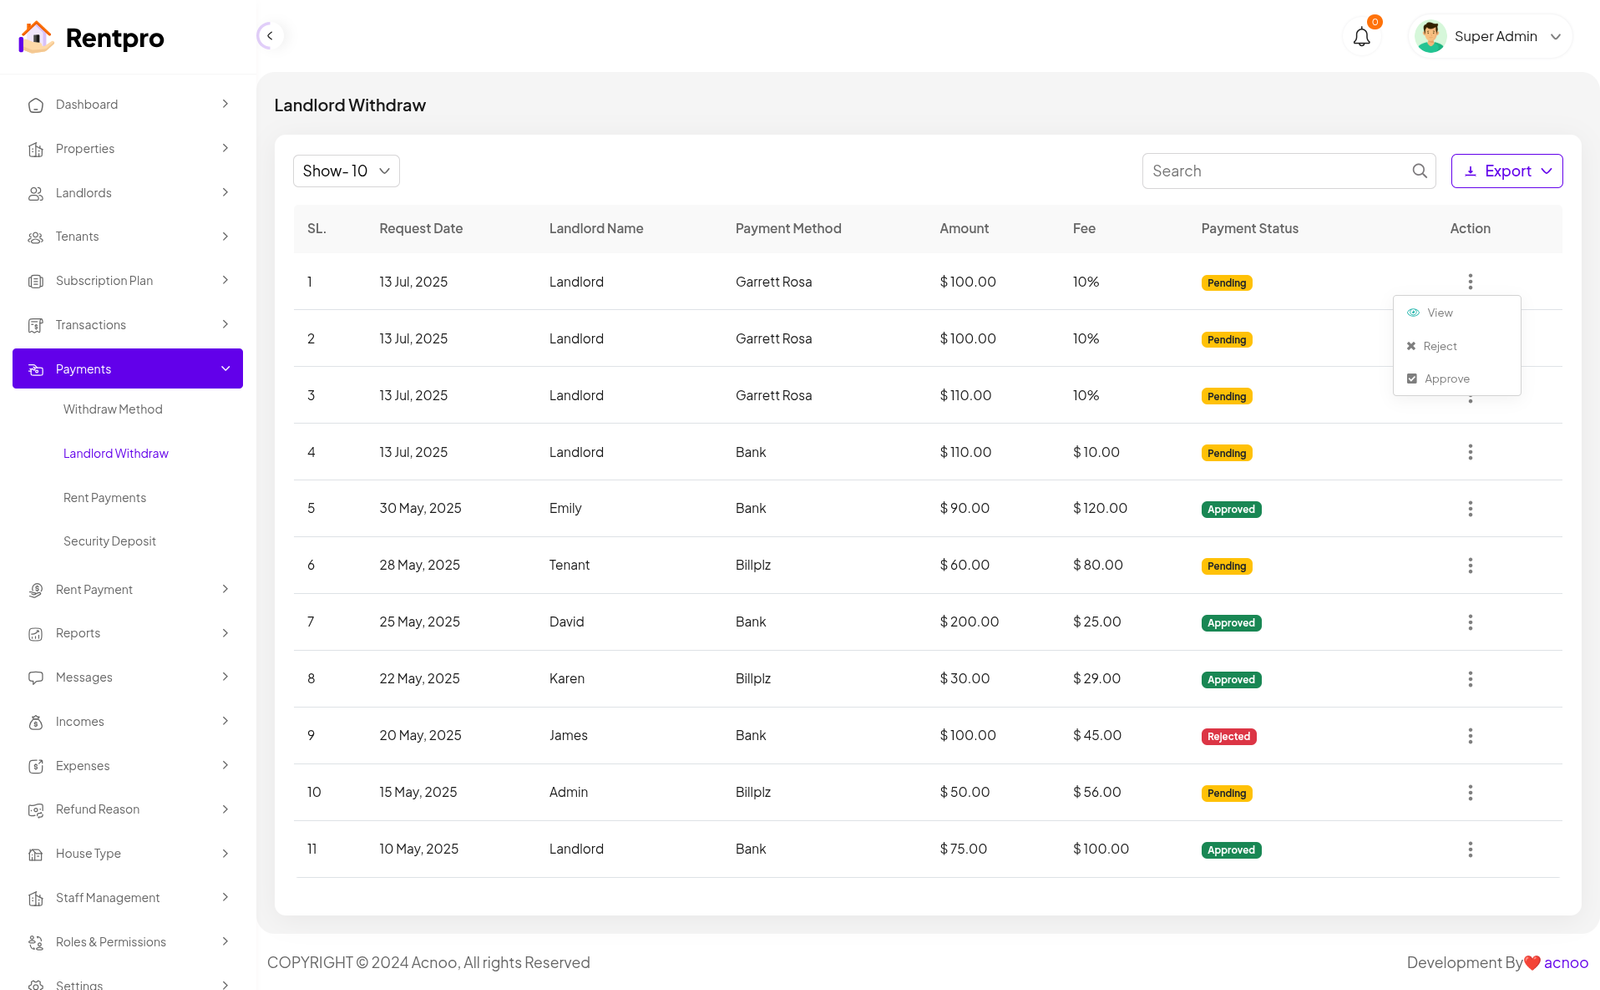
Landlord Withdraw
The "Landlord Withdraw" page is a critical financial management tool within the Rentpro admin panel. It provides a detailed list of all withdrawal requests submitted by landlords, allowing administrators to review, approve, or reject them.
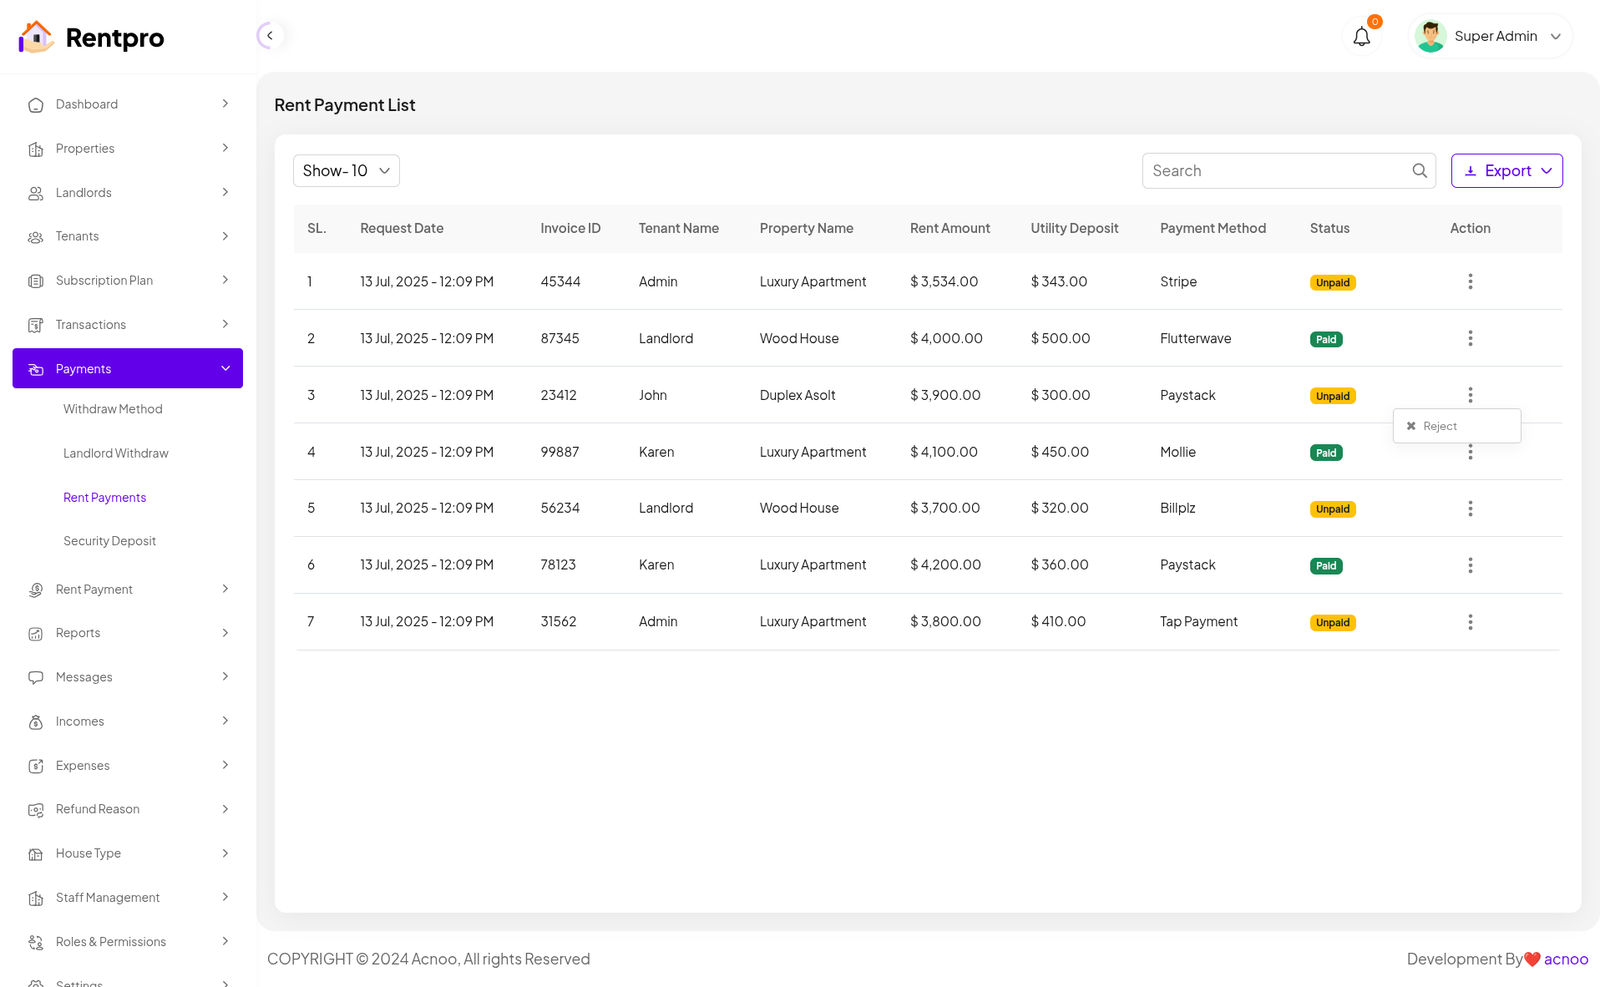
Rent Payments
The "Rent Payment List" page in the Rentpro admin panel is designed to provide a comprehensive record and management interface for all rent and related payments made by tenants. This page allows administrators to track payment statuses, and take action on specific payment entries.
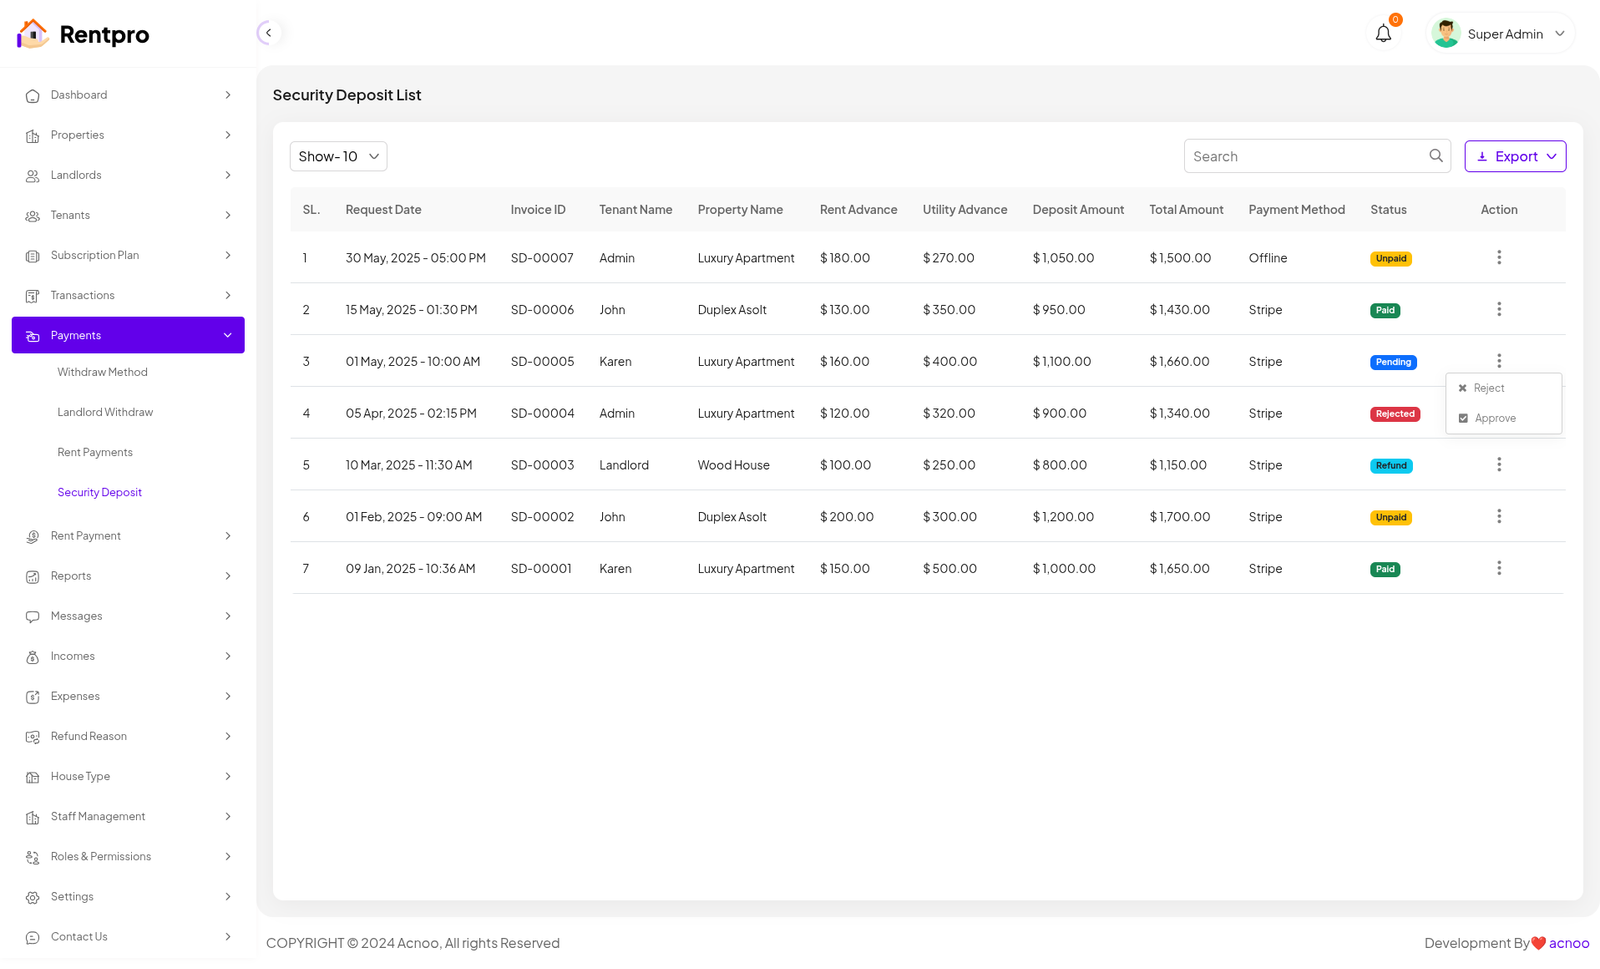
Security Deposit
The "Security Deposit List" page in the Rentpro admin panel is designed to track and manage all security deposits paid by tenants for their rental properties. This page is essential for financial transparency and managing funds held in escrow.
Reject: This option allows an administrator to reject a payment. This could be used for payments that are invalid or fraudulent.
Approve: This option allows an administrator to approve a payment, typically for payments with a "Pending" or "Offline" status.
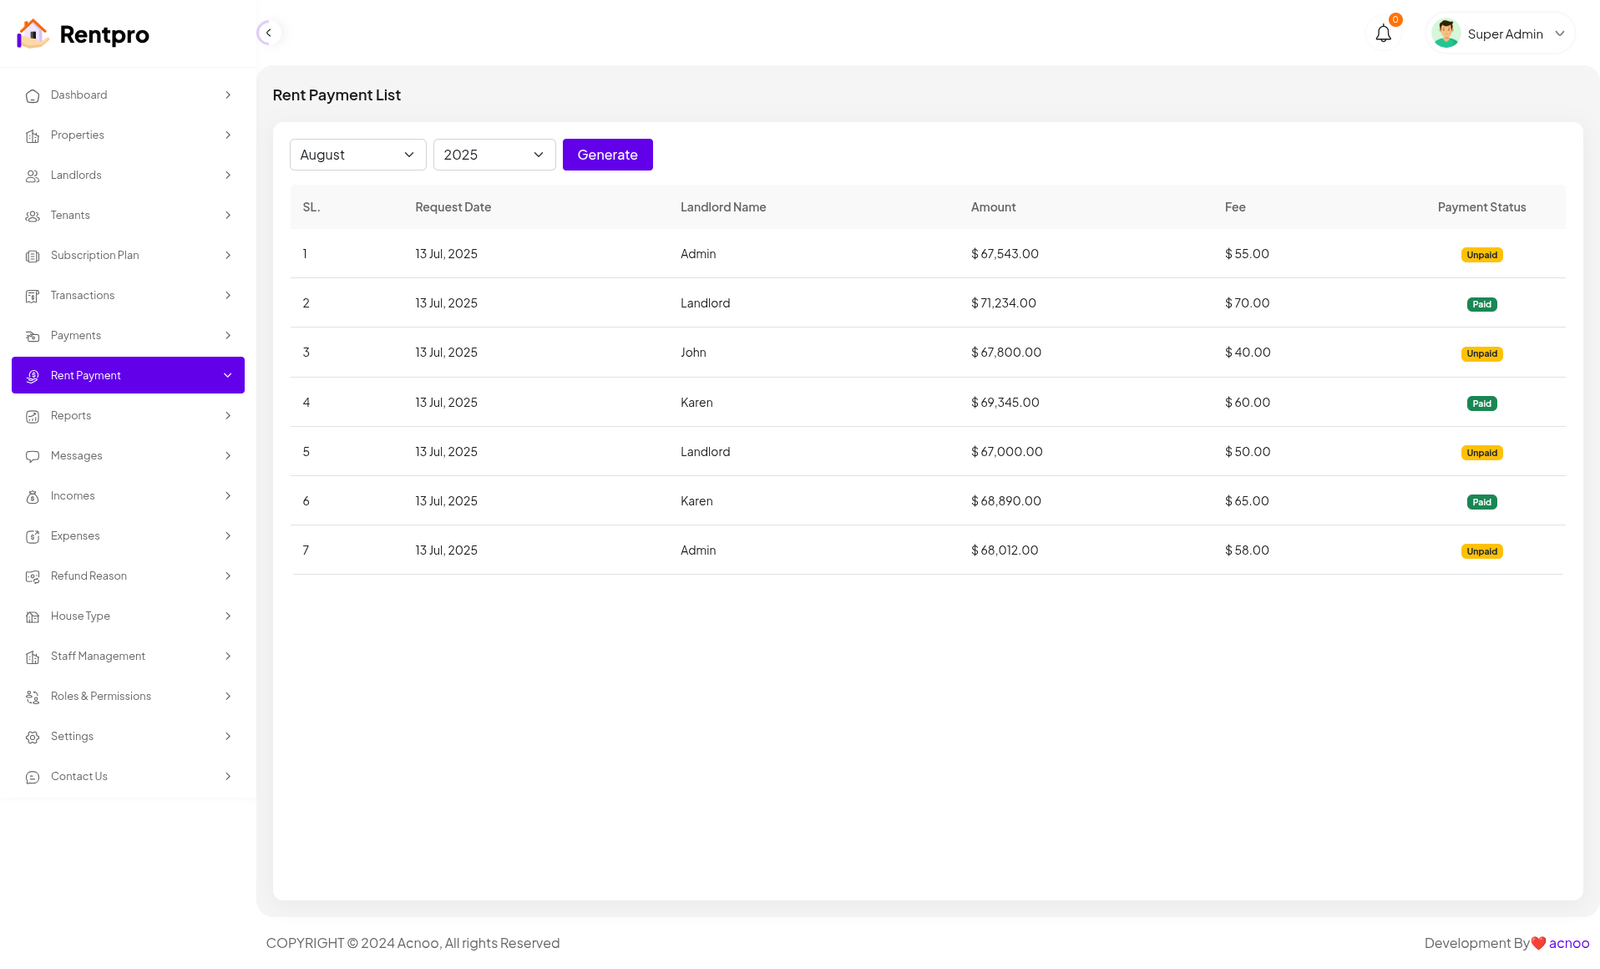
Rent Payment
The "Rent Payment" page in the Rentpro admin panel allows administrators to generate a list of rent payments for a specific month and year. This tool is crucial for financial tracking, ensuring all expected rent payments are accounted for and their status is clearly visible.
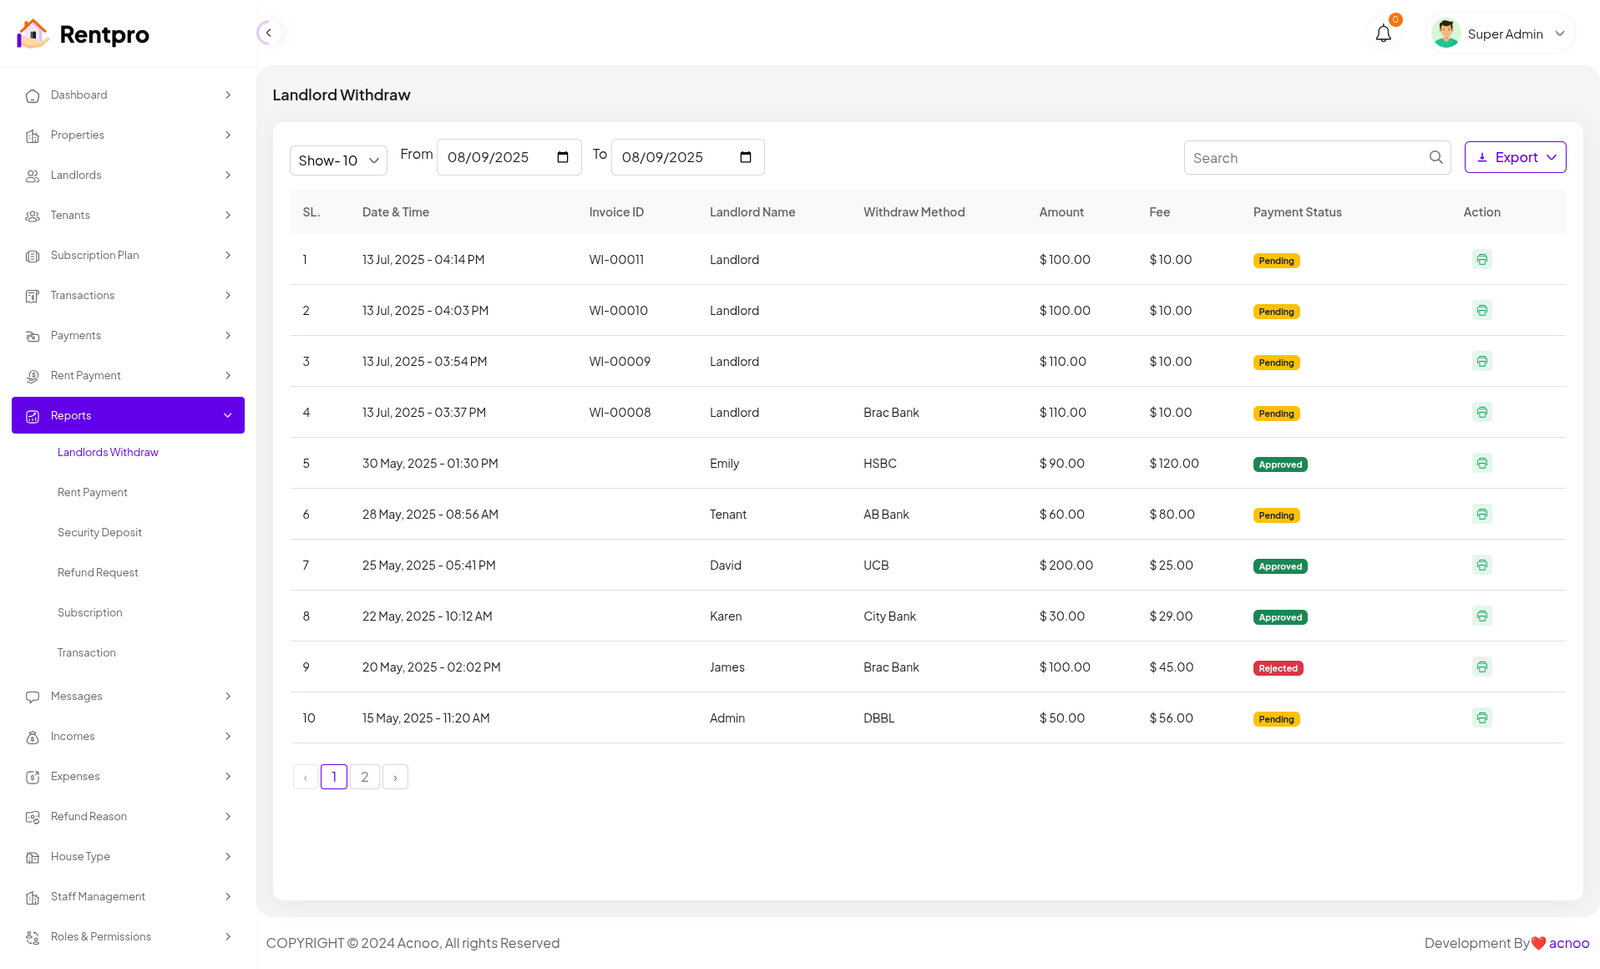
Landlord Withdraw
The "Landlord Withdraw" page under the Reports section of the Rentpro admin panel provides a historical and filterable view of all landlord withdrawal requests. This is a critical tool for financial reporting and auditing.
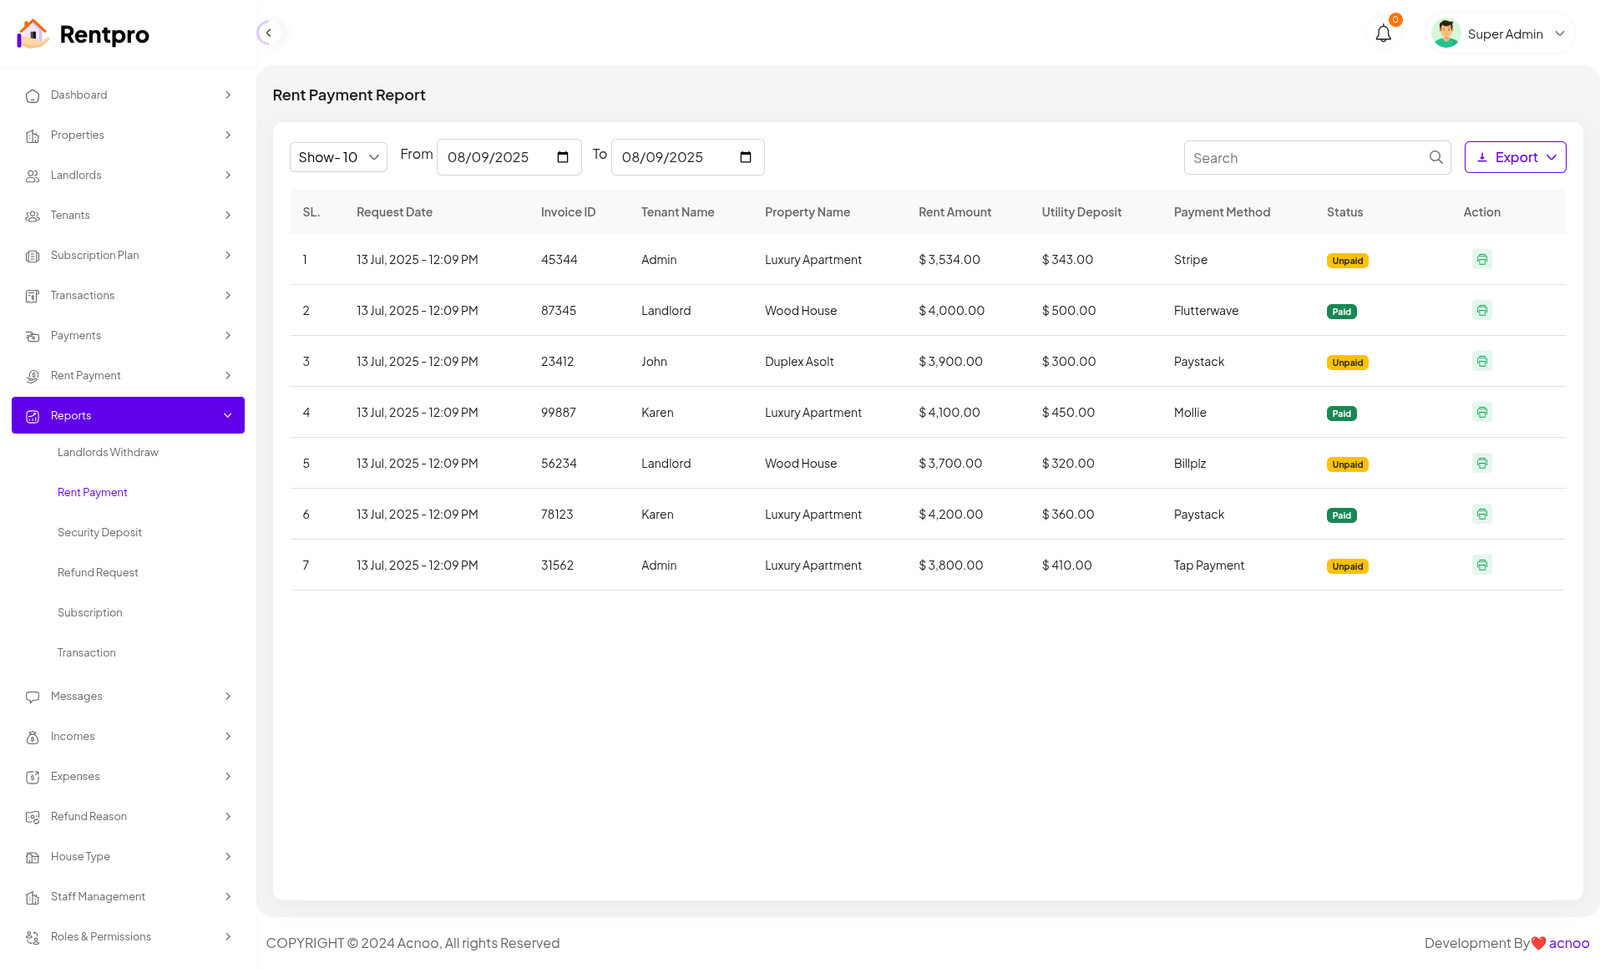
Rent Payment
The "Rent Payment Report" page is a powerful financial tool within the Rentpro admin panel. It allows administrators to generate and review a detailed list of rent payments over a specific, user-defined date range. This is essential for financial auditing, reconciliation, and reporting.
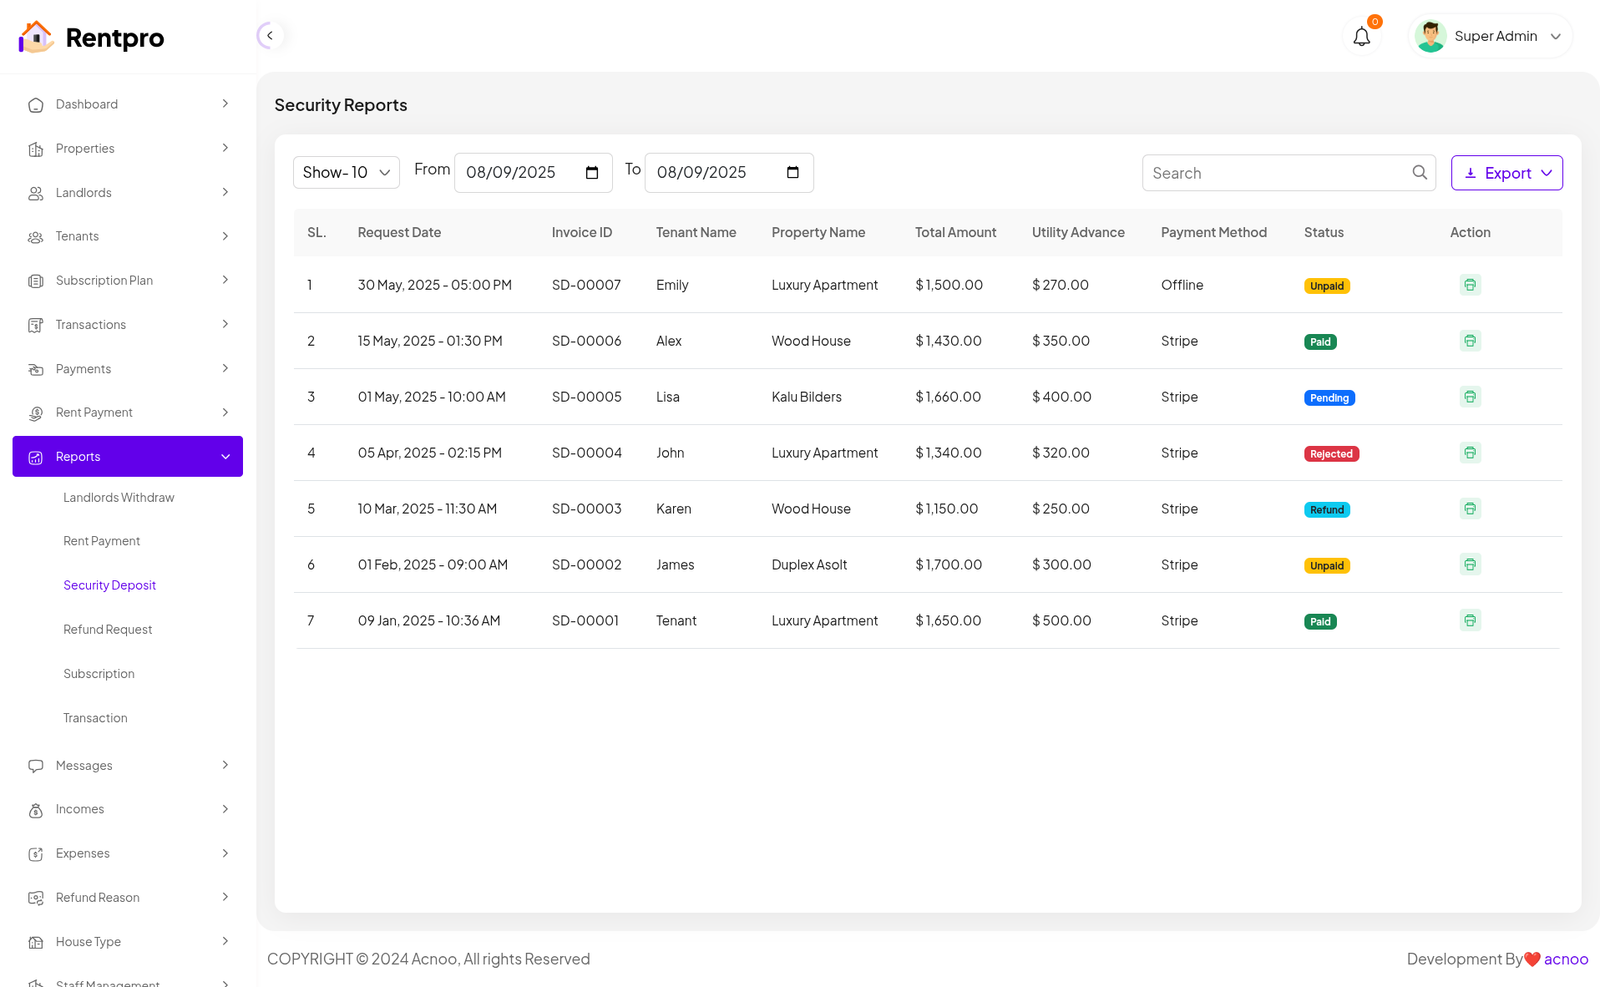
Security Deposit
The "Security Reports" page within the Rentpro admin panel provides a detailed, filterable overview of all security deposit payments. This report is a crucial tool for financial auditing, tracking deposit statuses, and managing funds held in escrow.
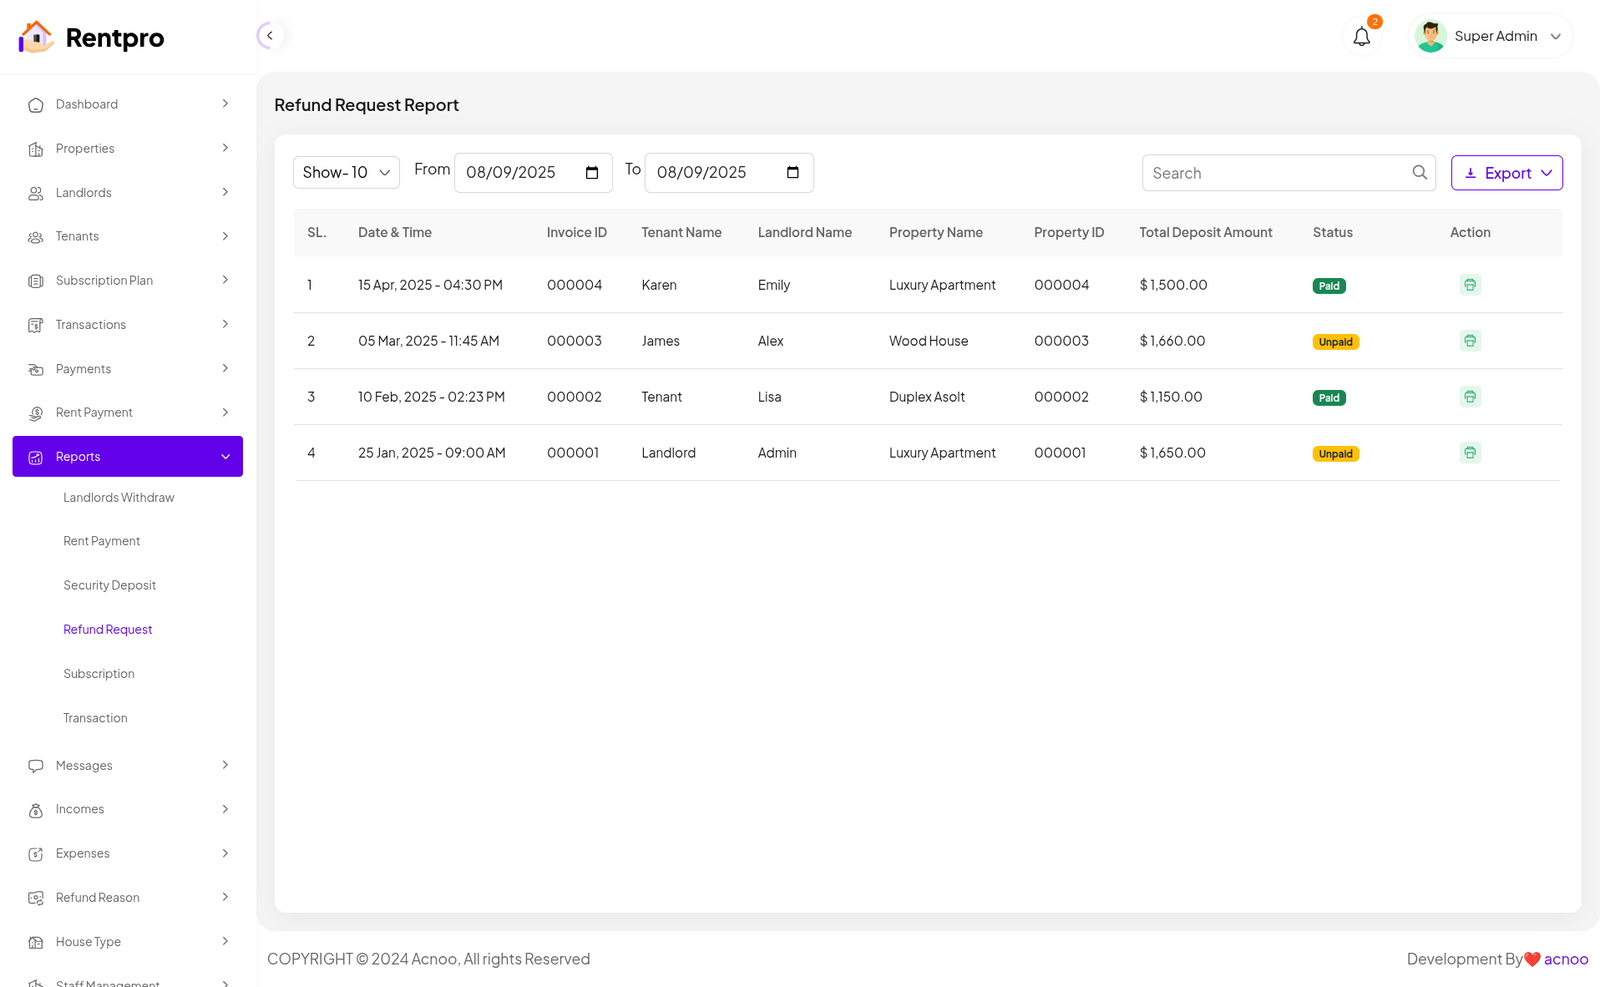
Refund Request
The "Refund Request Report" page in the Rentpro admin panel is a tool for tracking and managing all refund requests submitted by tenants or landlords. This report is crucial for financial oversight, dispute resolution, and maintaining a clear record of refund-related activities.
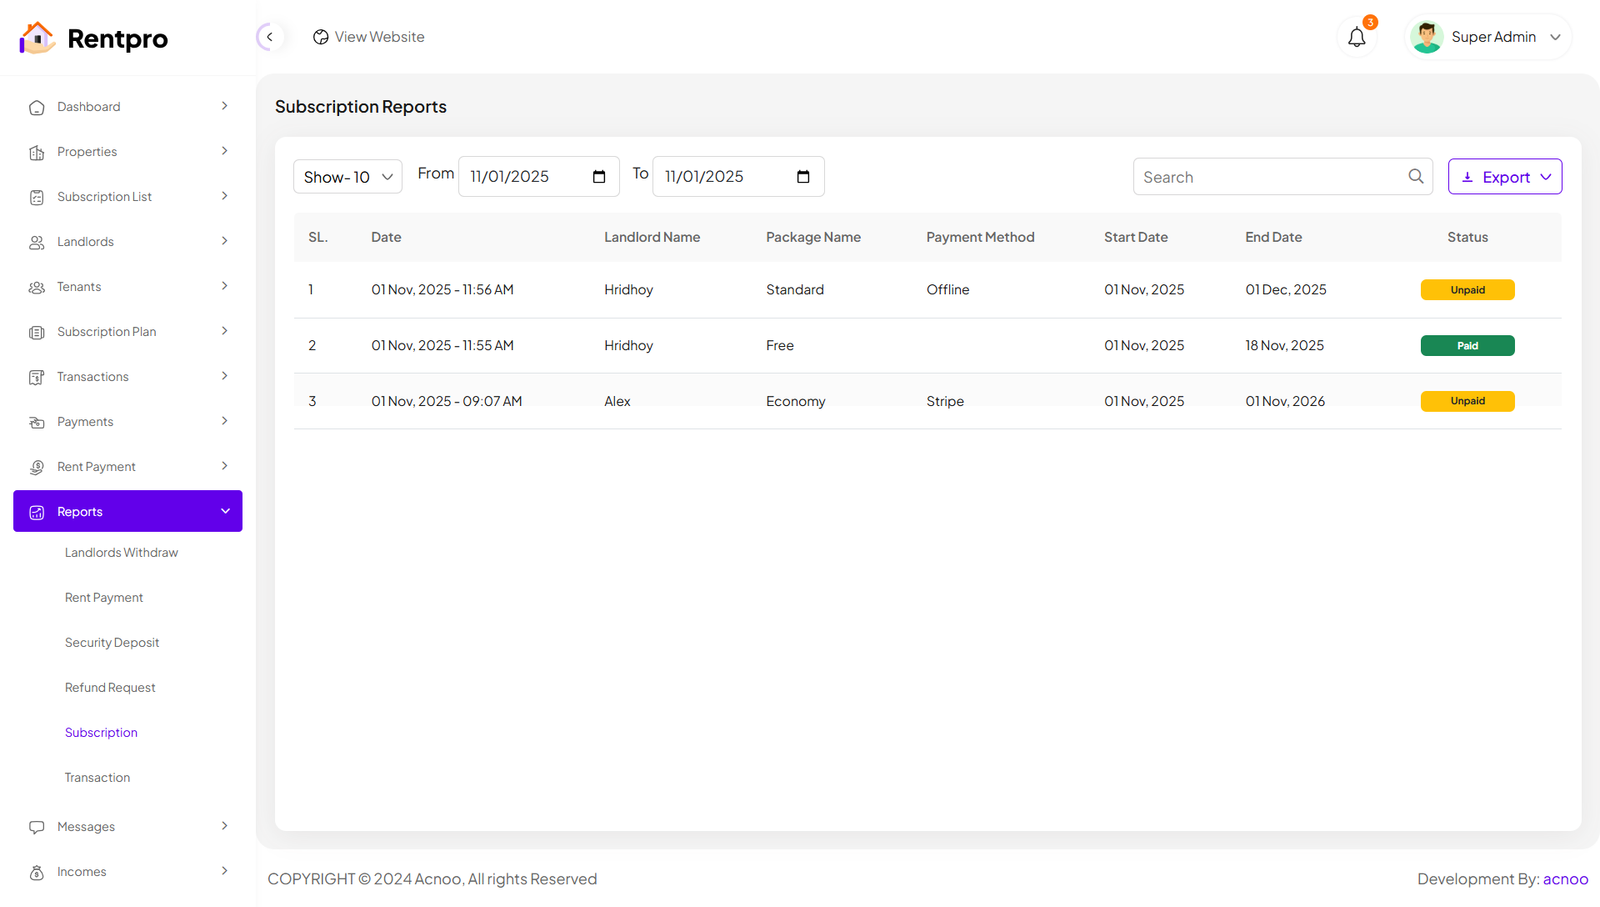
Subscription
The "Subscription Reports" page in the Rentpro admin panel provides a detailed, filterable overview of all subscription payments made by landlords. This report is essential for financial auditing, tracking subscription statuses, and managing revenue streams.
Transaction
Transaction Reports: Provides a detailed, filterable list of all transactions on the platform, including subscriptions, withdrawals, rent, and security deposits. The report can be filtered by a date range and includes details like Date, Transaction ID, Payment Type, Payment Method, and Amount.
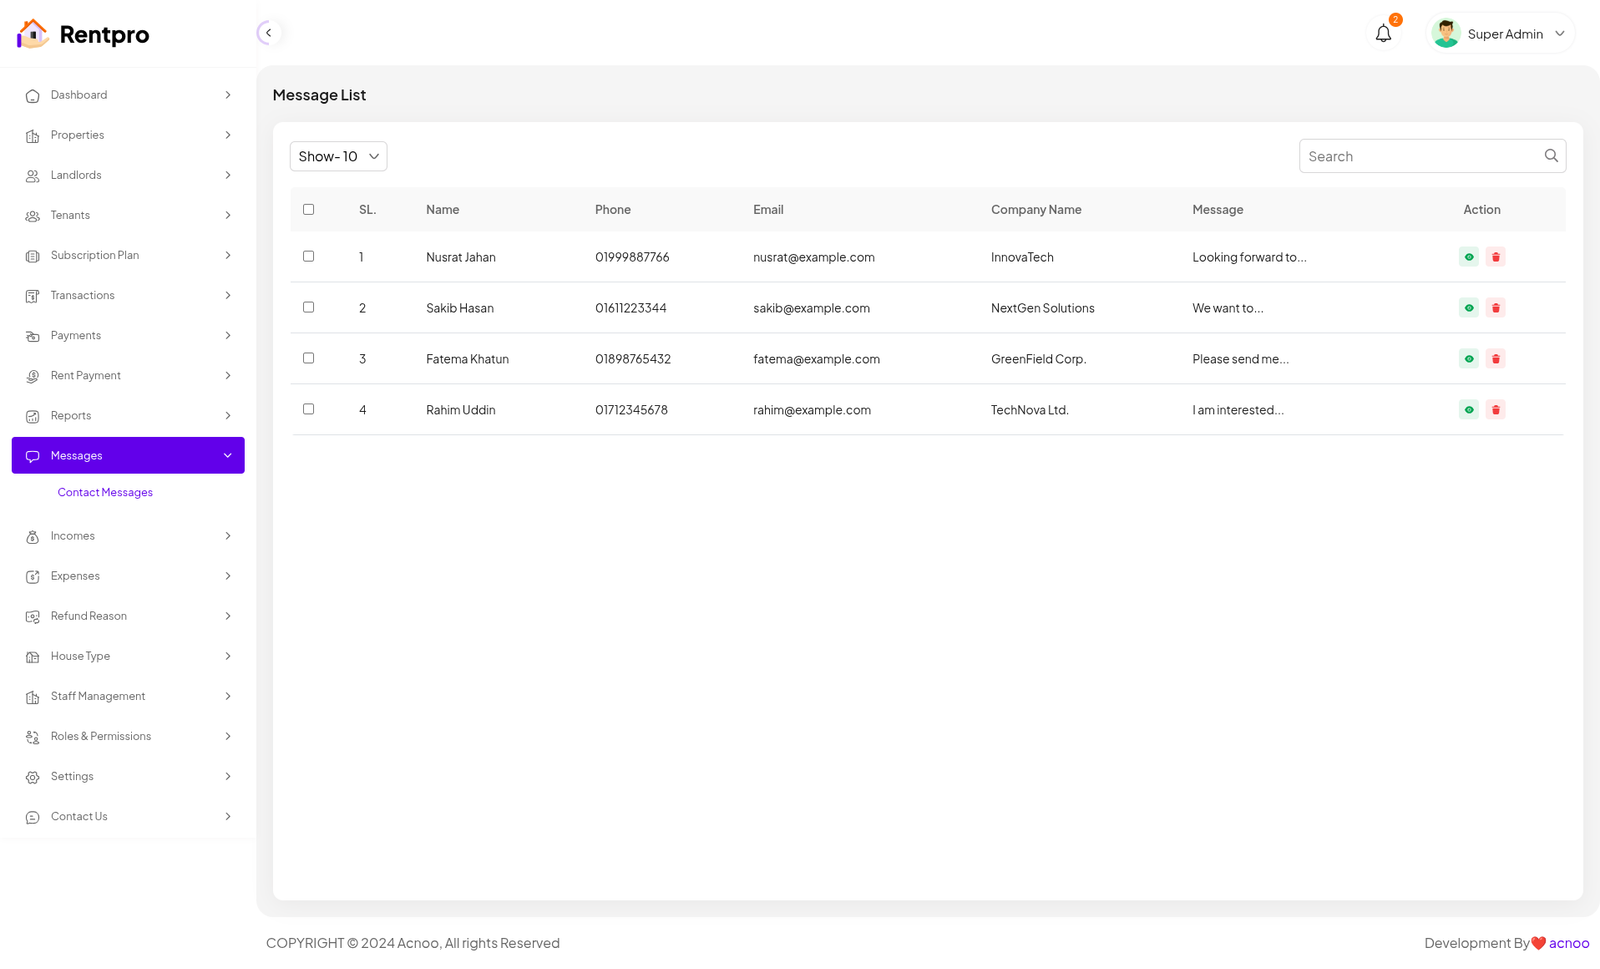
Contact Message
The "Message List" page provides administrators with a centralized location to view and manage all contact messages submitted through the platform. This is an essential tool for responding to user inquiries and providing support.
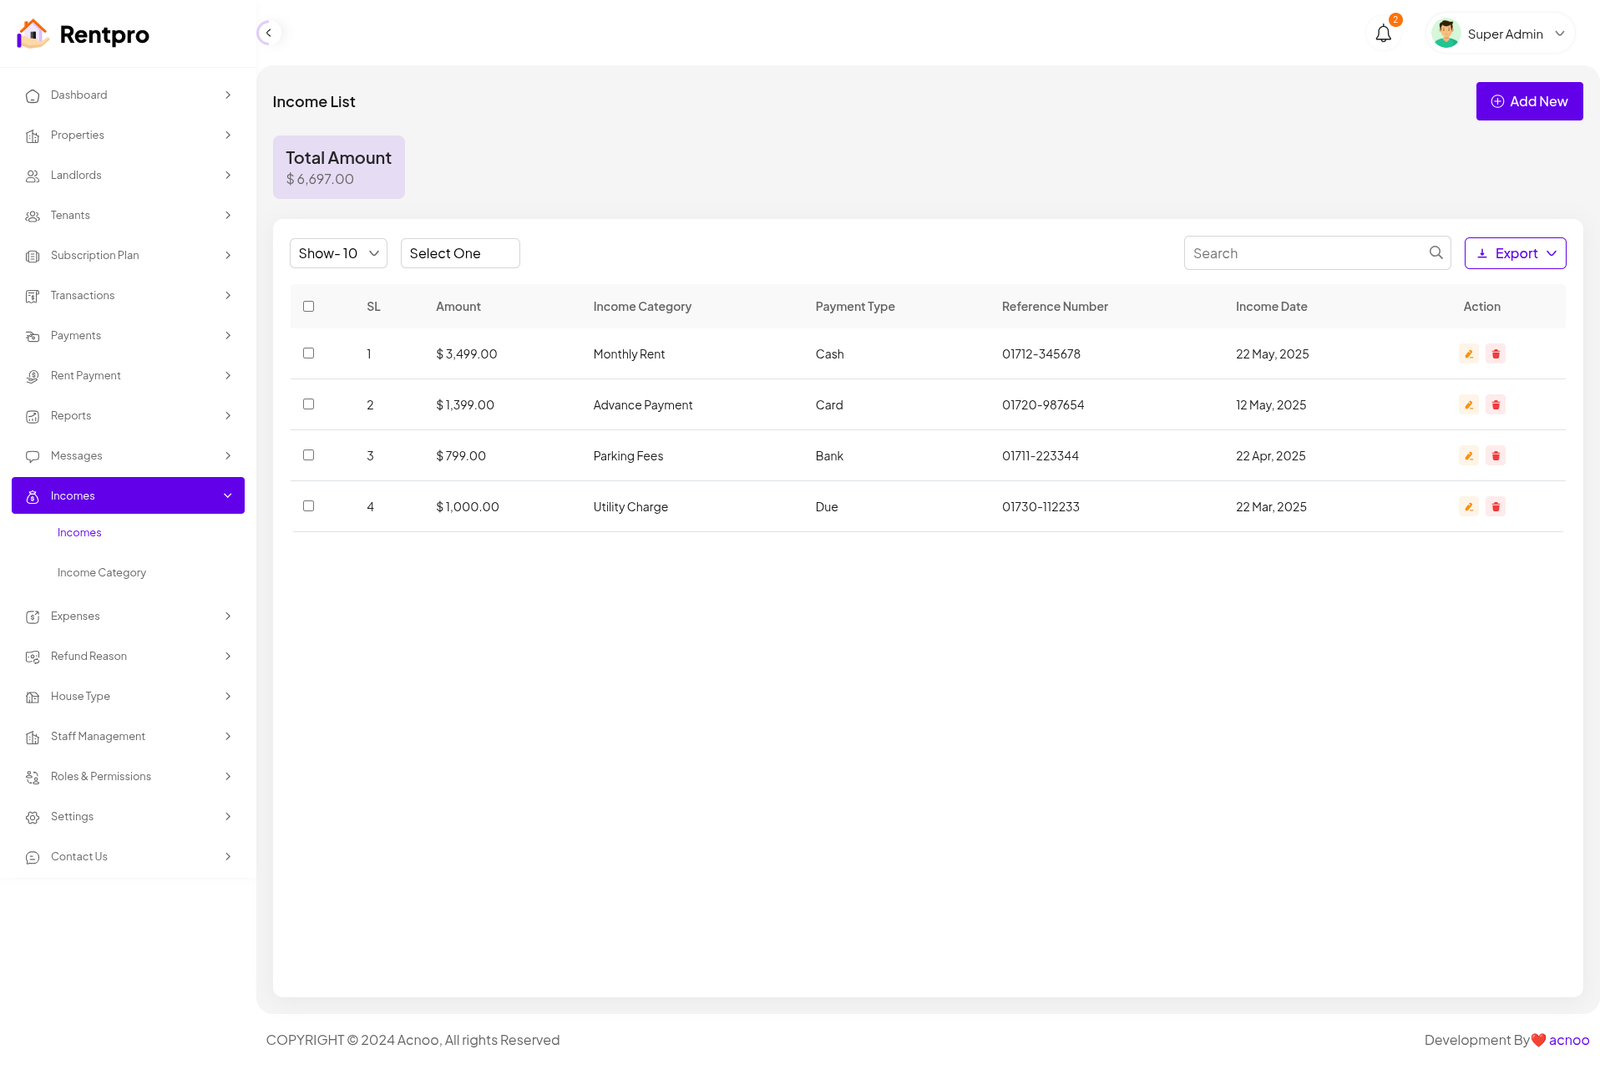
Income List
The "Income List" page provides a detailed record of all income generated by the platform. This is a crucial financial management tool that allows administrators to track revenue from various sources, such as rent, advance payments, fees, and utility charges.
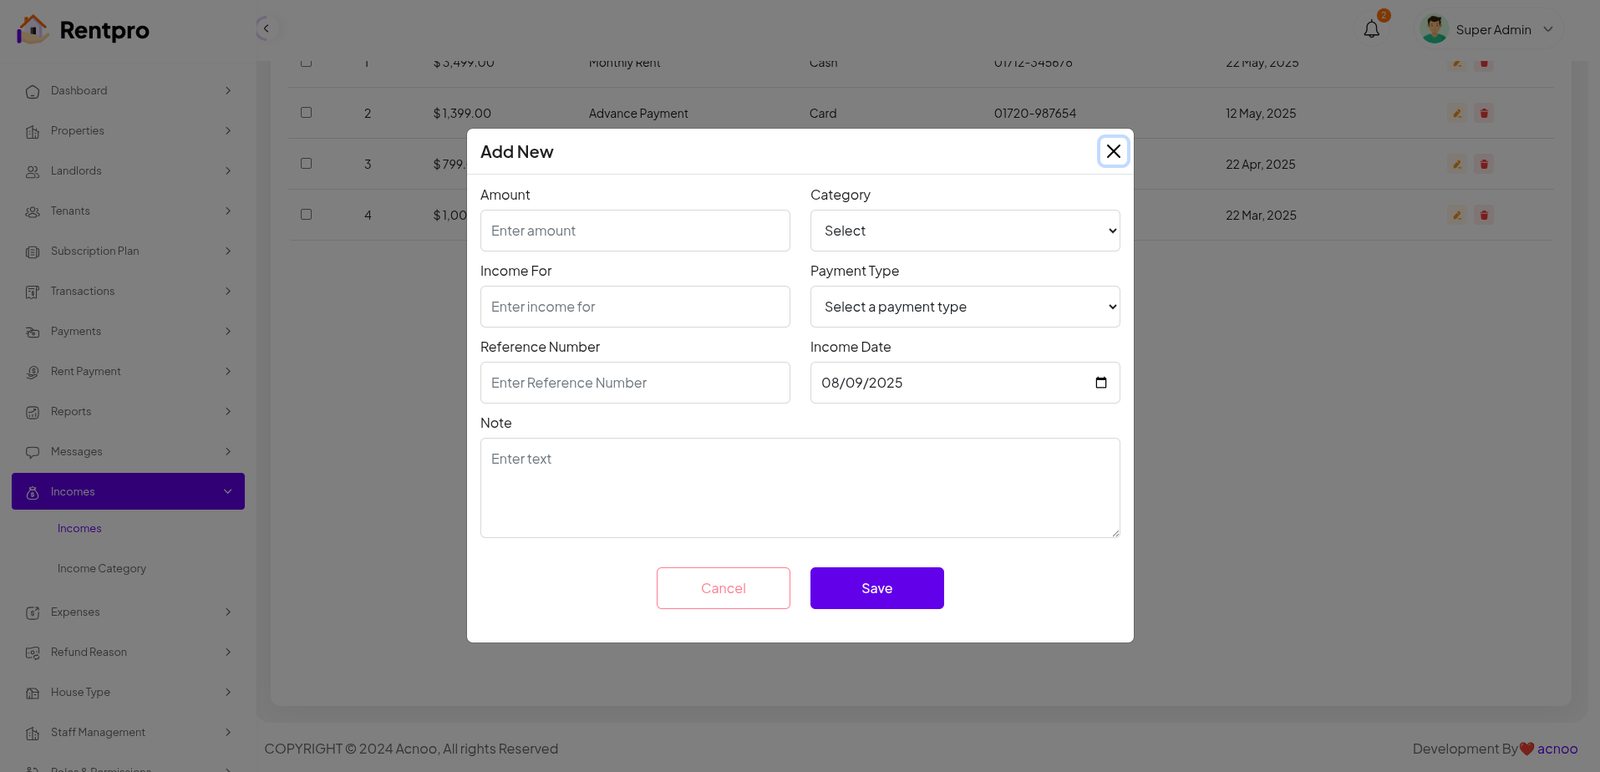
Add New Income
The "Add New" feature within the "Income" section of the Rentpro admin panel is used by administrators to manually record a new income transaction.
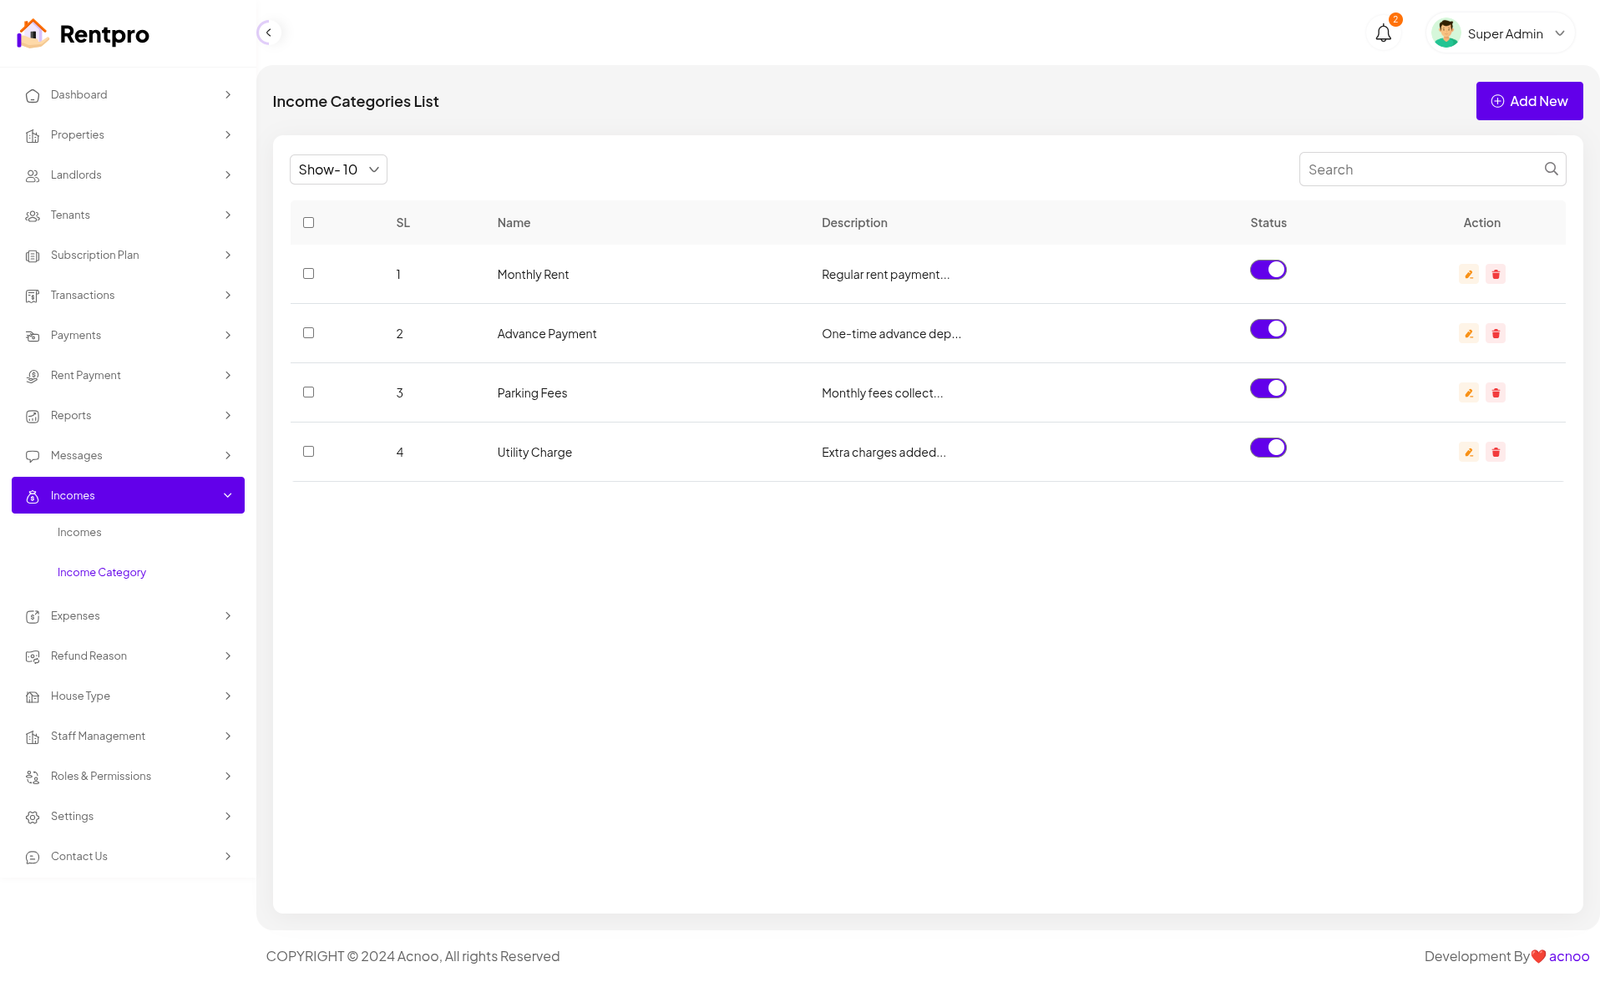
Income Category List
The "Income Categories List" page in the Rentpro admin panel is used to manage and define the different sources of income for the platform. This feature allows administrators to categorize all revenue streams for better financial tracking and reporting.
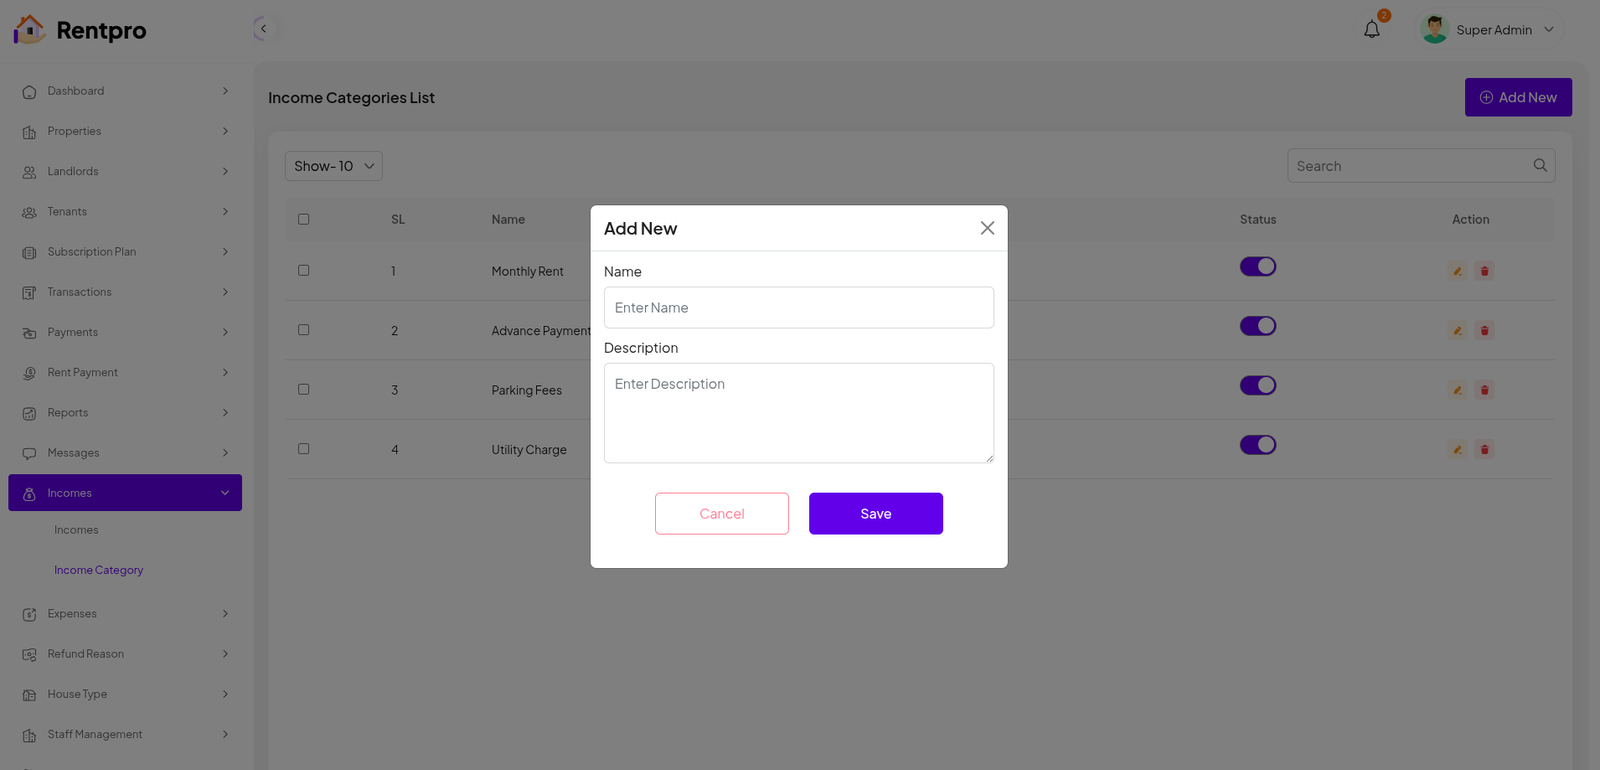
Add New Category
The "Add New" feature within the "Income Category" section of the Rentpro admin panel is used by administrators to manually record a new income Category.
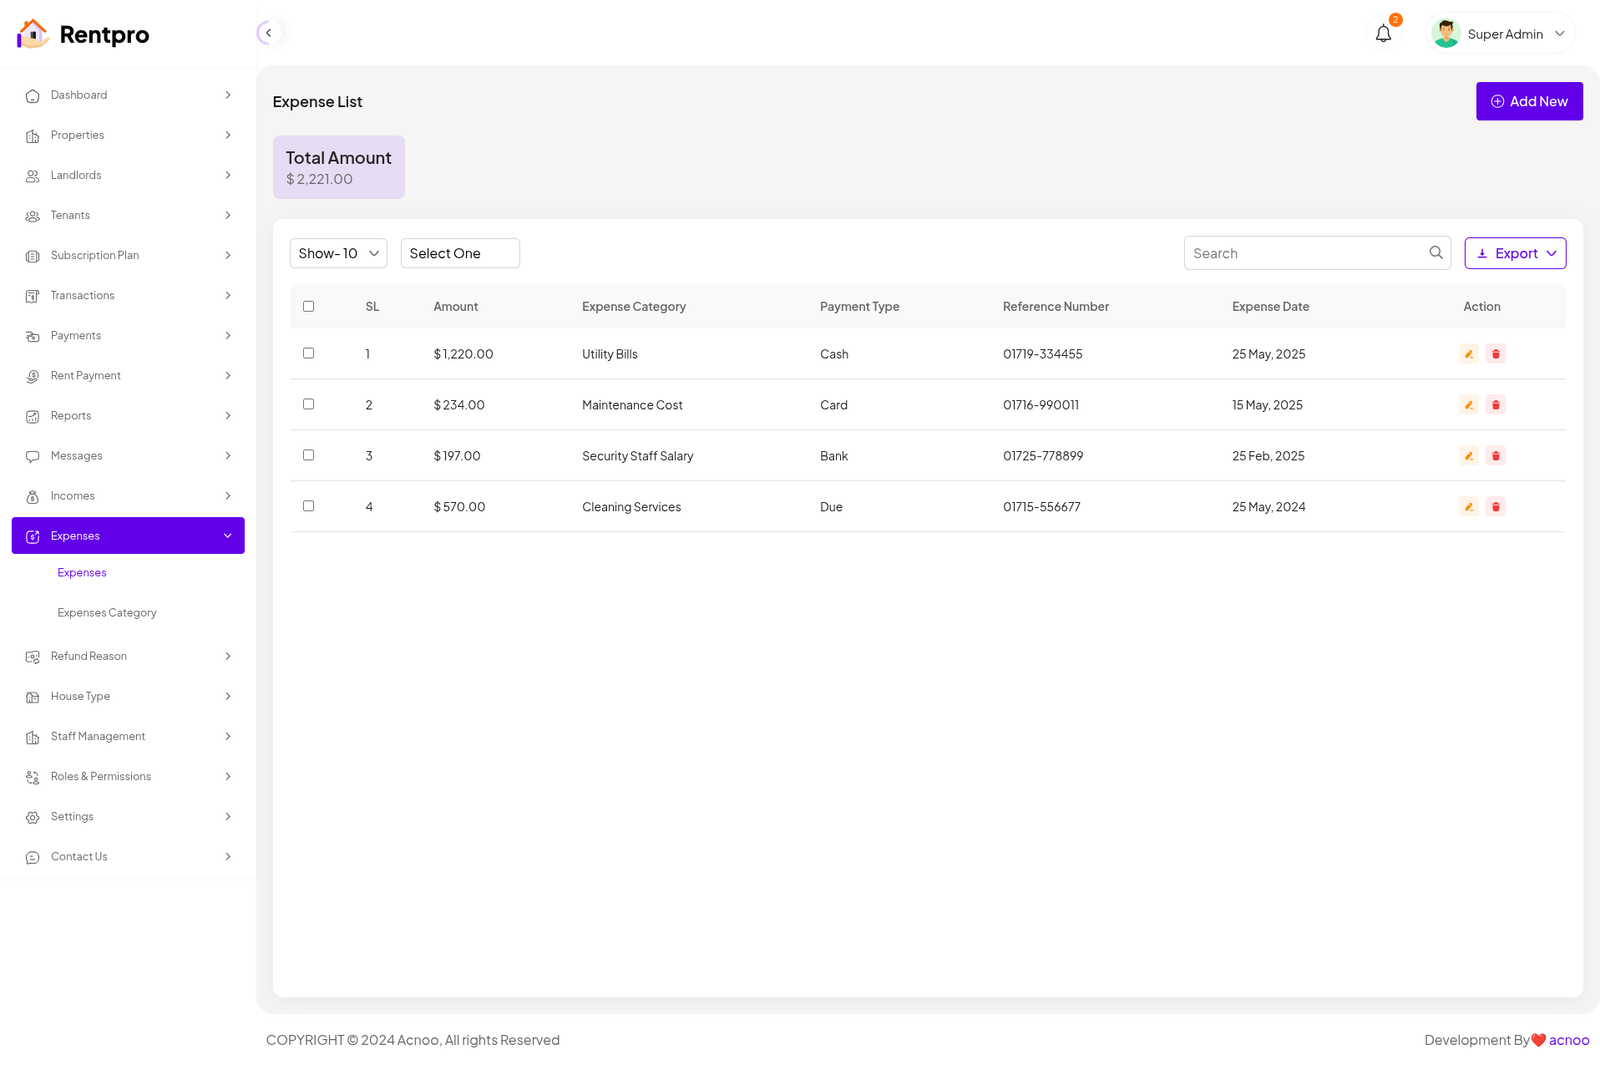
Expense List
The "Expense List" page provides a detailed record of all Expense generated by the platform. This is a crucial financial management tool that allows administrators to track revenue from various sources, such as rent, advance payments, fees, and utility charges.
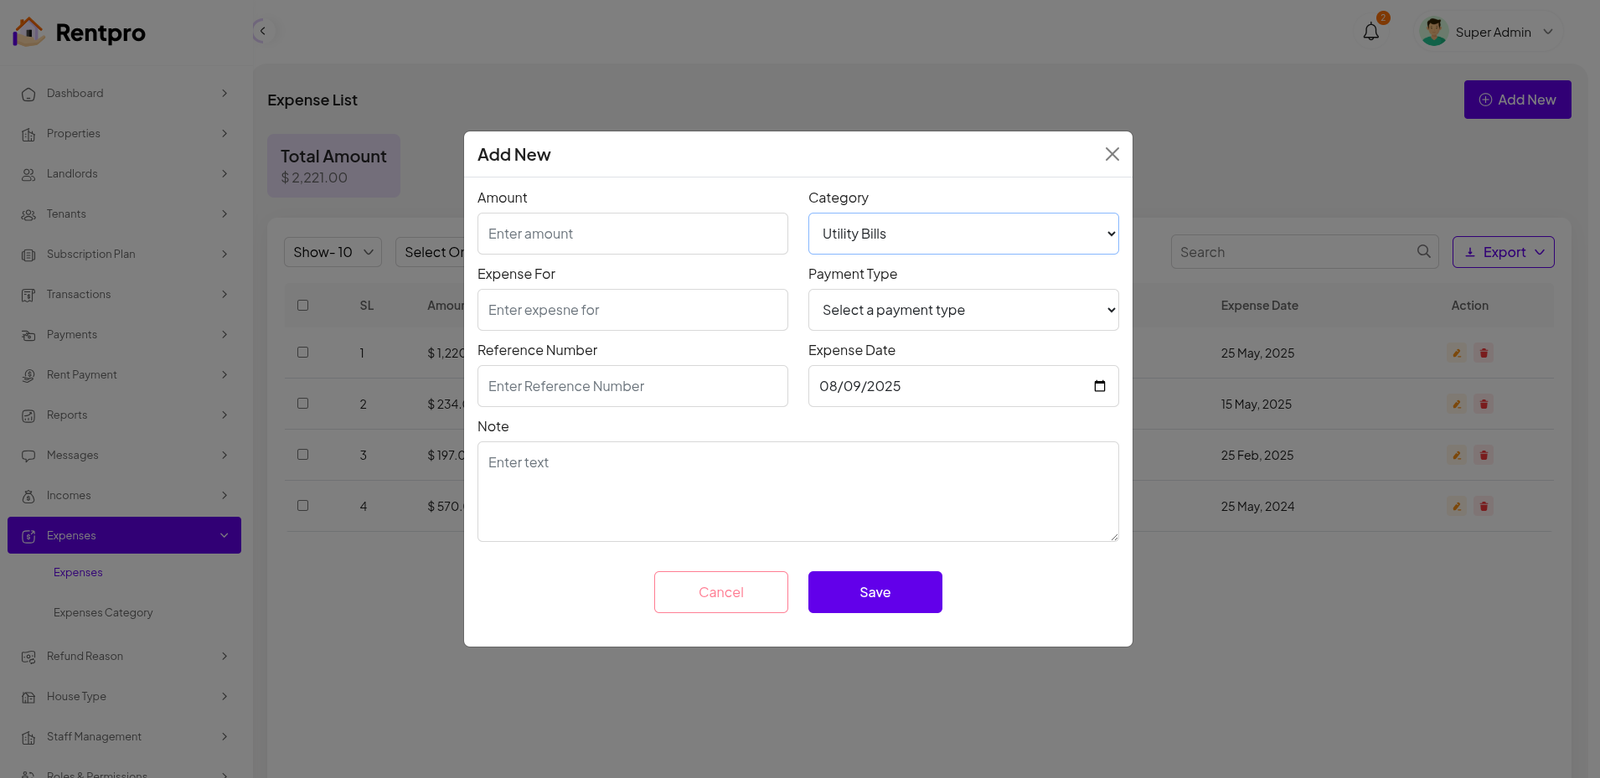
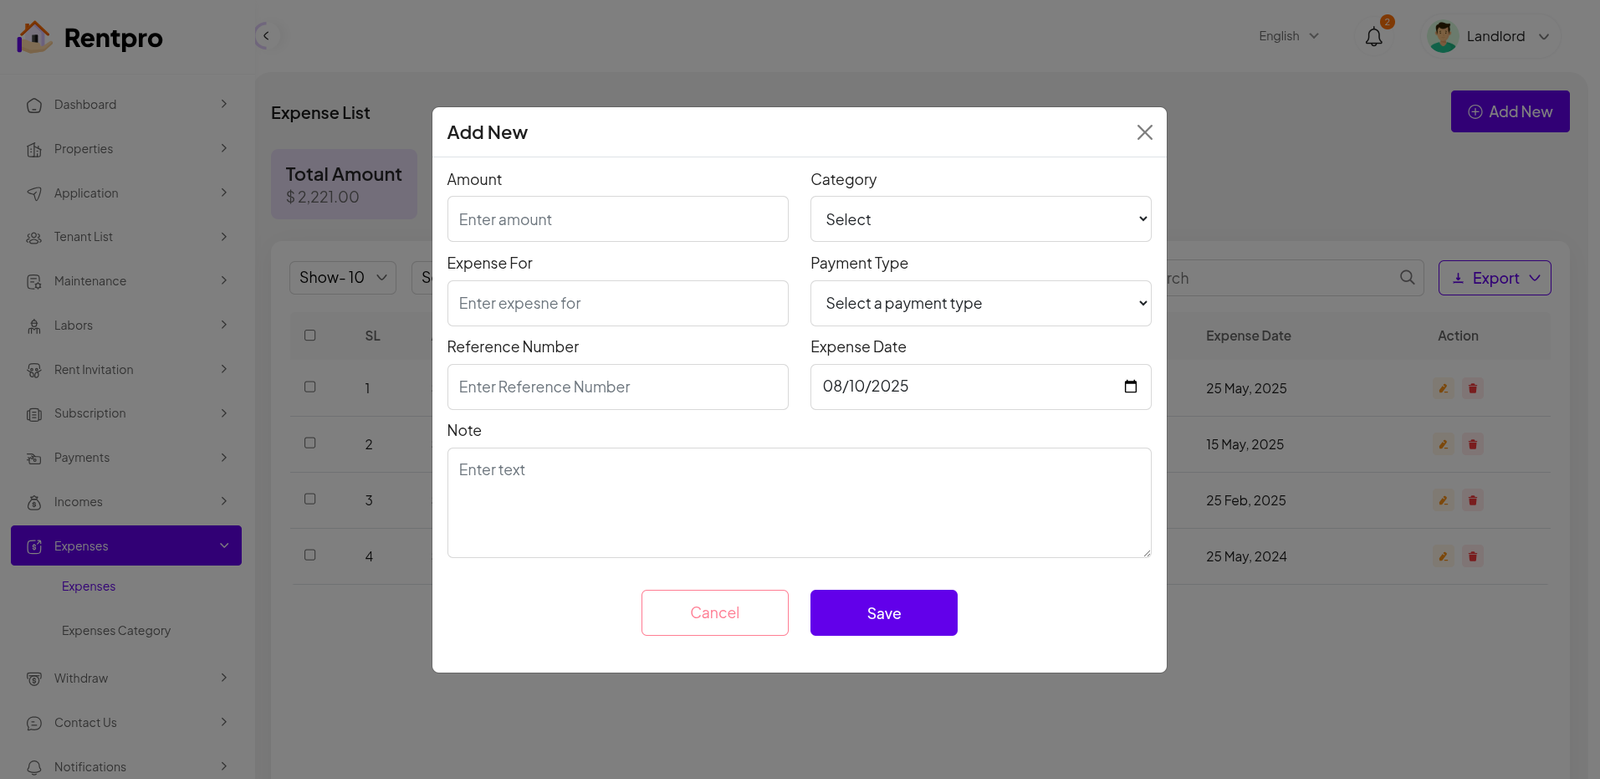
Add New Expense
The "Add New" feature within the "Expense" section of the Rentpro admin panel is used by administrators to manually record a new income transaction.
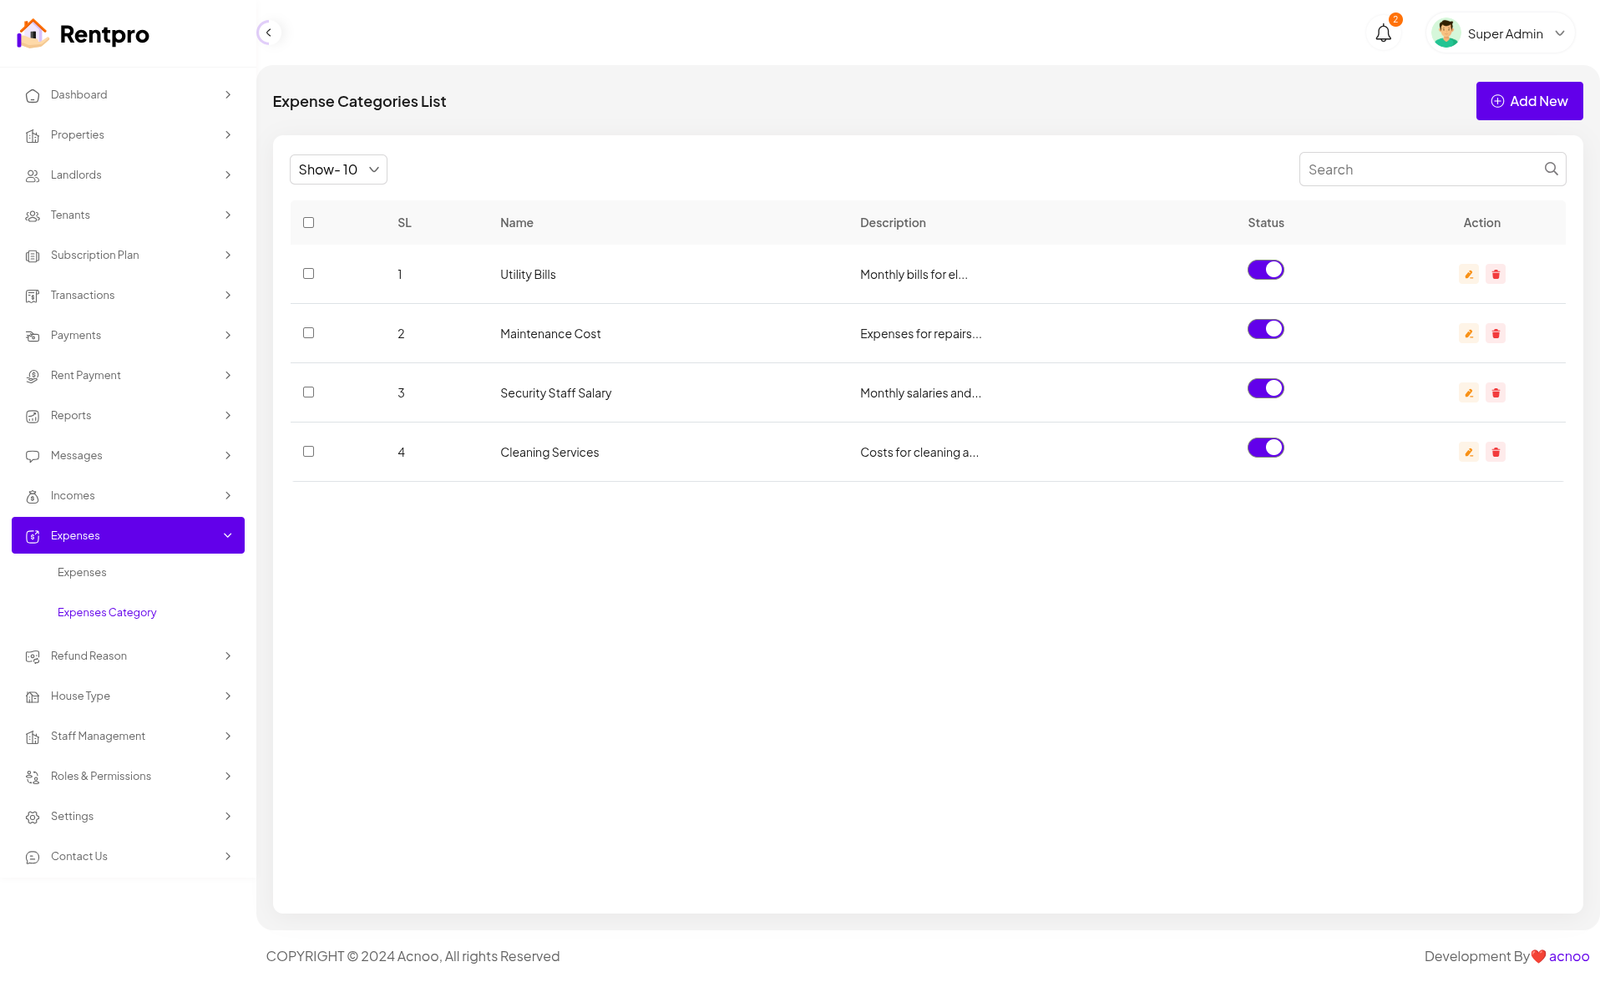
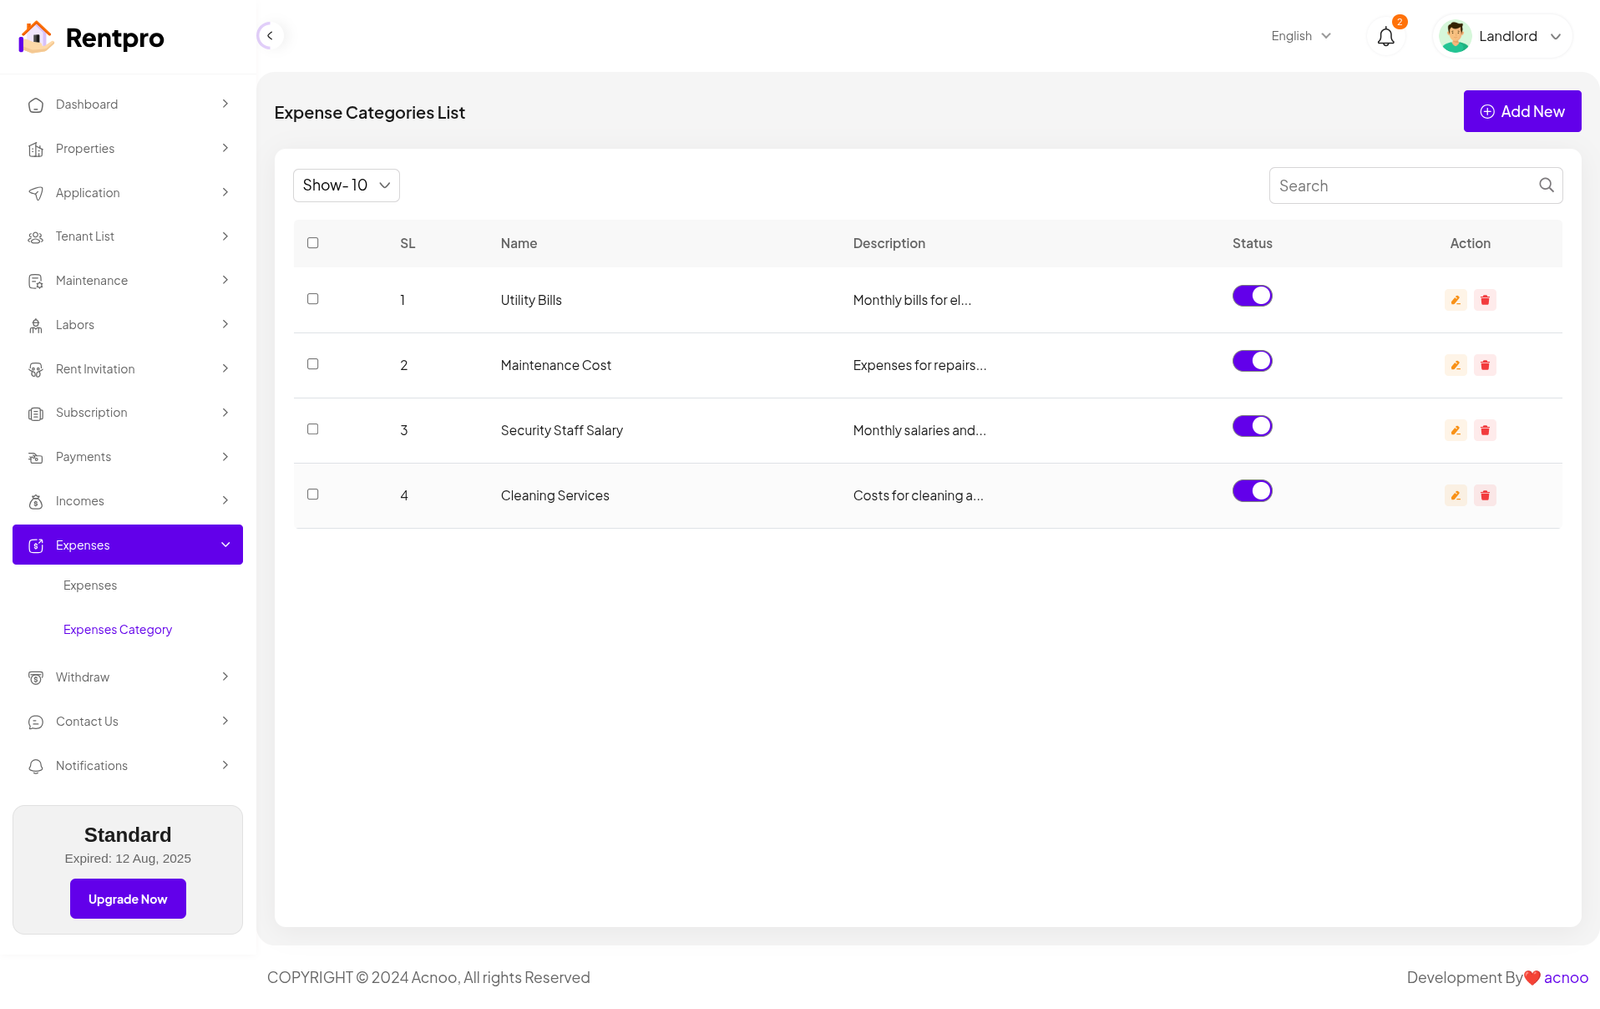
Expense Category List
The "Expense Categories List" page in the Rentpro admin panel is used to manage and define the different sources of Expense for the platform. This feature allows administrators to categorize all revenue streams for better financial tracking and reporting.
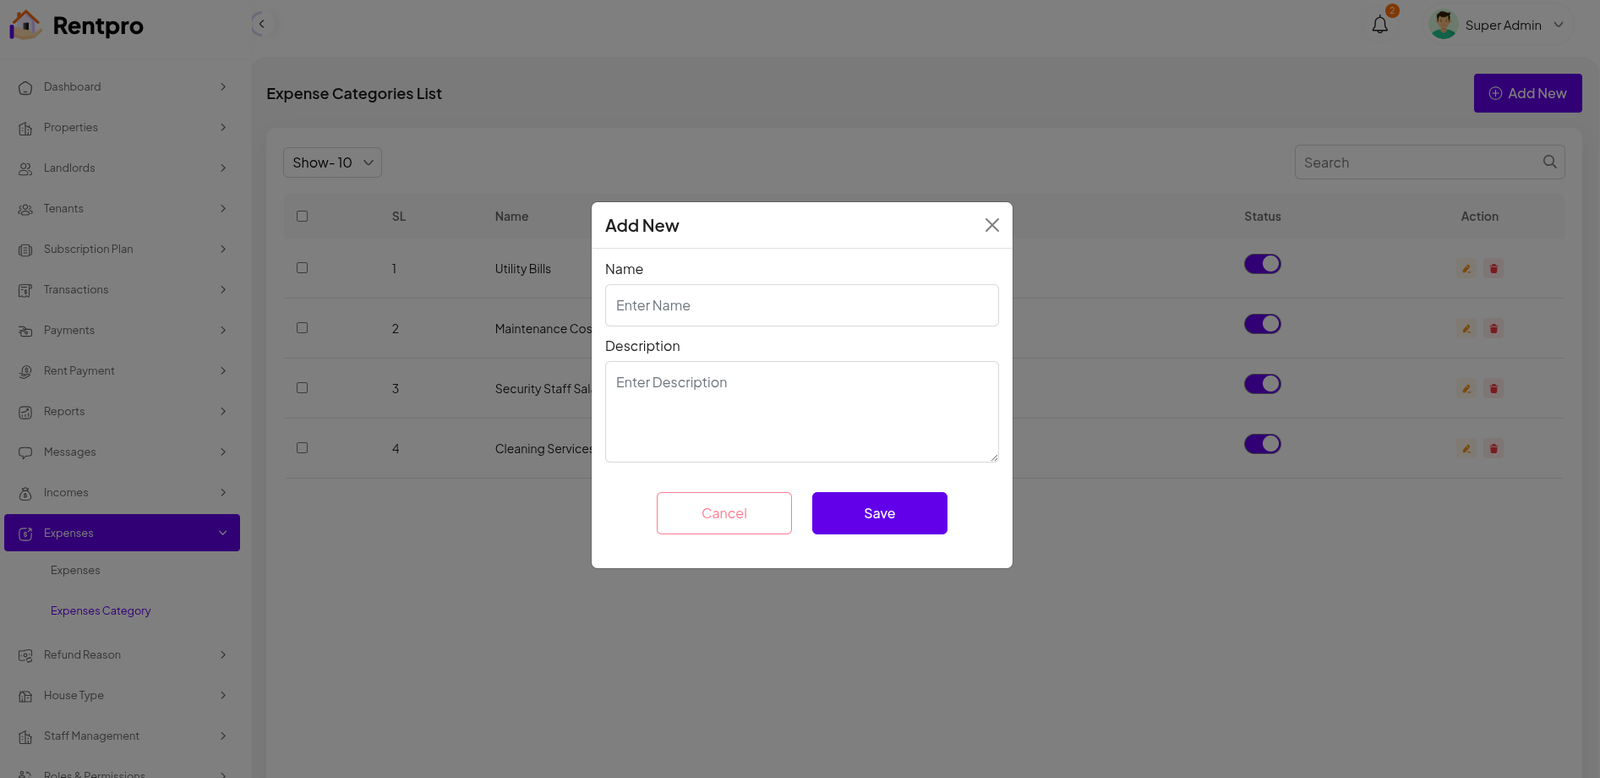
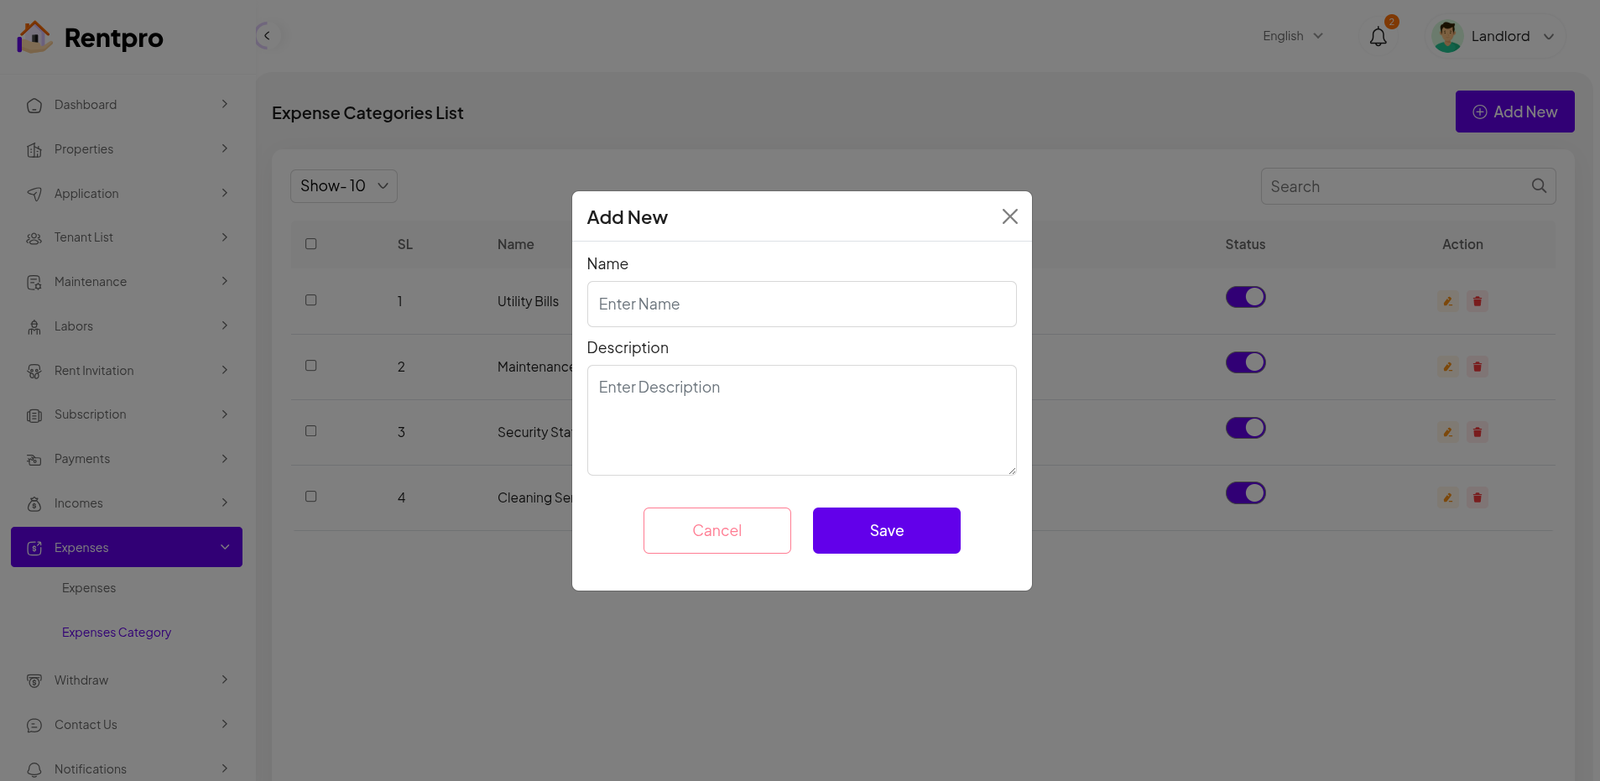
Add New Category
The "Add New" feature within the "Expense Category" section of the Rentpro admin panel is used by administrators to manually record a new Expense Category.
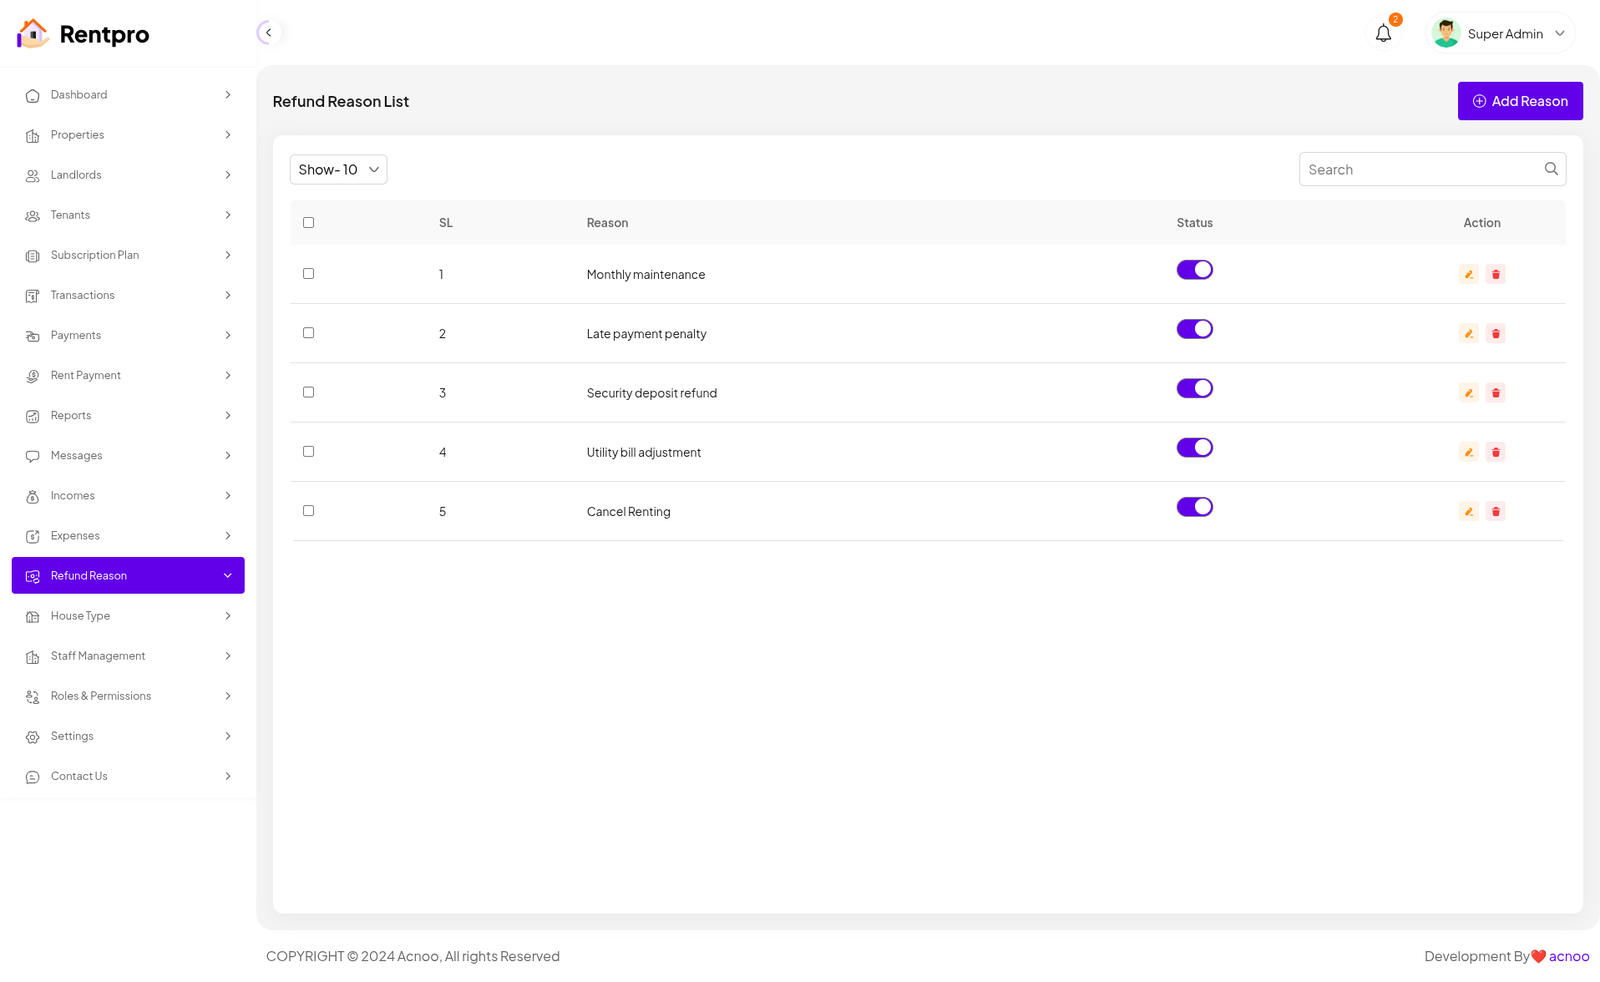
Refund Reason List
The "Refund Reason List" page displays all predefined reasons for processing refunds within the platform. This list helps administrators and staff maintain a standardized set of explanations for refund transactions, ensuring transparency and consistent record-keeping.
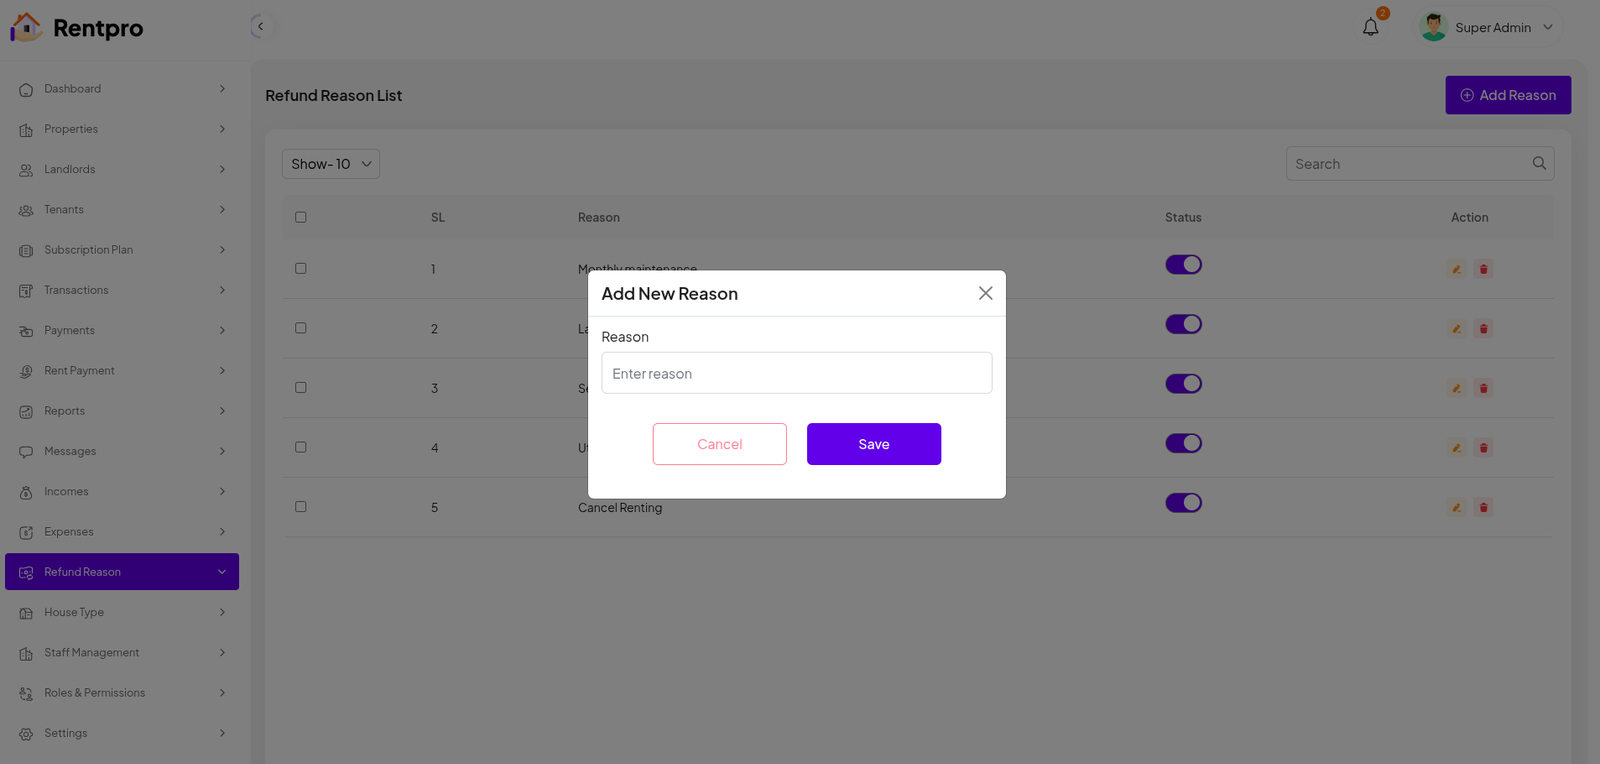
Add New Refund Reason
The "Add New" feature in the "Refund Reason" section allows administrators to create a new reason for refunding a transaction. This ensures that all future refund records can be categorized appropriately, improving reporting accuracy and audit processes.
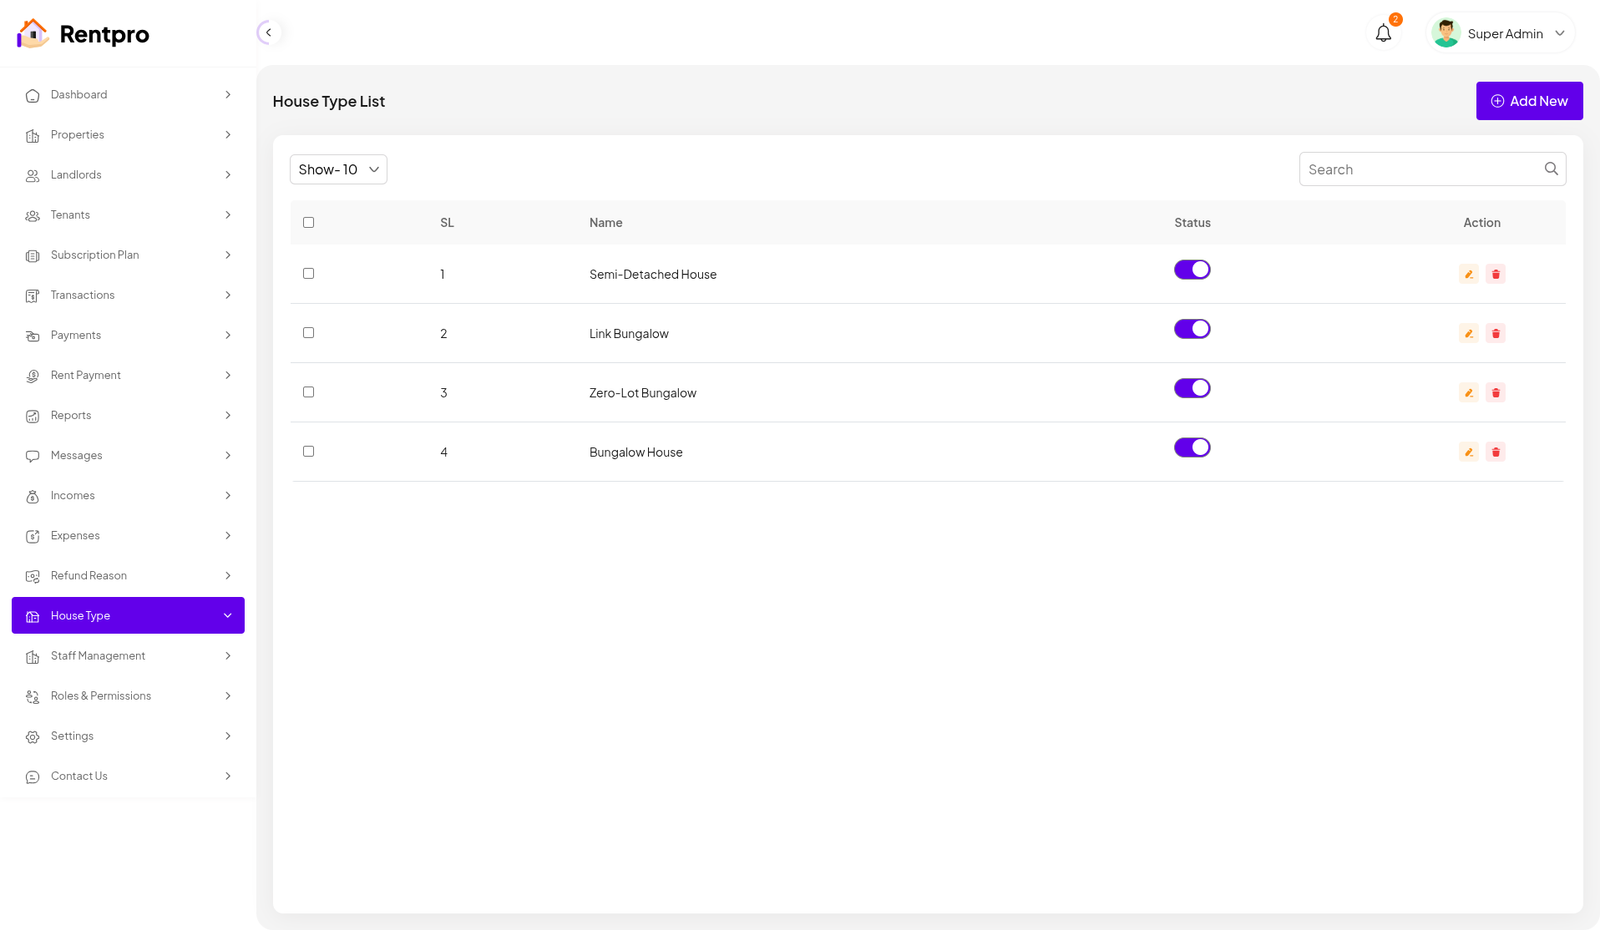
House Type List
The "House Type List" page in the Rentpro admin panel is used to manage and define the different categories or types of houses and properties available for listing on the platform. This feature is crucial for organizing property listings and providing a consistent classification system for users.
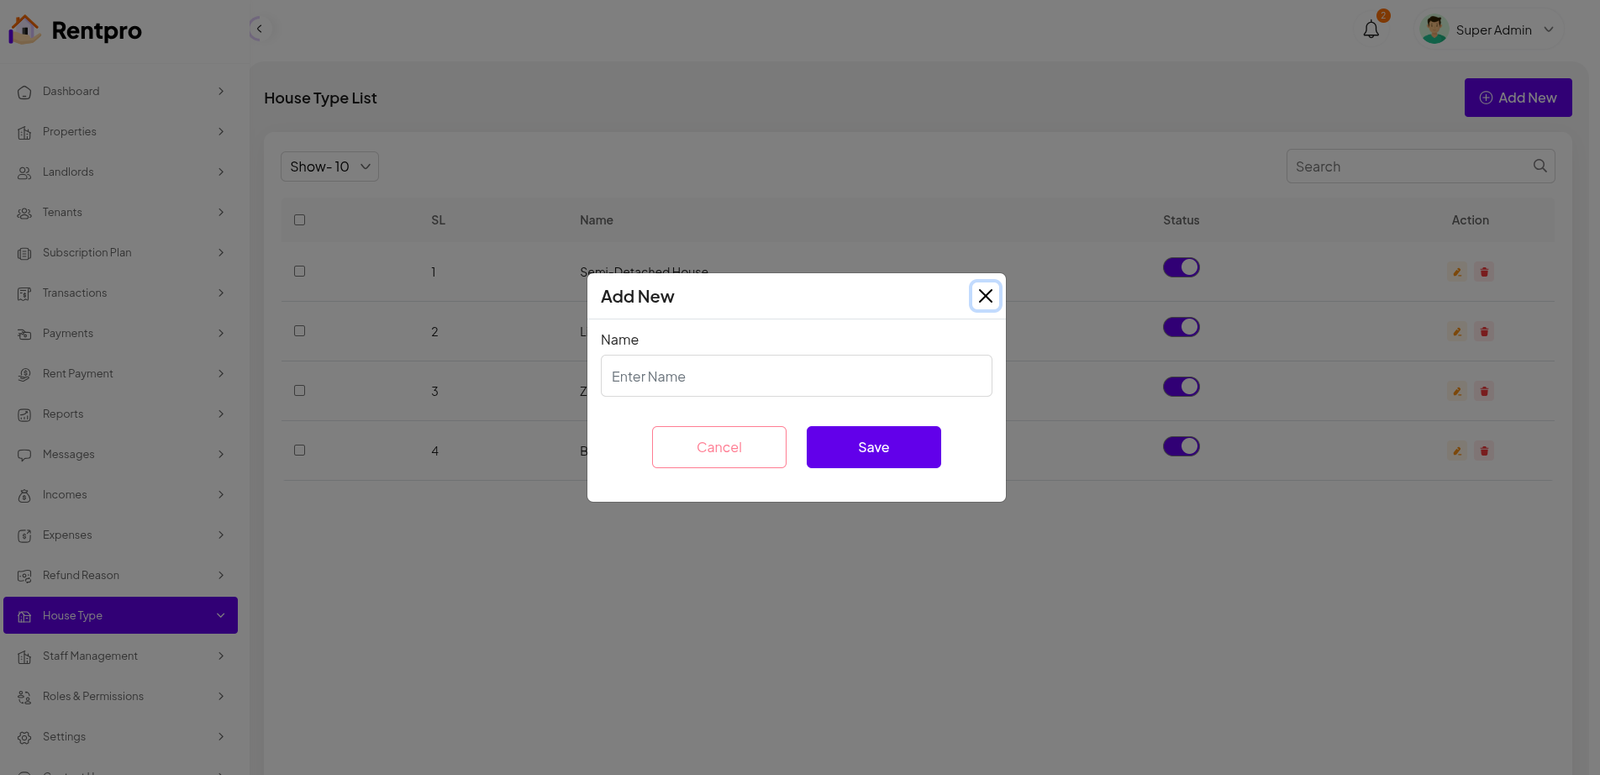
Add New House Type
The "Add New" feature within the "House Type" section of the Rentpro admin panel allows administrators to create new categories for property listings. This ensures the platform's property classification system remains up-to-date and relevant.
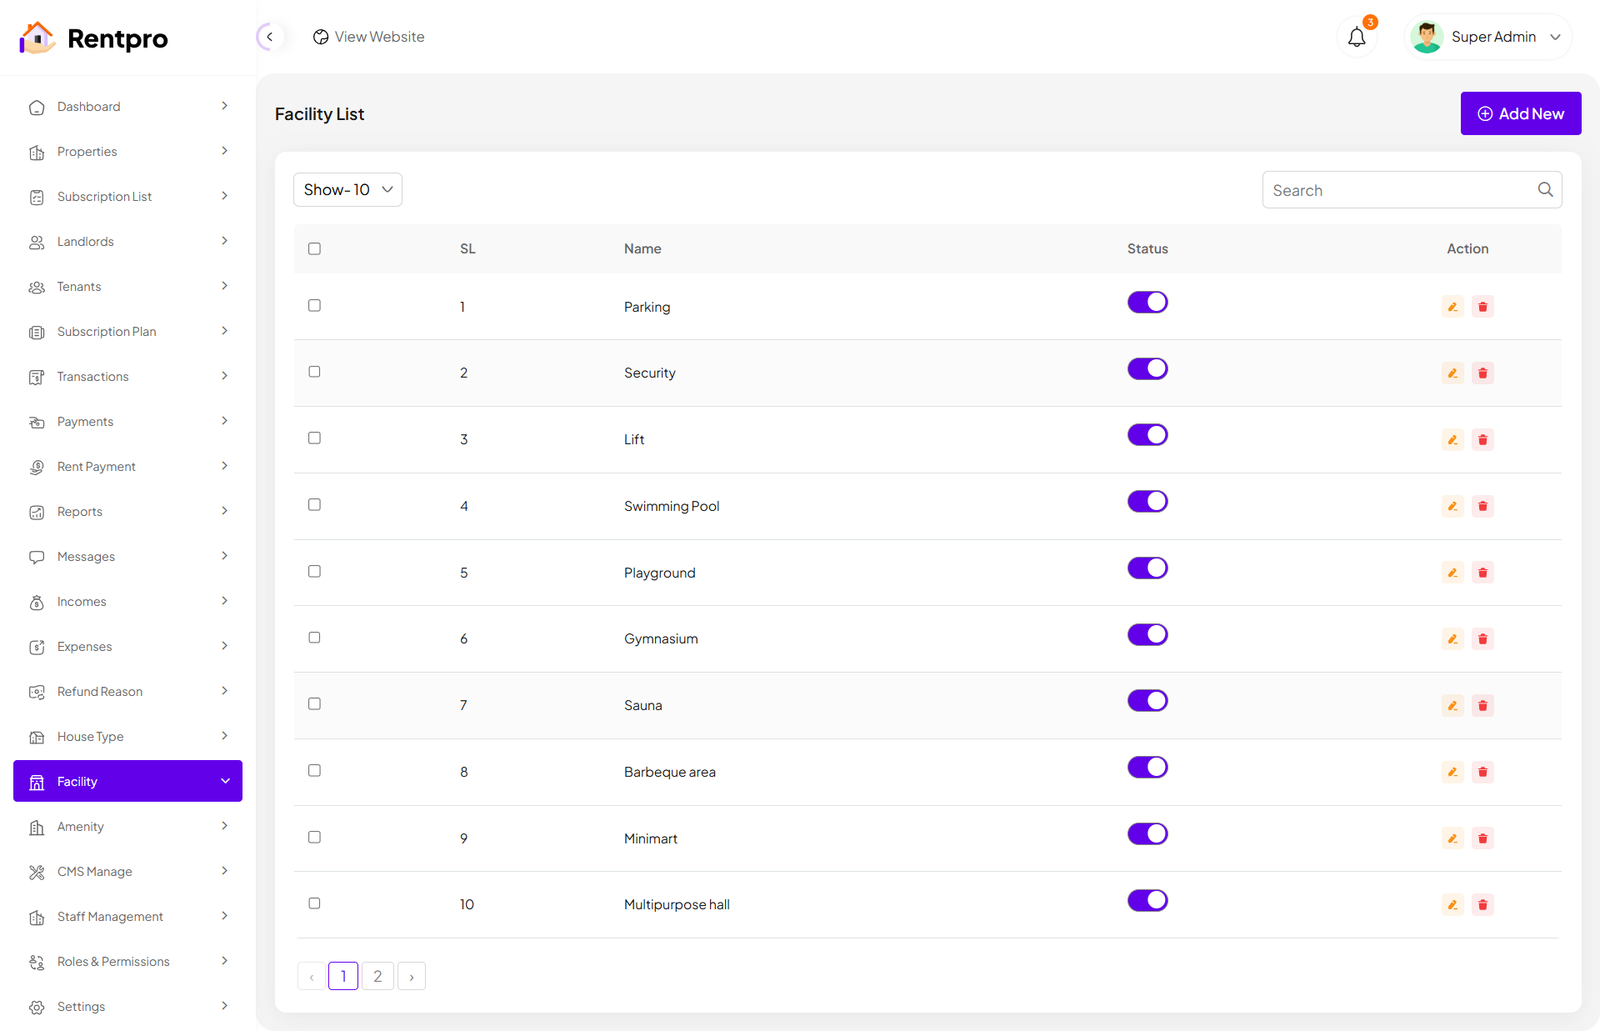
Facility List
The "Facility List" page allows administrators to manage and define all the available facilities for properties. Multiple facilities can be added here, and when creating or editing a property, users can select one or more of these facilities to accurately describe the property. This ensures consistent classification and helps users understand the facilities associated with each property. You can filter these facilities as needed, and also have the option to edit or delete them.
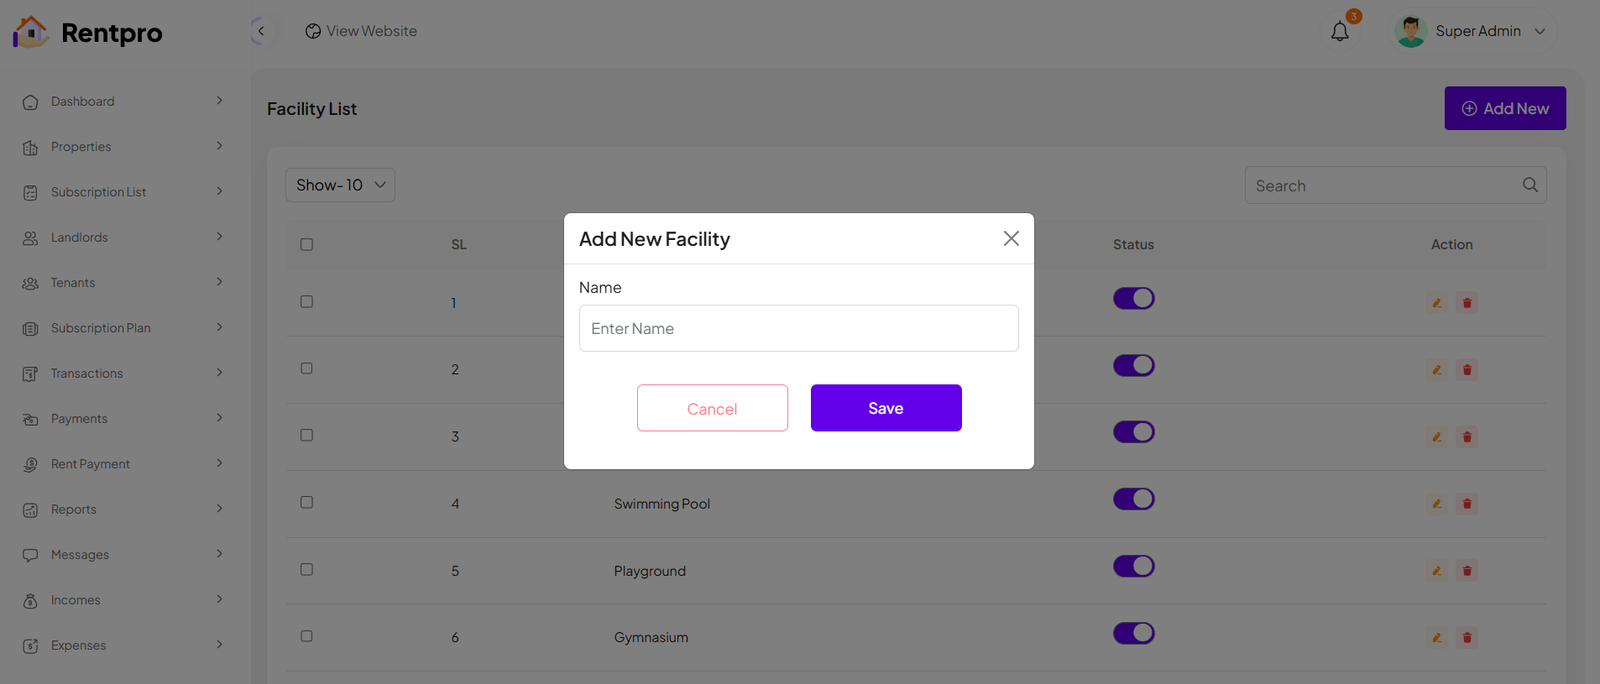
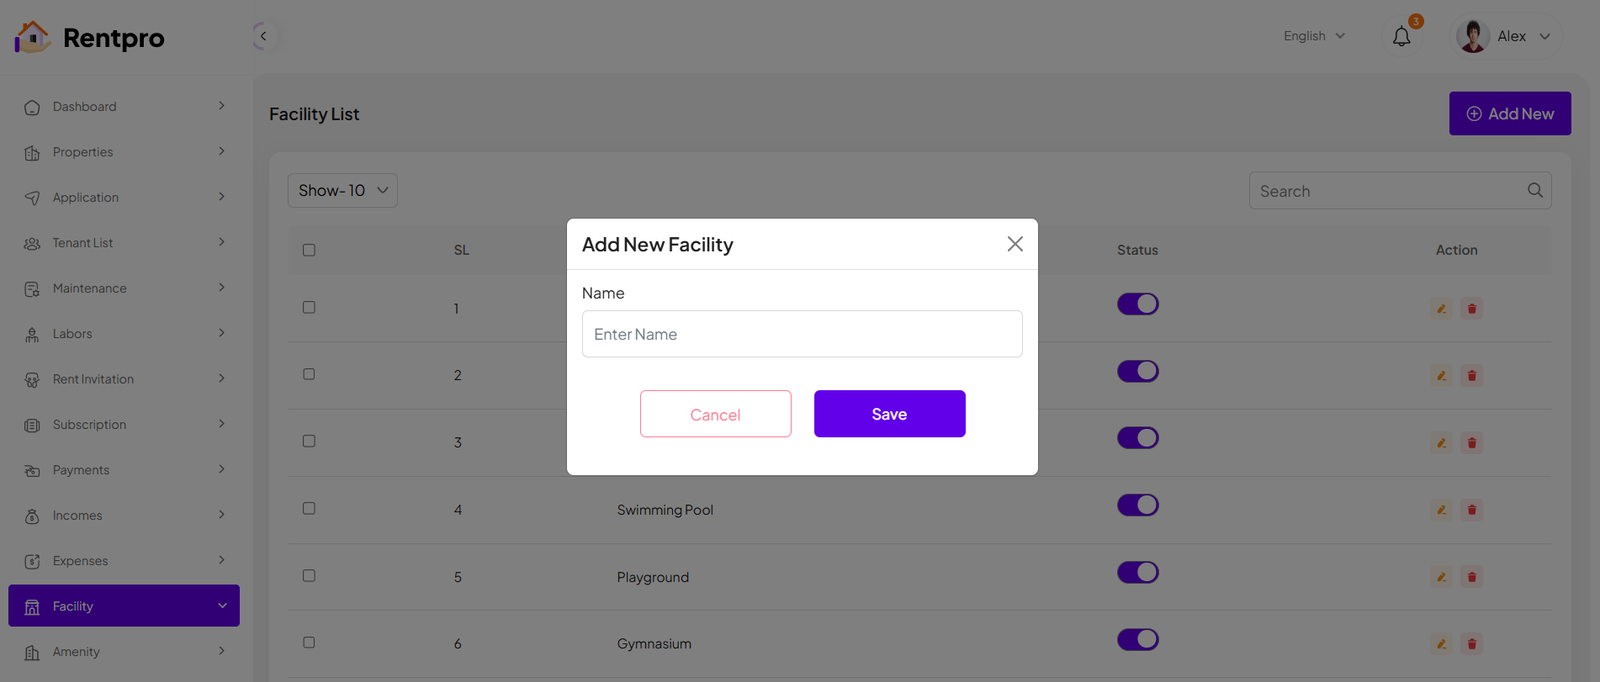
Add New Facility
The "Add New" feature within the "Facility" section of the Rentpro admin panel allows administrators to create new Facility for property listings. This ensures the platform's property classification system remains up-to-date and relevant.
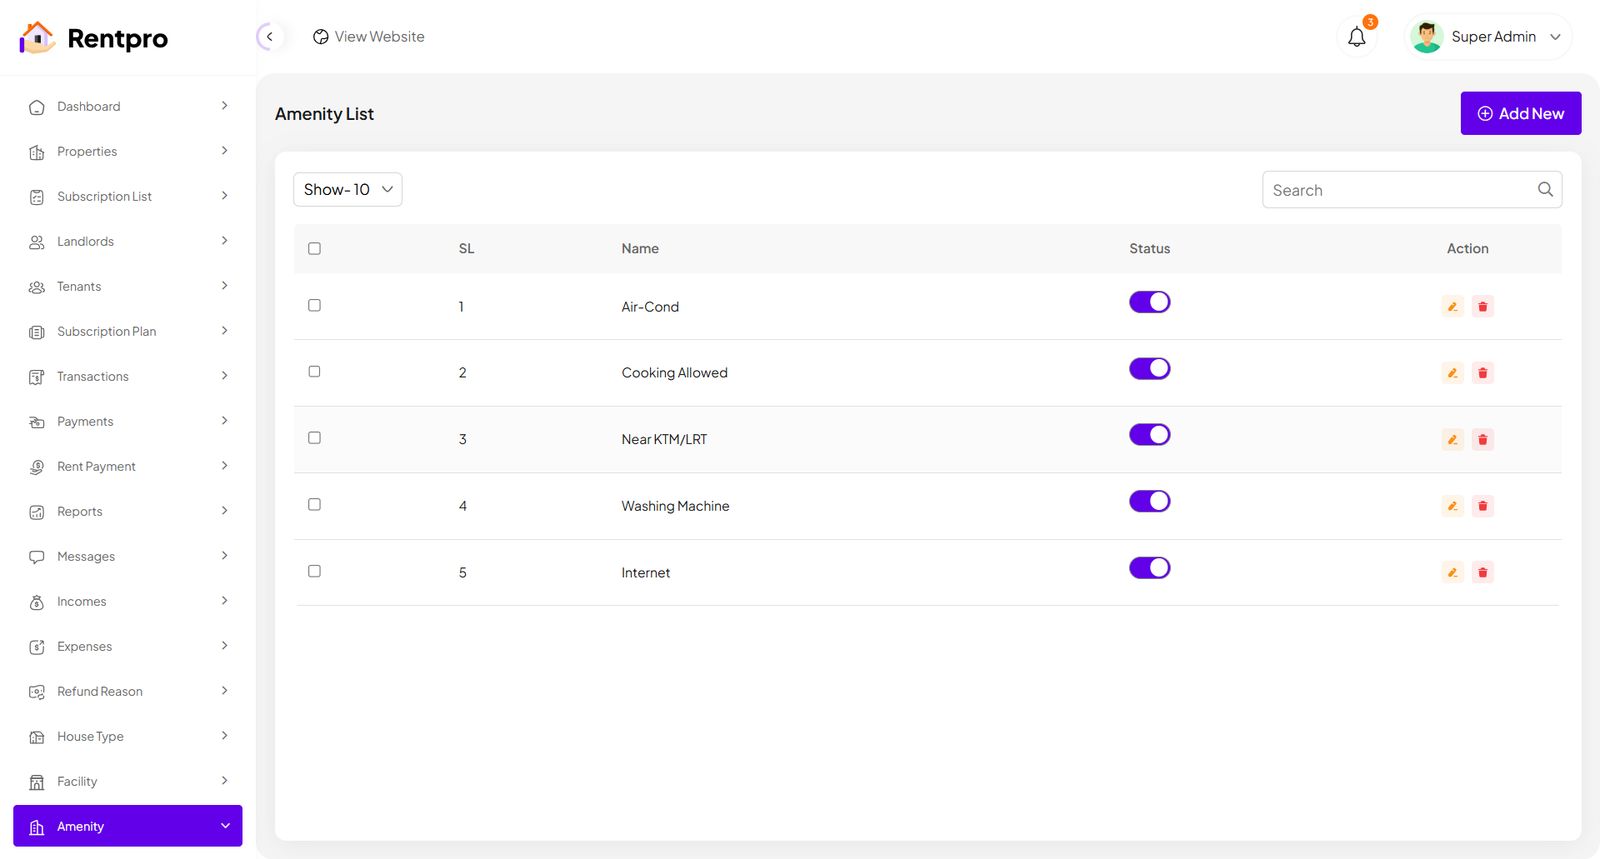
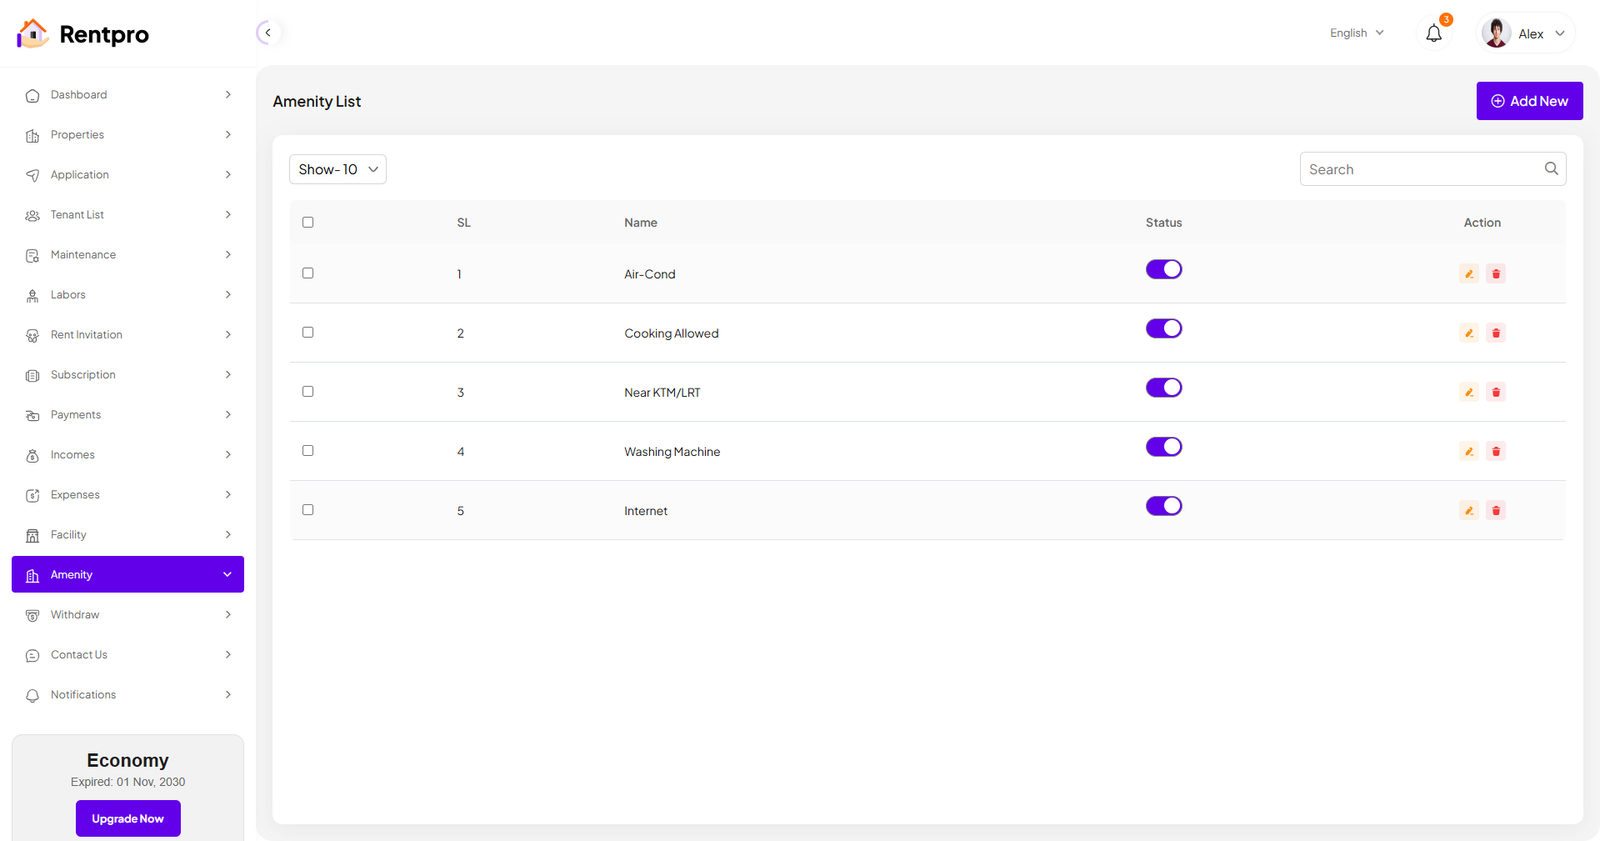
Amenity List
The "Amenity List" page allows administrators to manage and define all the available amenities for properties. Multiple amenities can be added here, and when creating or editing a property, users can select one or more of these amenities to accurately describe the property. This ensures consistent classification and helps users understand the amenities associated with each property. You can filter these amenities as needed, and also have the option to edit or delete them.
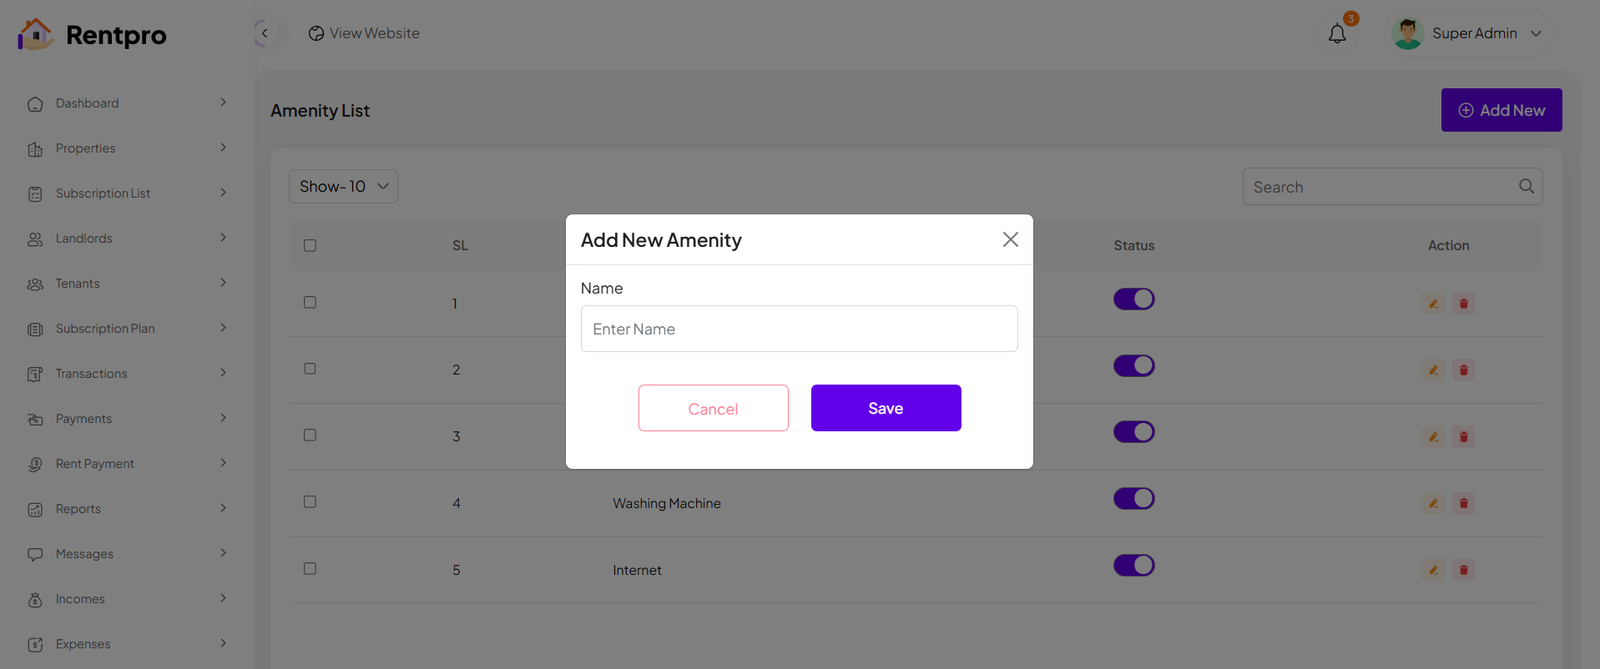
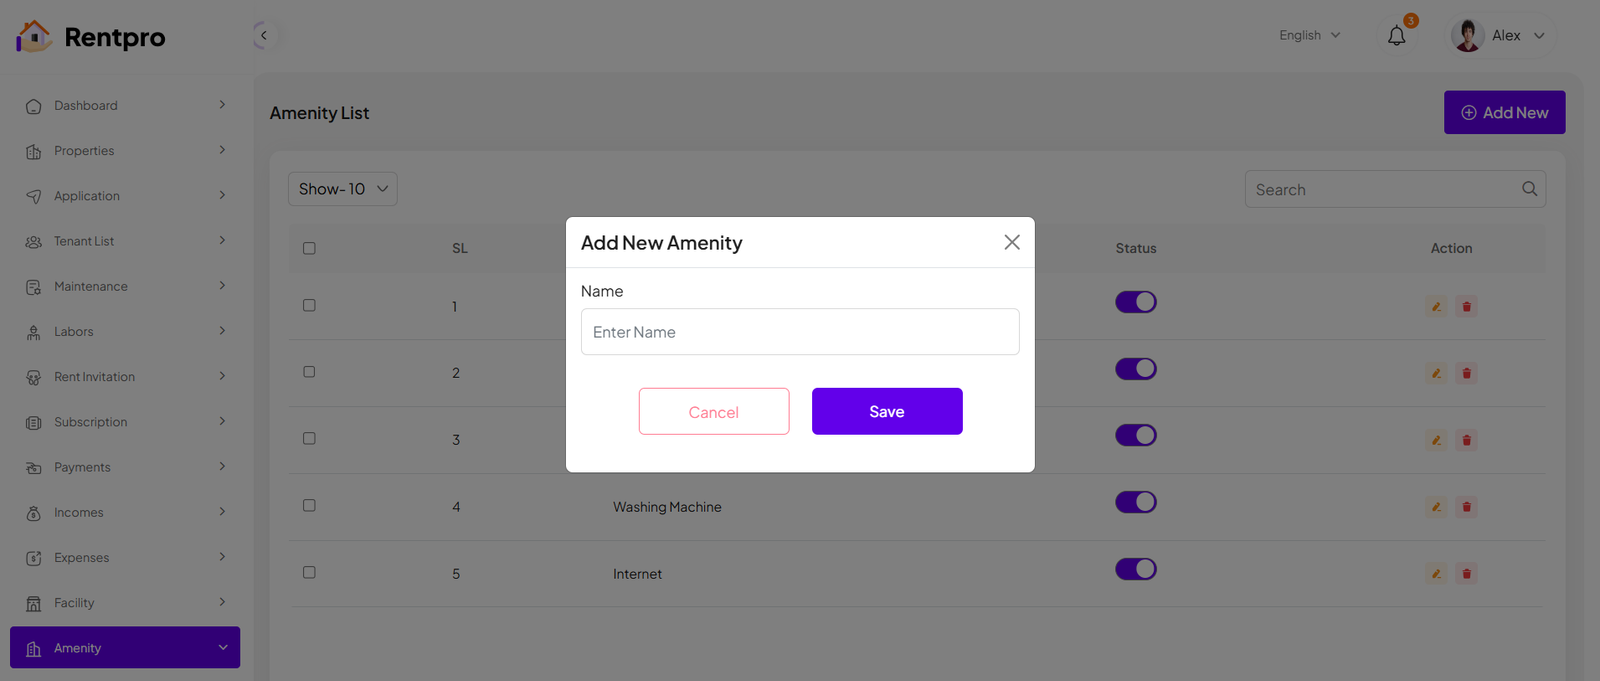
Add New Amenity
The "Add New" feature within the "Amenity" section of the Rentpro admin panel allows administrators to create new Amenity for property listings. This ensures the platform's property classification system remains up-to-date and relevant.
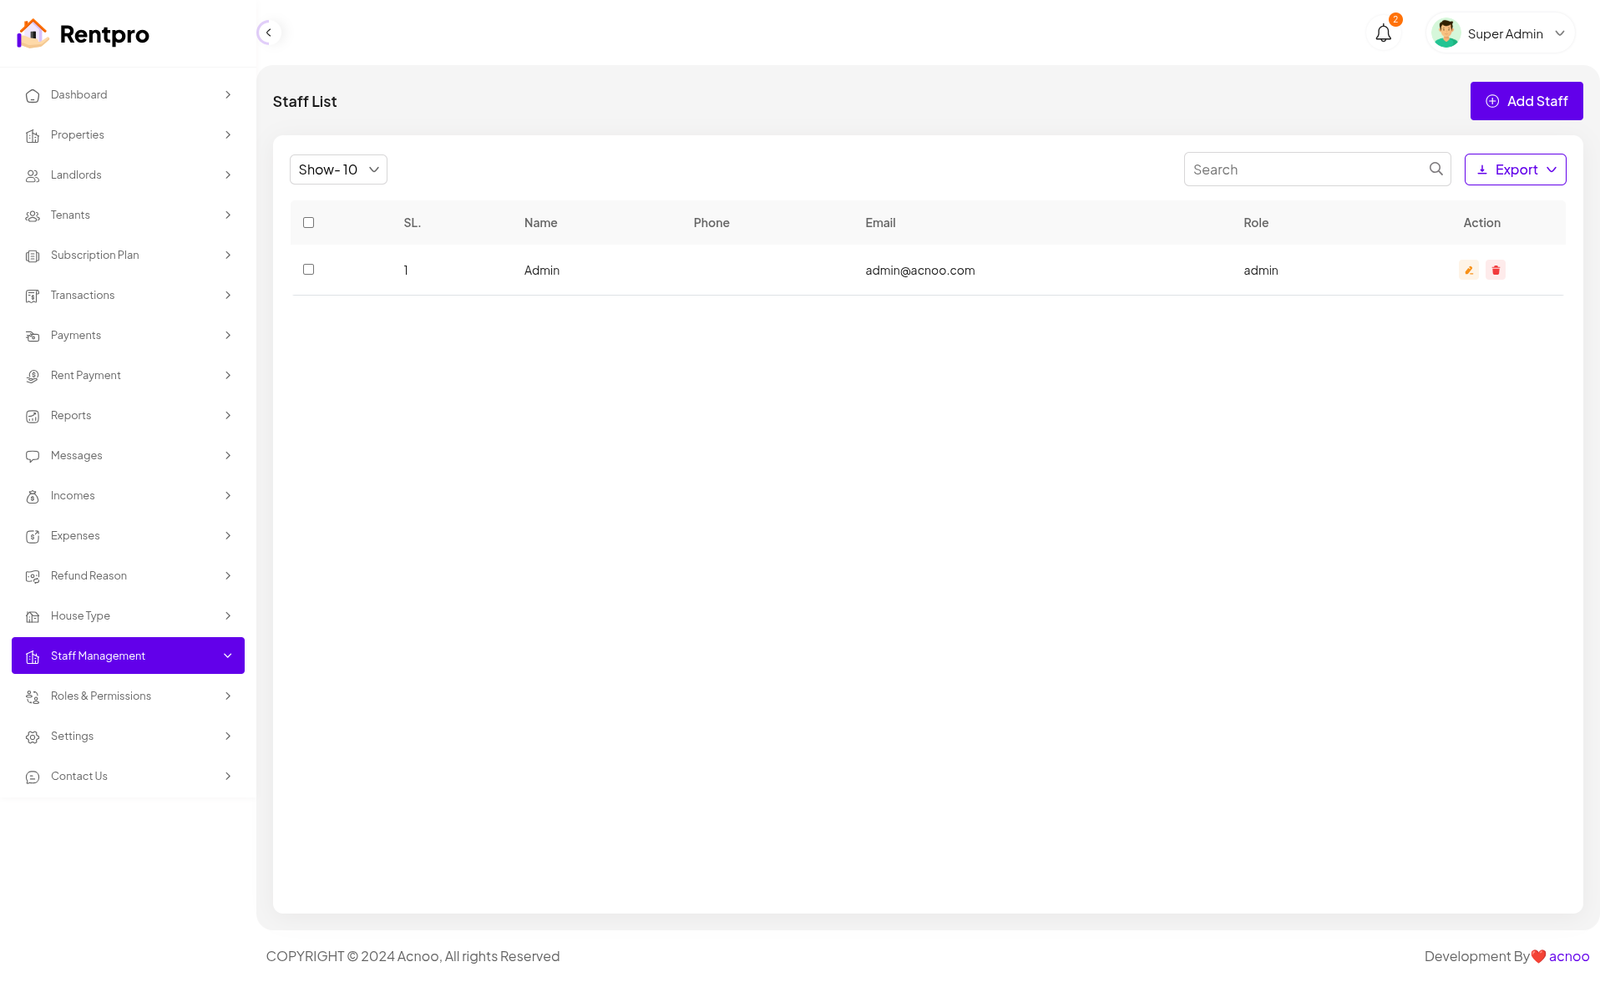
Staff List
Here, you can view the list of staff members along with a search filter. Additionally, you have the option to edit, delete individual entries, and perform multi-delete operations.
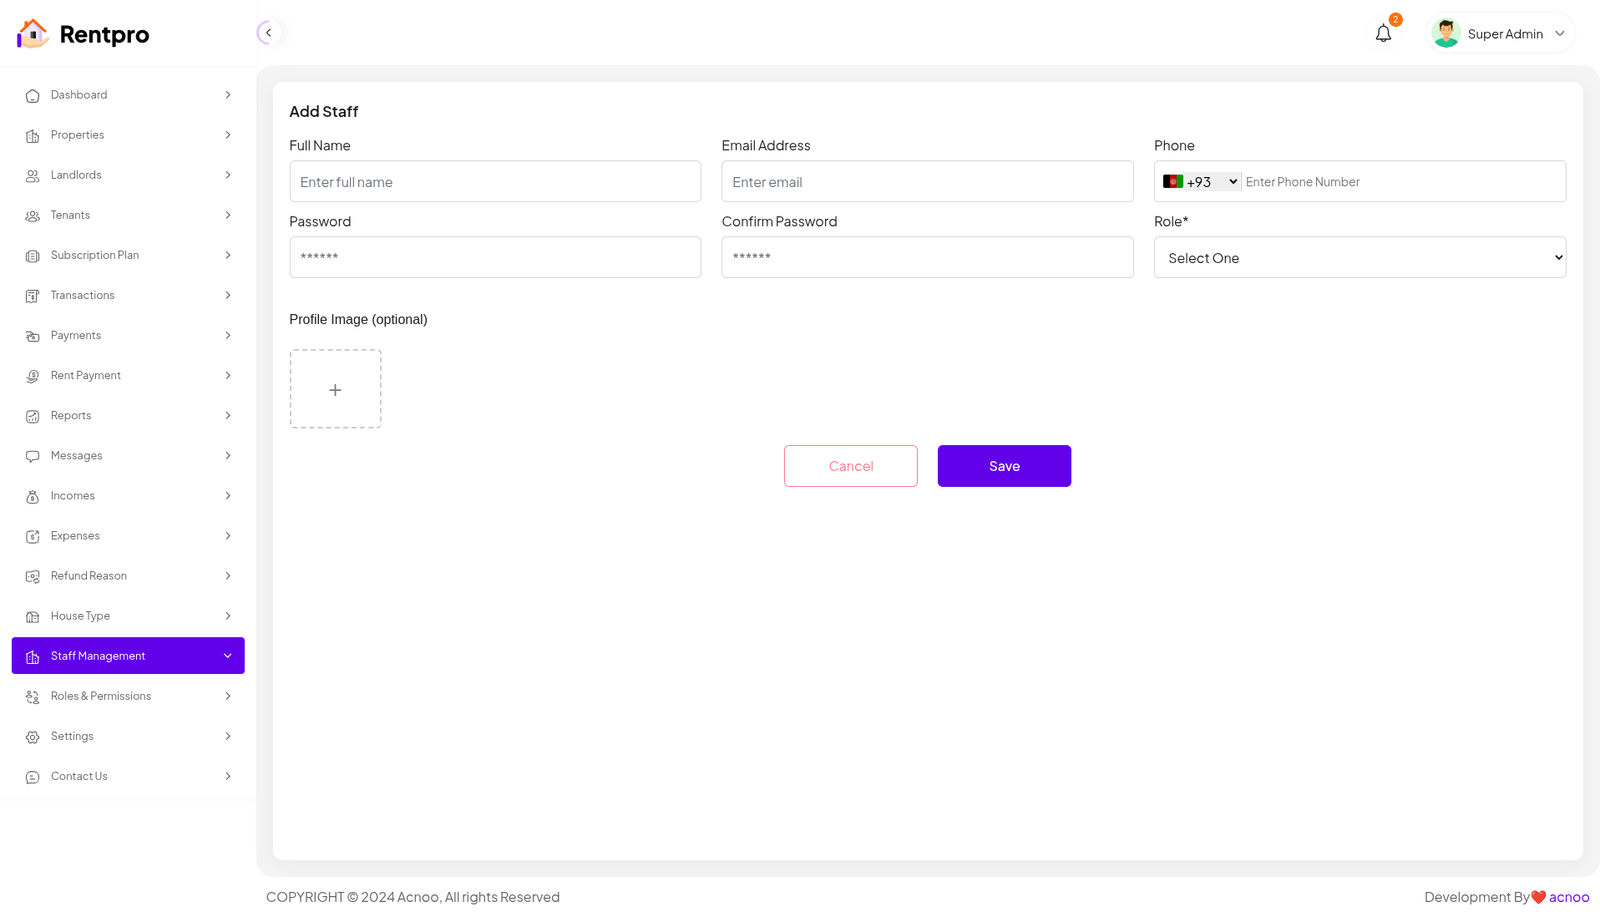
Add New Staff
You can create a staff member here by completing the necessary fields.
Roles & Permissions
In this section, you have the ability to define roles and allocate specific permissions to different users as needed.
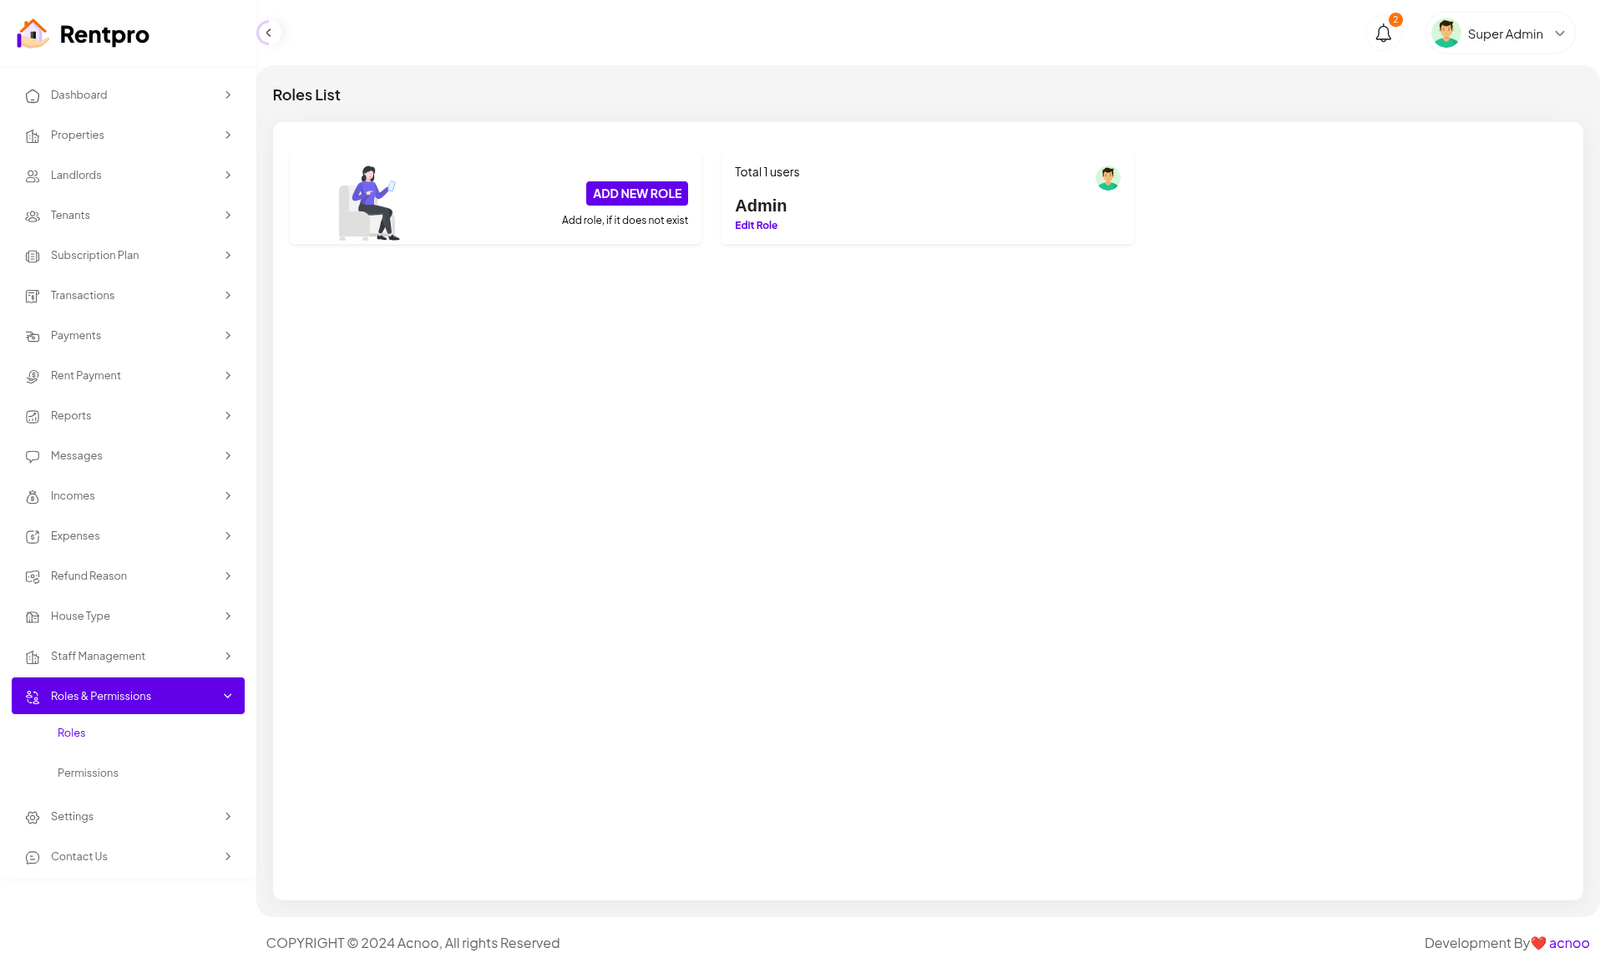
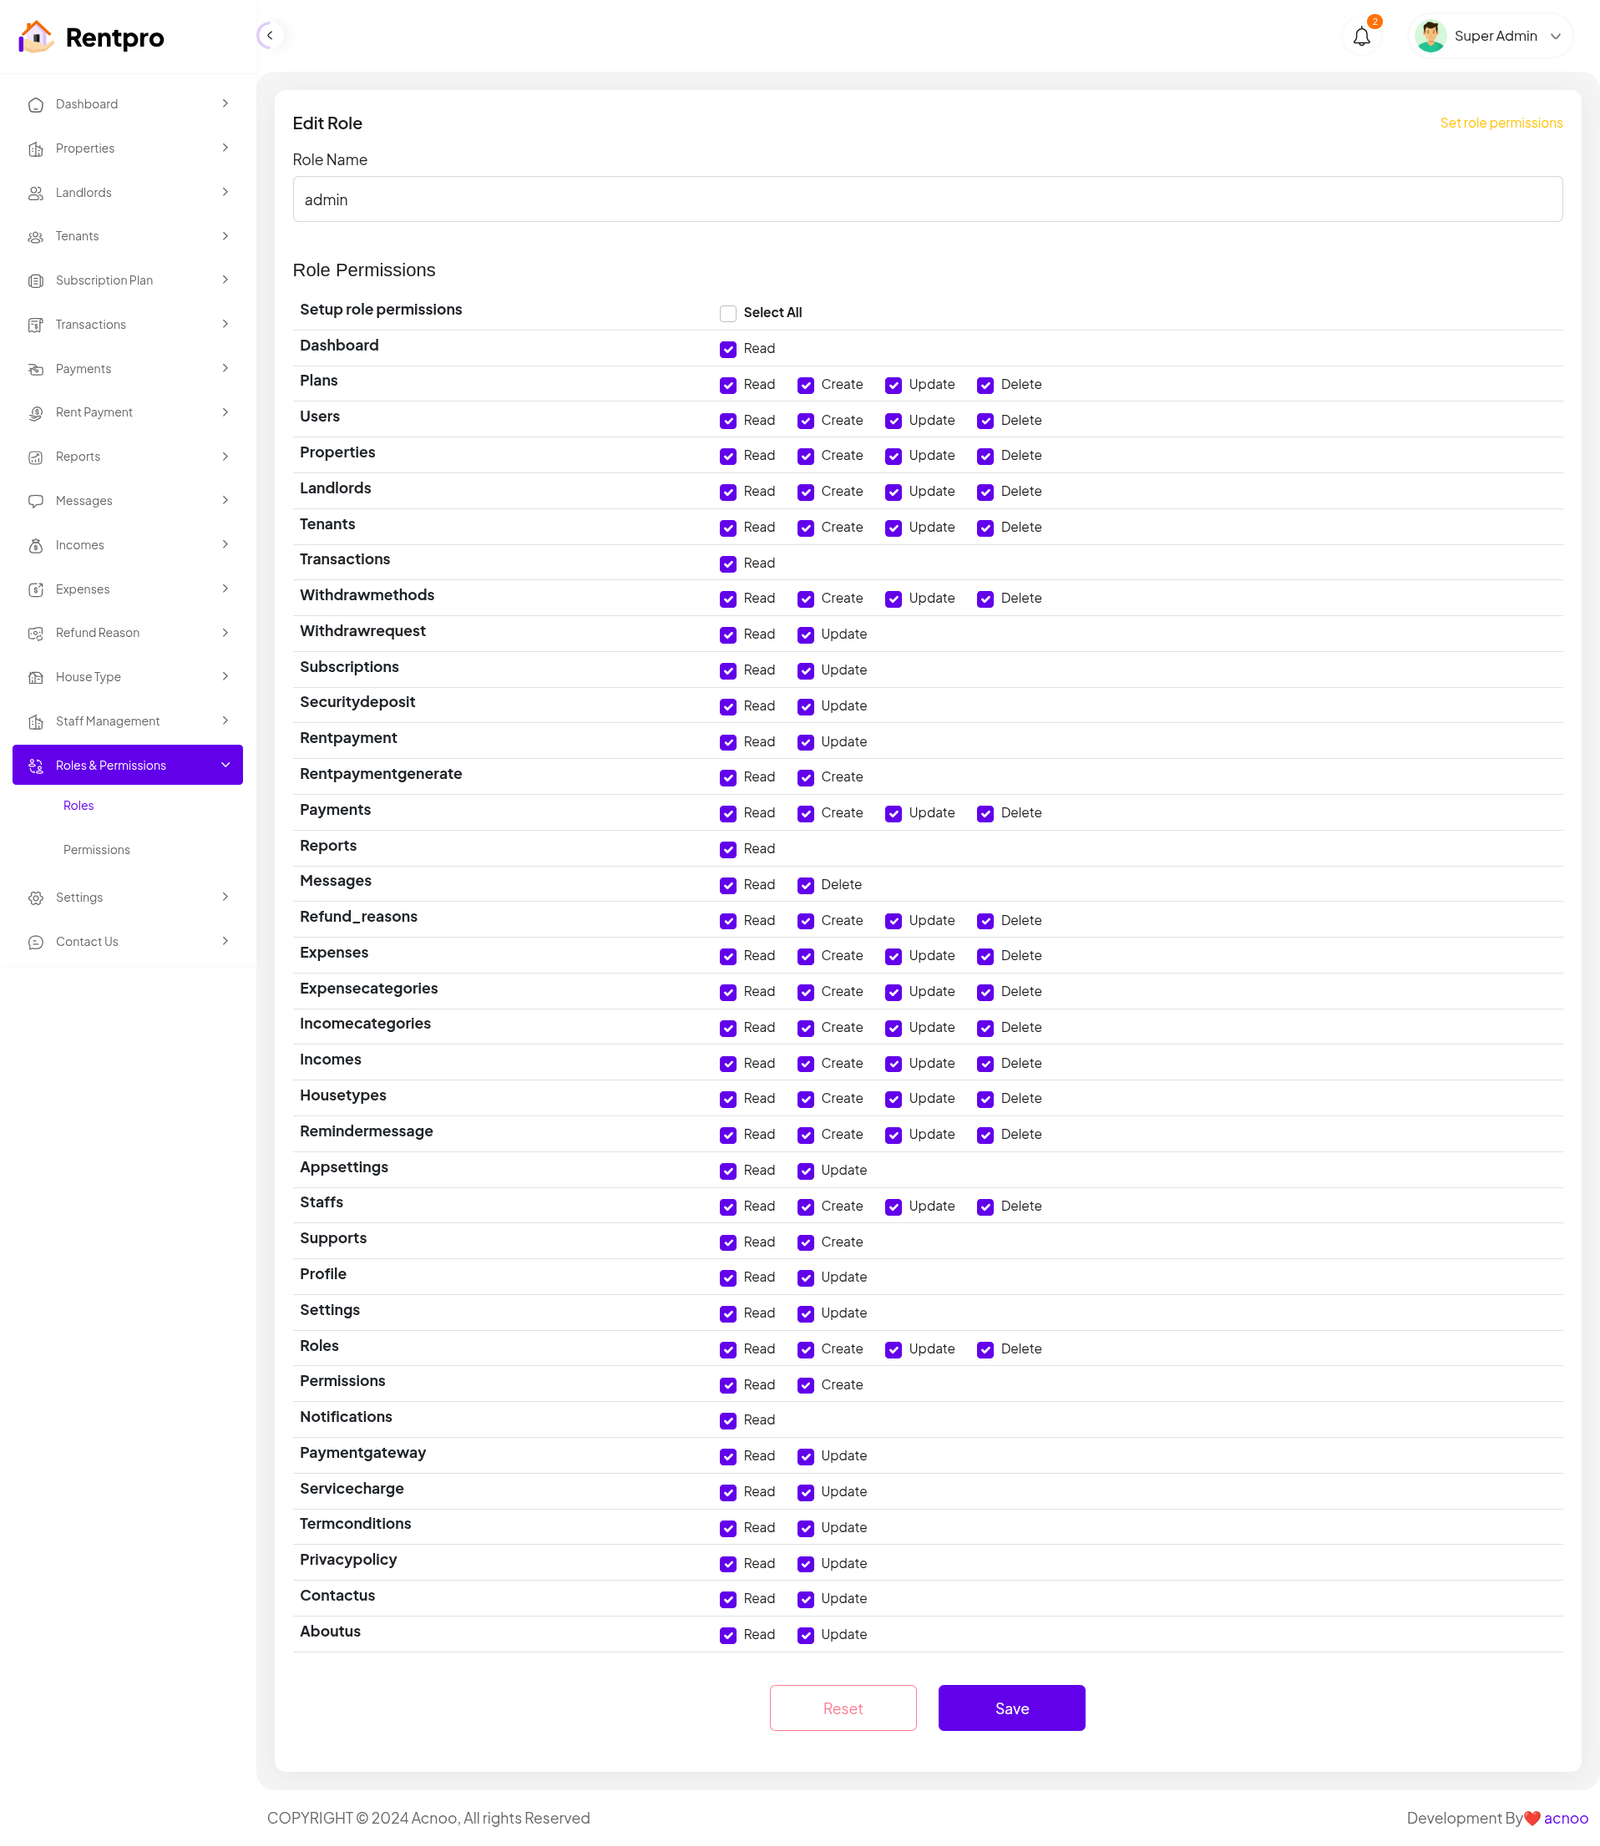
Roles
In this section, you have the capability to create new roles and update existing ones. When updating roles, you can configure their specific role permissions, granting or restricting access to various features and functionalities as required. This allows you to tailor user roles to your organizational needs and security requirements.
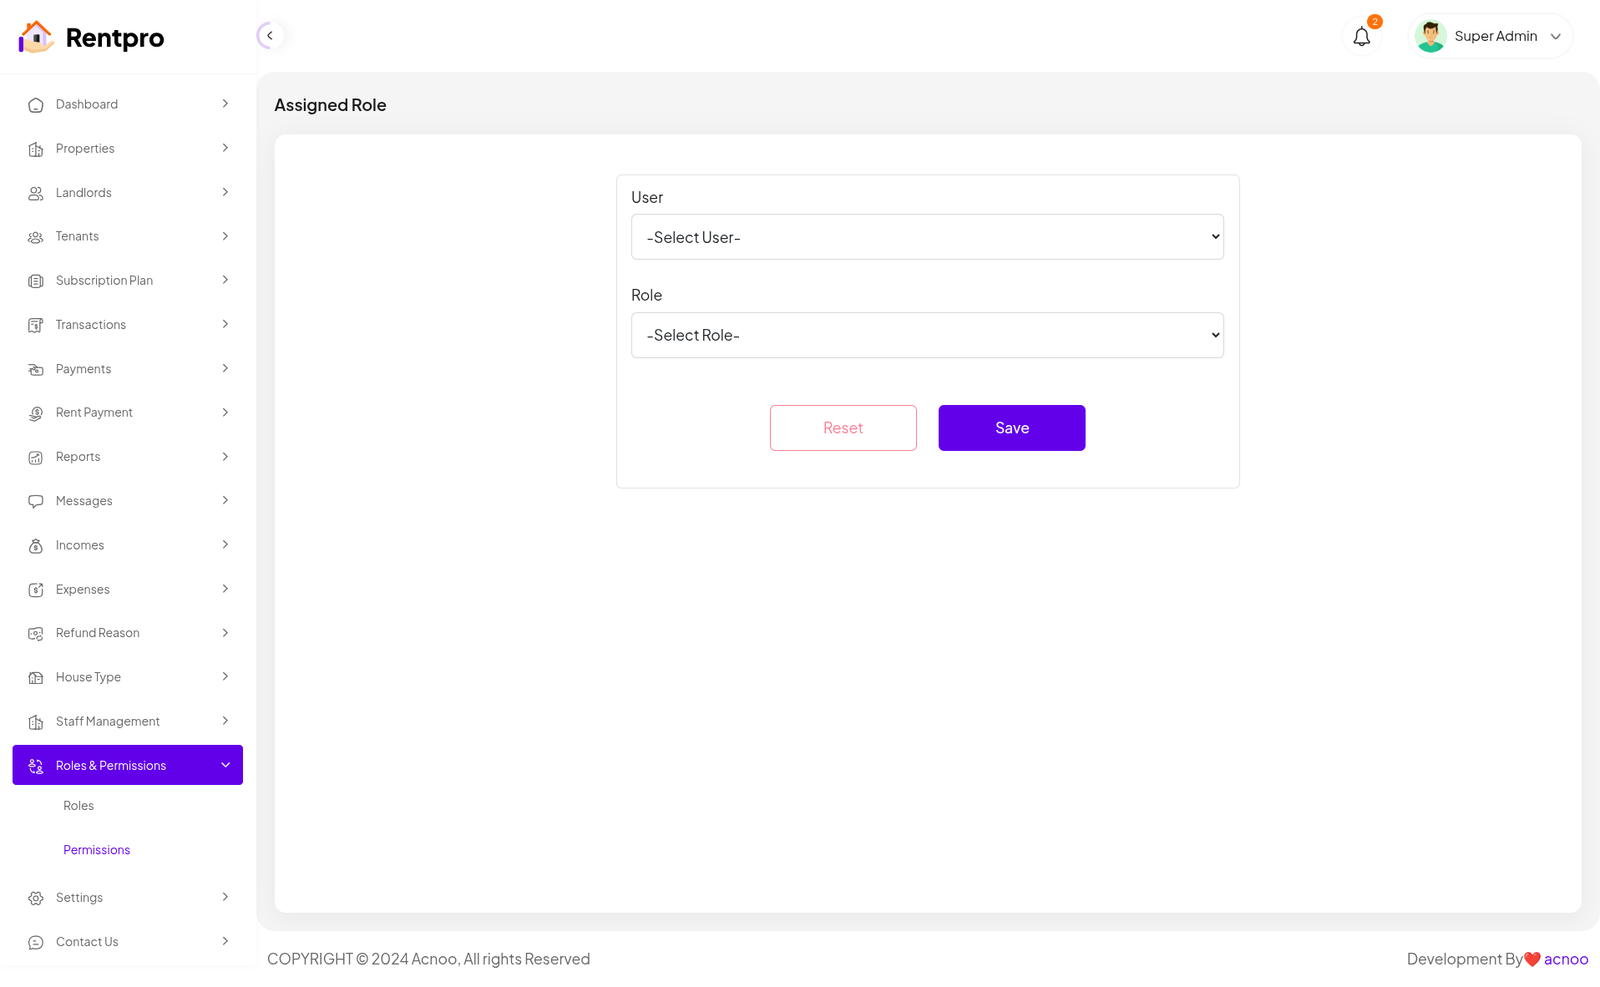
Permissions
In this section, you have the capability to set role-specific permissions, allowing you to fine-tune and control access rights for each role according to your organization's needs and security requirements.
Setting
In the Setting section, you have the capability to configure the fundamental aspects or core elements of this project.
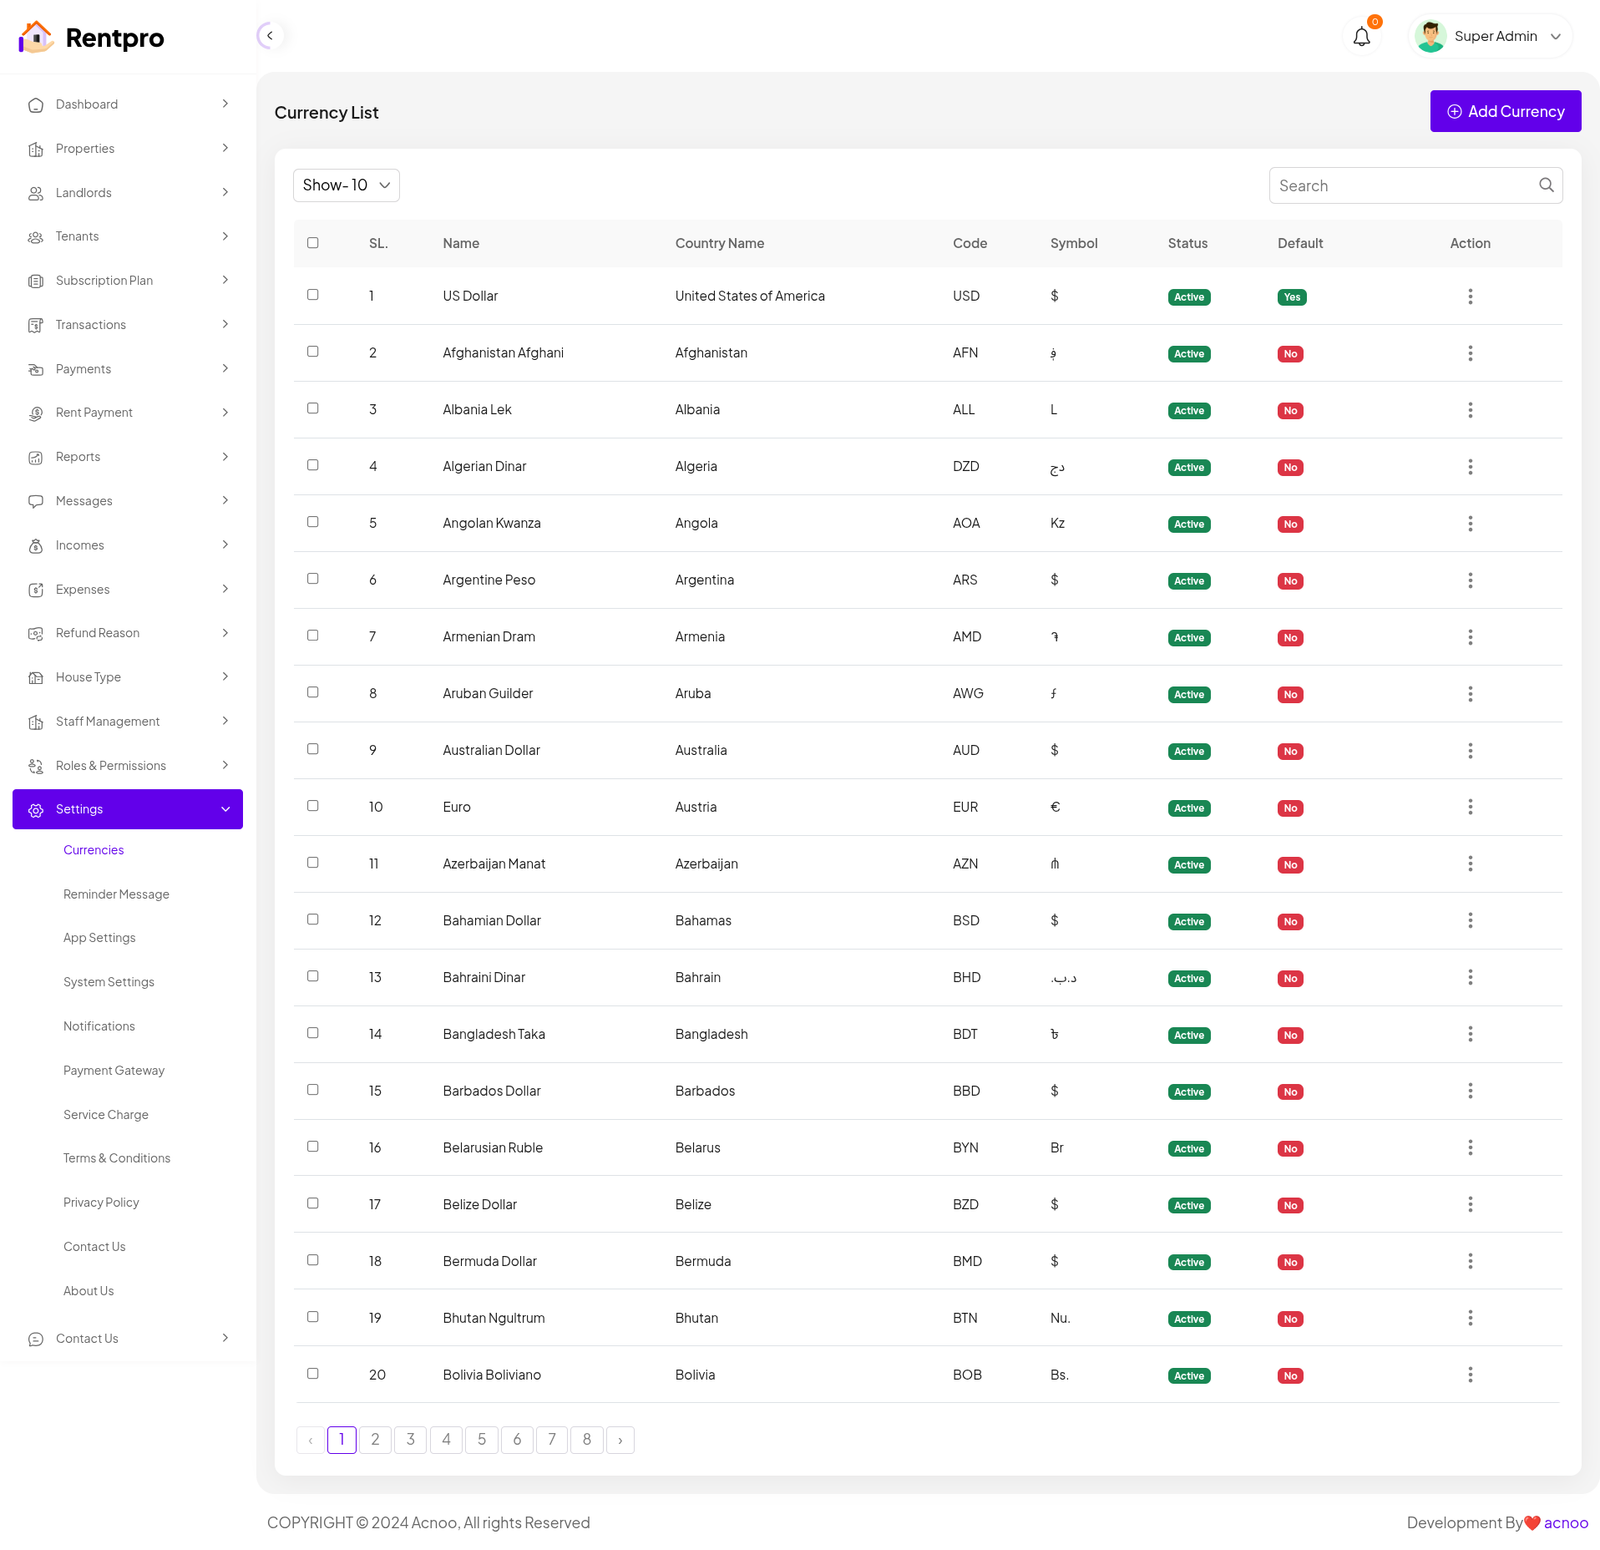
Currencies list
The "Currencies" page allows a Super Admin or system administrator to manage the list of currencies available for use within the Rentpro application. This is a crucial function for supporting international users and managing financial transactions in multiple currencies.
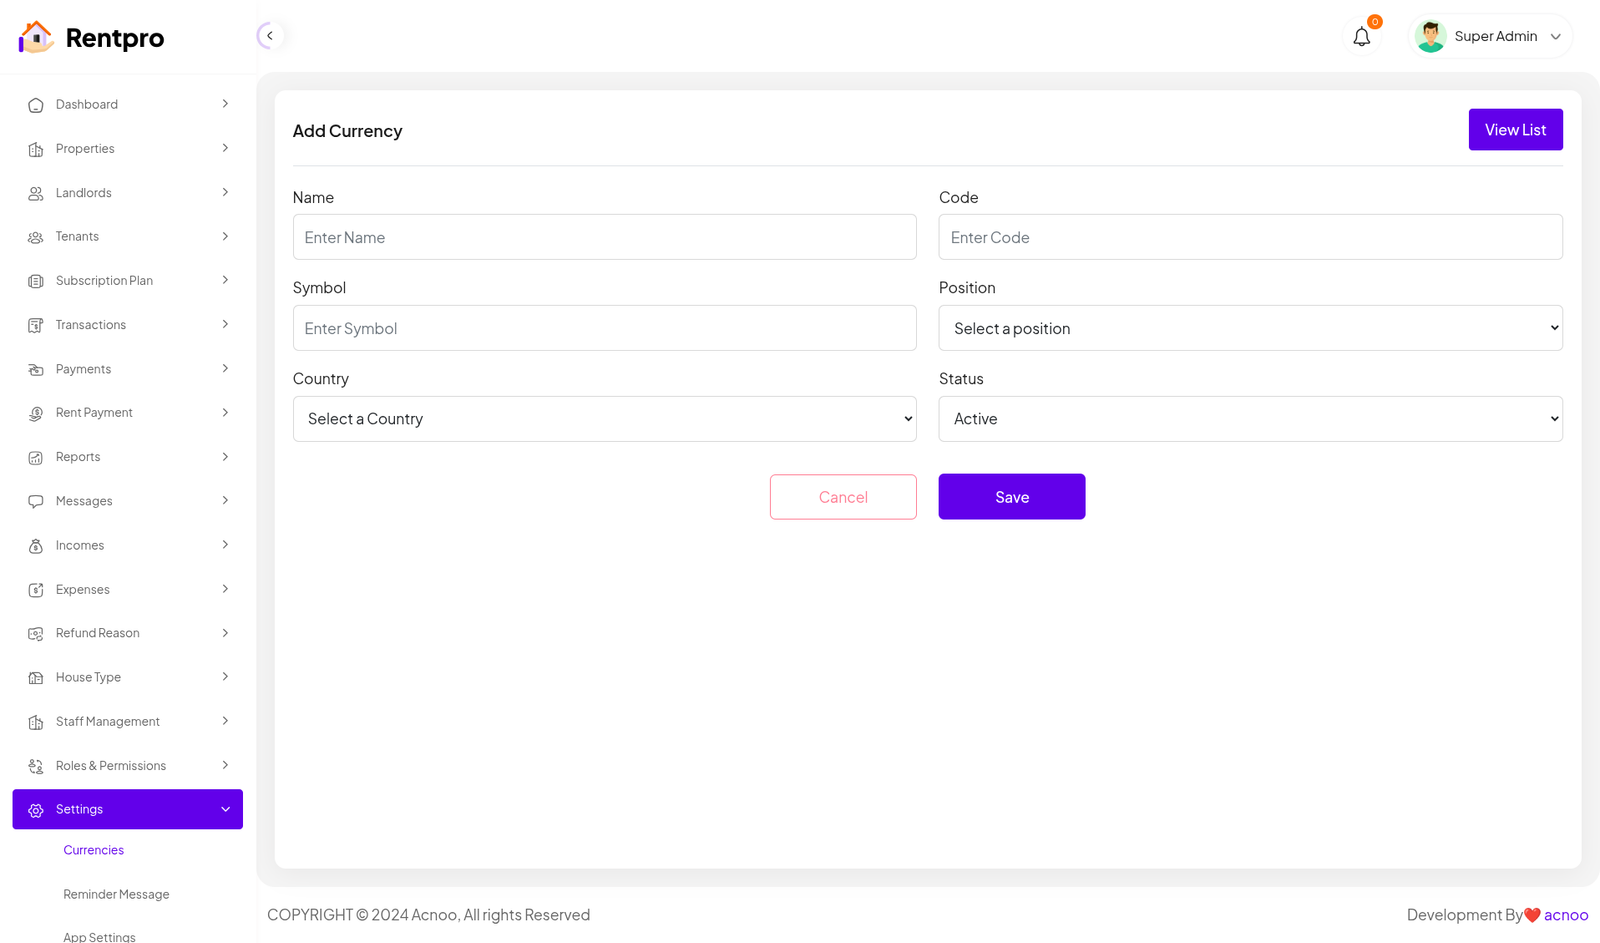
Add Currency
The "Add Currency" page allows a system administrator to add a new currency to the application's list of supported currencies. This is an administrative function to expand the financial capabilities of the platform for users operating in different regions.
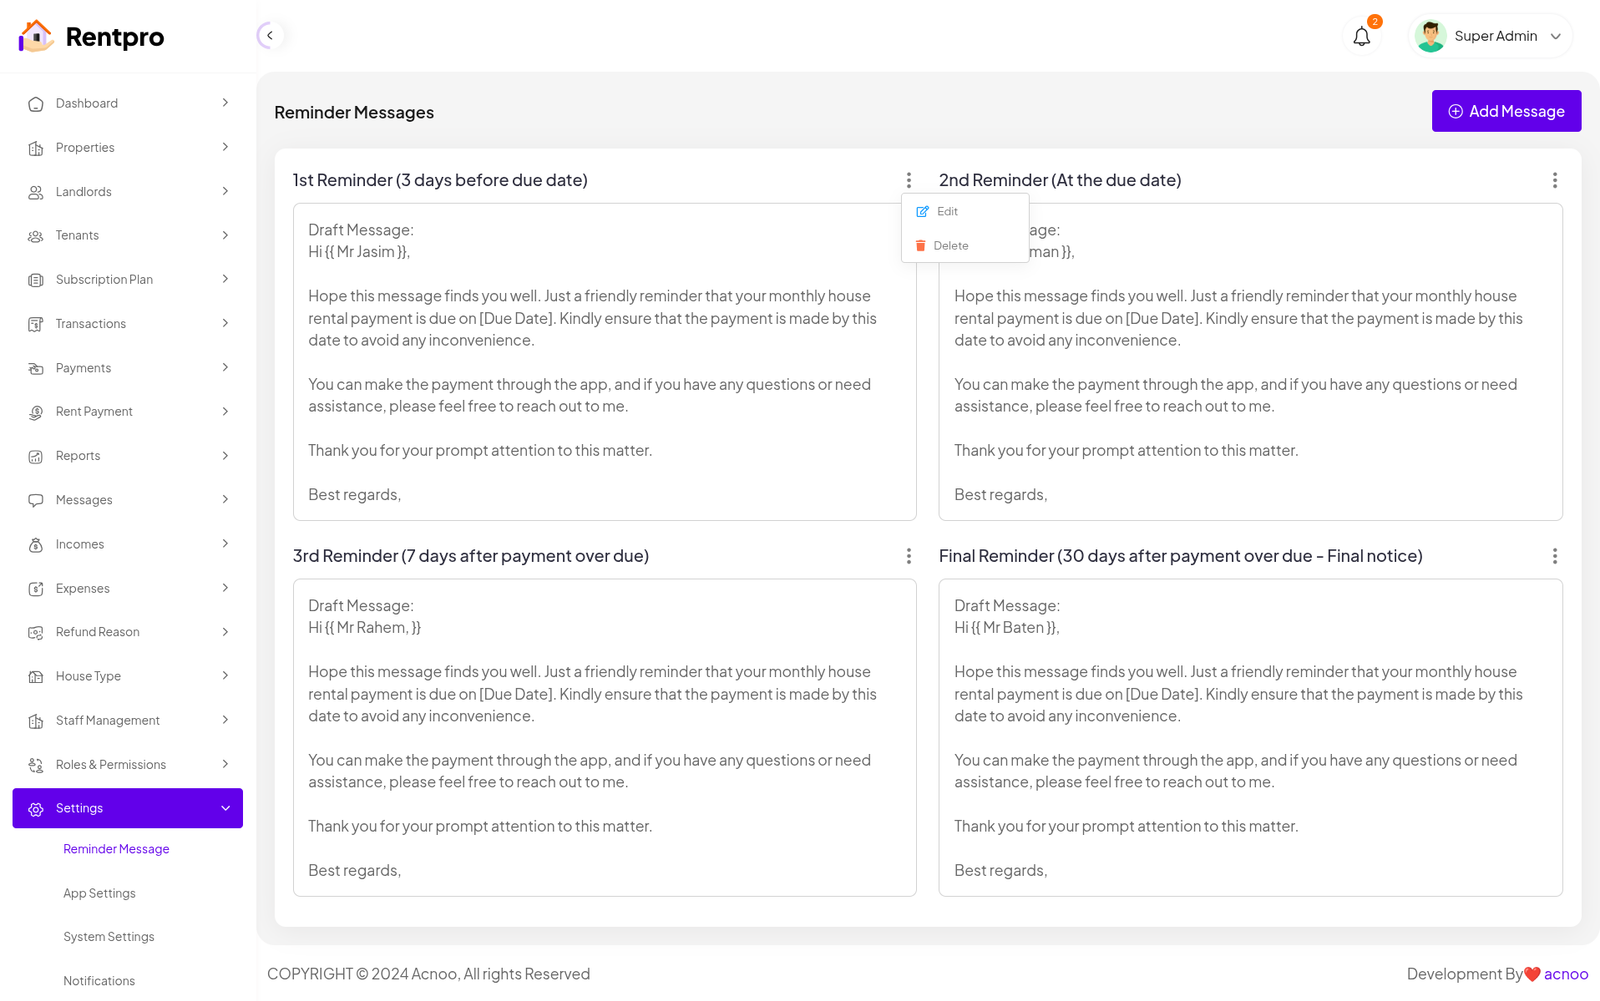
Reminder Message list
The "Reminder Messages" page is a key feature within the Rentpro admin panel that allows administrators to configure and customize automated reminder messages for rent payments. This system helps ensure timely payments by sending a series of notifications to tenants at different stages of the payment cycle.
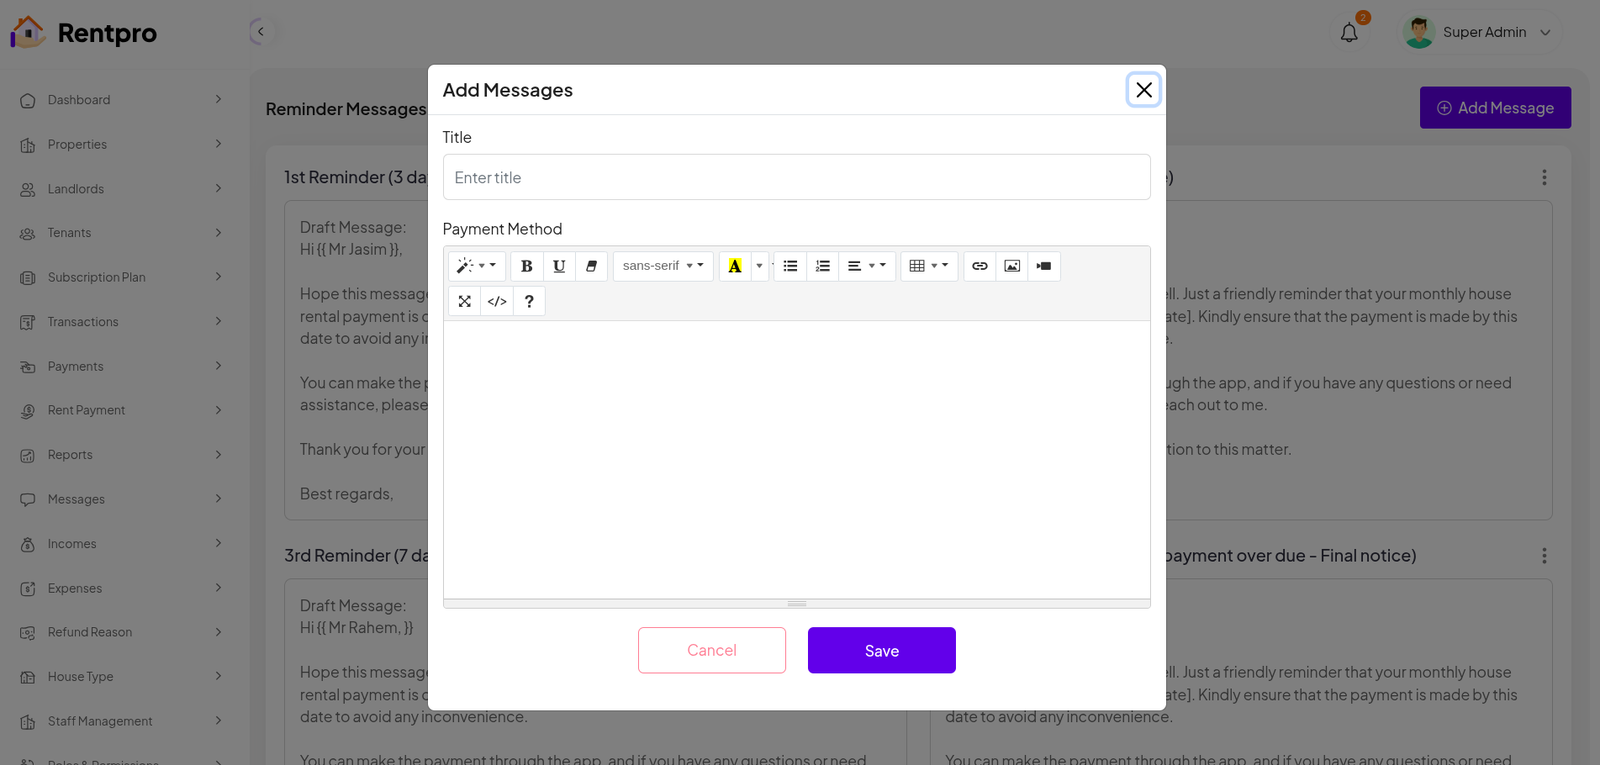
Add New Reminder Message
The "Add New" feature within the "Reminder Messages" page allows administrators to create and customize new automated reminder messages. This provides flexibility to create different communication schedules or messages for specific purposes beyond the default templates.
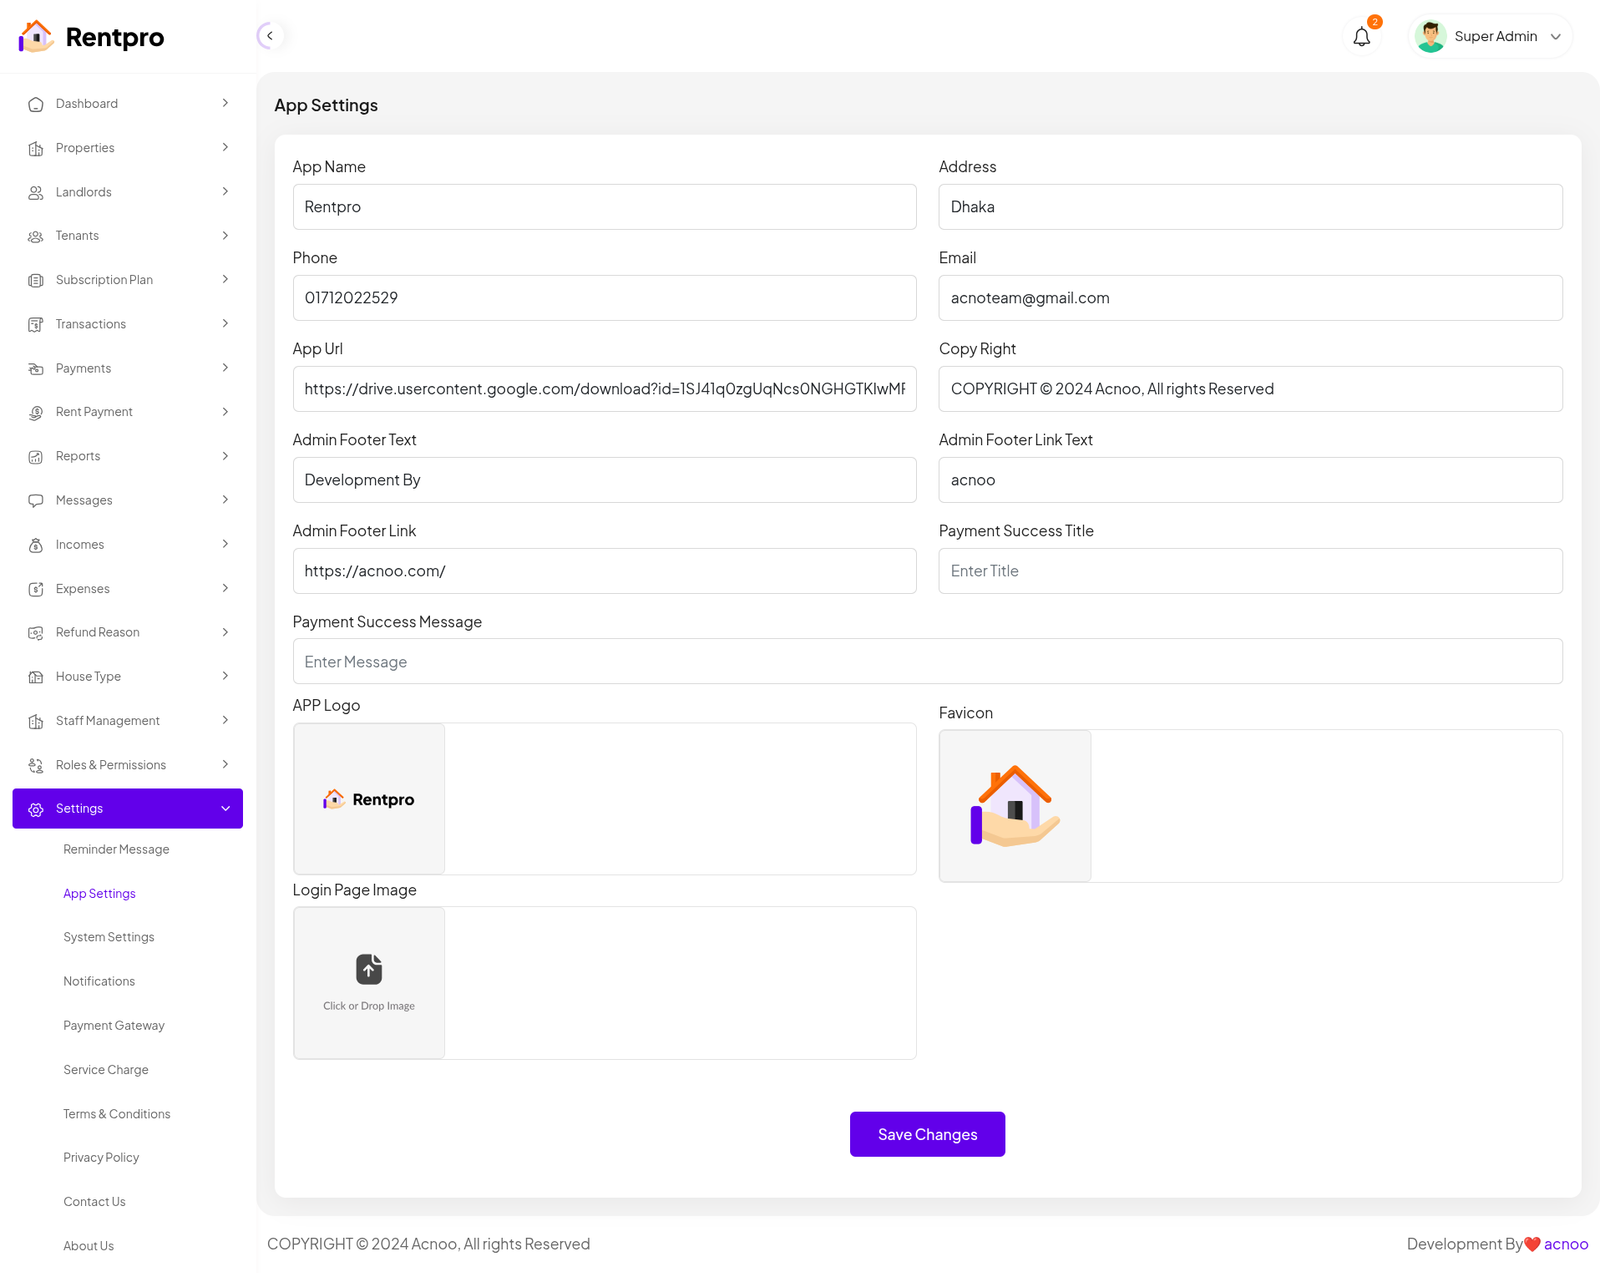
App Setting
The "App Settings" page in the Rentpro admin panel allows the administrator to configure core, platform-wide settings. This includes basic contact information, branding elements, and other key details that are displayed to users.
System Settings
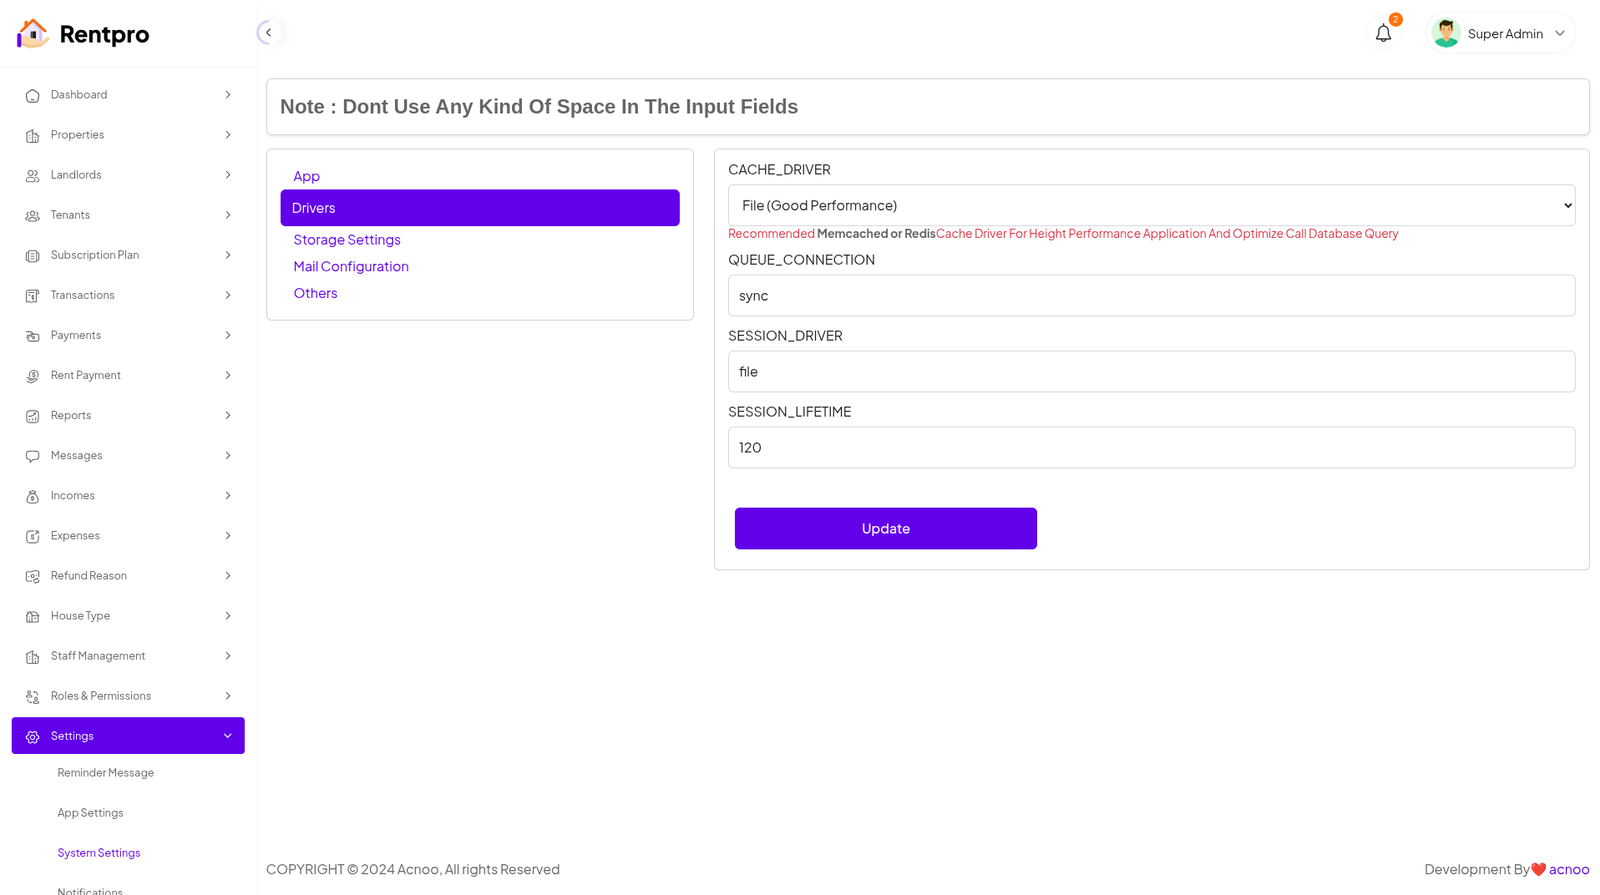
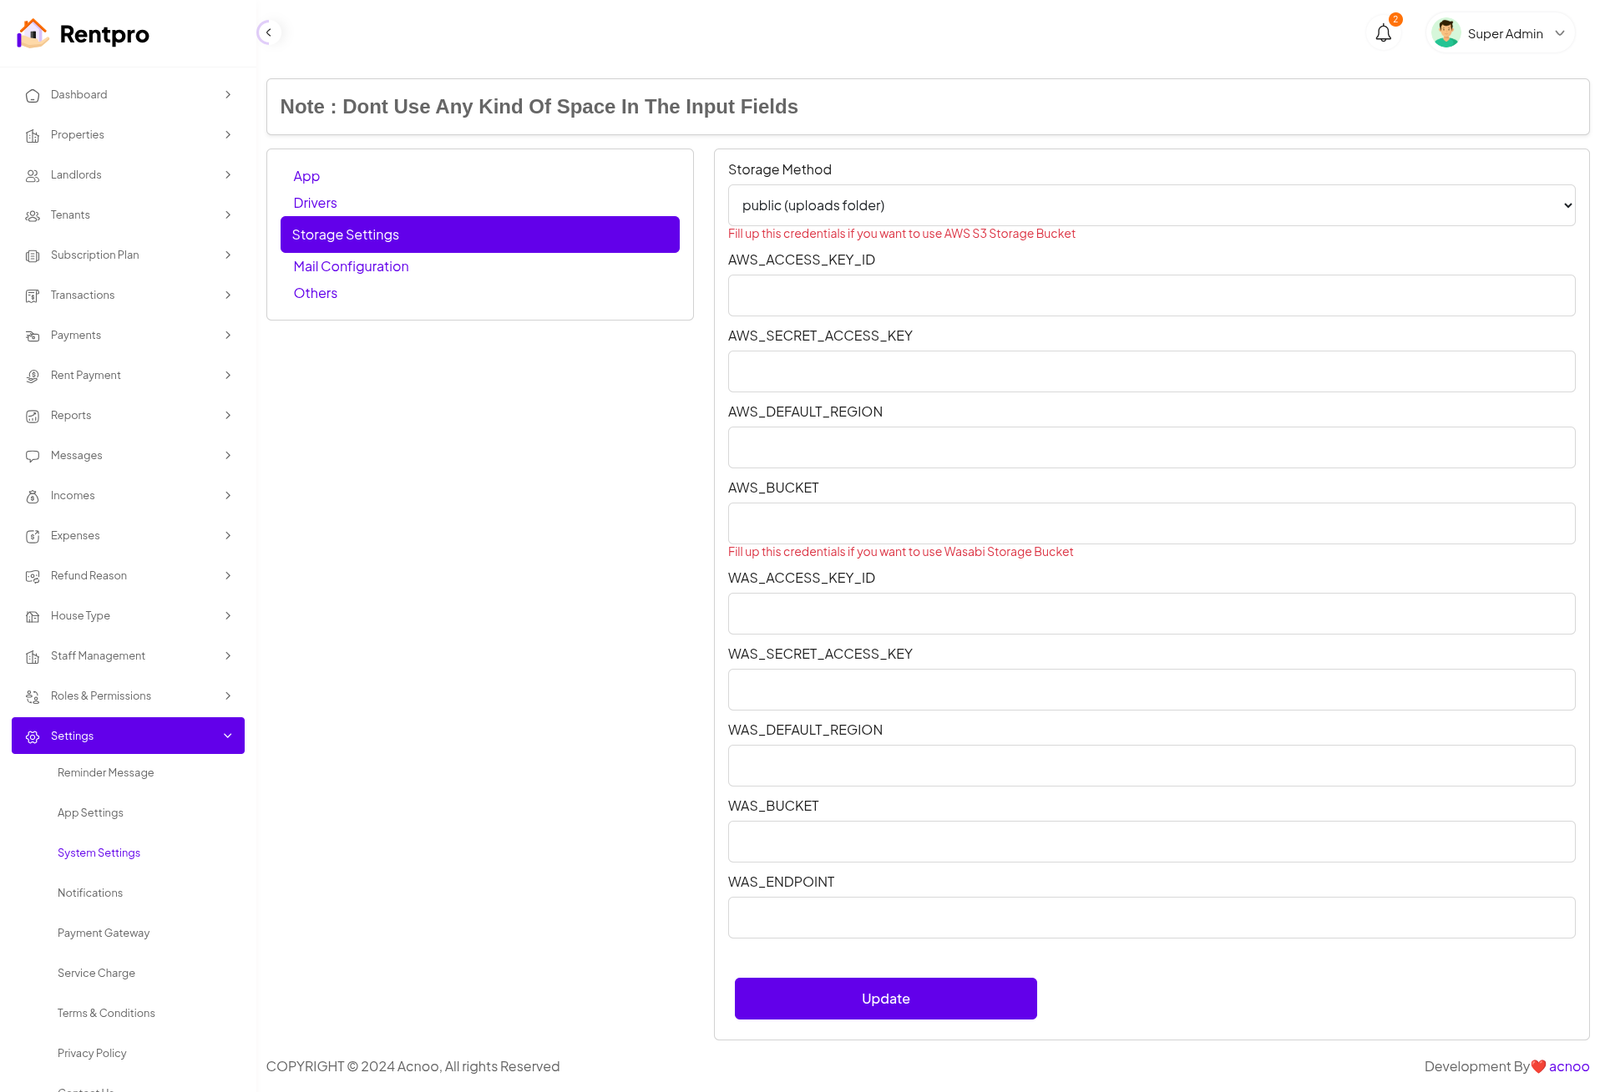
In this section, you can configure various backend settings for the project, including application setup, driver configurations, mail settings, storage configurations, and other essential components. It's crucial to handle these configurations with care as they impact the functionality and security of the system.
App
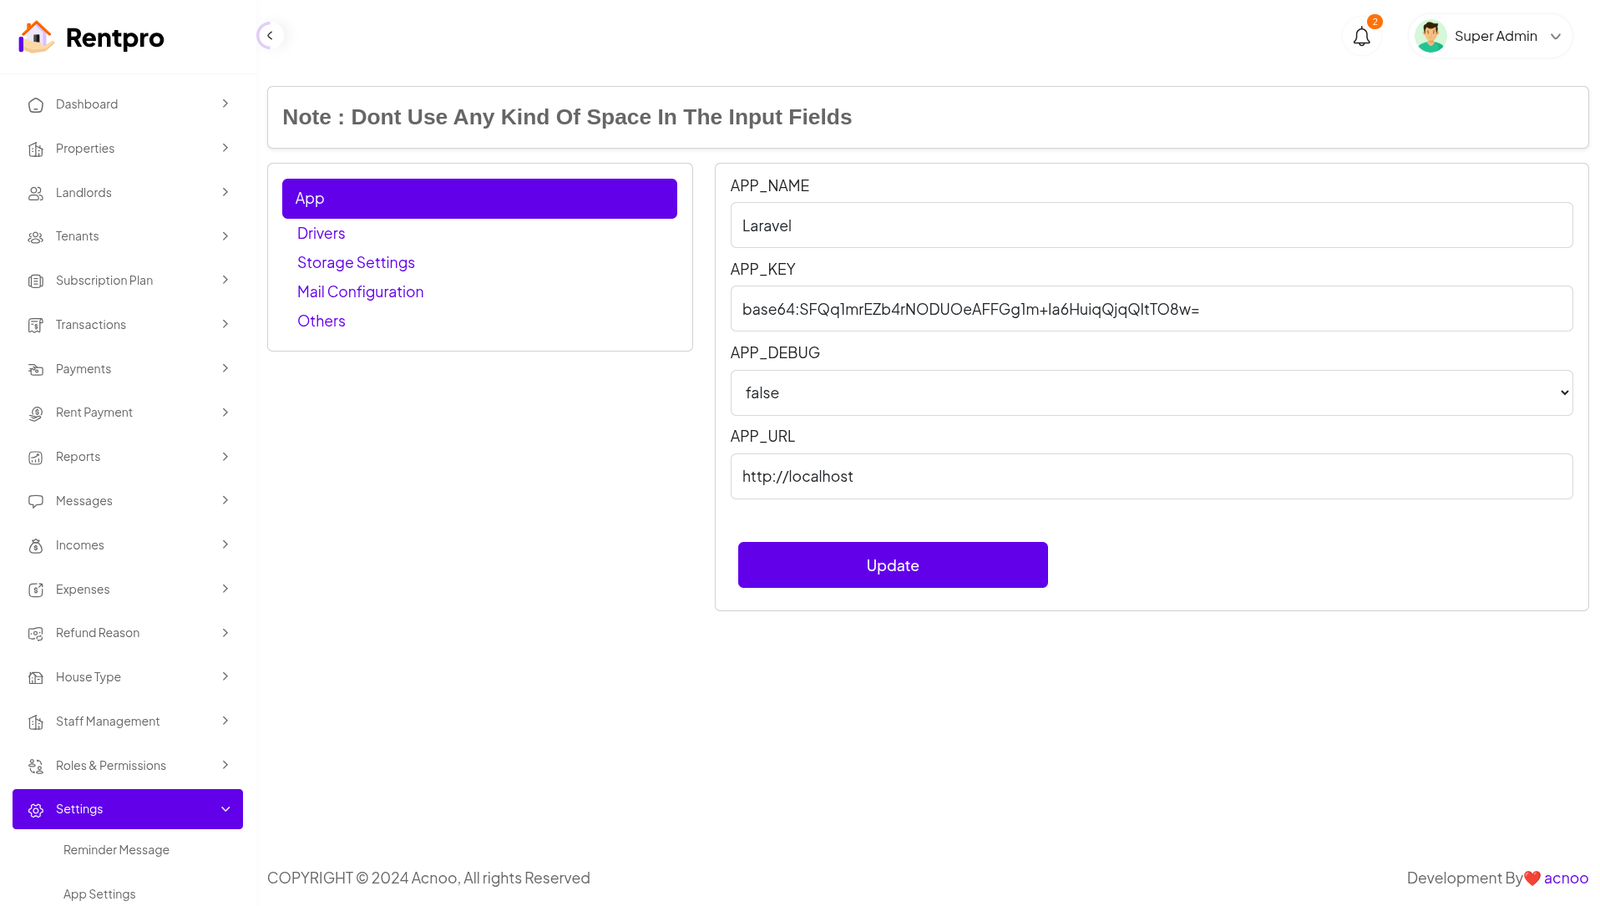
Drivers
Storage Settings
Mail Configuration
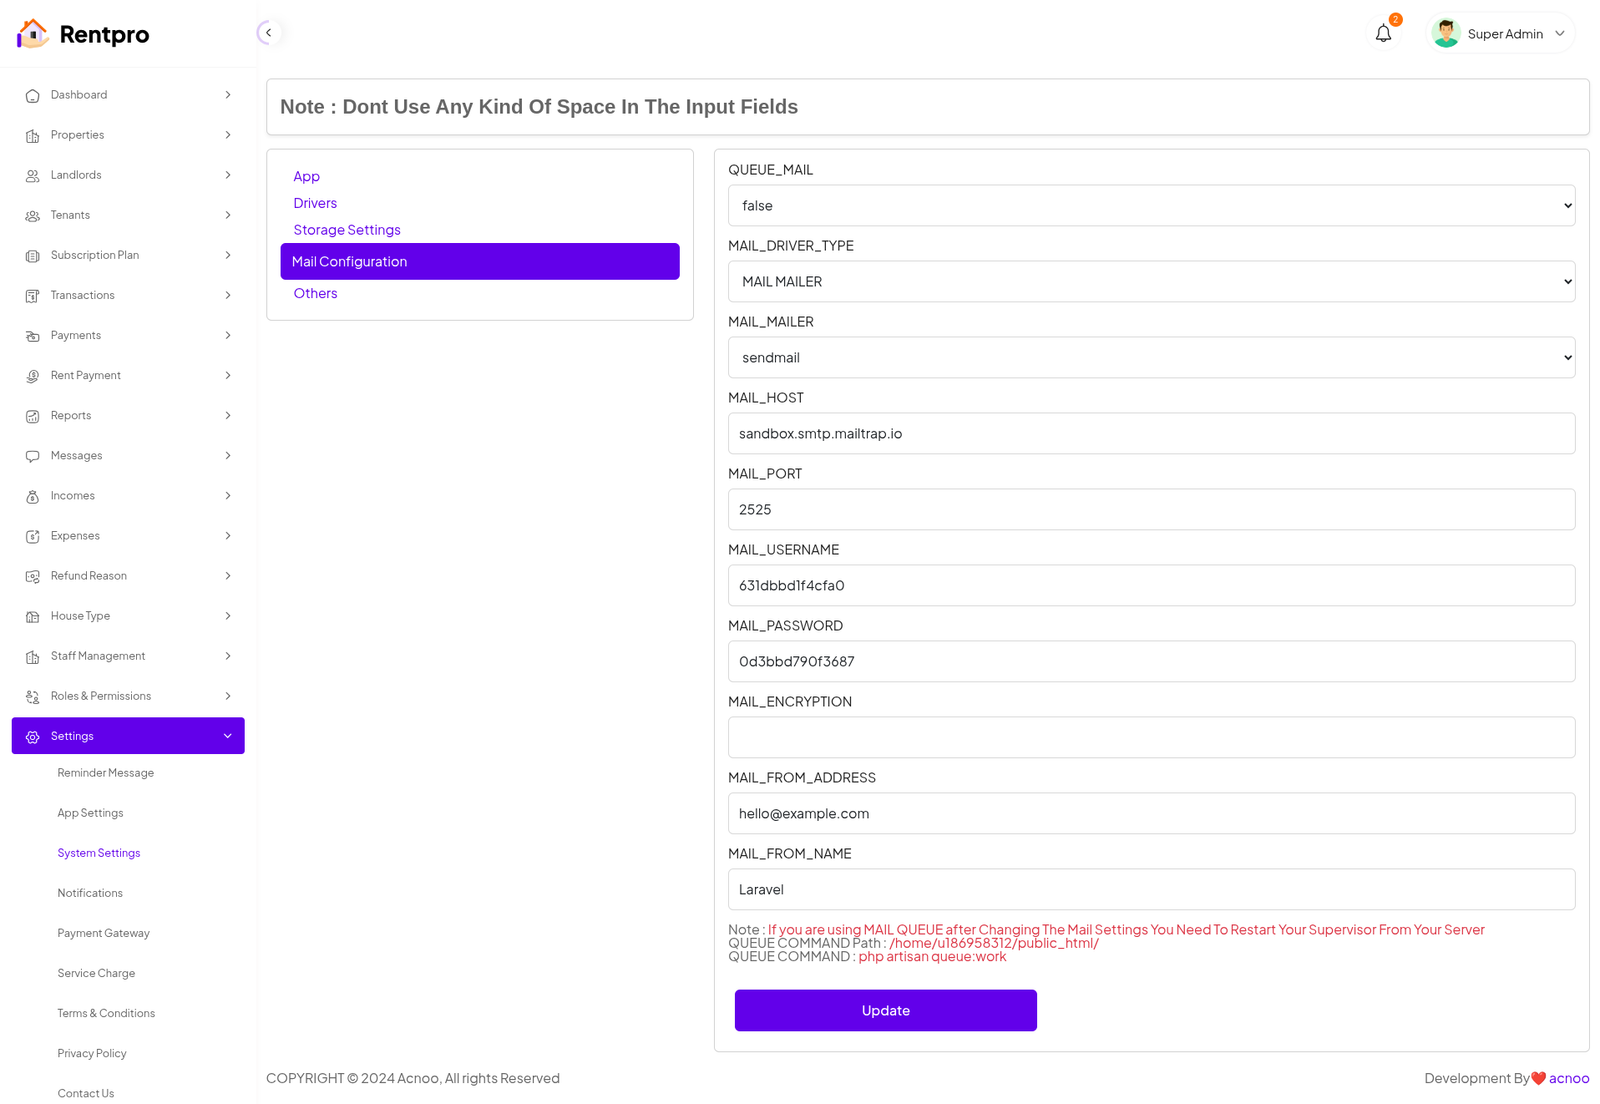
Note: Please note that if you change QUEUE_MAIL from false to true, you need to run the following command: php artisan queue:work. Remember: The command path should be: /home/u186958312/domains/yourdomain.com/public_html. Make sure you're in the correct path.
Note: If you're not familiar with running the command, there's another option. Simply visit yourdomain.com/queue-work and it will be executed automatically.
Note: If you select QUEUE_MAIL as true but do not run the command or visit the URL, email functionality will not work properly.
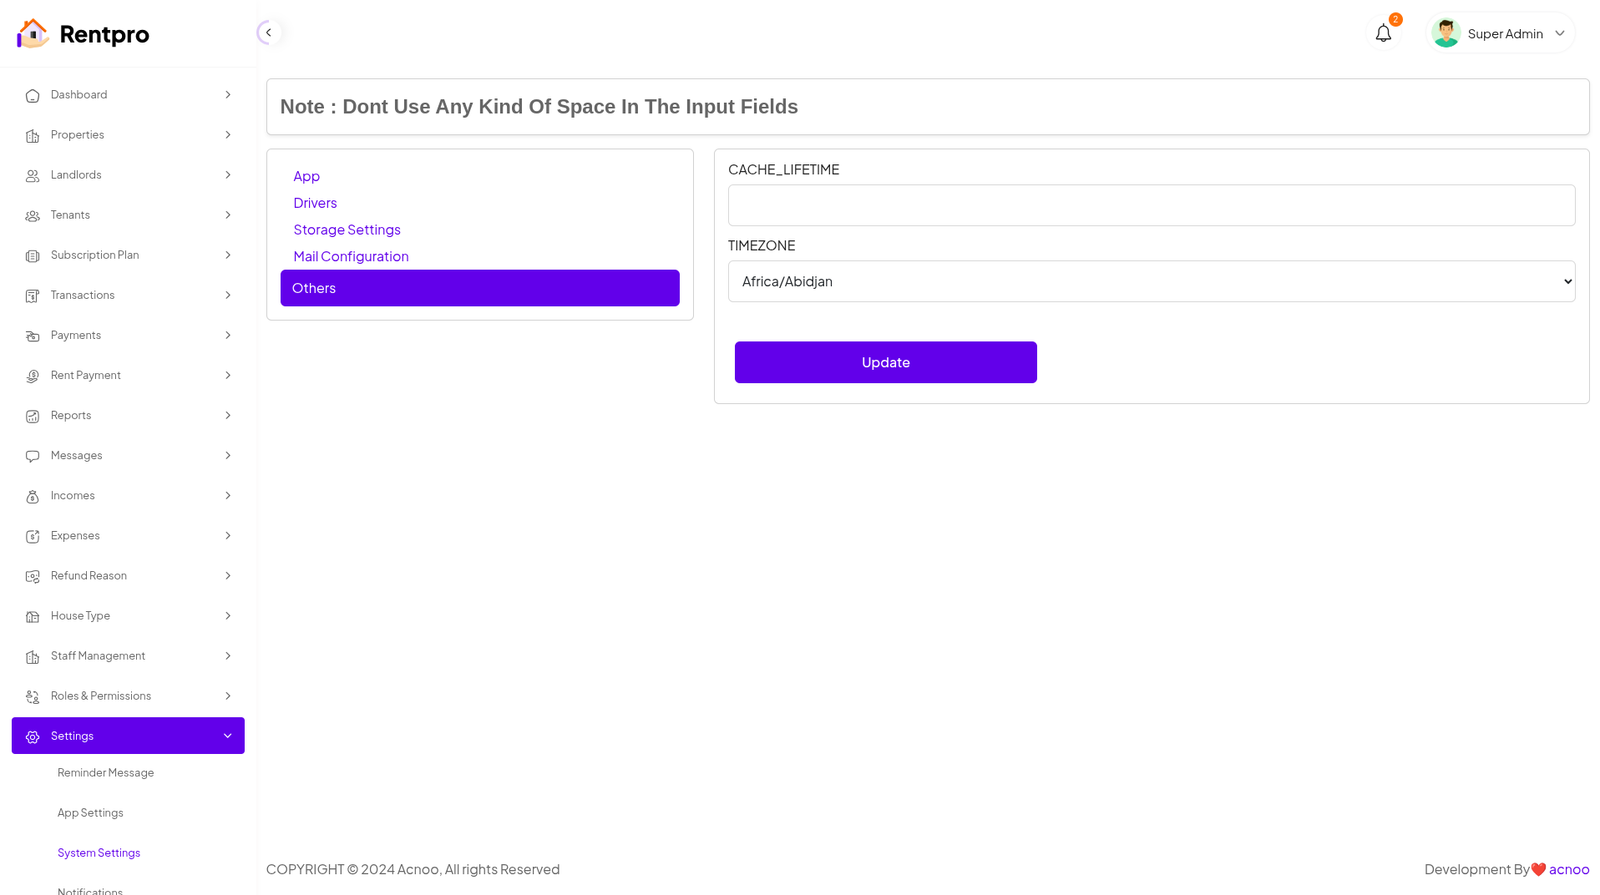
Others
Notification
Here, you can view a list of various notifications. You also have the option to filter these notifications based on available criteria.In each list, clicking the "View" button allows you to see detailed information.
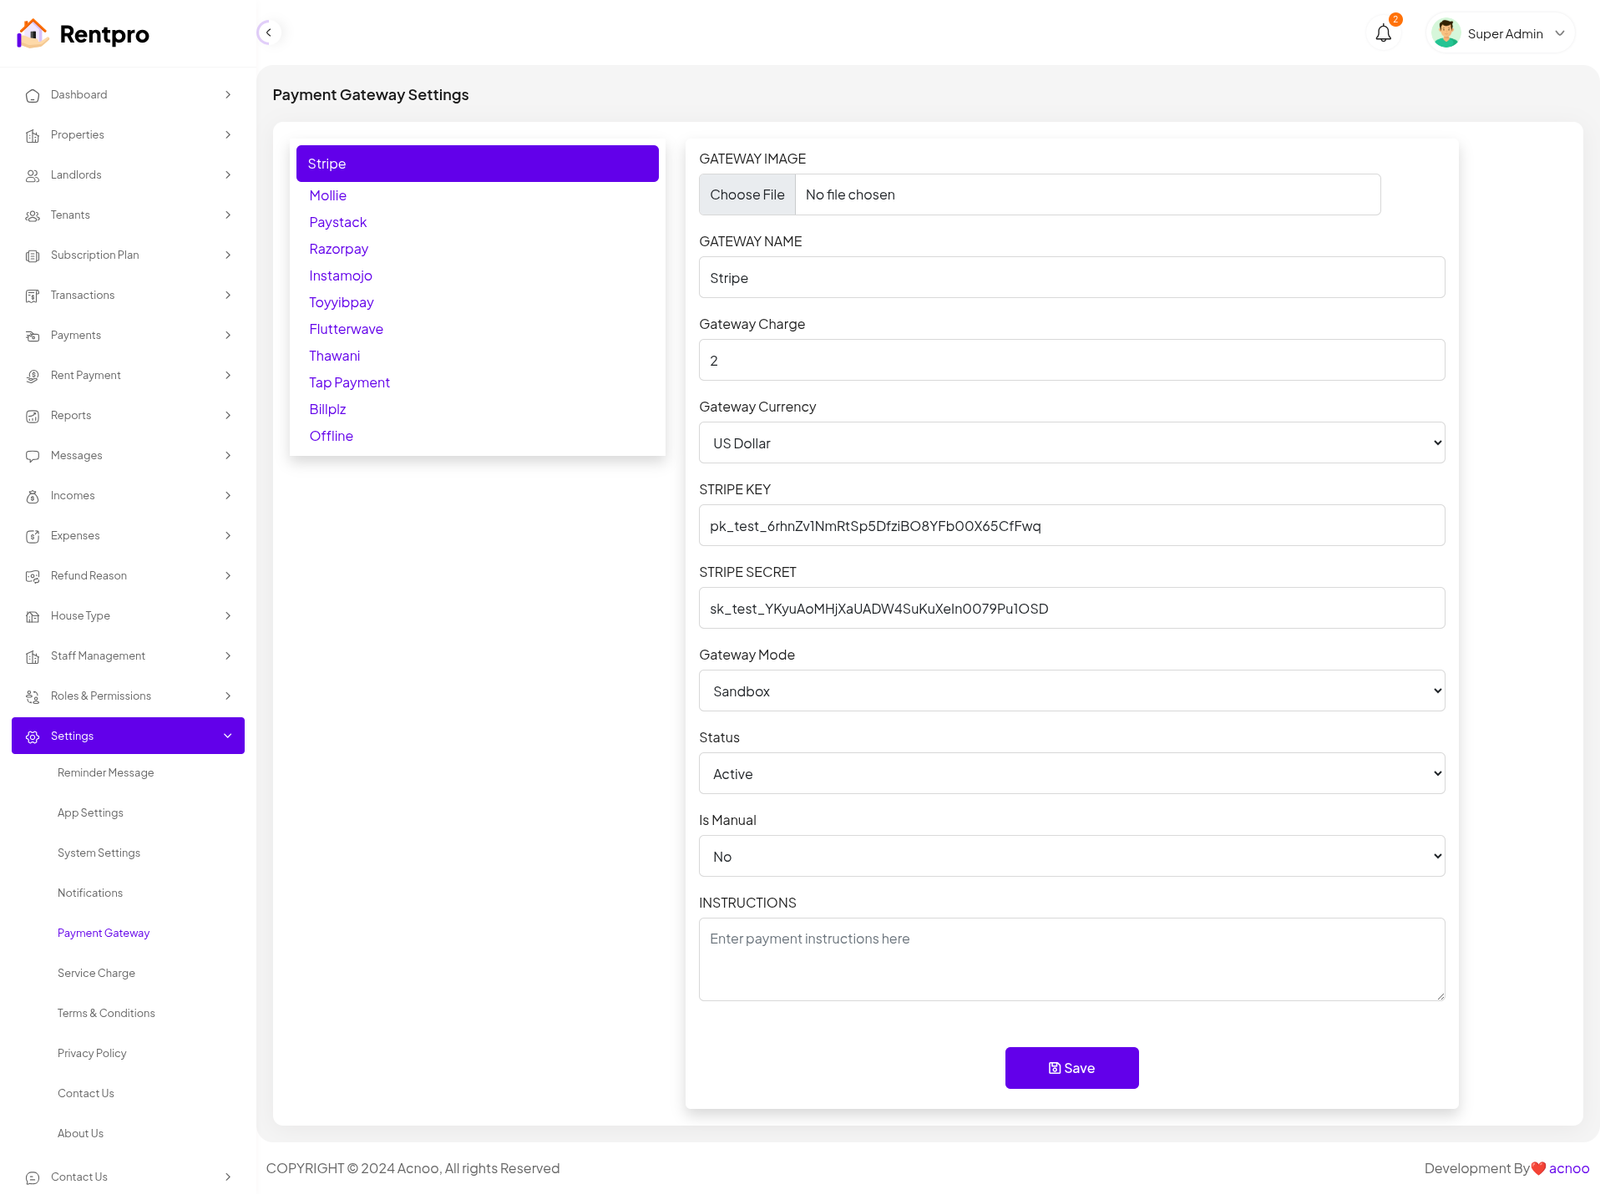
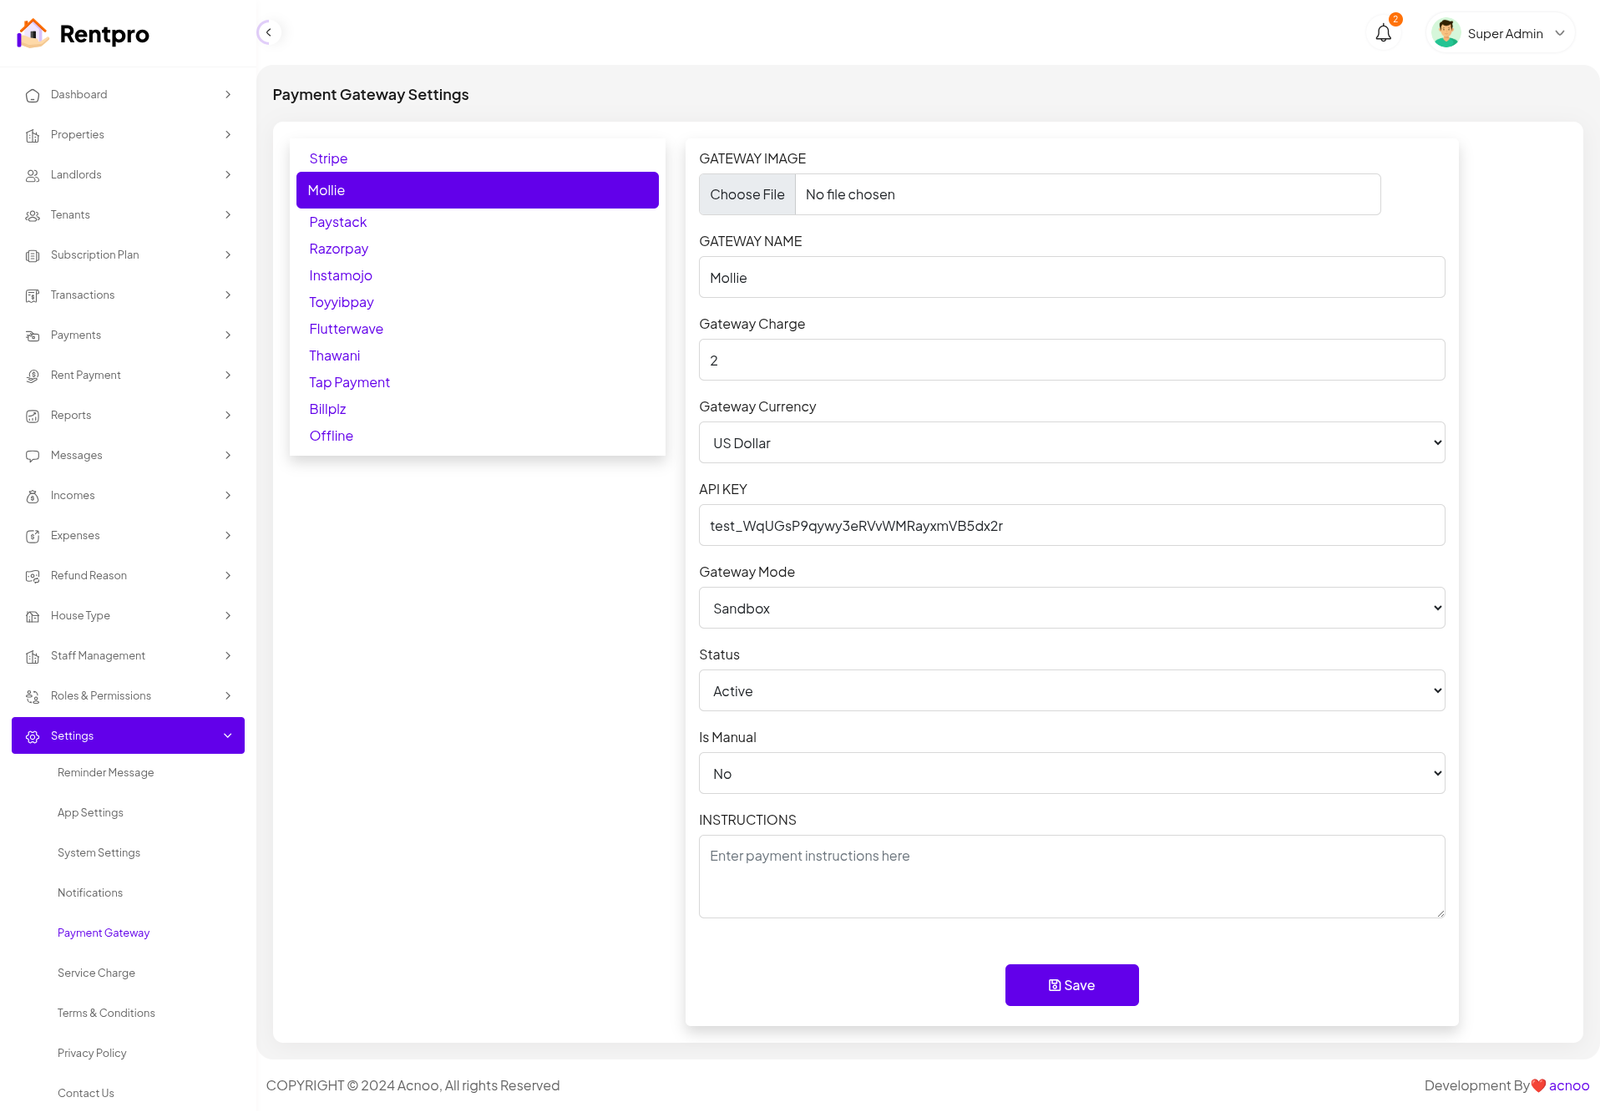
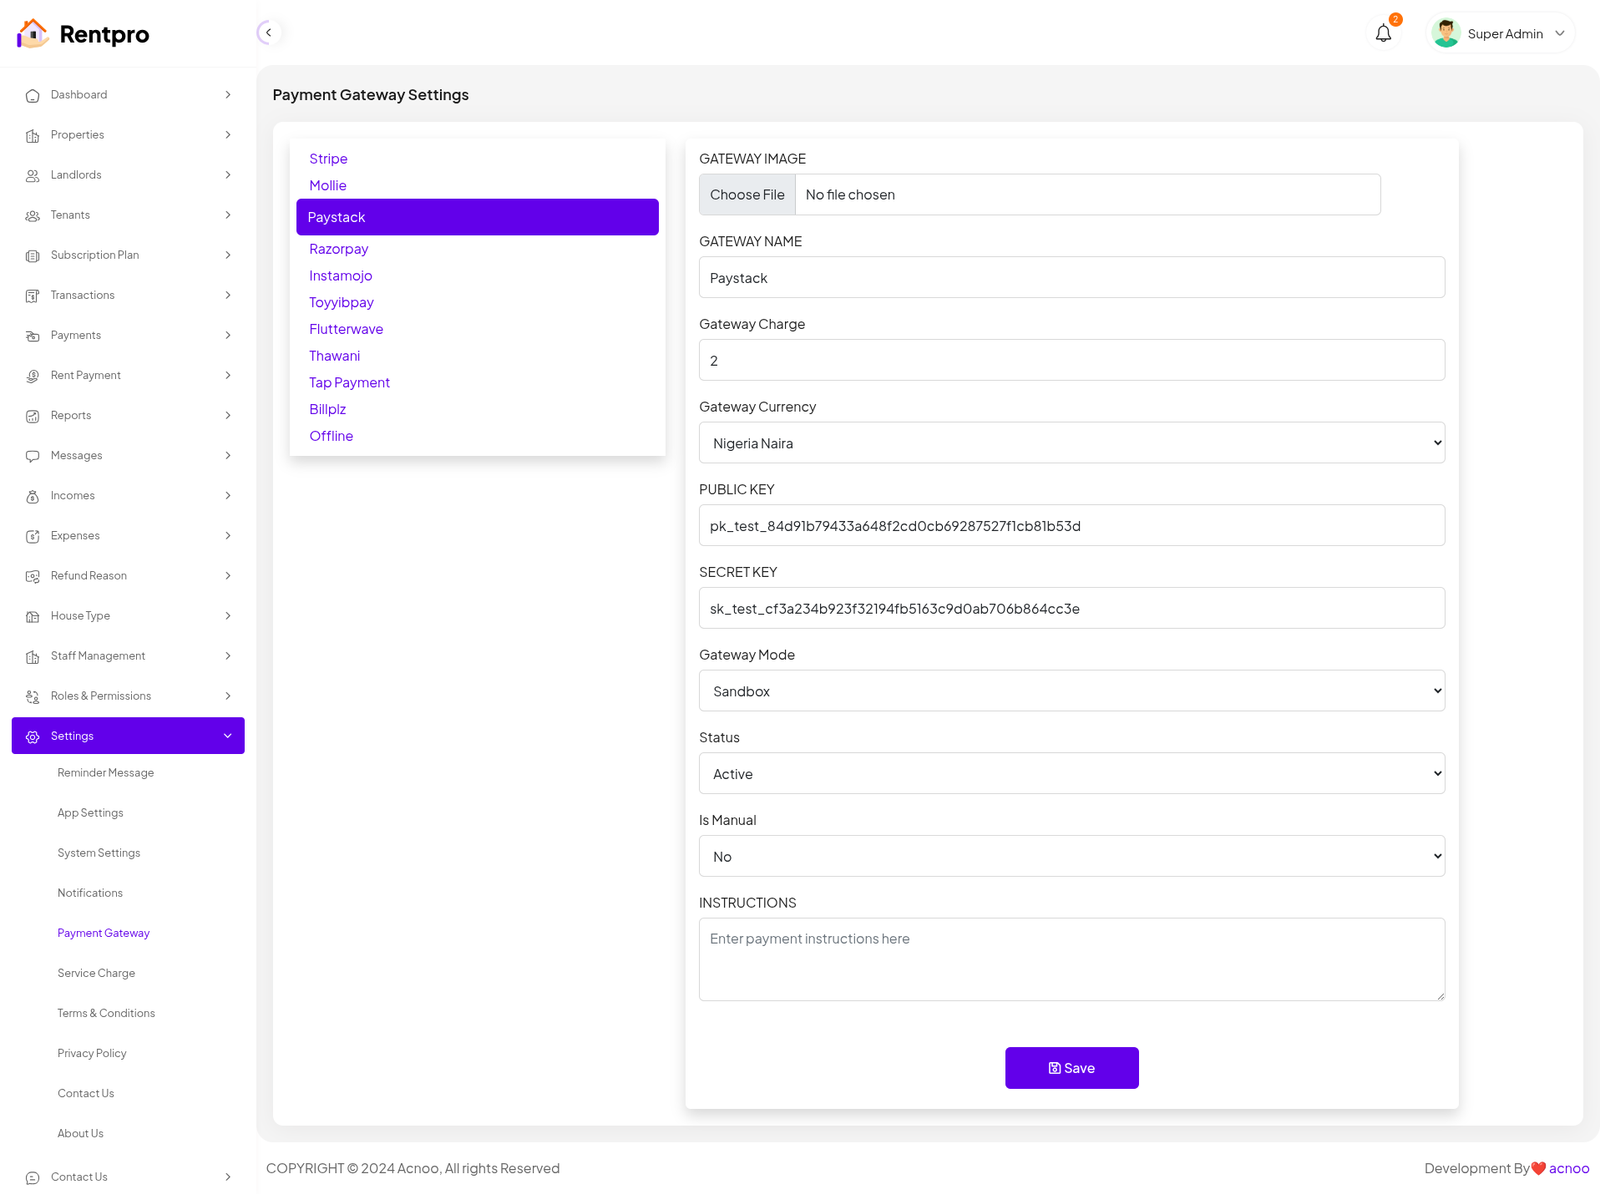
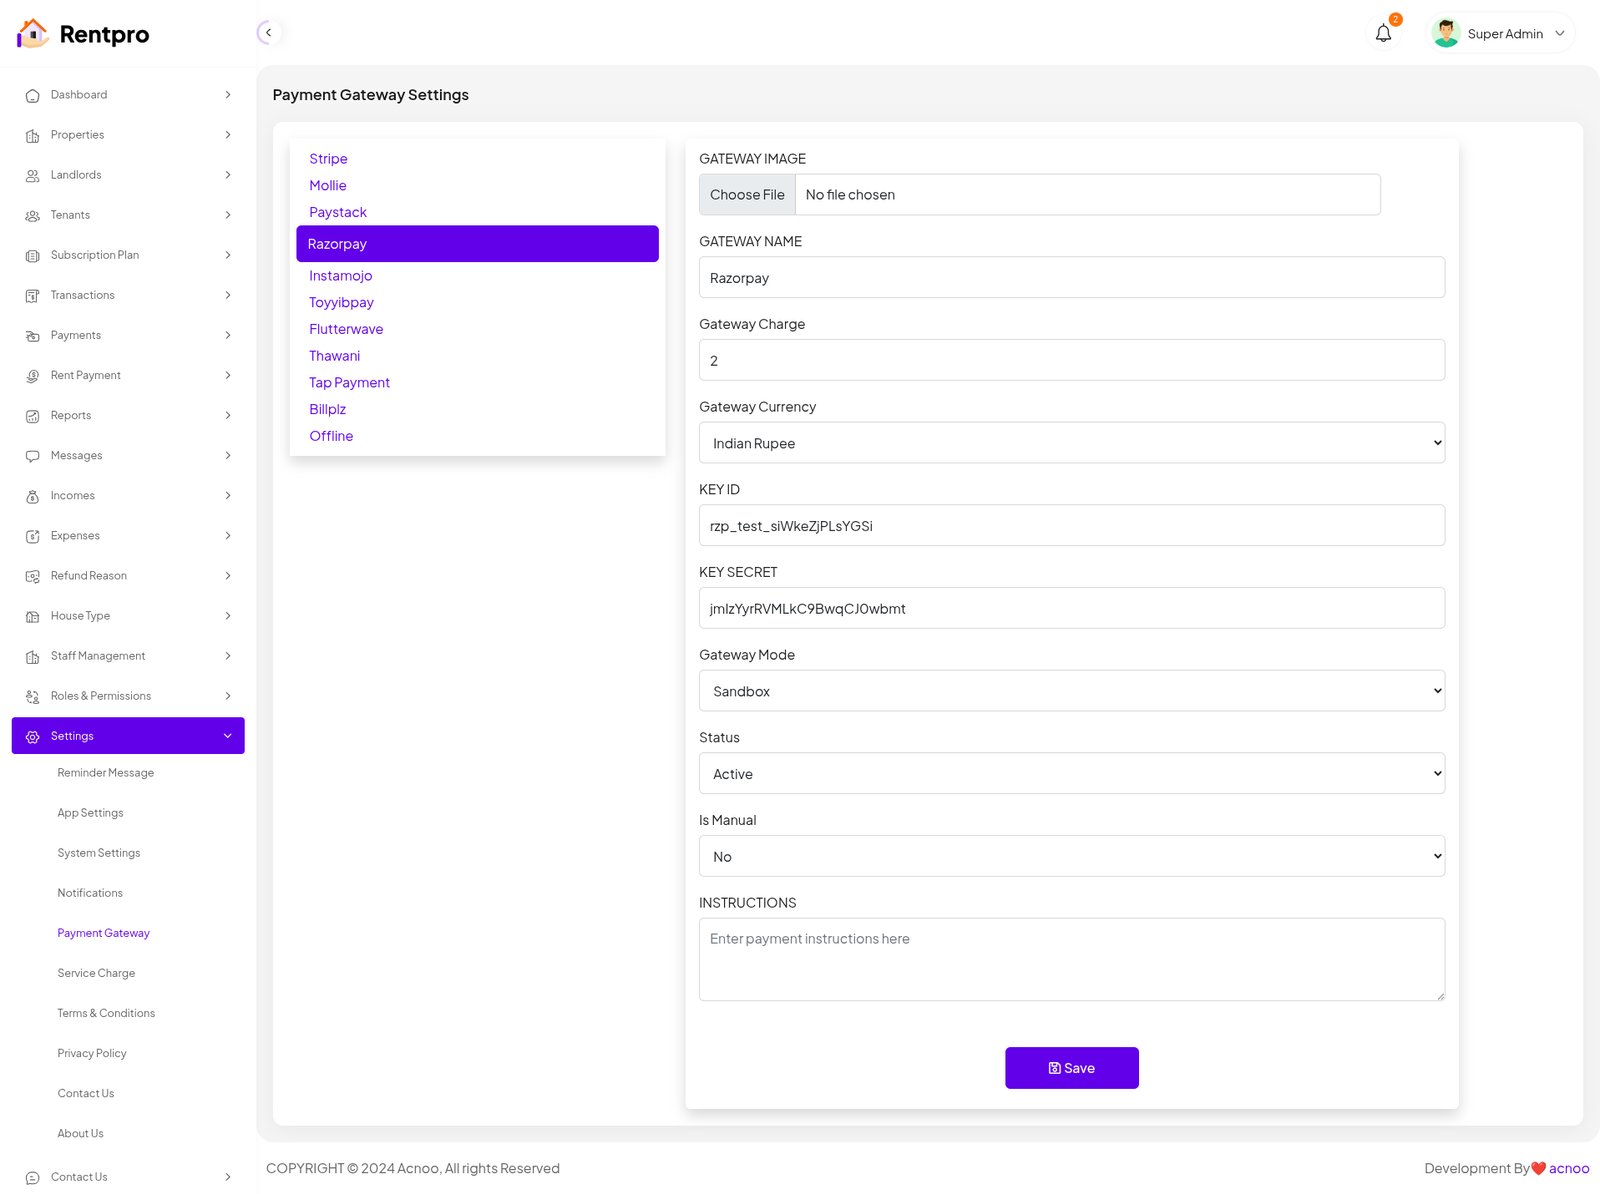
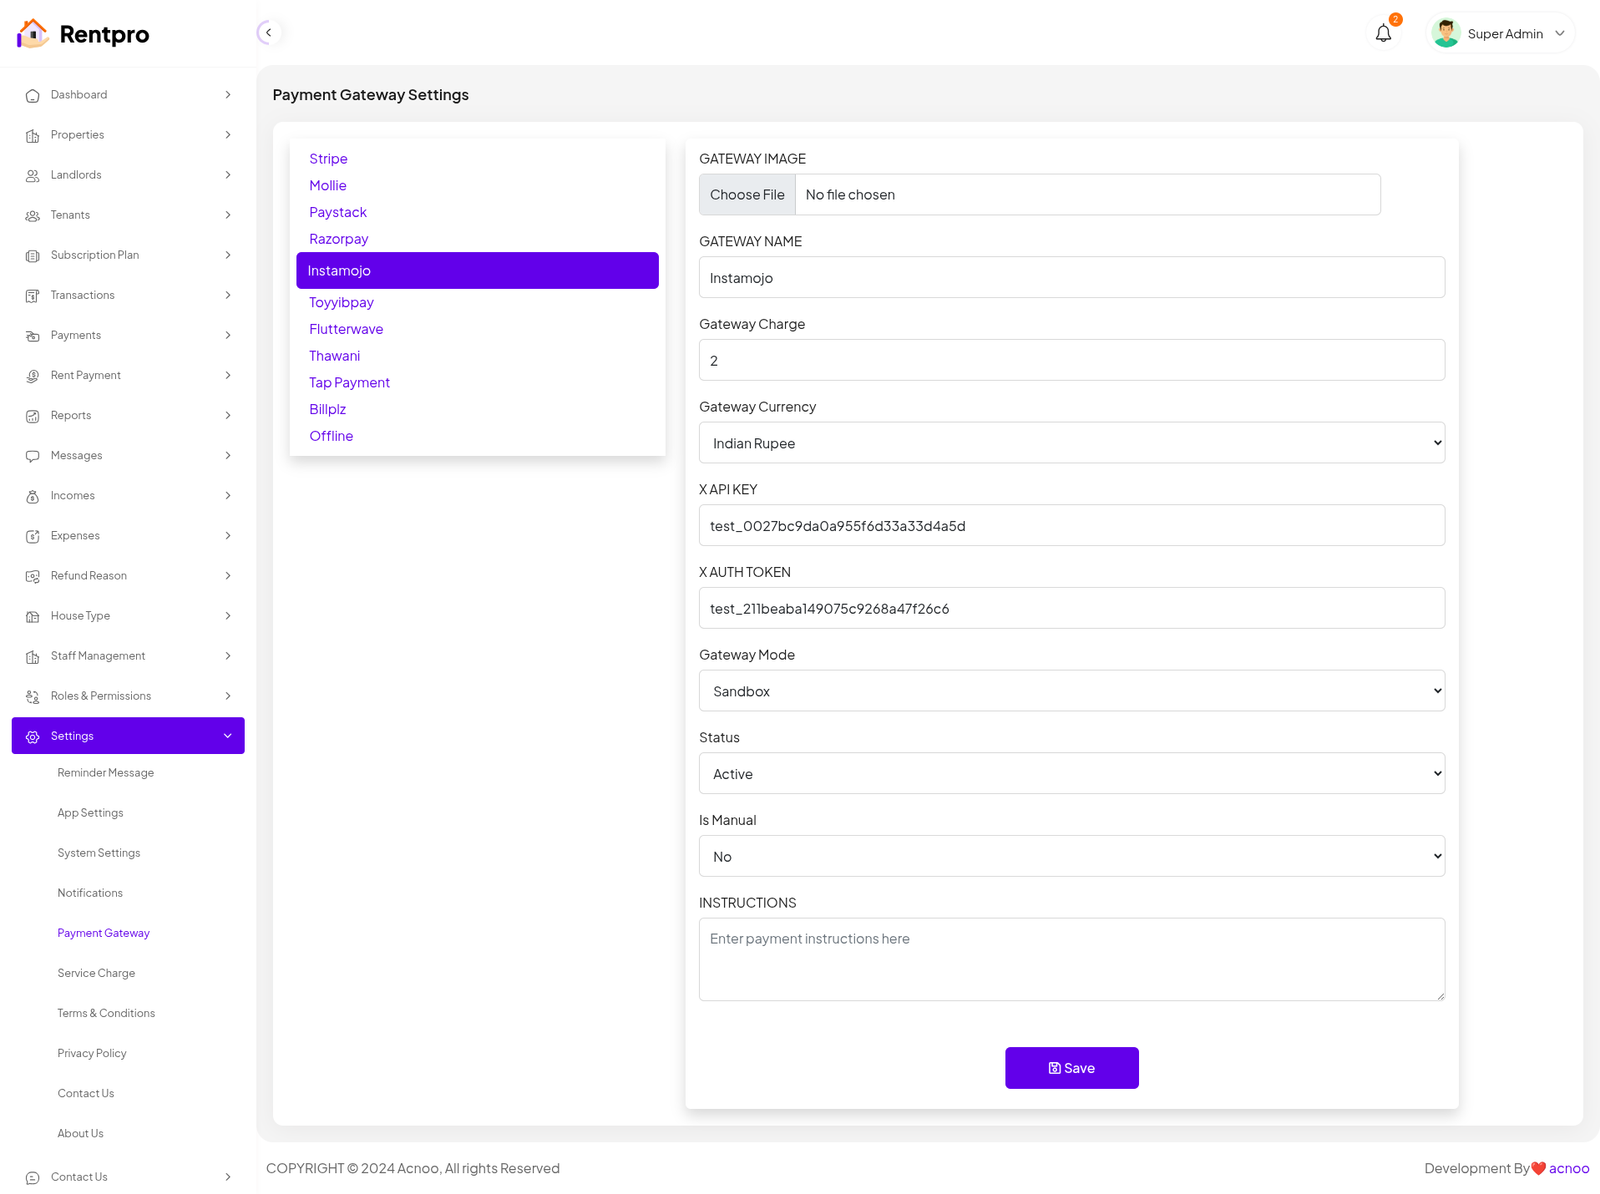
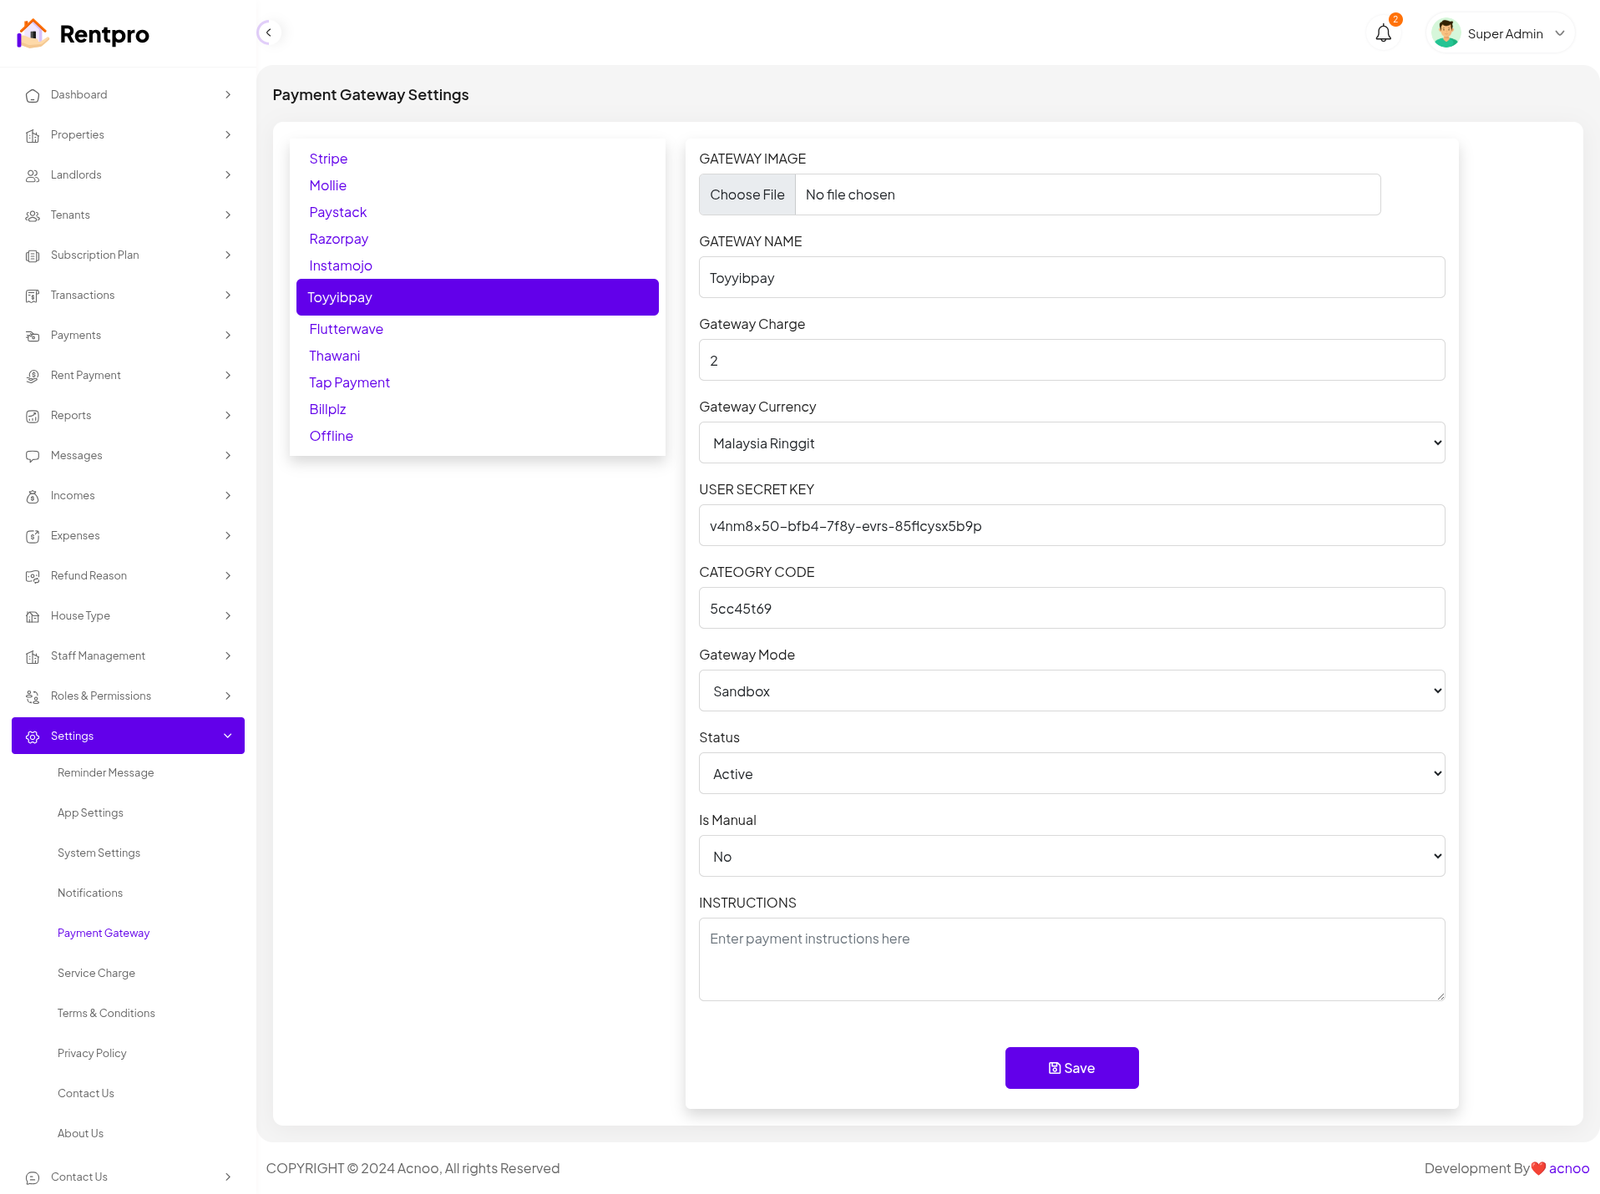
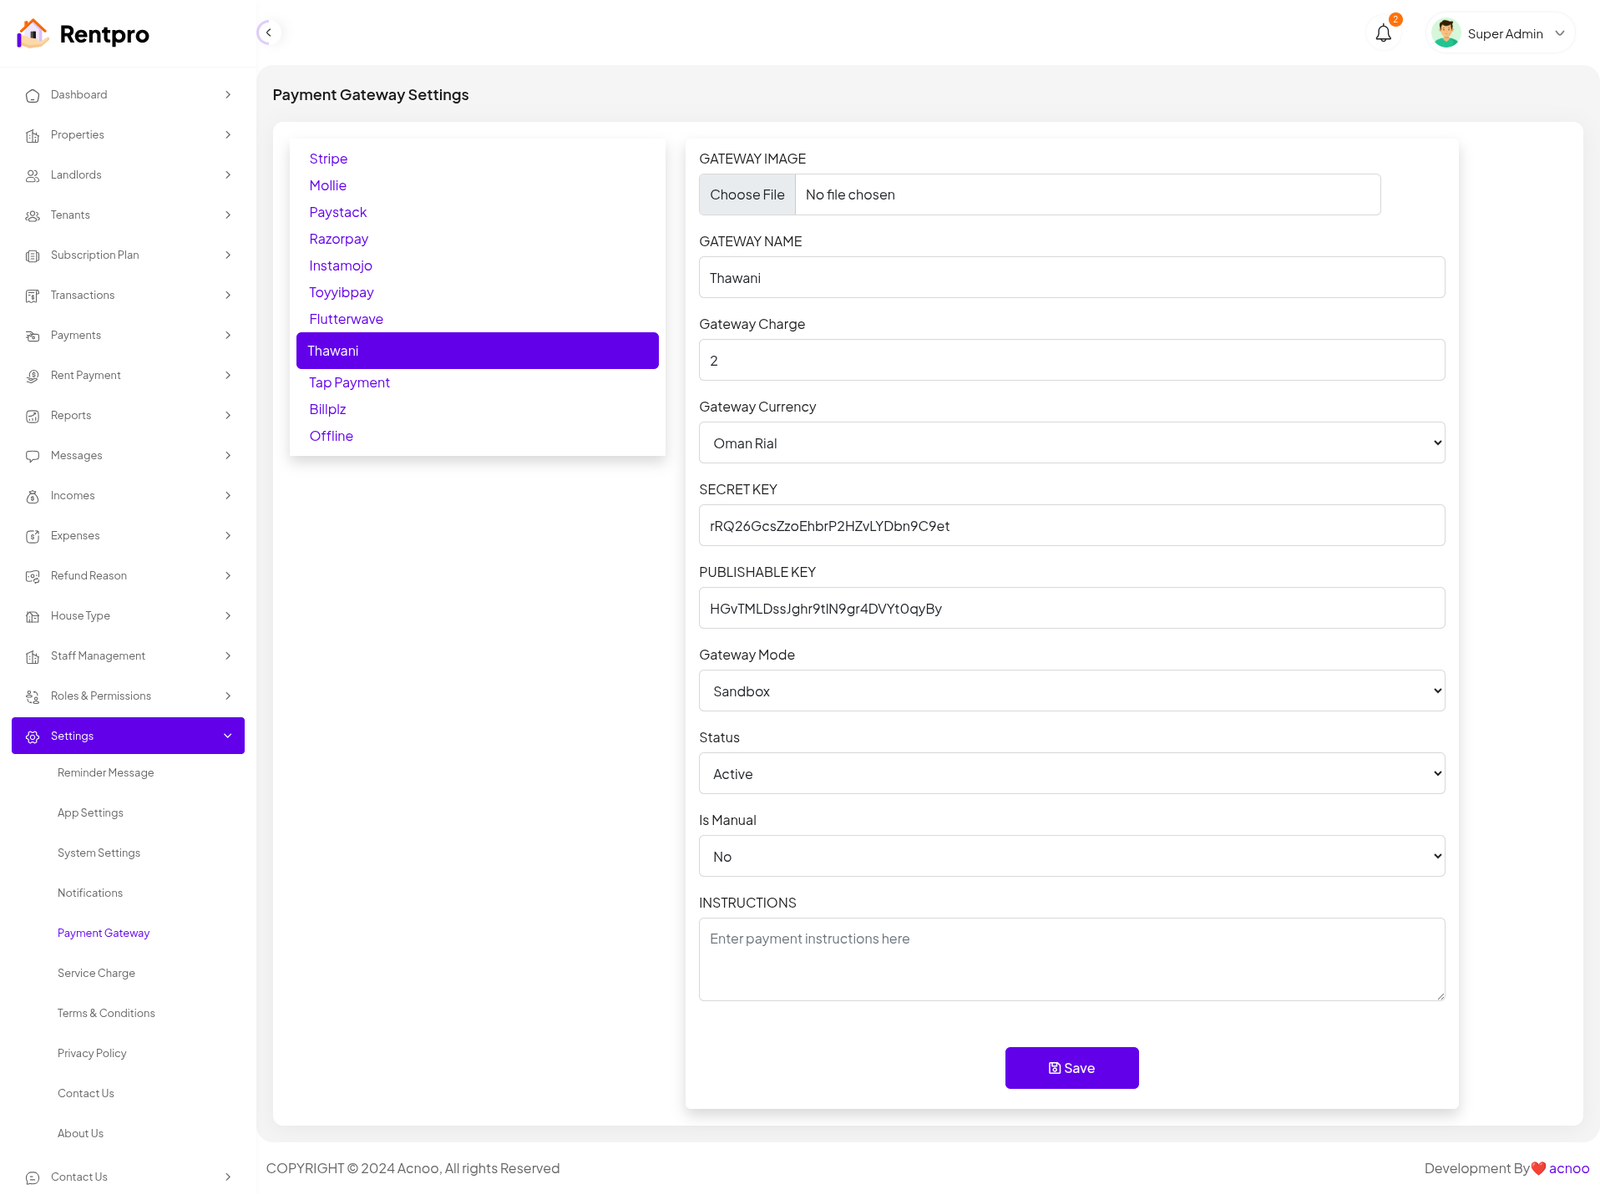
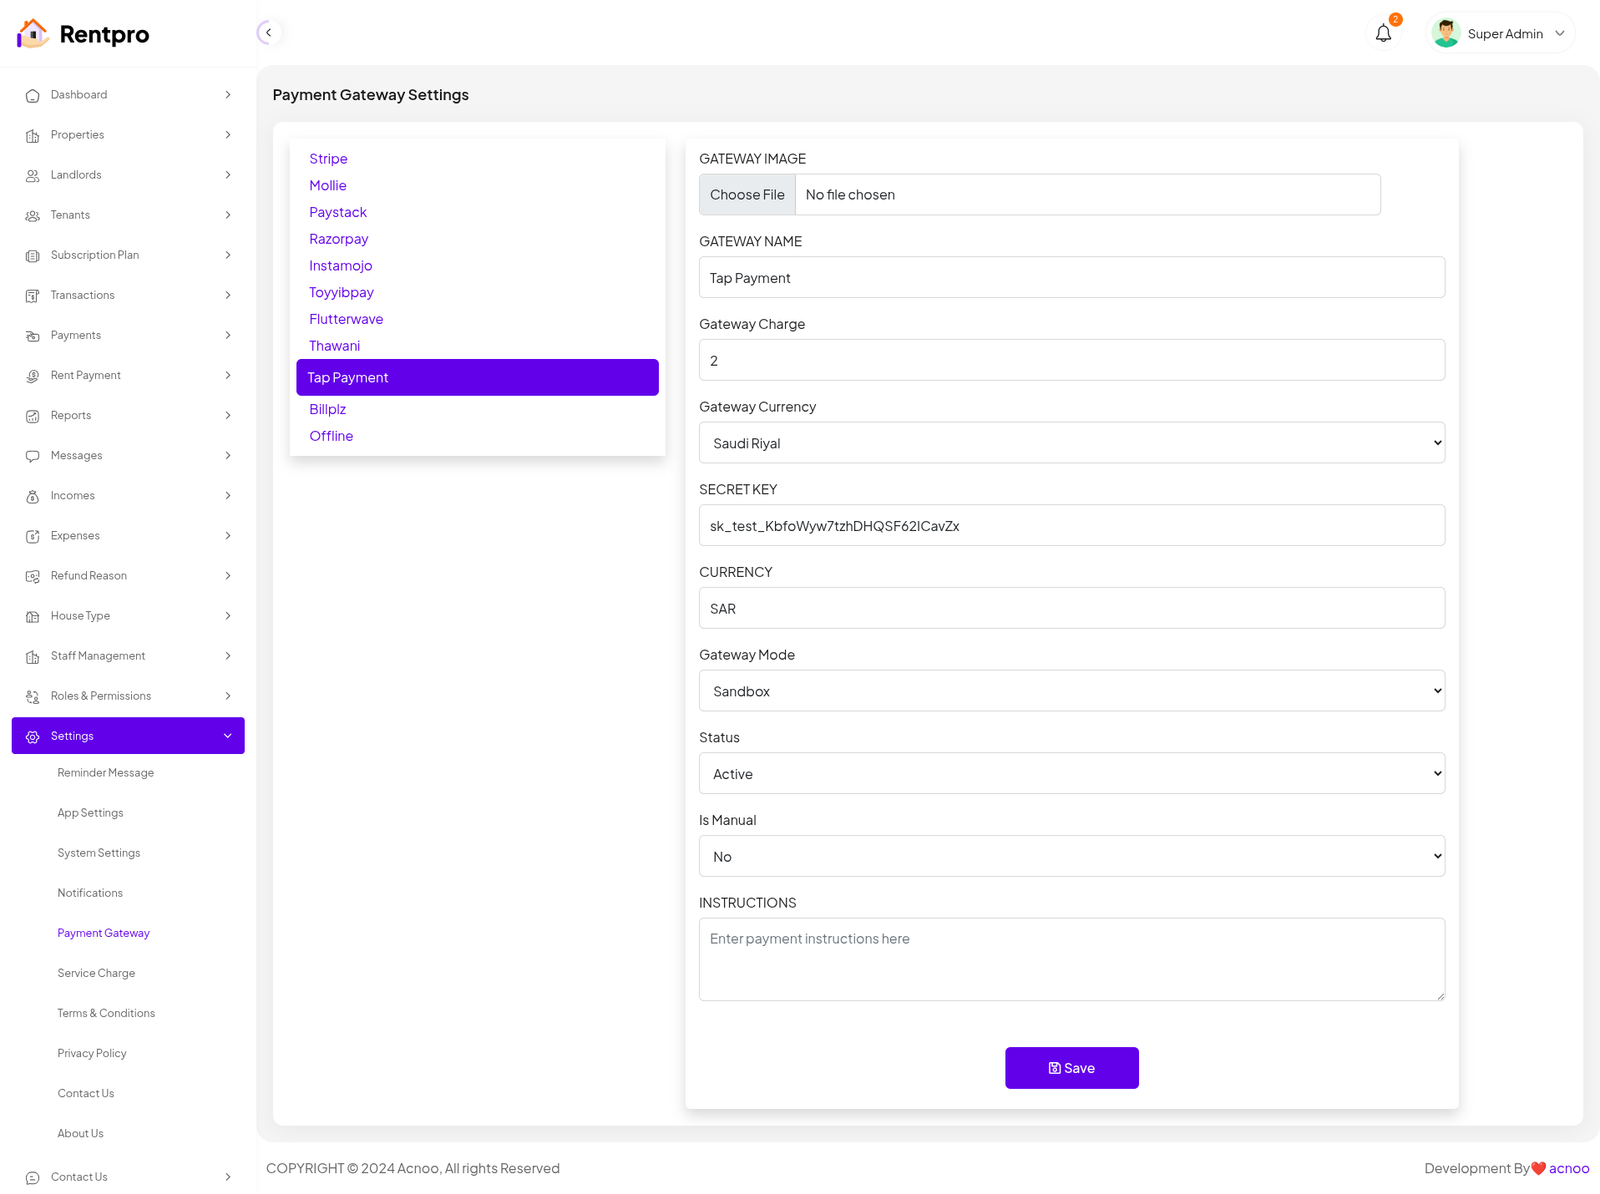
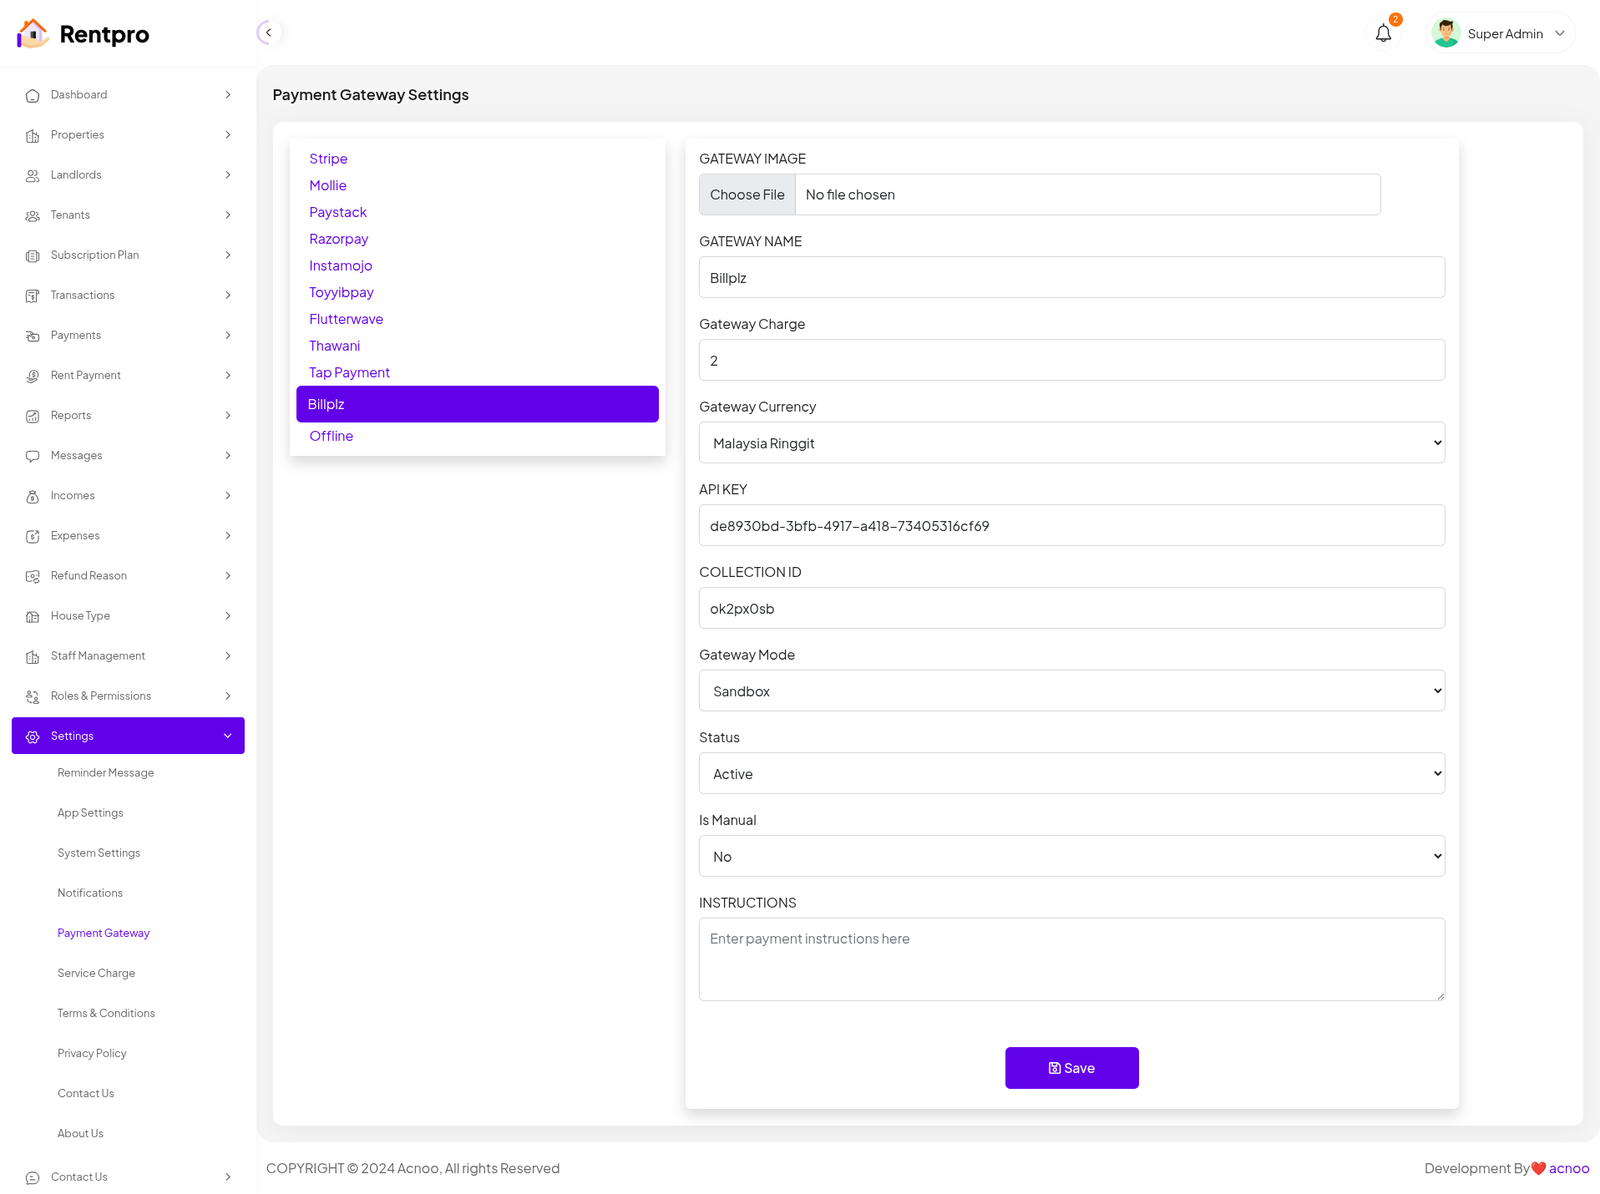
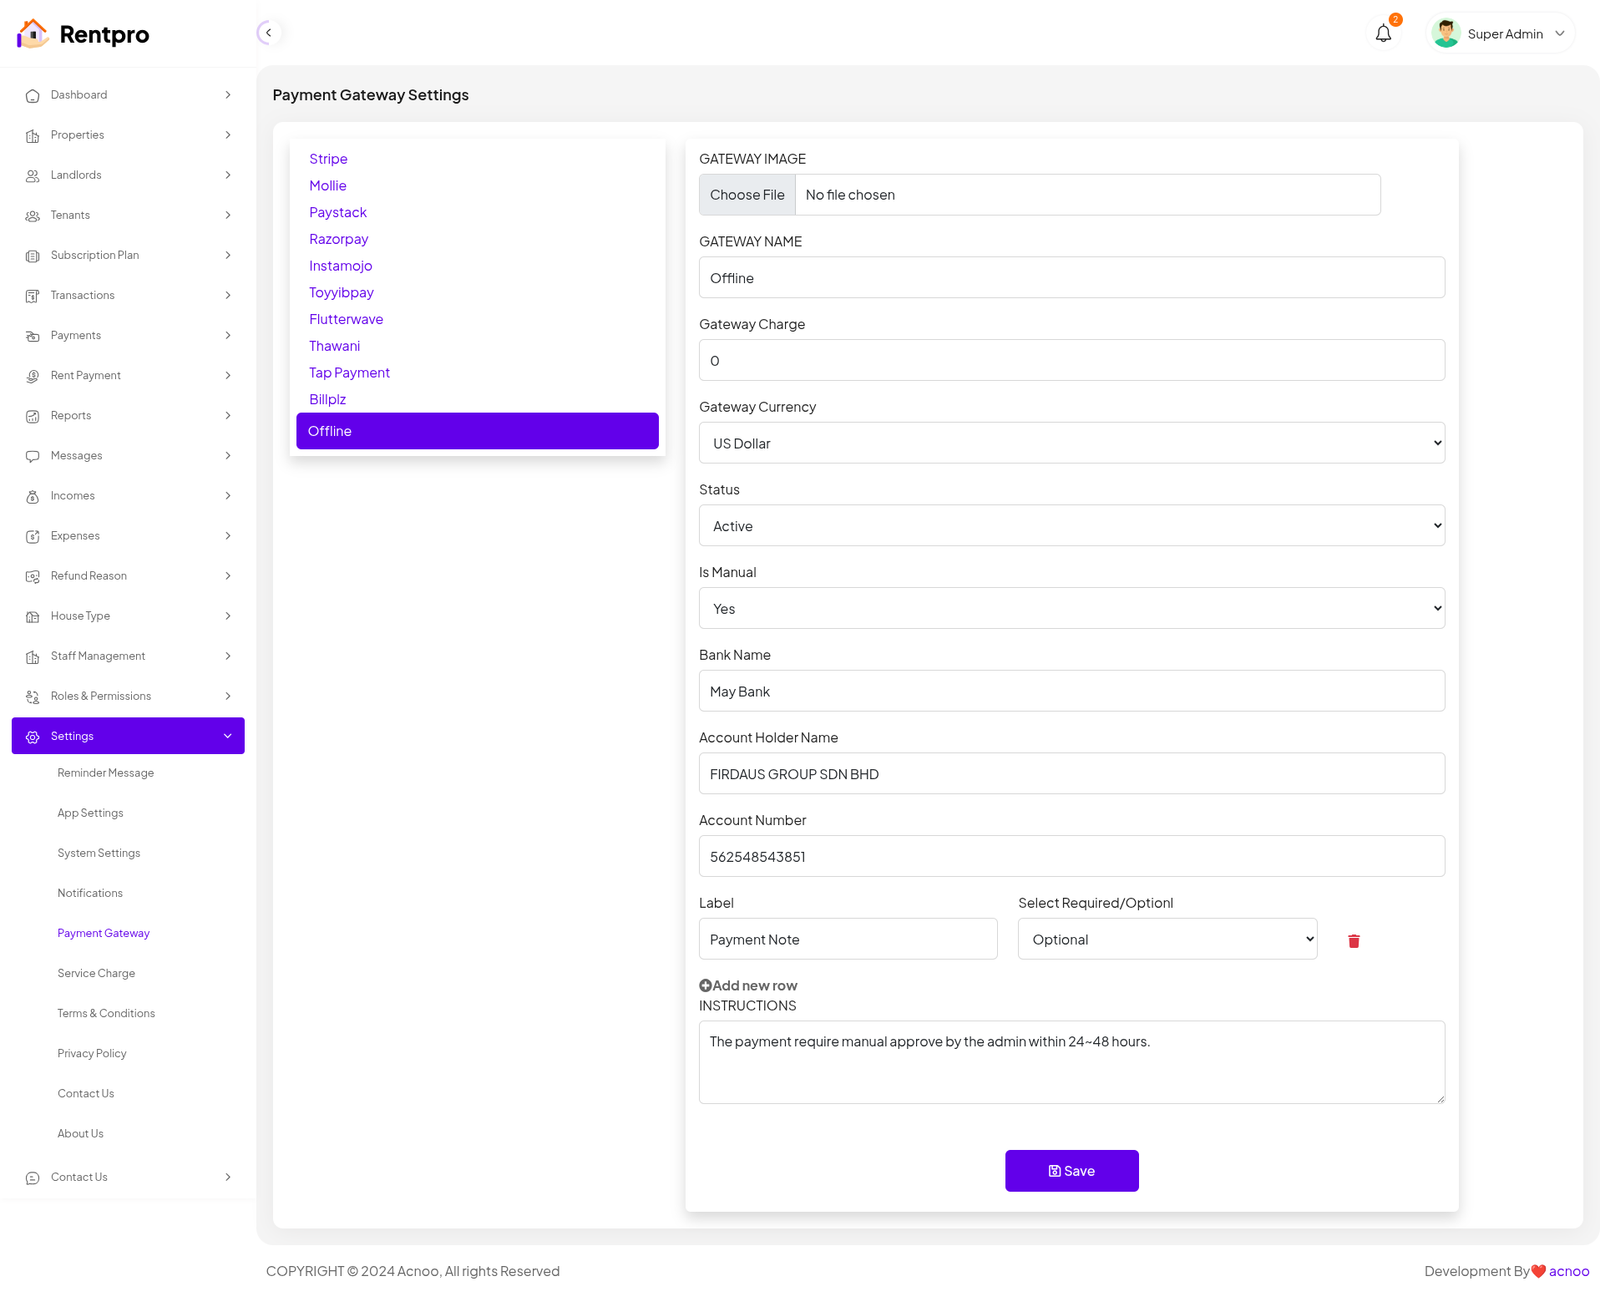
Payment Gateway Settings
Here, you can modify various payment gateways like Stripe, PayPal, SSLCommerz, manual and many others options.
Stripe
Mobile
Paystack
Razorpay
Instamojo
Toyyibpay
Flutter Wave

Thawani
Tap Payment
Billplz
Offline
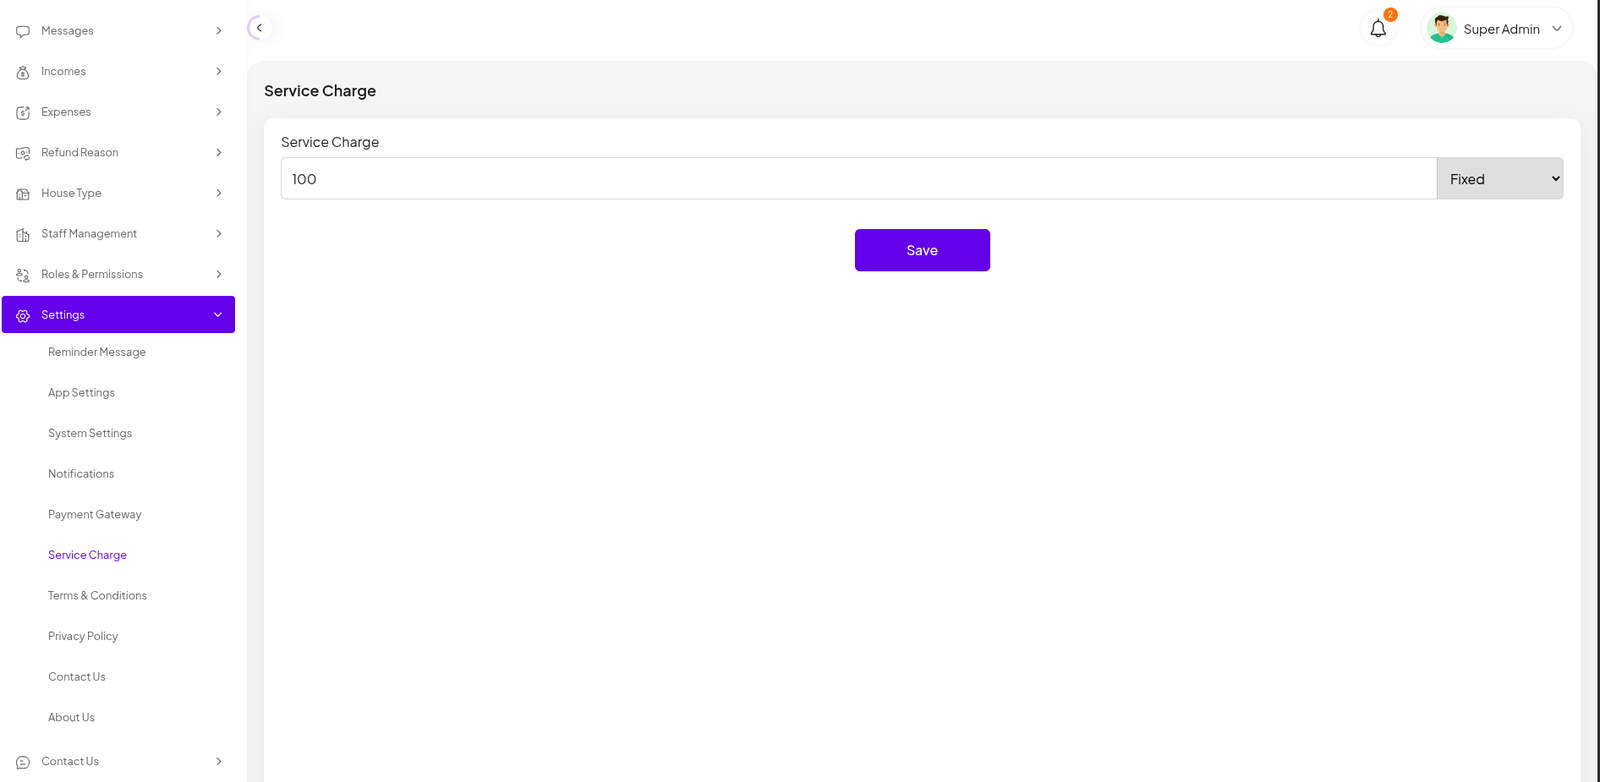
Service Charge
The "Service Charge" page in the Rentpro admin panel is used to configure the service fee that is applied to transactions on the platform. This feature allows administrators to set a fixed or percentage service charge.
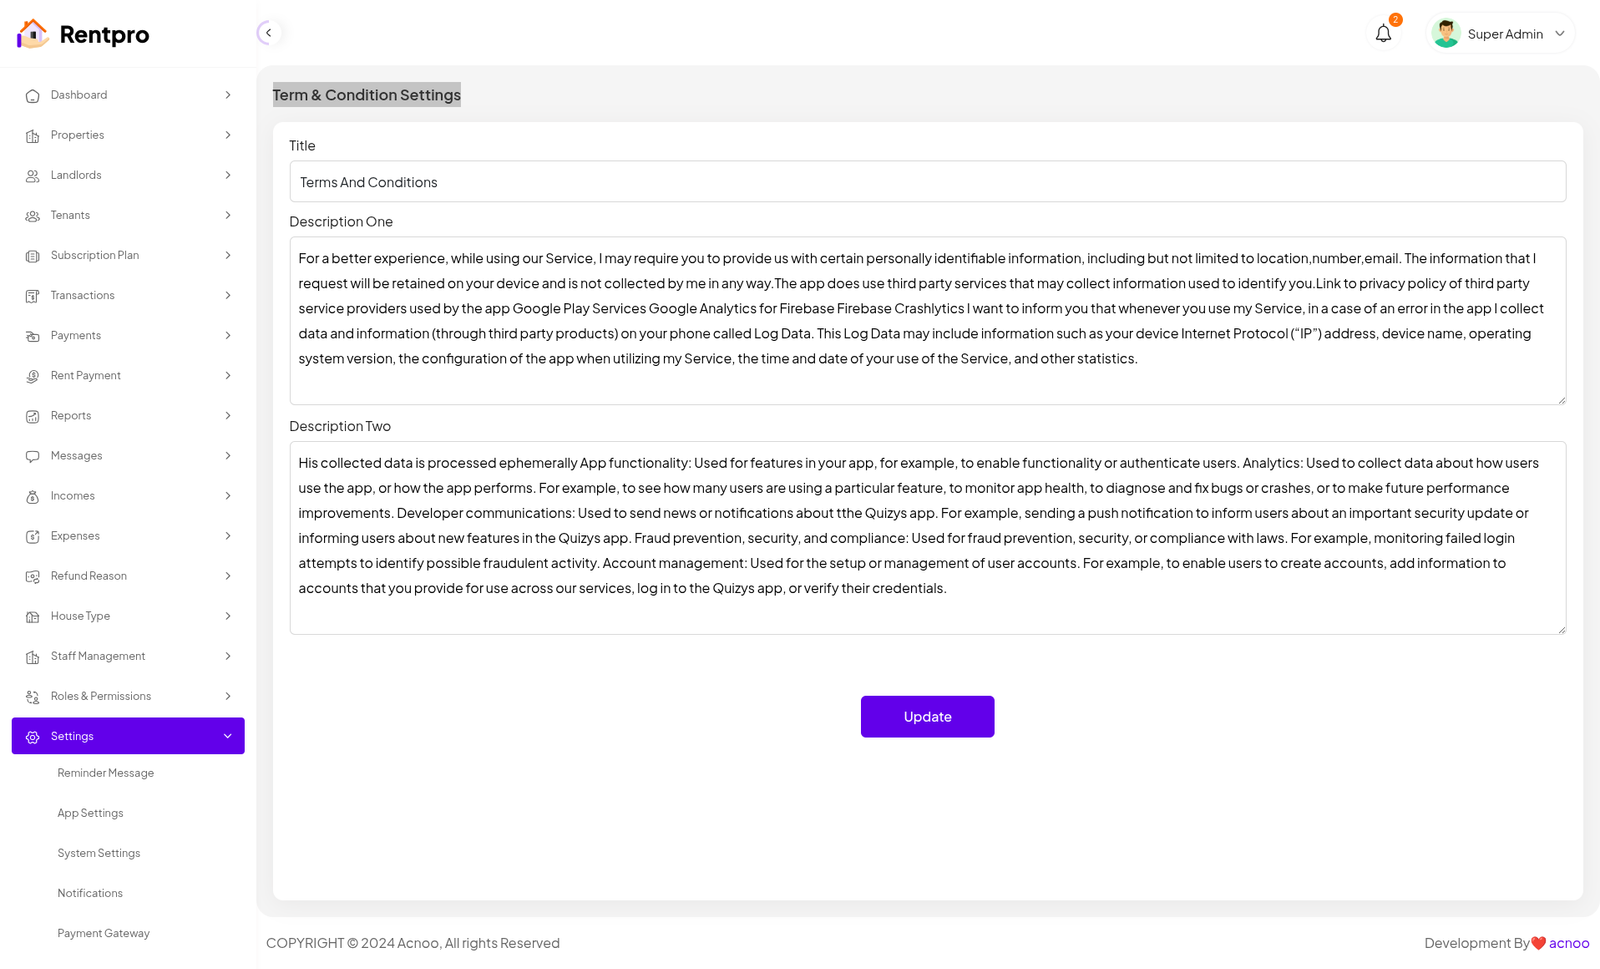
Term & Condition Settings
The "Term & Condition Settings" page in the Rentpro admin panel allows administrators to view and update the platform's terms and conditions. This is a critical page for ensuring legal compliance and clearly communicating the rules and policies to all users.
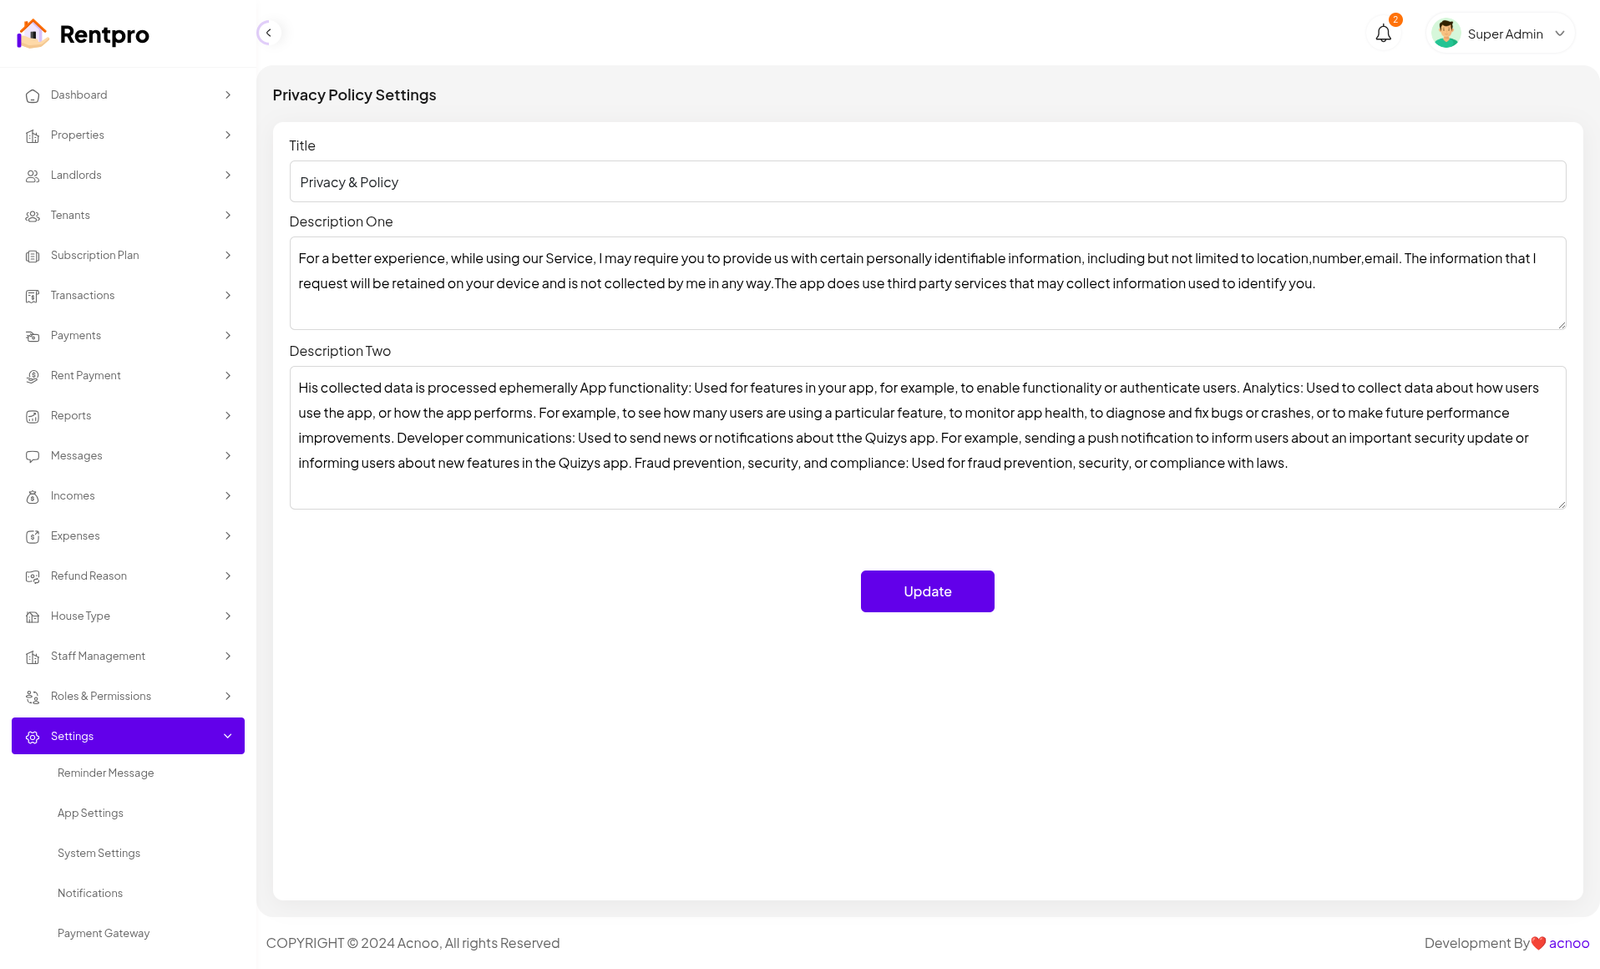
Privacy Policy Settings
The "Term & Condition Settings" page in the Rentpro admin panel allows administrators to view and update the platform's terms and conditions. This is a critical page for ensuring legal compliance and clearly communicating the rules and policies to all users.
Contact Us Settings
The "Contact Us Settings" page in the Rentpro admin panel allows administrators to customize the content and appearance of the "Contact Us" page on the user-facing platform. This includes the title, button text, image, and a descriptive message.

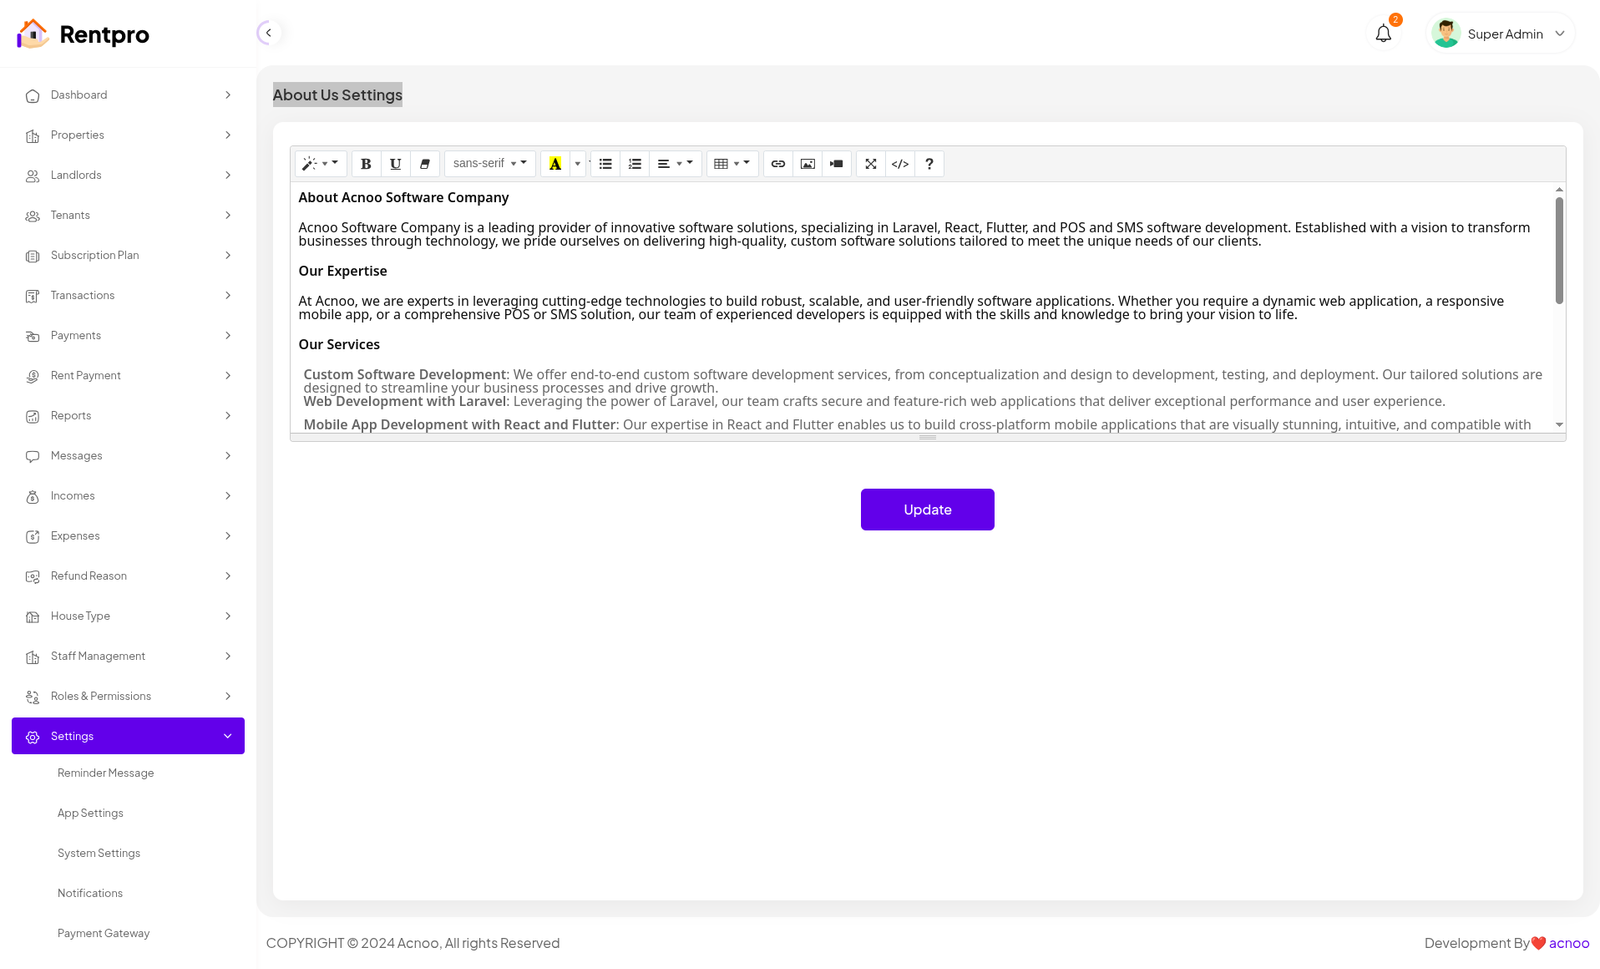
About Us Settings
The "About Us Settings" page in the Rentpro admin panel allows administrators to customize the content of the "About Us" page on the user-facing platform. This is a crucial feature for providing information about the company's mission, expertise, and services.
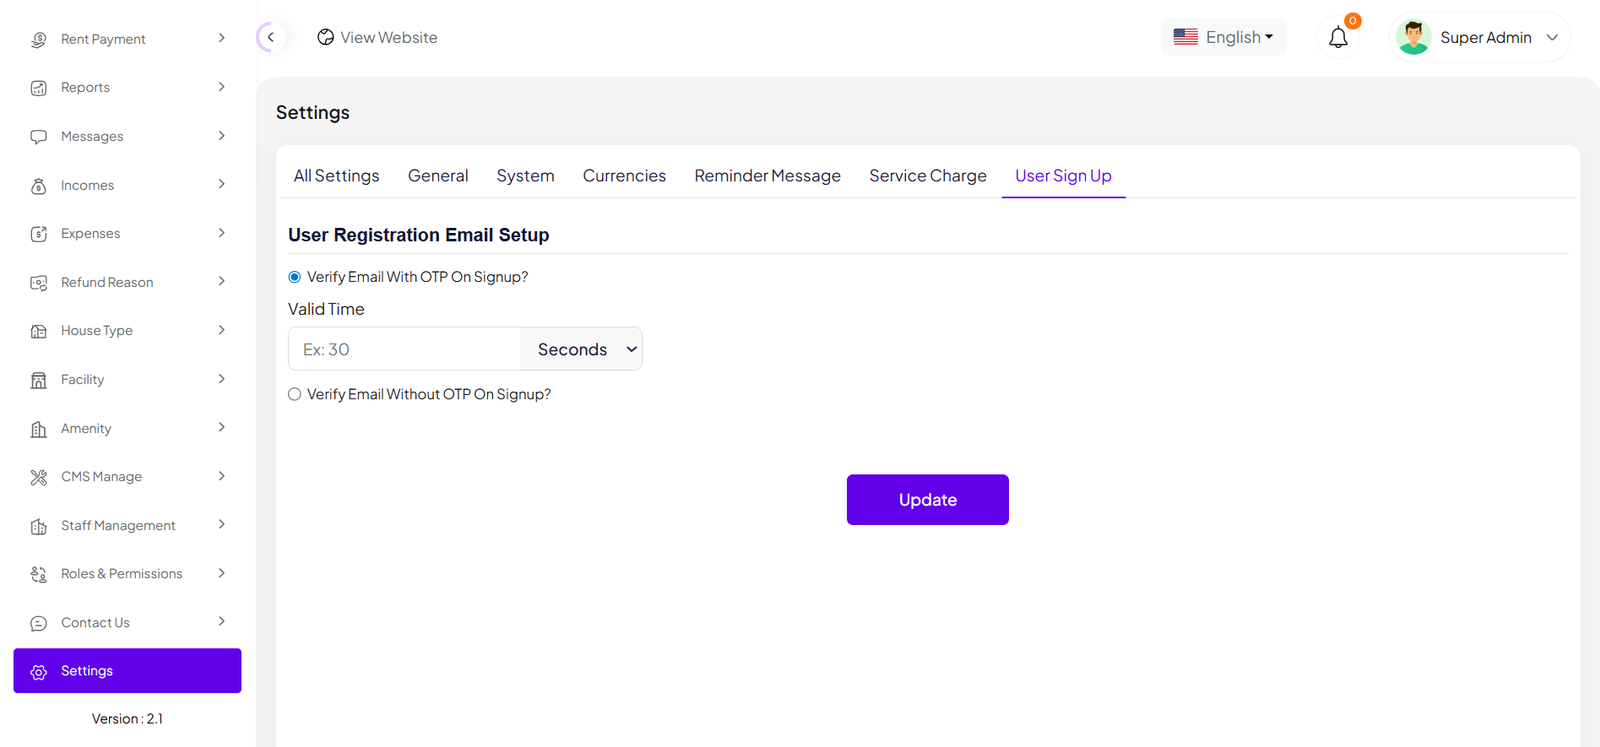
User sign up
Previously, the system required OTP verification for all user sign-ups by default. In this version, we have introduced a dynamic configuration for the sign-up process. Now, users can register either with OTP verification or without it, based on the system settings. Additionally, the admin can define the OTP validity duration (e.g., 50 seconds, 2 minutes, etc.). Users must complete the OTP verification within this specified time.
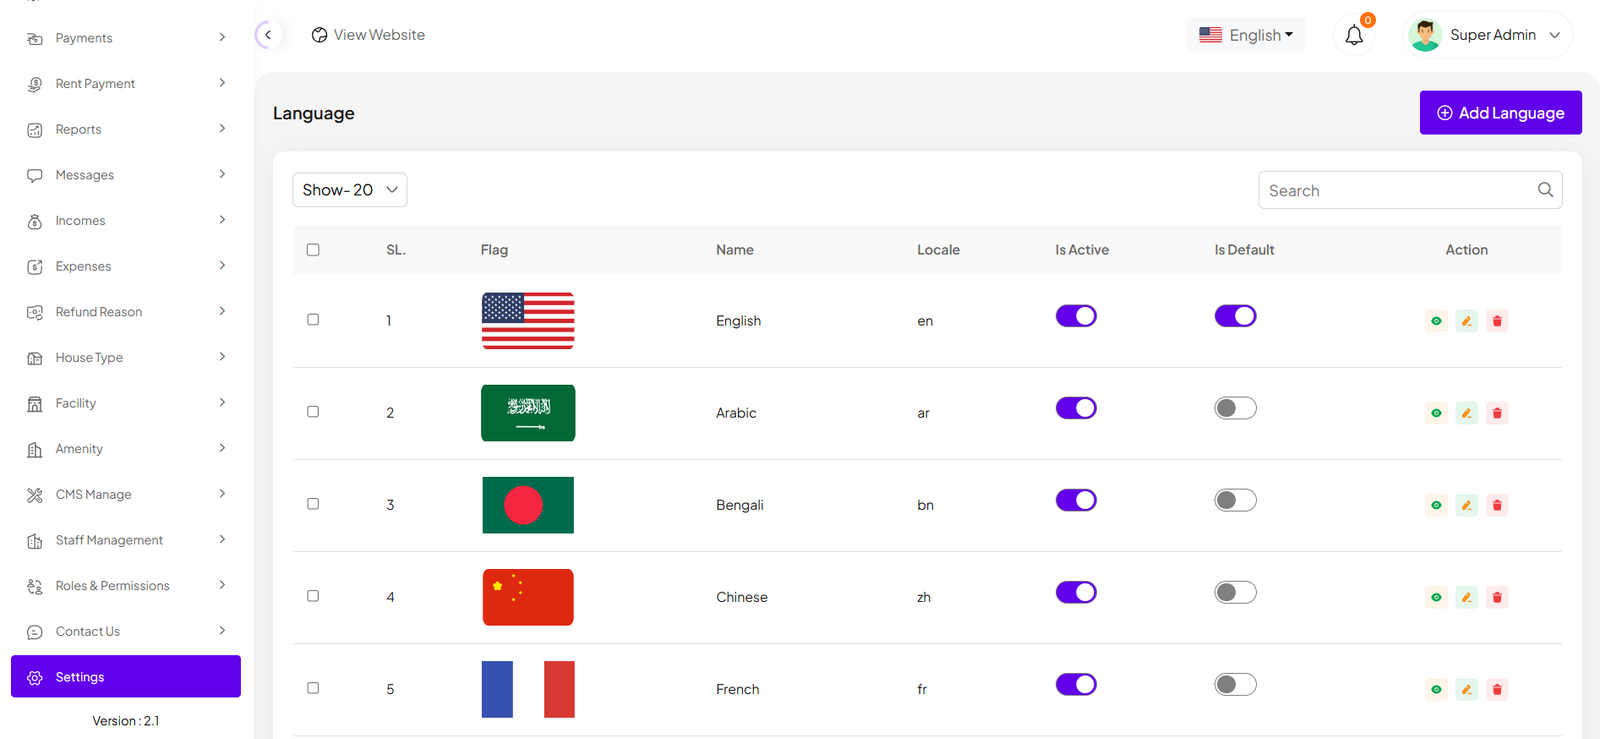
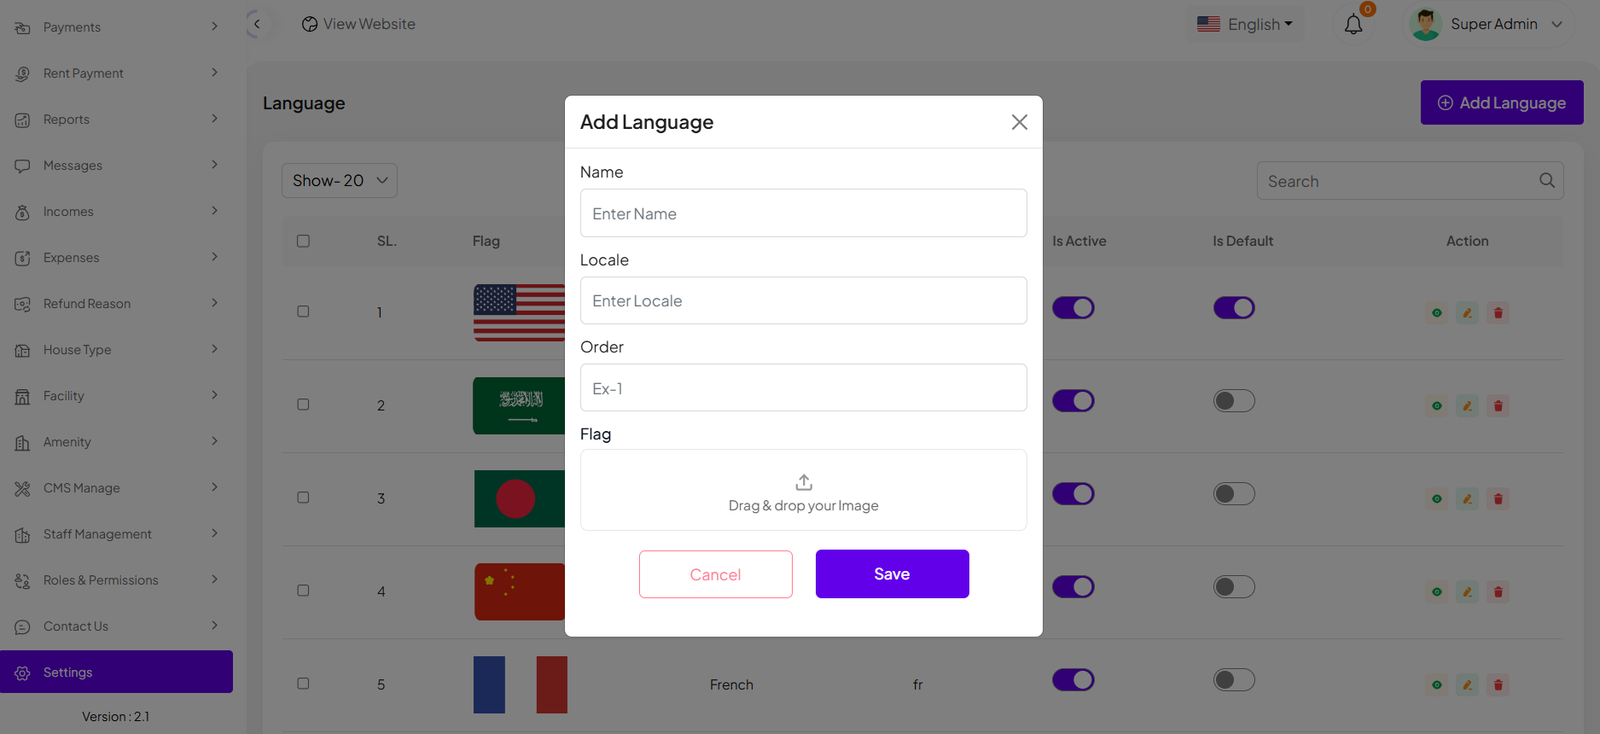
Language
The Language module allows users to manage system languages efficiently. From this section, users can add new languages by providing the required fields. Users can also edit existing languages to update their information or delete them when no longer needed. Additionally, the module supports multi-delete functionality, allowing users to remove multiple languages at once for faster management. A built-in filter and search option is also available to quickly find specific languages.
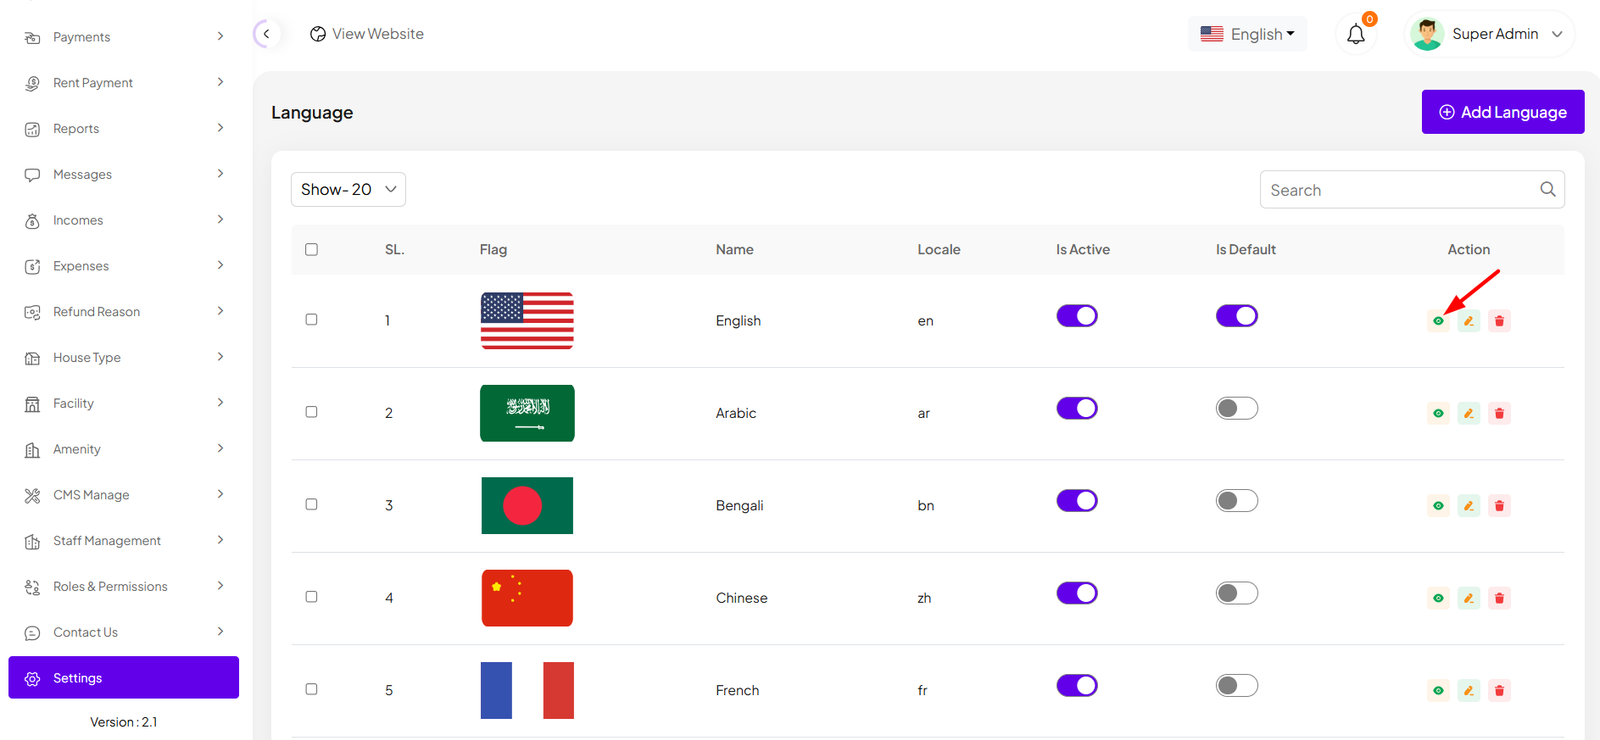
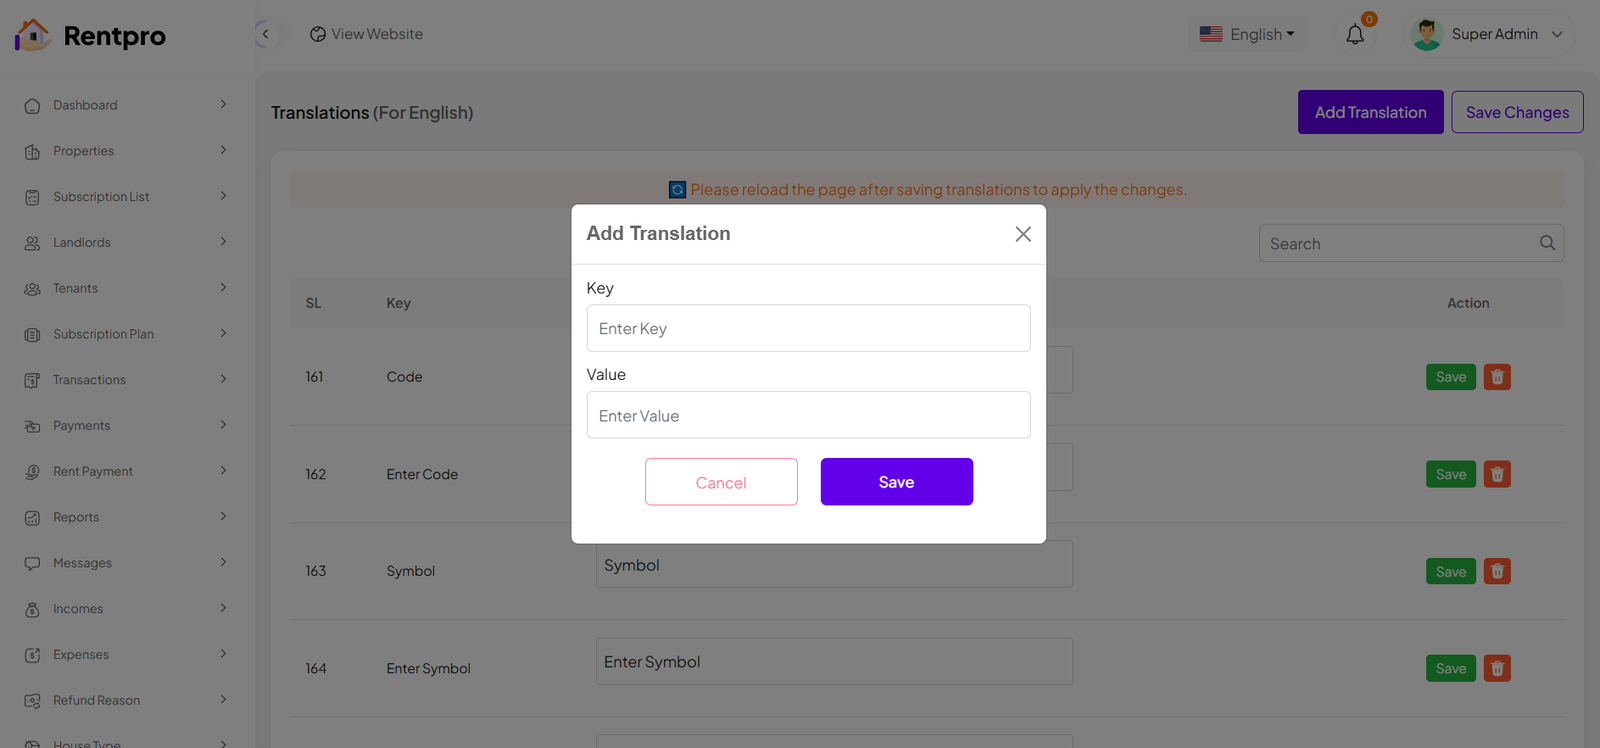
Dynamic Language Text
After clicking the eye icon, you will be redirected to the translation list of the selected language within the project. Here, you can view all the existing translation keys and their corresponding values used throughout the system. You can also add new translations based on your selected language. The key should always be written in English, while the value should be entered in your target language (for example, Bangla). Once you add or update any translation, perform a hard reload of the application. The previously untranslated strings will then be displayed in the selected language based on your defined values.
Contuct Us
The "Contact Us" page in the Rentpro admin panel provides a live chat interface for administrators to communicate with landlords. This feature facilitates direct communication and support.

Mail Configuration / SMTP Setup
Cpanel
To create and configure an SMTP email account using cPanel, follow below steps:
Step 1: Log in to cPanel
Step 2: Create an Email Account
1. In cPanel, go to "Email Accounts".
2. Click “Create”.
3. Fill in:
a. Username: e.g., info, test, or hr
b. Domain: Select the correct domain (if multiple are available)
c. Password: Set a strong password or use the generator
4. Click Create.
📌 This creates an email like test@yourdomain.com
Step 3: Get SMTP Settings
Once the email is created:
1. Go to "Email Accounts" again.
2. Find your new email and click “Connect Devices”.
3. You’ll see the SMTP settings under the Mail Client Manual Settings section like below image:
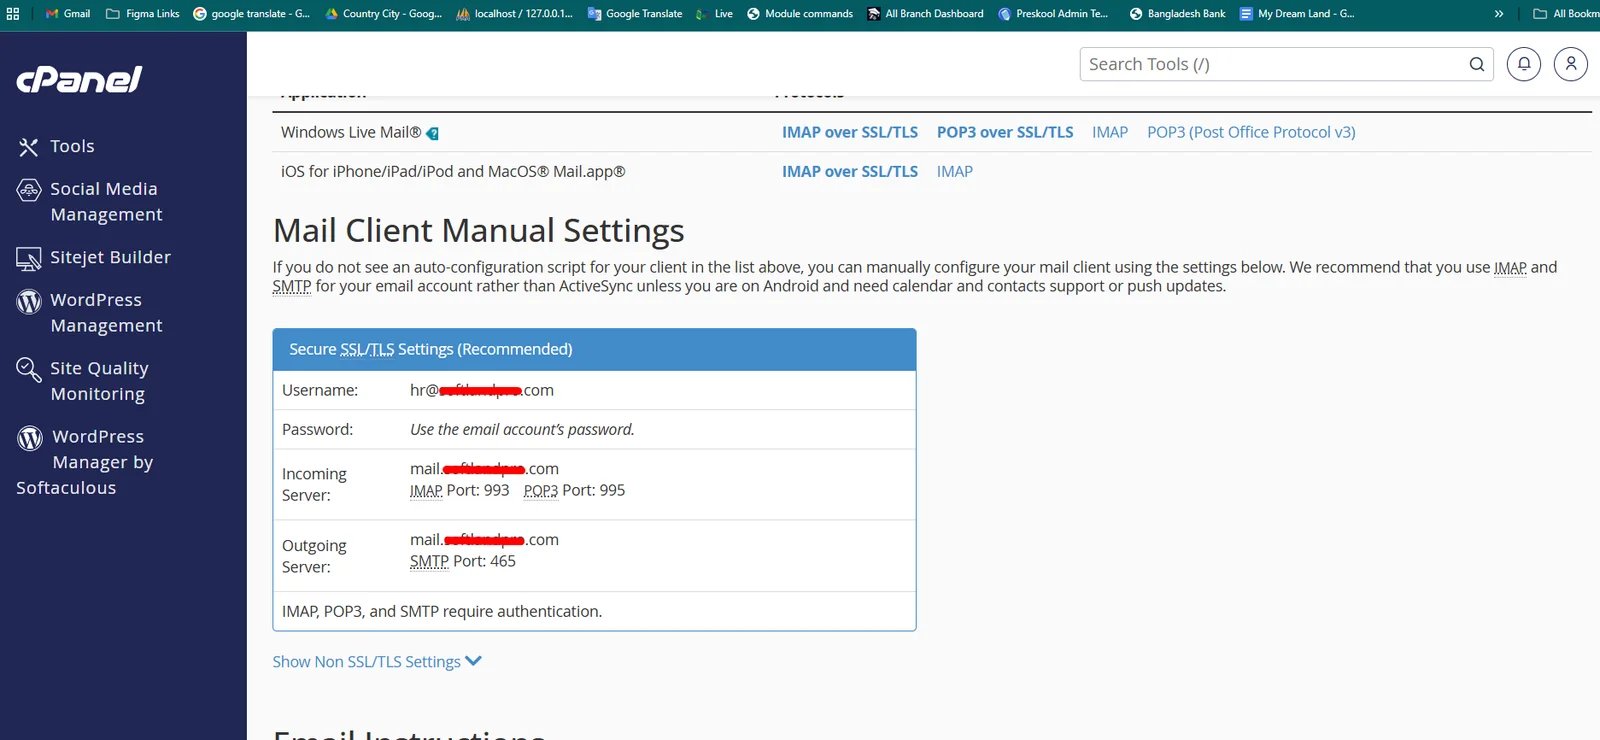
Example:
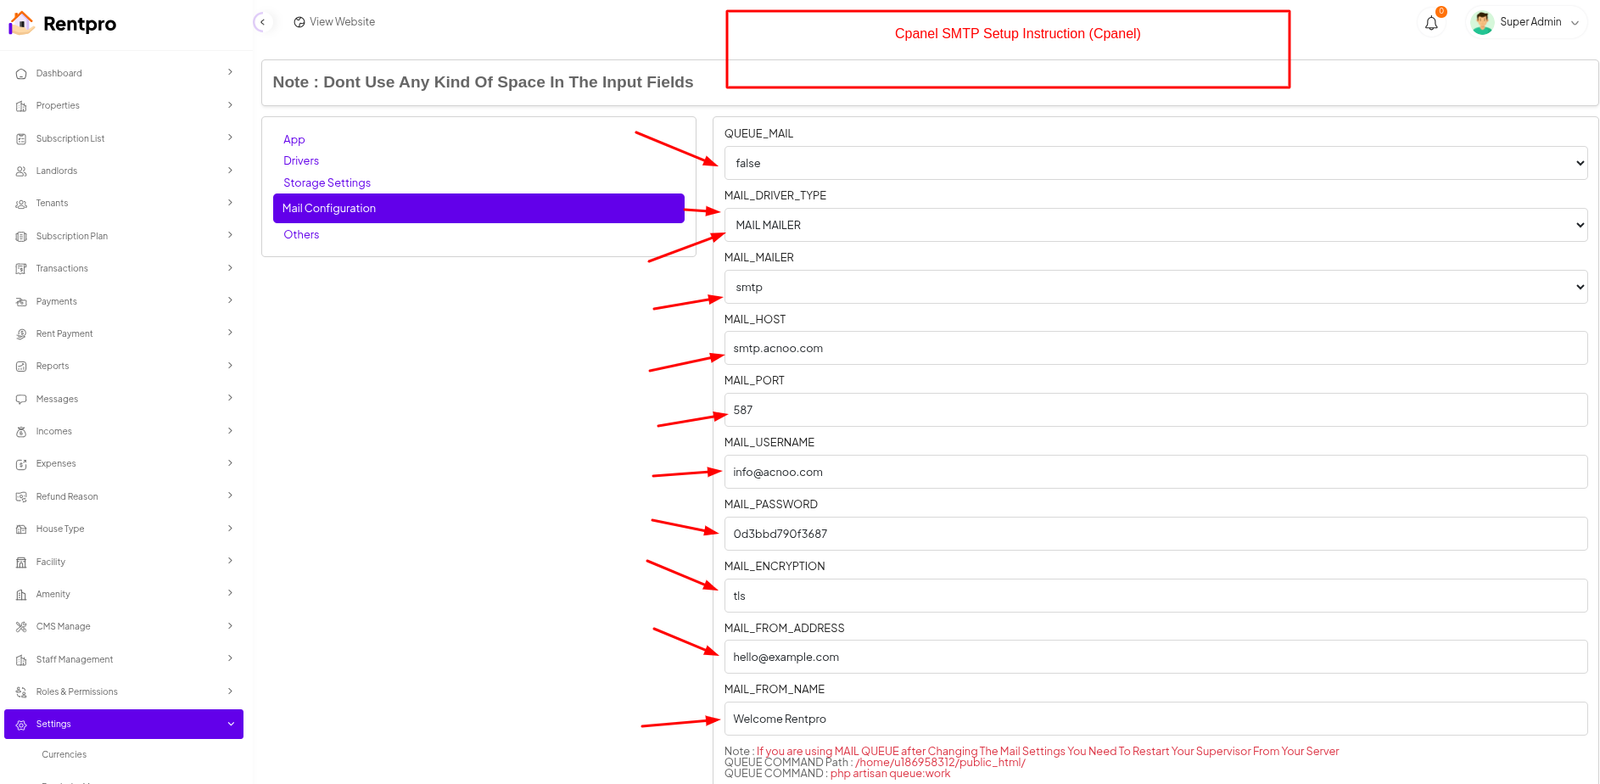
| Input | Value |
|---|---|
| QUEUE_MAIL | Select true / false, (If you select true, you need to run the following command: php artisan queue:work on server) |
| MAIL_DRIVER_TYPE | Select MAIL MAILER / MAIL DRIVER |
| MAIL_DRIVER |
Use sendmail if your server has a local mail server installed (like Postfix
or Exim).
Use smtp when sending emails through an external mail service (like Gmail, Mailgun, or your hosting provider's SMTP server). |
| MAIL_HOST | mail.yourdomain.com |
| MAIL_PORT | 587 |
| MAIL_USERNAME | test@yourdomain.com |
| MAIL_PASSWORD | The one you set |
| MAIL_ENCRYPTION | tls |
| MAIL_FROM_ADDRESS | yourmail@gmail.com |
| MAIL_FROM_NAME | Your project/app name |
Set the values to System Settings → Mail Configuration
If you want to know more details please follow their, Official documentation. Here is also a youtube video link for reference.
Hostinger Panel
To create and configure an SMTP email account using hostinger, follow below steps:
Step 1: Log In to Hostinger hPanel https://hpanel.hostinger.com
Step 2: Create an Email Account
1. Go to Emails from the top menu.
2. Select your domain name.
3. Click "Create New Email Account".
4. Fill in:
a. Email address (e.g., info, test, or hr)
b. Password
5. Click "Create".
📌 This creates an email like test@yourdomain.com
Step 3: Get SMTP Settings
1. After creating the email, go back to the Email Accounts section.
2. Find your email and click “Connect App & Devices” or “Set Up Devices”.
3. Look for the Manual Configuration or SMTP Settings.
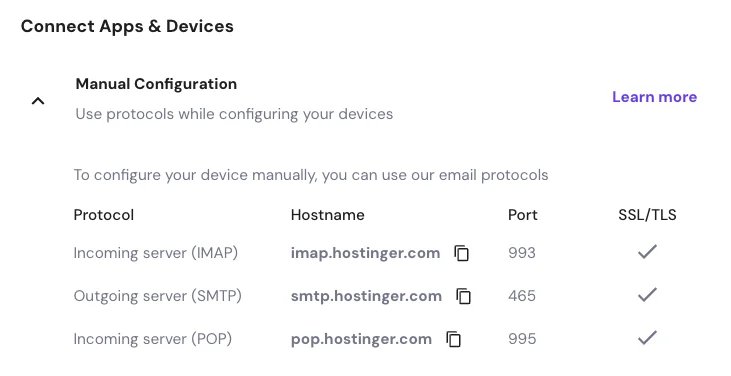
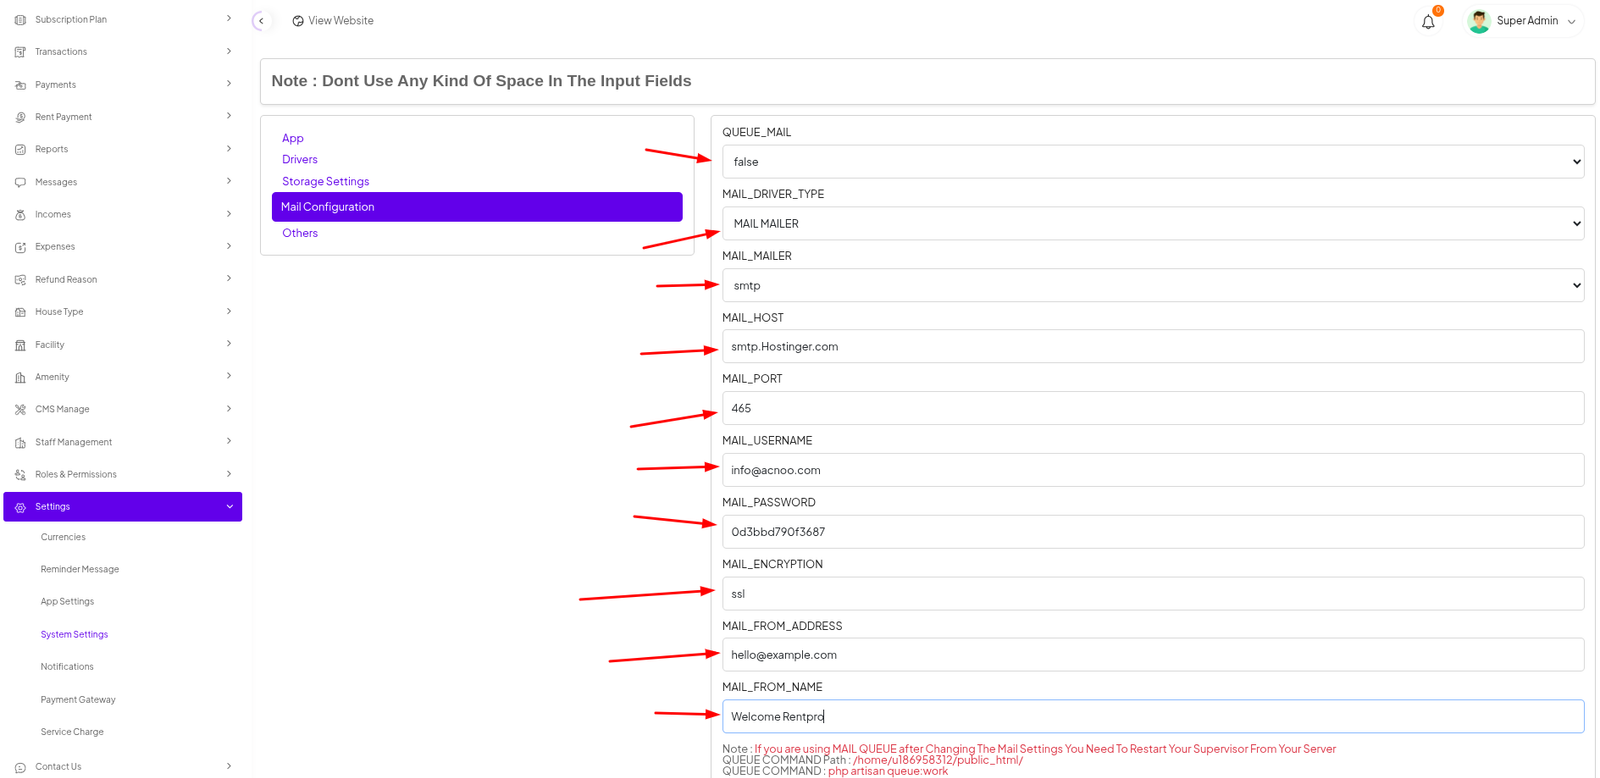
Example:
| Input | Value |
|---|---|
| QUEUE_MAIL | Select true / false, (If you select true, you need to run the following command: php artisan queue:work on server) |
| MAIL_DRIVER_TYPE | Select MAIL MAILER / MAIL DRIVER |
| MAIL_DRIVER |
Use sendmail if your server has a local mail server installed (like Postfix
or Exim).
Use smtp when sending emails through an external mail service (like Gmail, Mailgun, or your hosting provider's SMTP server). |
| MAIL_HOST | mail.yourdomain.com |
| MAIL_PORT | 465 |
| MAIL_USERNAME | test@yourdomain.com |
| MAIL_PASSWORD | The one you set |
| MAIL_ENCRYPTION | ssl |
| MAIL_FROM_ADDRESS | yourmail@gmail.com |
| MAIL_FROM_NAME | Your project/app name |
Set the values to System Settings → Mail Configuration
If you want to know more details please follow their, Official documentation. Here is also a youtube video link for reference.
Note: Please note that if you change QUEUE_MAIL from false to true,
you need to run the following command: php artisan queue:work.
Remember: The command path should be:
/home/u186958312/domains/yourdomain.com/public_html. Make sure you're in the
correct path.
Note: If you're not familiar with running the command, there's
another option. Simply visit yourdomain.com/queue-work and it will be executed
automatically.
Note: If you select QUEUE_MAIL as true but do not run the command or visit the URL, email functionality will not work properly.
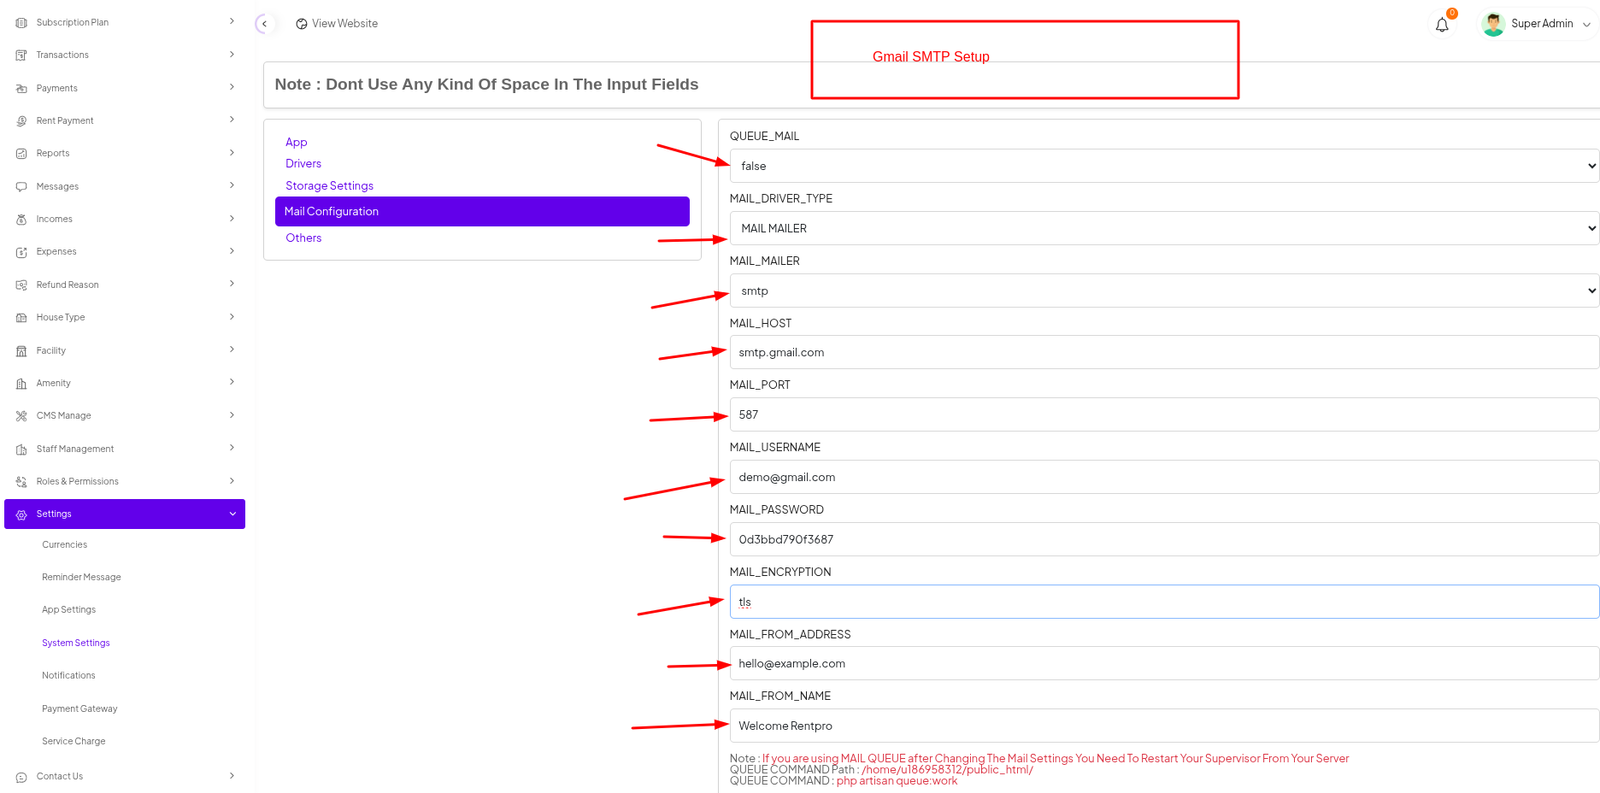
Gmail
To create and configure an SMTP email account using Gmail, follow below steps:
Step 1: Enable 2-Step Verification on Google Account
1. Go to https://myaccount.google.com
2. Click "Security" from the left menu.
3. Under "Signing in to Google", enable 2-Step Verification.
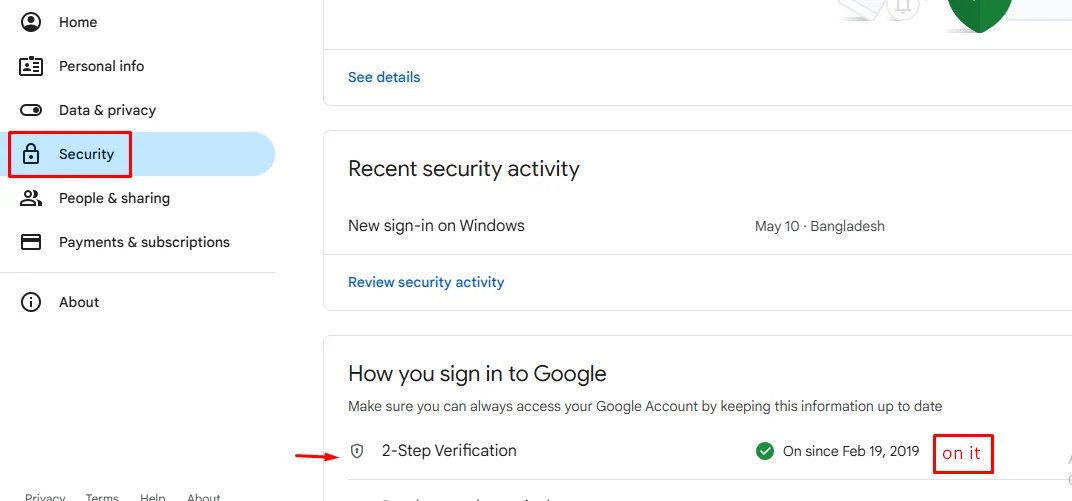
4. Complete the setup with your phone or other options.
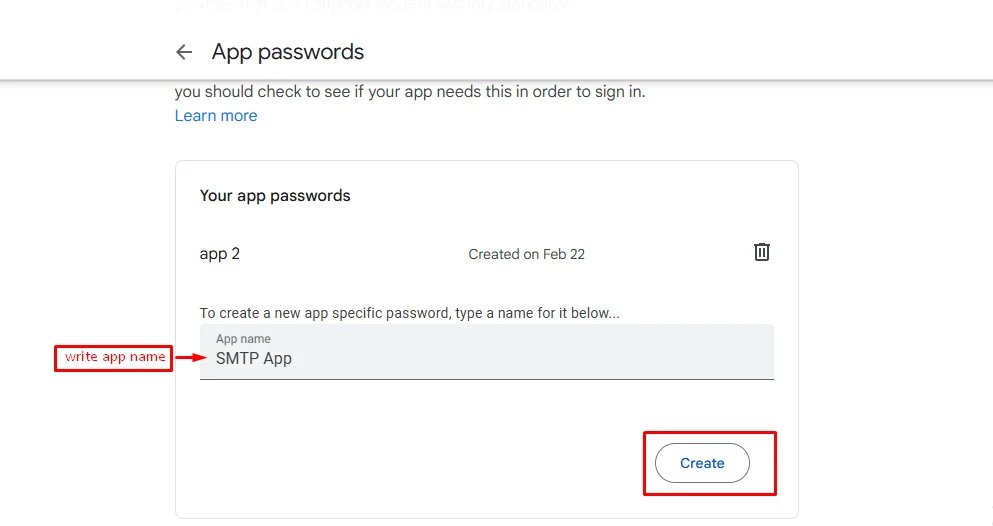
Step 2: Create an App Password
After enabling 2-Step Verification:
1. Visit: https://myaccount.google.com/apppasswords
2. Sign in if asked.
3. Under "Select the app", choose Other (Custom name).
4. Give it a name like "SMTP App" and click Generate.
5. Google will show you a 16-character password — copy it. You’ll use this as your SMTP password
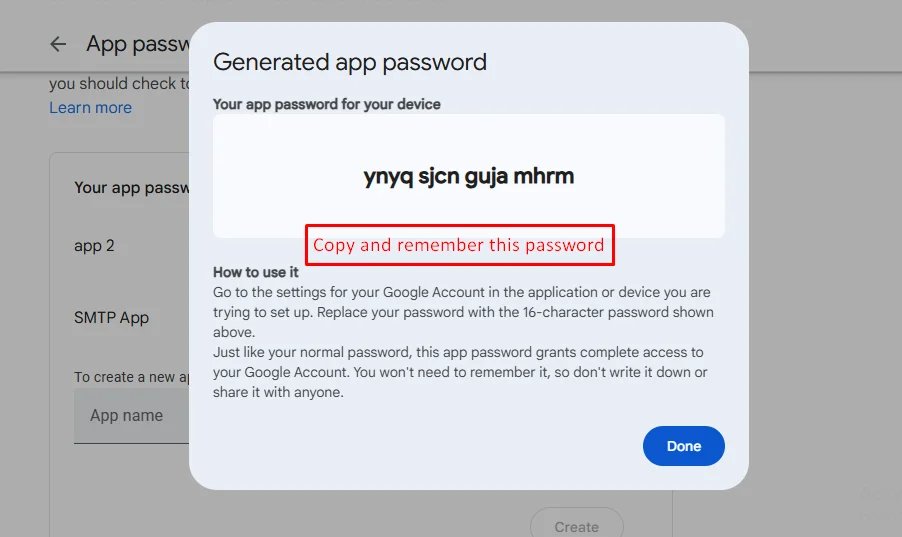
Example:
| Input | Value |
|---|---|
| QUEUE_MAIL | Select true / false, (If you select true, you need to run the following command: php artisan queue:work on server) |
| MAIL_DRIVER_TYPE | Select MAIL MAILER / MAIL DRIVER |
| MAIL_DRIVER | smtp |
| MAIL_HOST | smtp.gmail.com |
| MAIL_PORT | 587 |
| MAIL_USERNAME | your_email@gmail.com |
| MAIL_PASSWORD | your_app_password |
| MAIL_ENCRYPTION | tls |
| MAIL_FROM_ADDRESS | your_email@gmail.com |
| MAIL_FROM_NAME | Your project/app name |
Set the values to System Settings → Mail Configuration
If you want to know more details please follow their, Official documentation. Here is also a youtube video link for reference.
Others
Change Logs
Version: 2.1.0 ( 07 April 2026 )
- Installer updated
- Language migration added.
- Improved and updated the installer module for better reliability
- Web version added in the sidebar.
- Implemented language migration system for smoother localization handling
- Resolved minor bugs and enhanced overall system stability
- Refactored and improved settings page UI/UX design
- Introduced flag support for language and regional configuration
Note: Please replace the following folders:
✔app
✔database
✔public/assets,backend,maan,flags
( Please don't replace the entire public folder; just update assets,backend,maan,flags folders inside it )
✔resources
✔routes
After replacing them, visit yourdomain.com/update to install the new version and
please don't forget to reload hard your browser. Without visiting the URL and reloading
hard, your project will not function correctly, so ensure you complete this step.
Note: If you face any issues with the update, please contact us.
Version: 2.0.0 ( 04 November 2025 )
- Database structure updated
- Added new property category with multi-unit support
- Refined overall design and UI elements
- Introduced property sale management system
- Fixed major bugs and improved stability
- Enhanced key sections such as Rent Invite, Application, and their detail views
- Landing Page added
Note: Please replace the following folders:
✔app
✔database
✔public/assets,backend,maan
✔resources
✔routes
After replacing them, visit yourdomain.com/update to install the new version and
please don't forget to reload hard your browser. Without visiting the URL and reloading
hard, your project will not function correctly, so ensure you complete this step.
Note: If you face any issues with the update, please contact us.
App Change Logs:
- Property Sale Support: Added sale amount field and updated pricing step for property sales
- New Property Categories: Introduced new categories including Plot, Bungalow, Land, Commercial, House, Apartment, and Unit/Flat with dedicated models and UI fields
- Facility Amenity Module: Added facility amenity repository, UI views, and API integration for landlords to manage facilities
- Tenant Preferences: Added Family option in TenantPreferenceSelector widget
- UI Enhancements: Added MultiChoiceSelector with emptyItemsBuilder, image clear button in ImagePreviewCard, category grid view, DefaultTabControllerWrapper, custom dropdown widget, and MyKad ID validation
- Mortgage Calculator: Updated with yearly breakdown, gauge chart, and calculation fixes
- Ratings and Reviews: Added rating overview and reviews functionality
- Additional Fields: Added late fee field, unit selection dropdown, and property favorite API
- API Integrations: Added amenities and facilities APIs with updated models
- Property Models: Extensive updates to property models for apartment, house, commercial, land, bungalow, plot, and unit/flat types, including dynamic fields and validations
Version: 1.1.0 ( 19 October 2025 )
- Database Update
- Property minimum rental period update
- Refund and Invitation dropdown property list api update
- Phone number filed update
- Some design issue fixed
Note: Please replace the following folders:
✔app
✔database
✔resources
✔routes
✔public/assets
After replacing them, visit yourdomain.com/update to install the new version and
please don't forget to reload hard your browser. Without visiting the URL and reloading
hard, your project will not function correctly, so ensure you complete this step.
Note: If you face any issues with the update, please contact us.
Version: 1.0.0 ( 02 September 2025 )
Initial Release
Note: If you face any issues with the update, please contact us.
Dashboard
The Dashboard is the main landing page of the Rentpro admin panel, providing a comprehensive overview of the platform's key activities, financial status, and pending tasks at a glance.

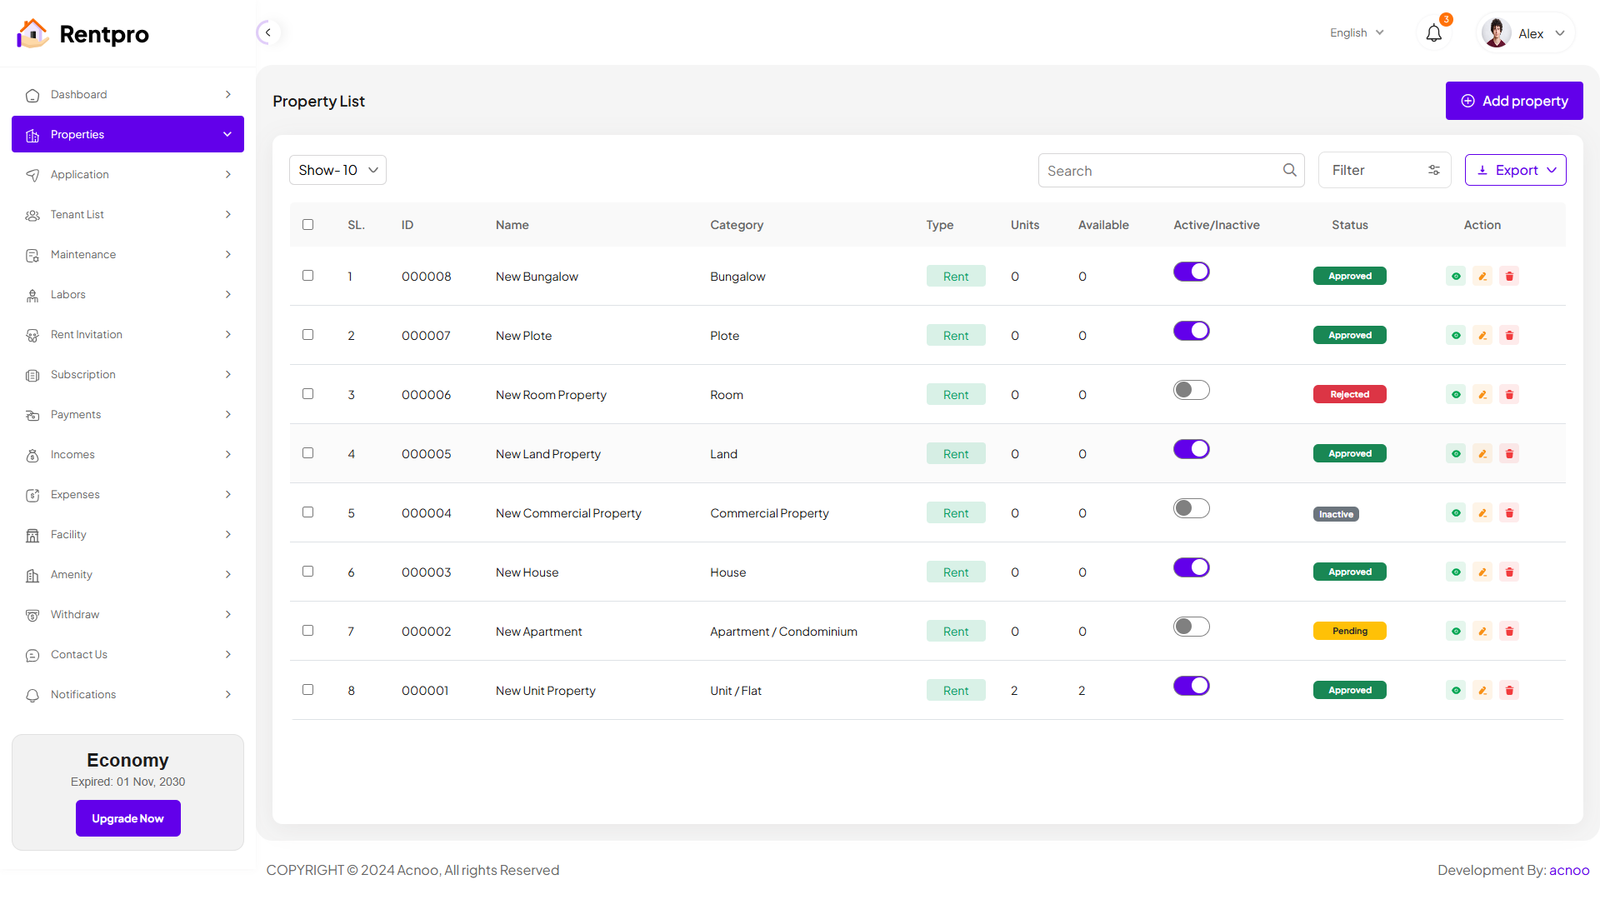
Property List
The "Properties" page in the Rentpro admin panel provides a centralized view and management interface for all properties listed on the platform. This page allows administrators to monitor property details, status, and perform administrative actions. By clicking the "View" button, you can see the details of each property. You can also create a new property by clicking the "Add Property" button. Below, we'll describe how you can create a new property.
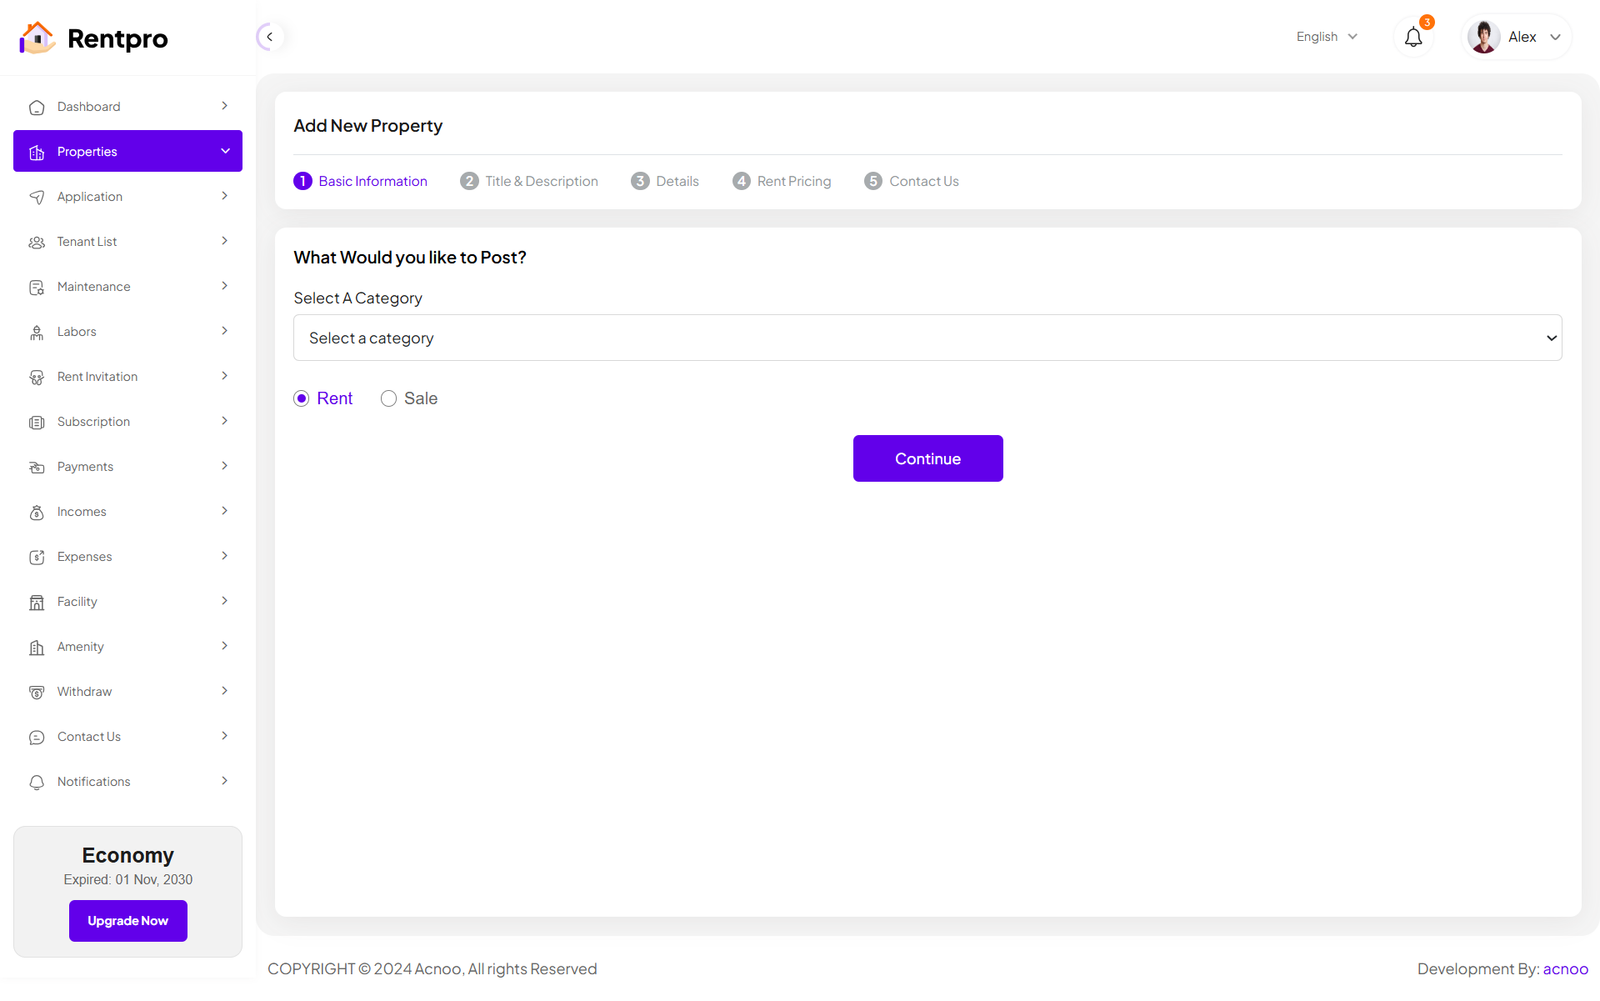
Add New Property
By clicking on the "Add property" button, you can create a new property. You will need to fill in the necessary fields. Here is the screenshot of the Create Property page. In the first screenshot, the input fields will change according to the selected category. Specifically, if you select the "Unit/Flat" category, the input fields will change significantly. Additionally, in the first screenshot, there is a "Type" field with options "Rent" and "Sale." Selecting either of these will only affect the Rent Pricing section, while the rest of the fields will remain unchanged.
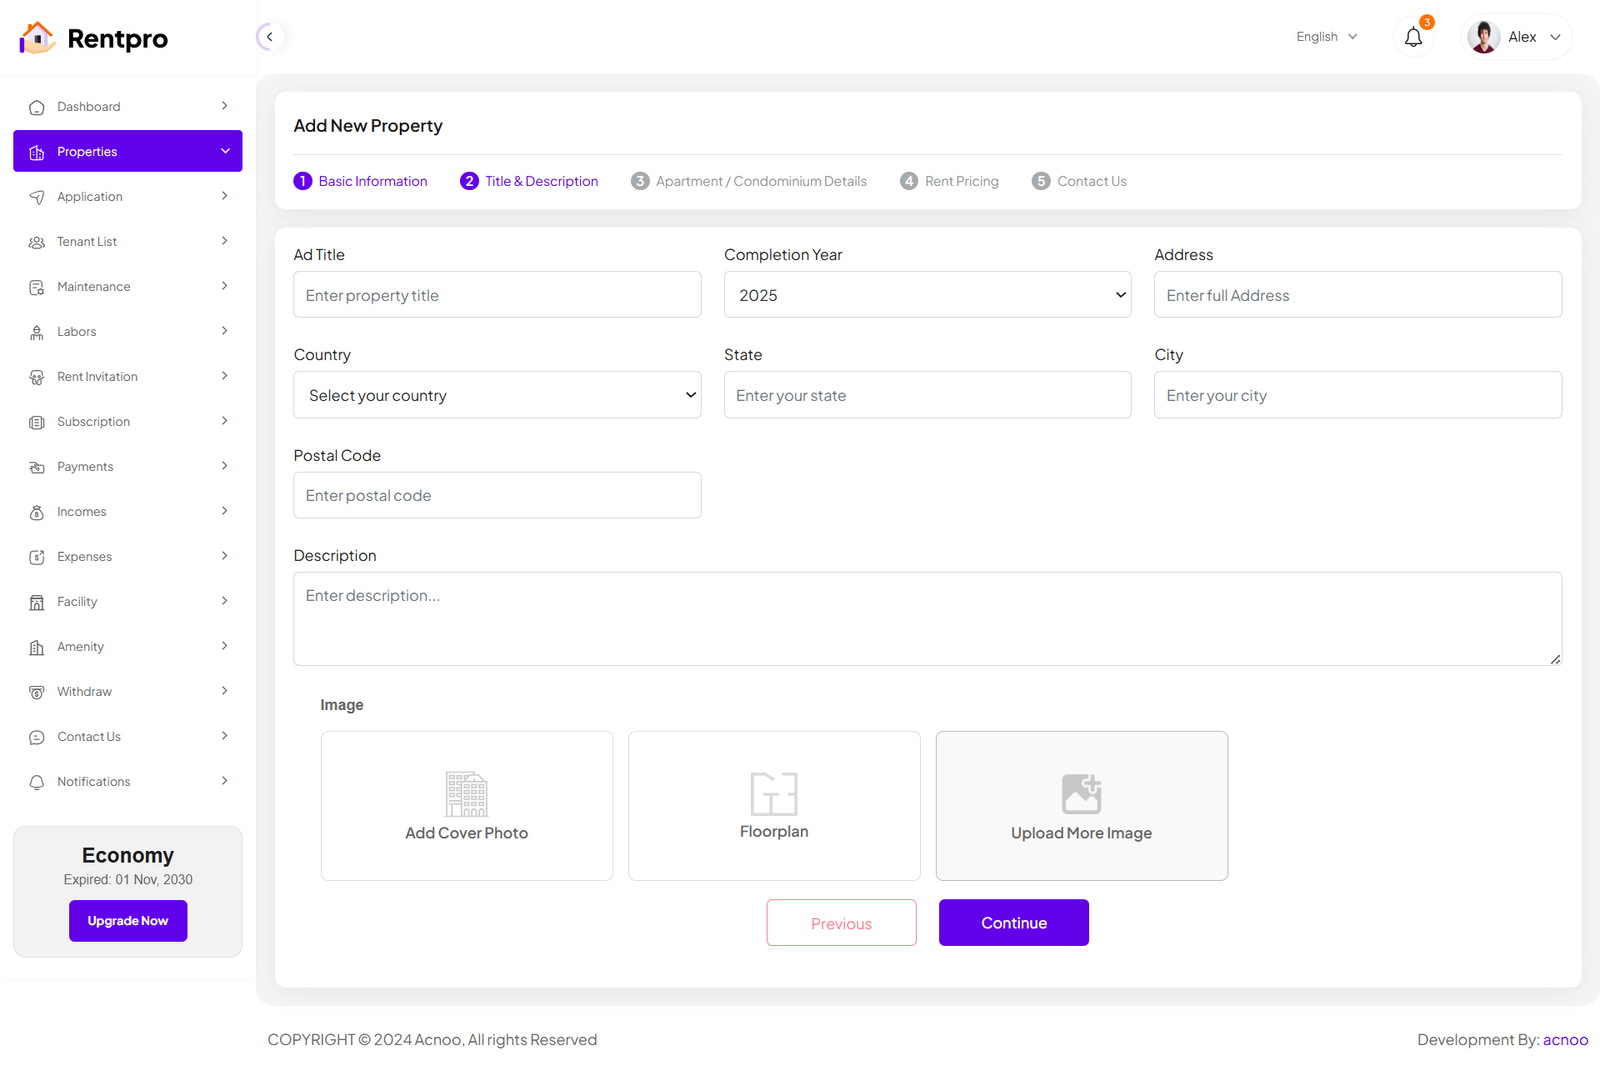


When the category is "Unit/Flat," the input fields on the Details and Pricing pages will update accordingly. Additionally, you can click the green "Add More" button to add more units as needed, according to your preference.
View Property
There are two types of Property View pages. The view for properties with the category set as "Unit/Flat" is slightly different. In the screenshot below, I am showing both pages for comparison.

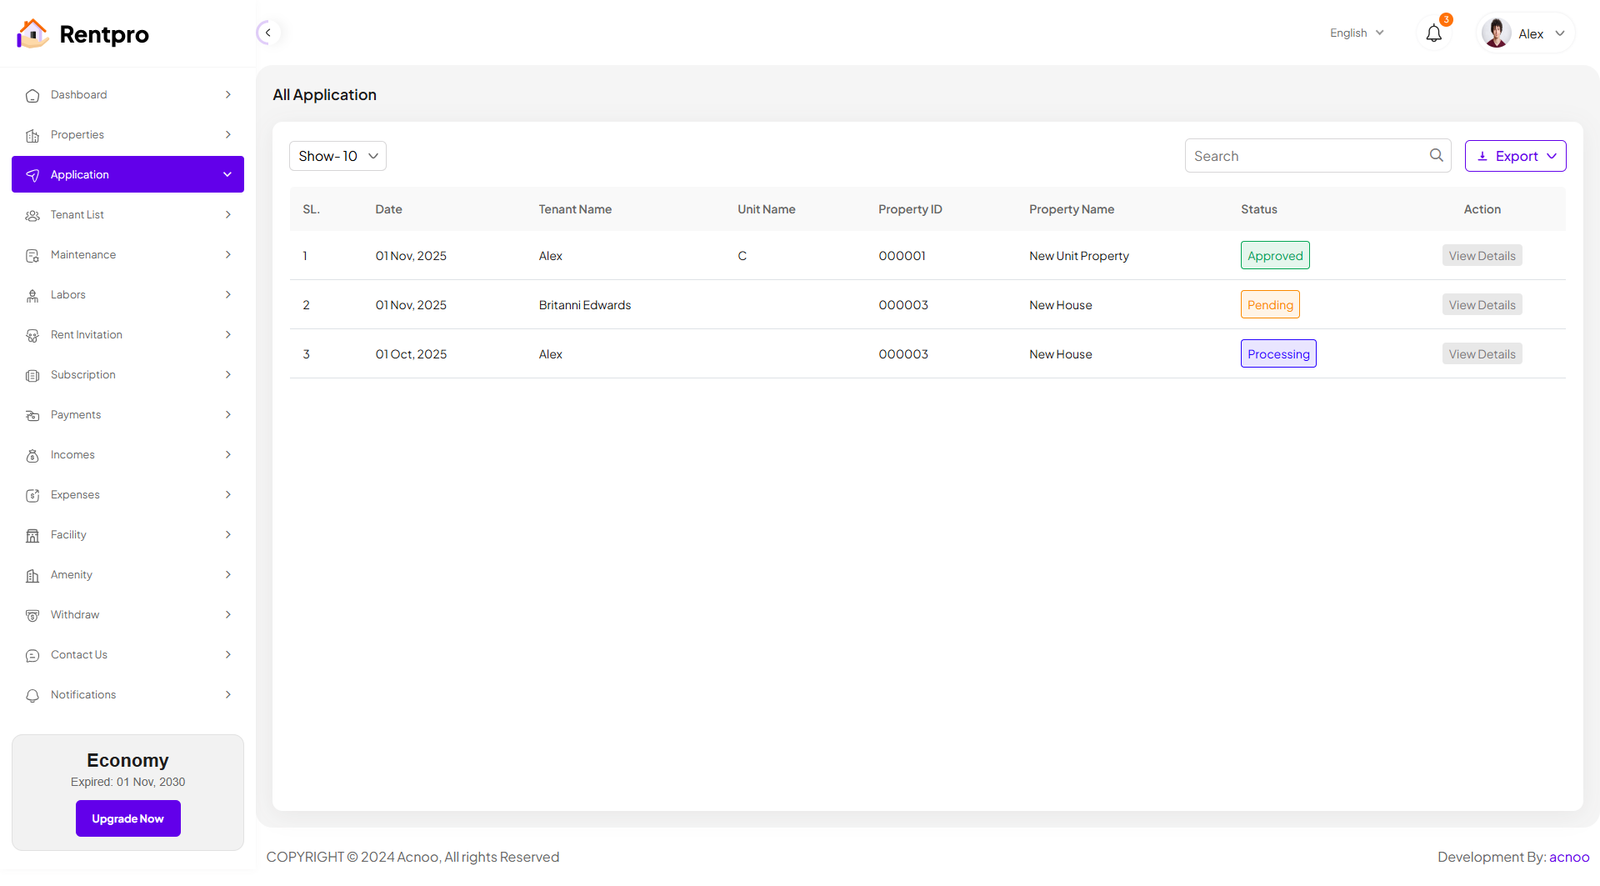
Application
This page provides an administrative view of all submitted rental applications, allowing a landlord or property manager to track the status of each application.
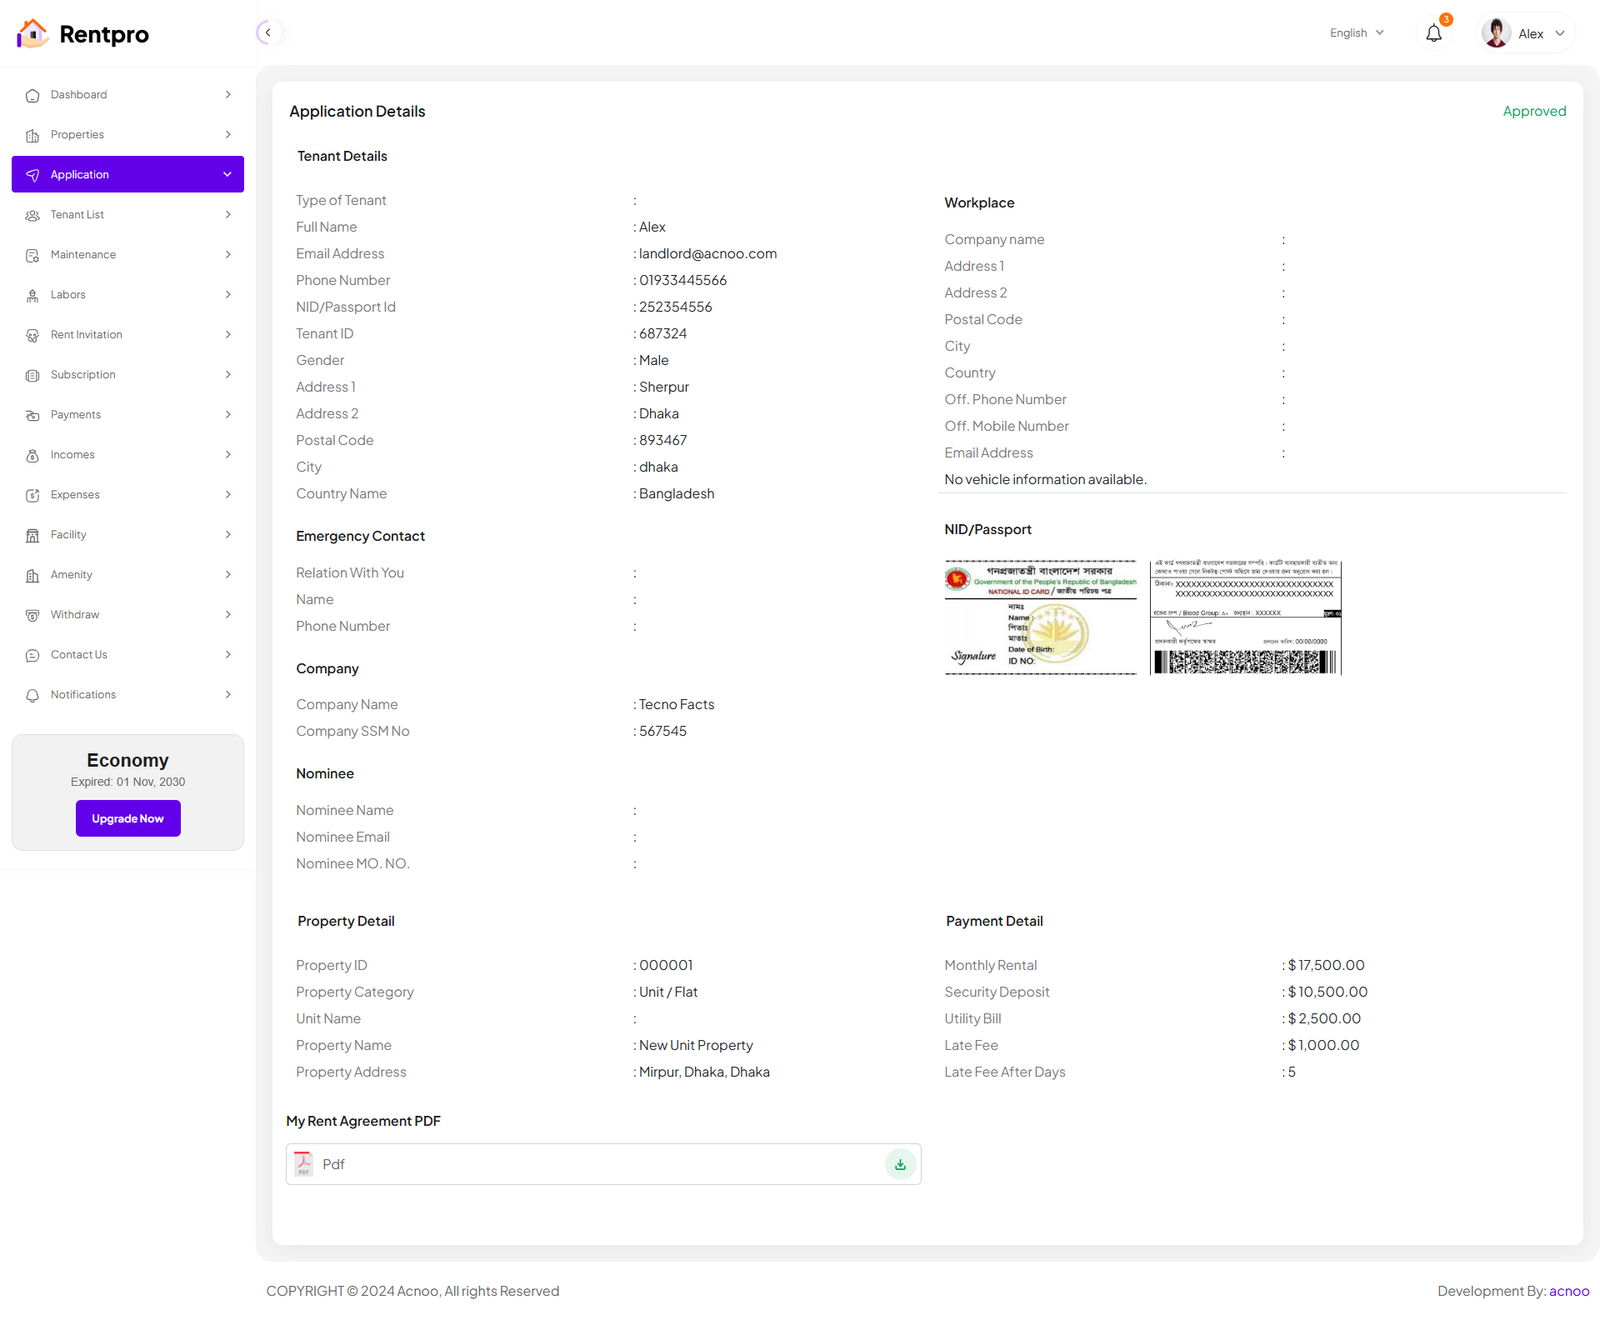
Application Details
This page serves as a central hub for landlords or property managers to review a prospective tenant's complete application, verify submitted information, and manage the application's lifecycle from submission to a final decision.
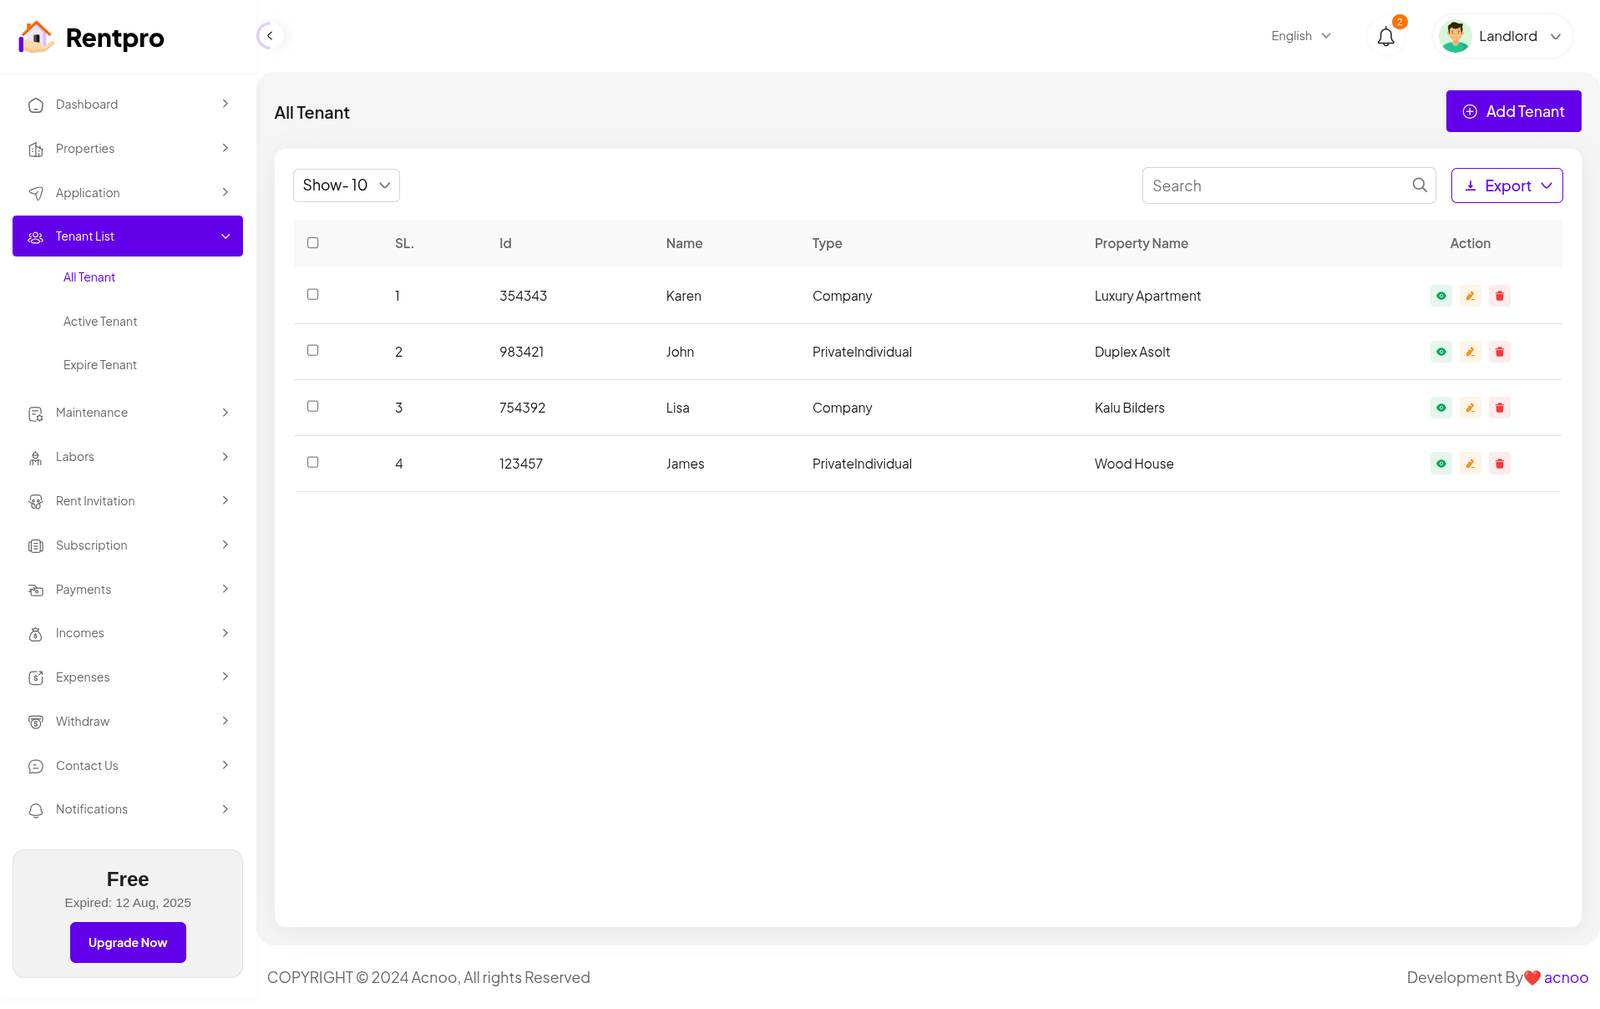
All Tenant
This page provides a centralized list of all tenants associated with the landlord's properties. It serves as a directory for managing tenant information and accessing individual tenant details.
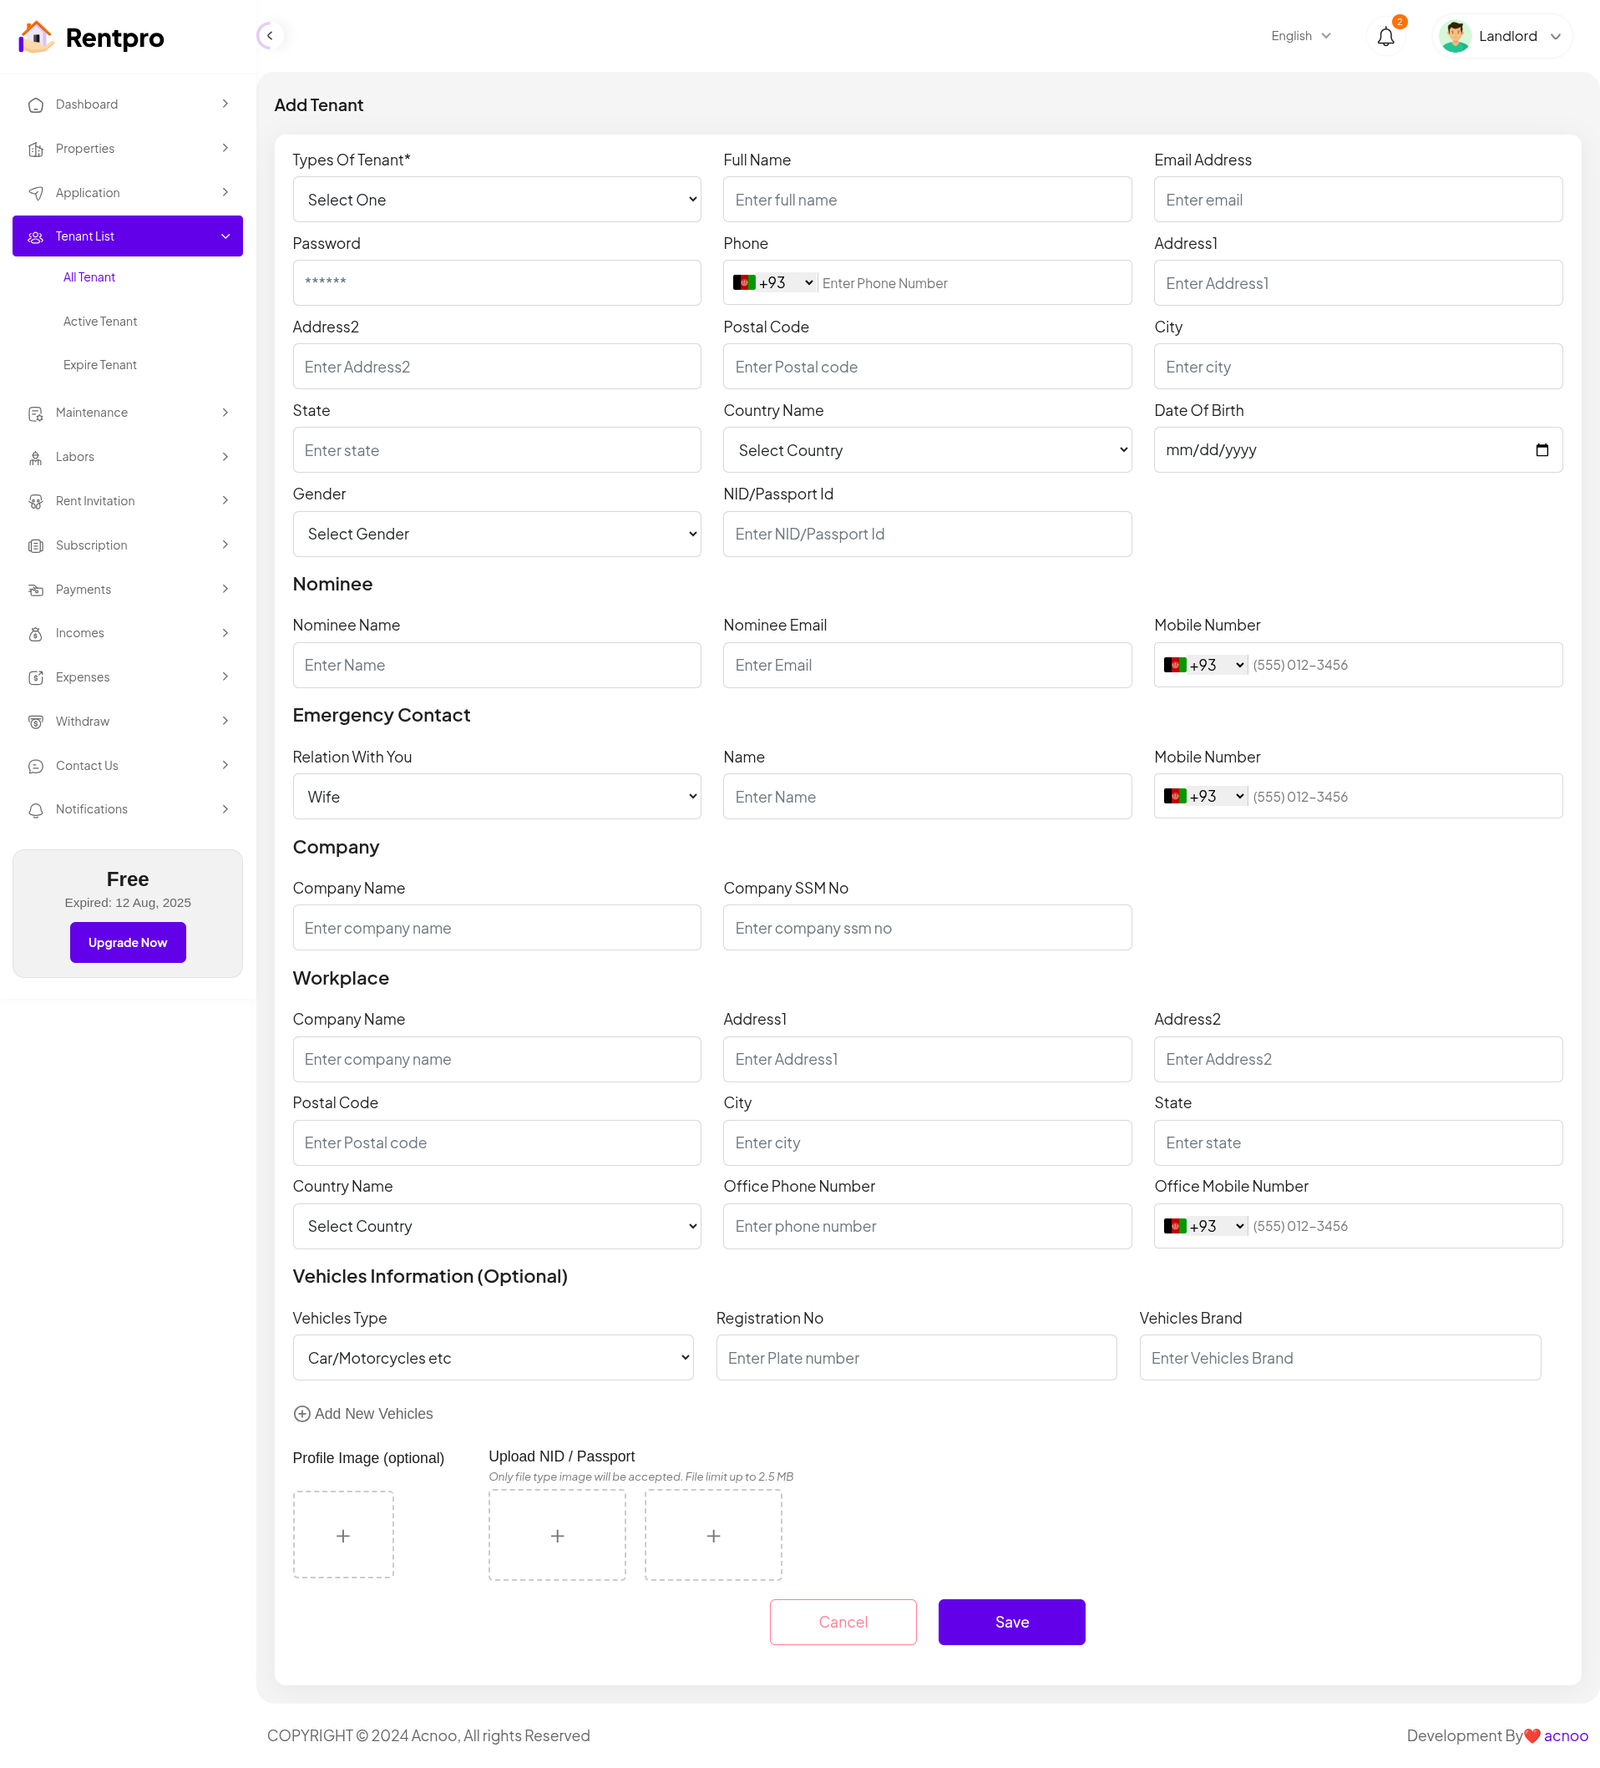
Add Tenant
This page allows a landlord or property manager to manually add a new tenant to the system. This is typically used for tenants who have not gone through the standard online application process.
Active Tenant
The "Active Tenant" page within the Rentpro application provides a streamlined view of all tenants who currently have an active lease. It functions as a core management tool for landlords or property owner.

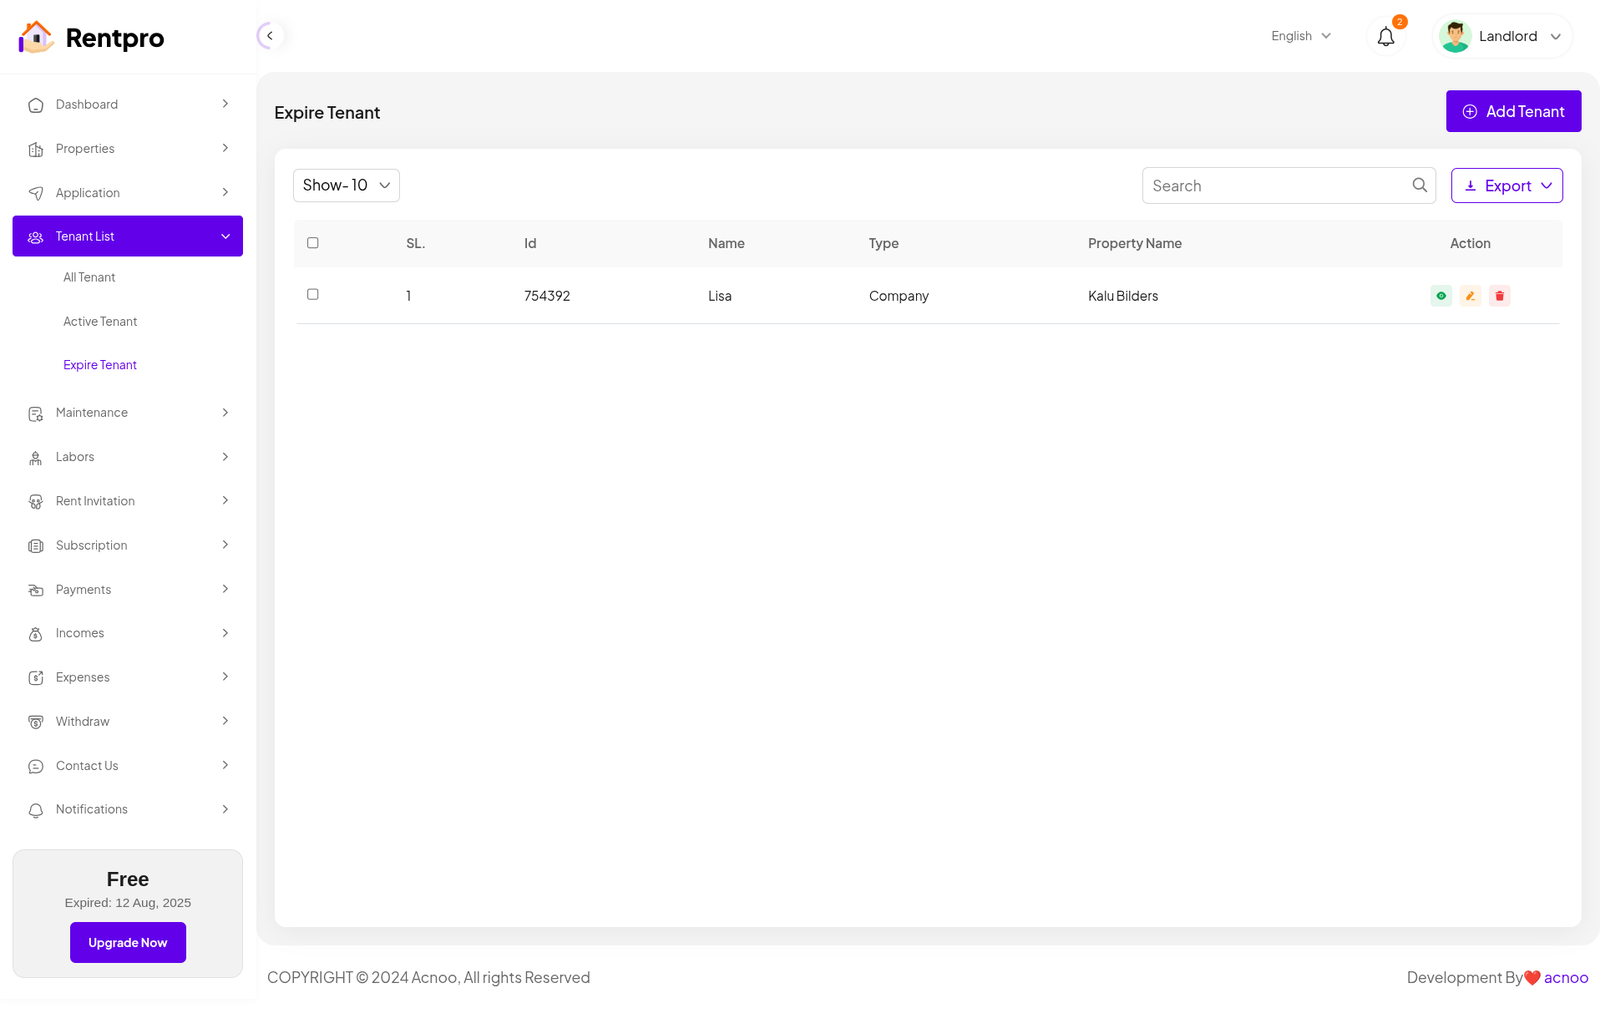
Expired Tenant
The "Expire Tenant" page is a dedicated section within the Rentpro application designed to help landlords or property owner track tenants whose leases have either expired or are nearing their expiration date. This page is essential for proactive lease management and timely renewals.
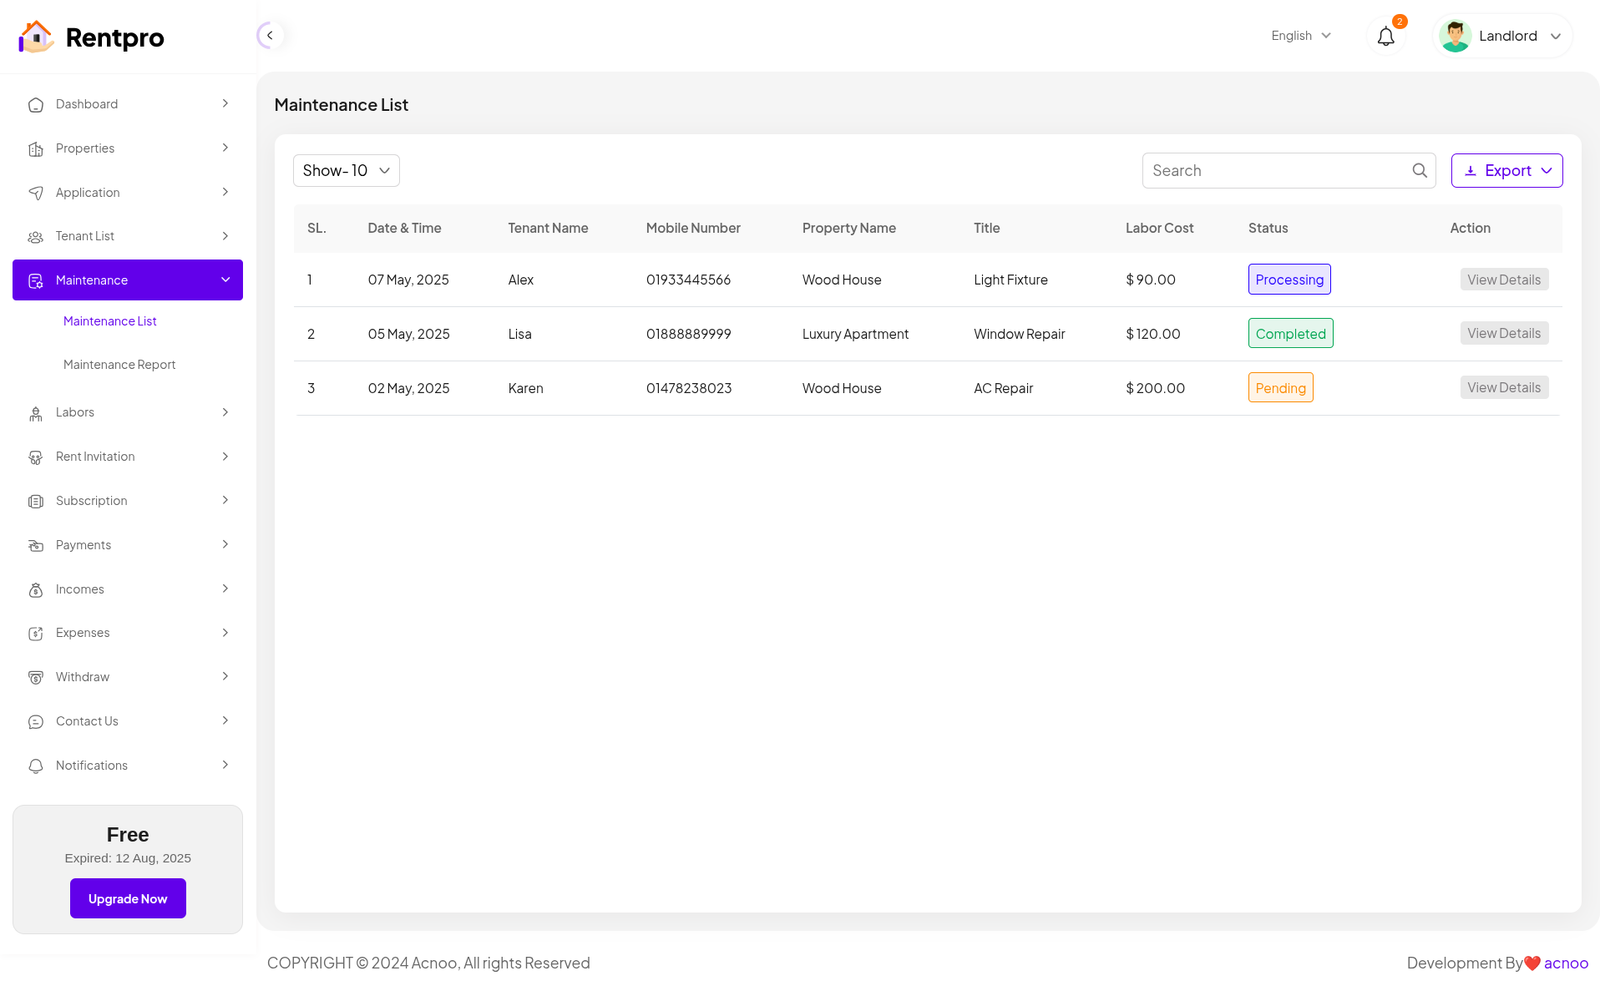
Maintenance List
The "Maintenance List" page provides an administrative overview of all maintenance requests submitted by tenants. It allows landlords to track the status of repairs, view associated costs, and manage each request.
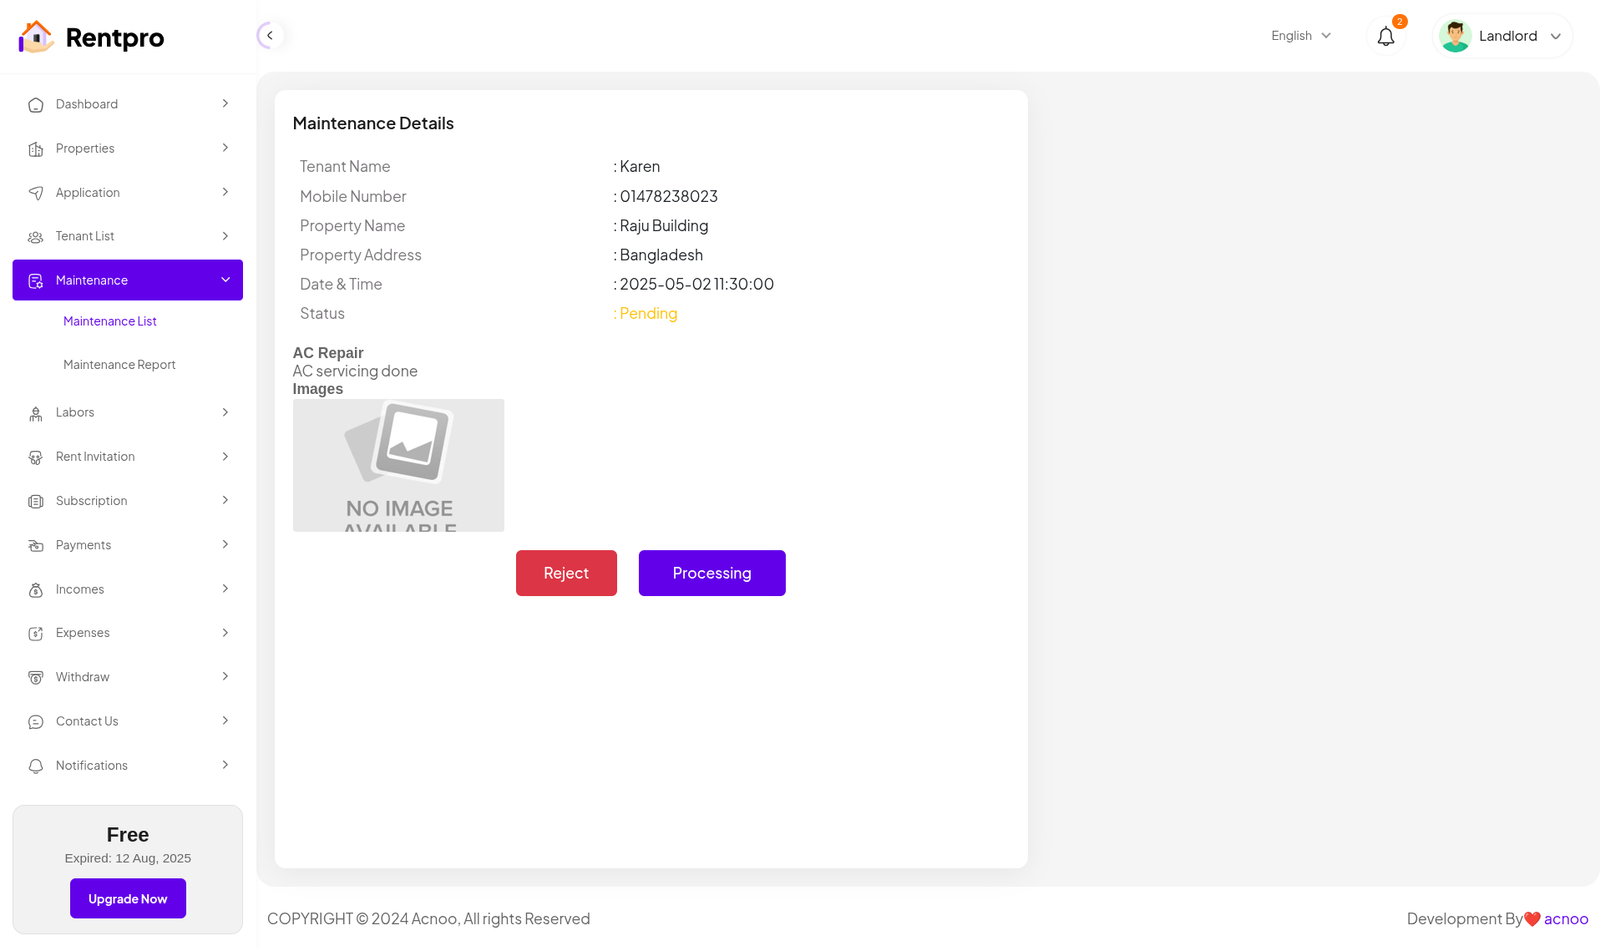
Maintenance Details
The "Maintenance Details" page provides a focused, single-view of a specific maintenance request. It allows a landlord to review all the information submitted by the tenant regarding the issue and manage the status of the repair. This page is accessed by clicking the "View Details" button from the "Maintenance List" page.
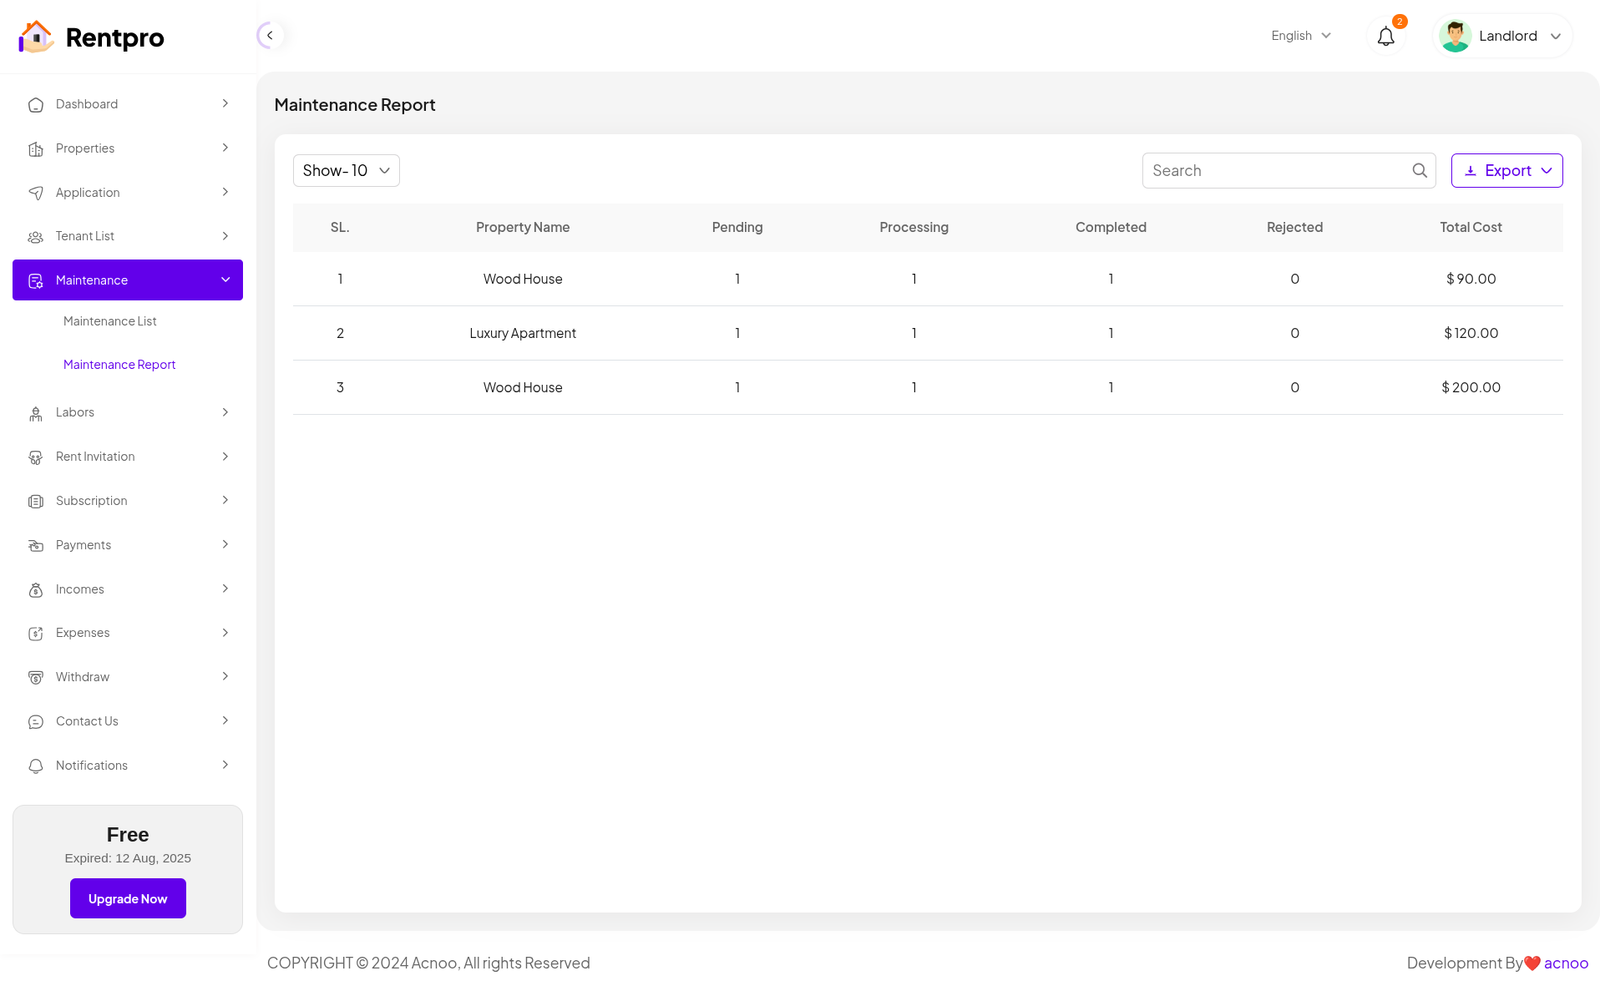
Maintenance Report
The "Maintenance Report" page provides an aggregated summary of maintenance activities, broken down by property. It offers a high-level overview of the status and costs of all maintenance requests.
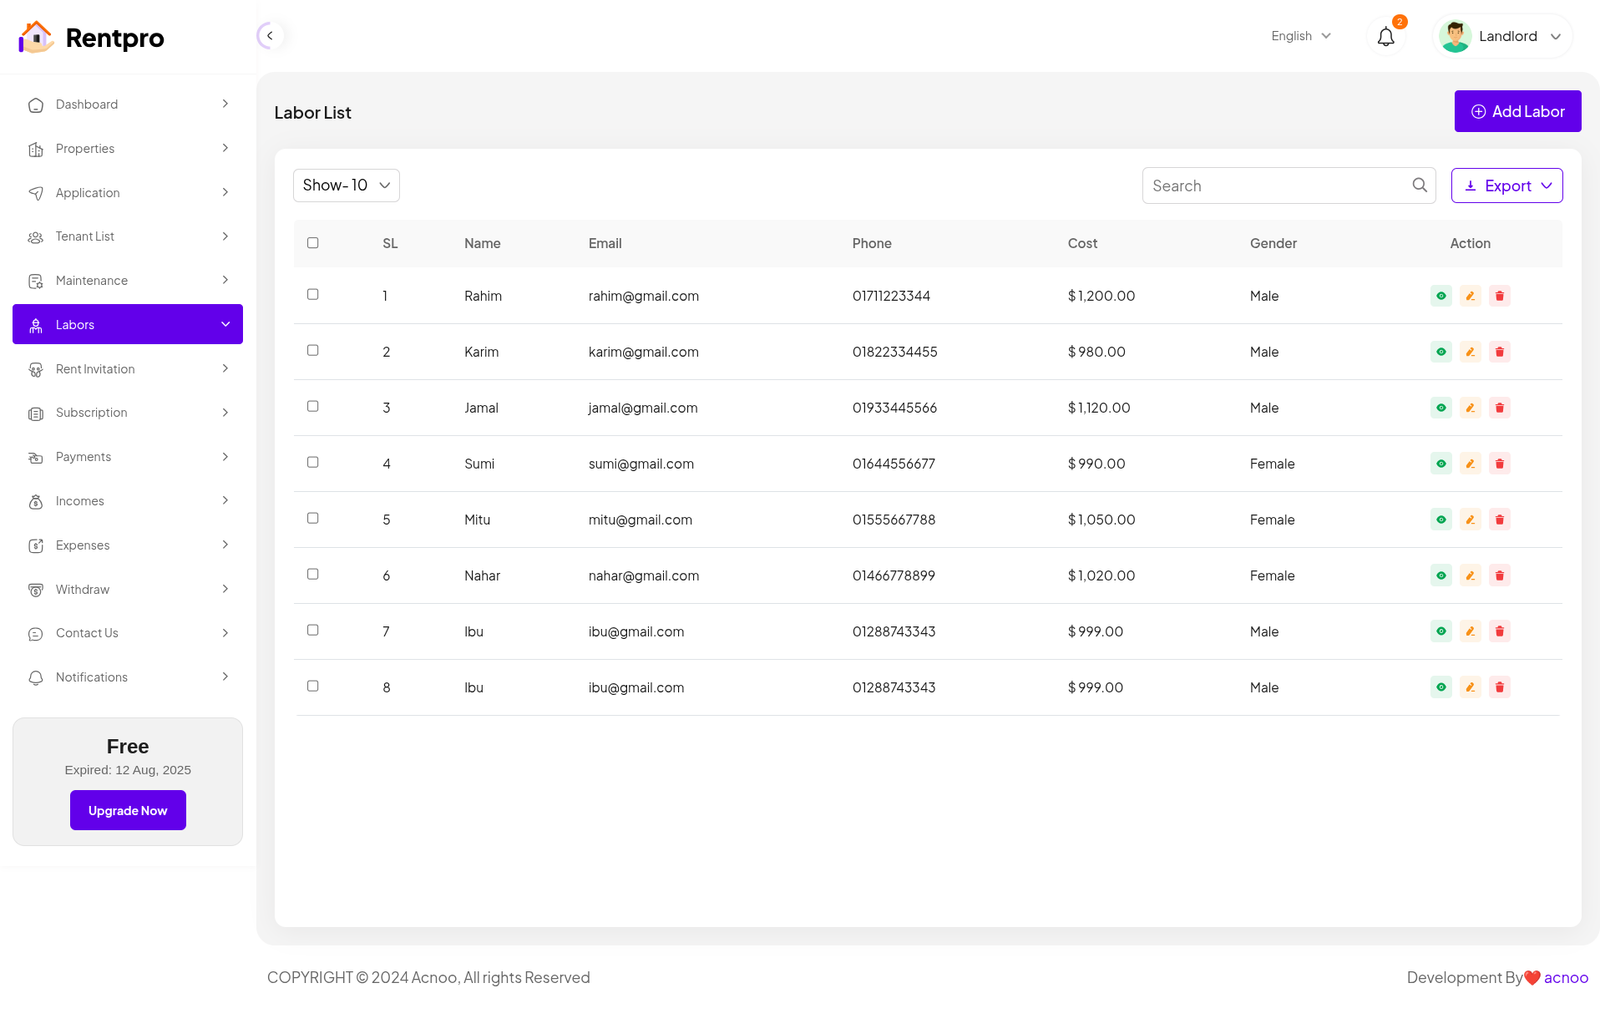
Labor List
The "Labor List" page serves as a directory of all laborers or contractors available for maintenance and repair jobs. It allows a landlord or property manager to manage their contact list of service providers, including their personal information and typical costs.
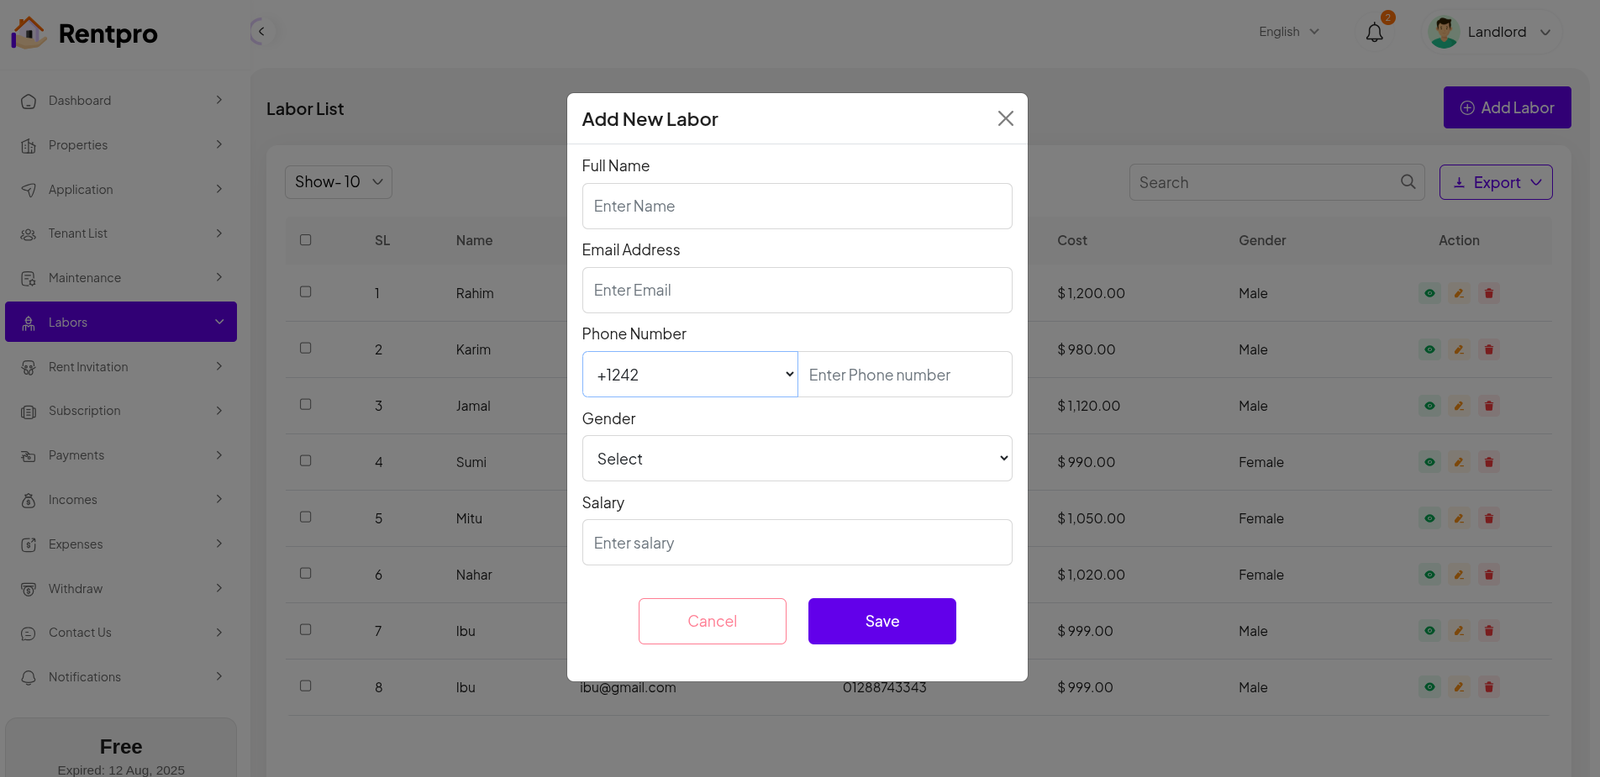
Add Labor
This feature allows a landlord or property manager to add a new laborer or contractor to their directory.
Maintenance Report
The "Maintenance Report" page provides an aggregated summary of maintenance activities, broken down by property. It offers a high-level overview of the status and costs of all maintenance requests.
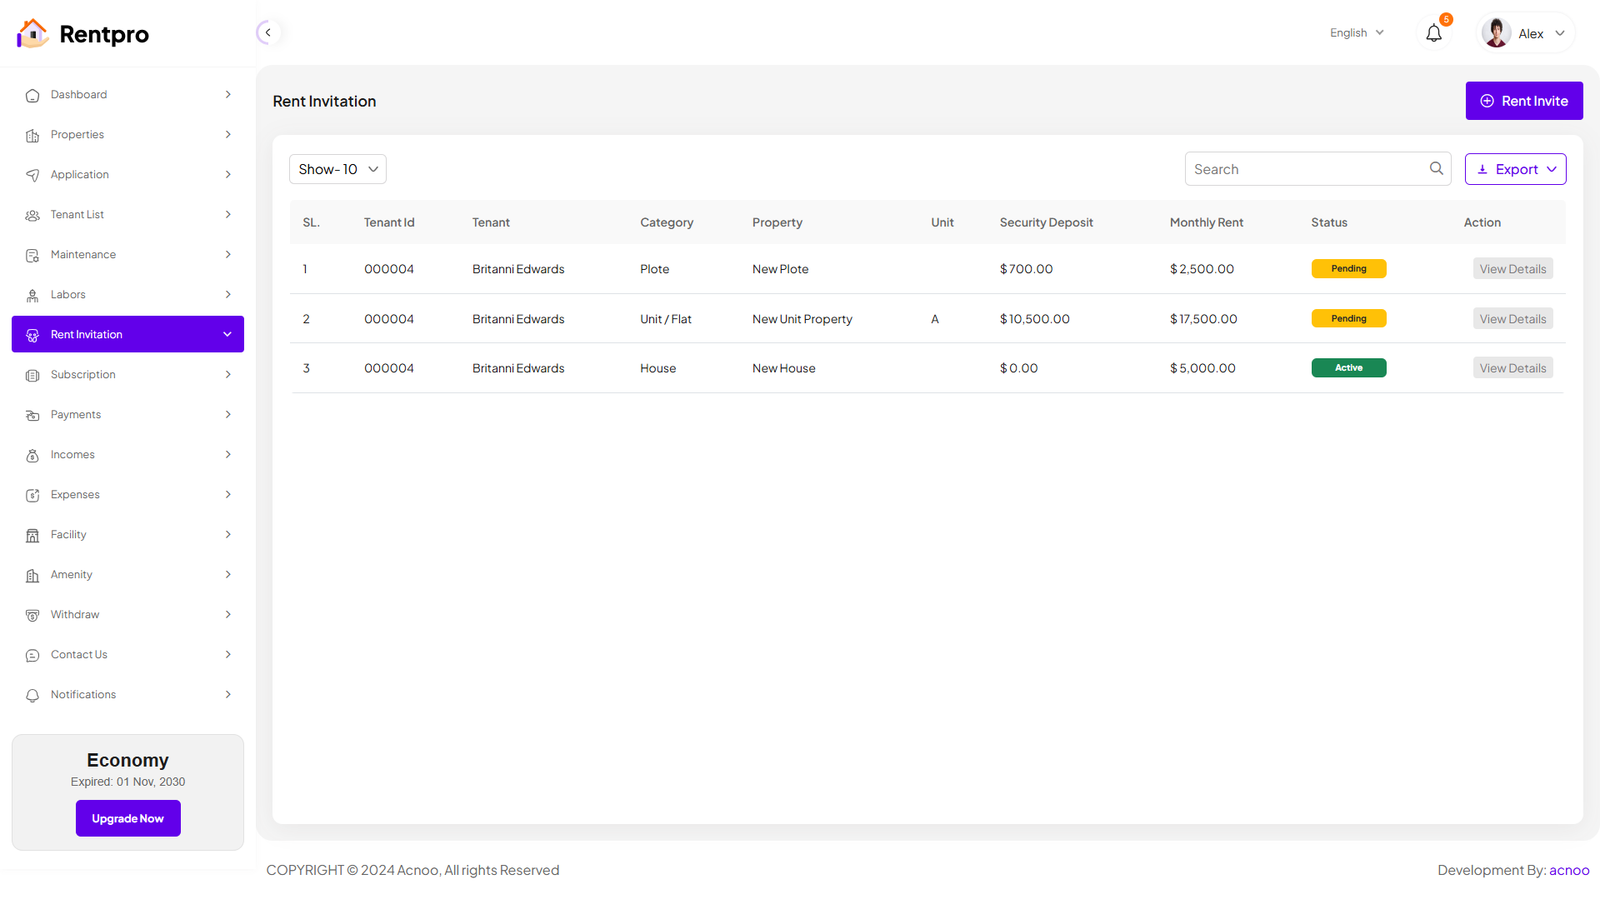
Rent Invitation List
The "Rent Invitation" page is a key feature that allows a landlord or property manager to proactively send a rental invitation to a prospective tenant. This page lists all such invitations, providing a clear overview of the status of each.
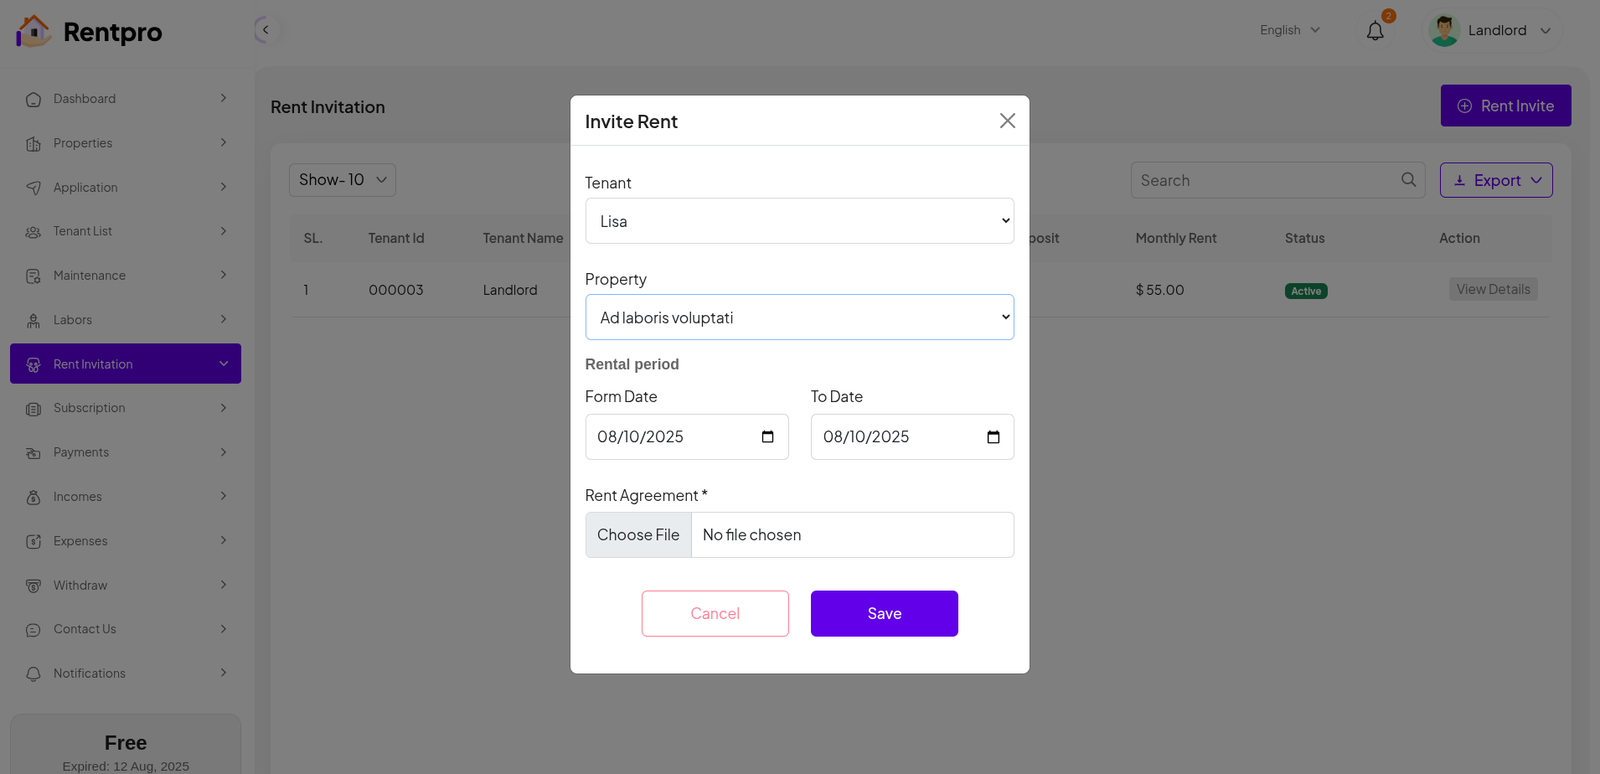
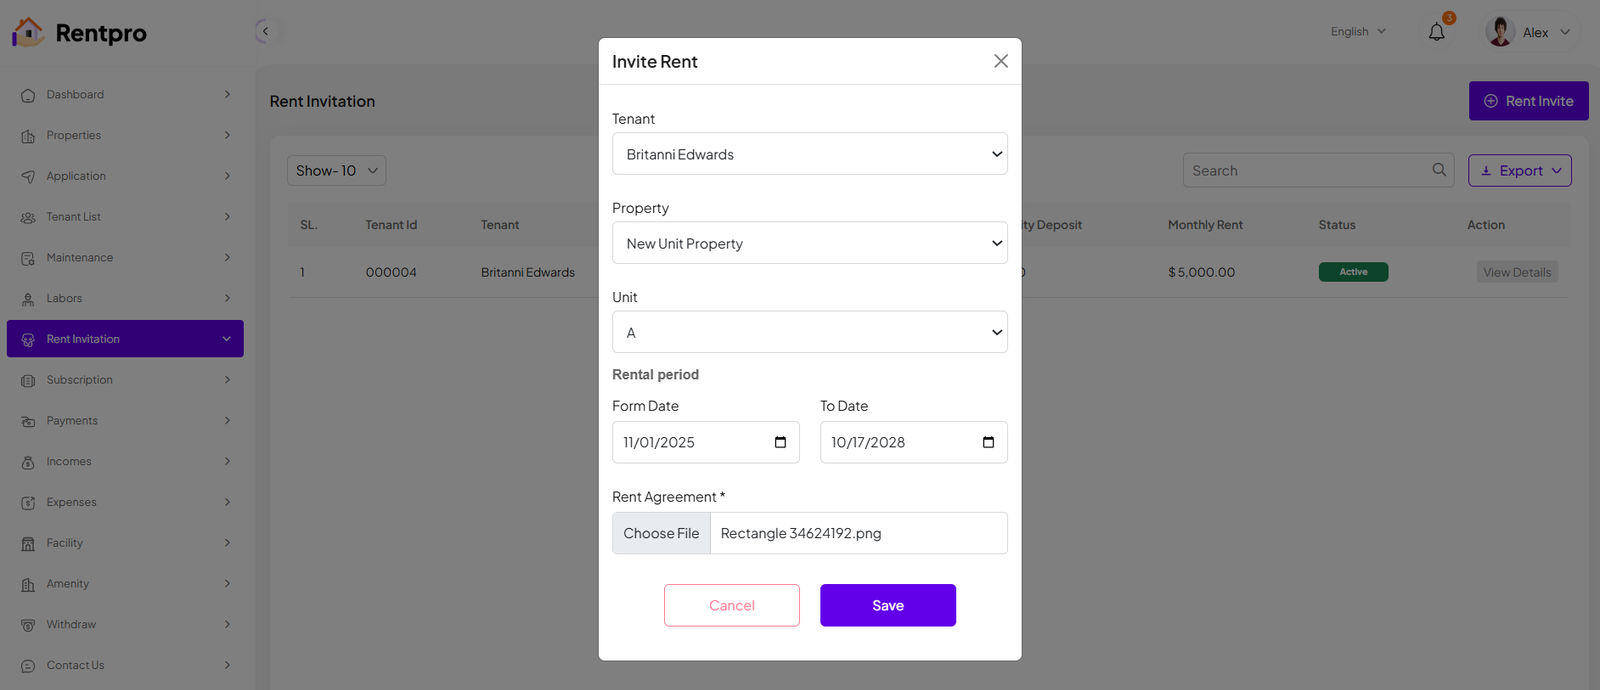
Rent Invite
The "Invite Rent" modal allows a landlord or property manager to create and send a formal rental invitation to a prospective tenant. When you select a property with the "Unit/Flat" category, a new Unit field will appear, which must be filled in. This feature is used when the landlord initiates the rental process, as opposed to waiting for a tenant-submitted application.
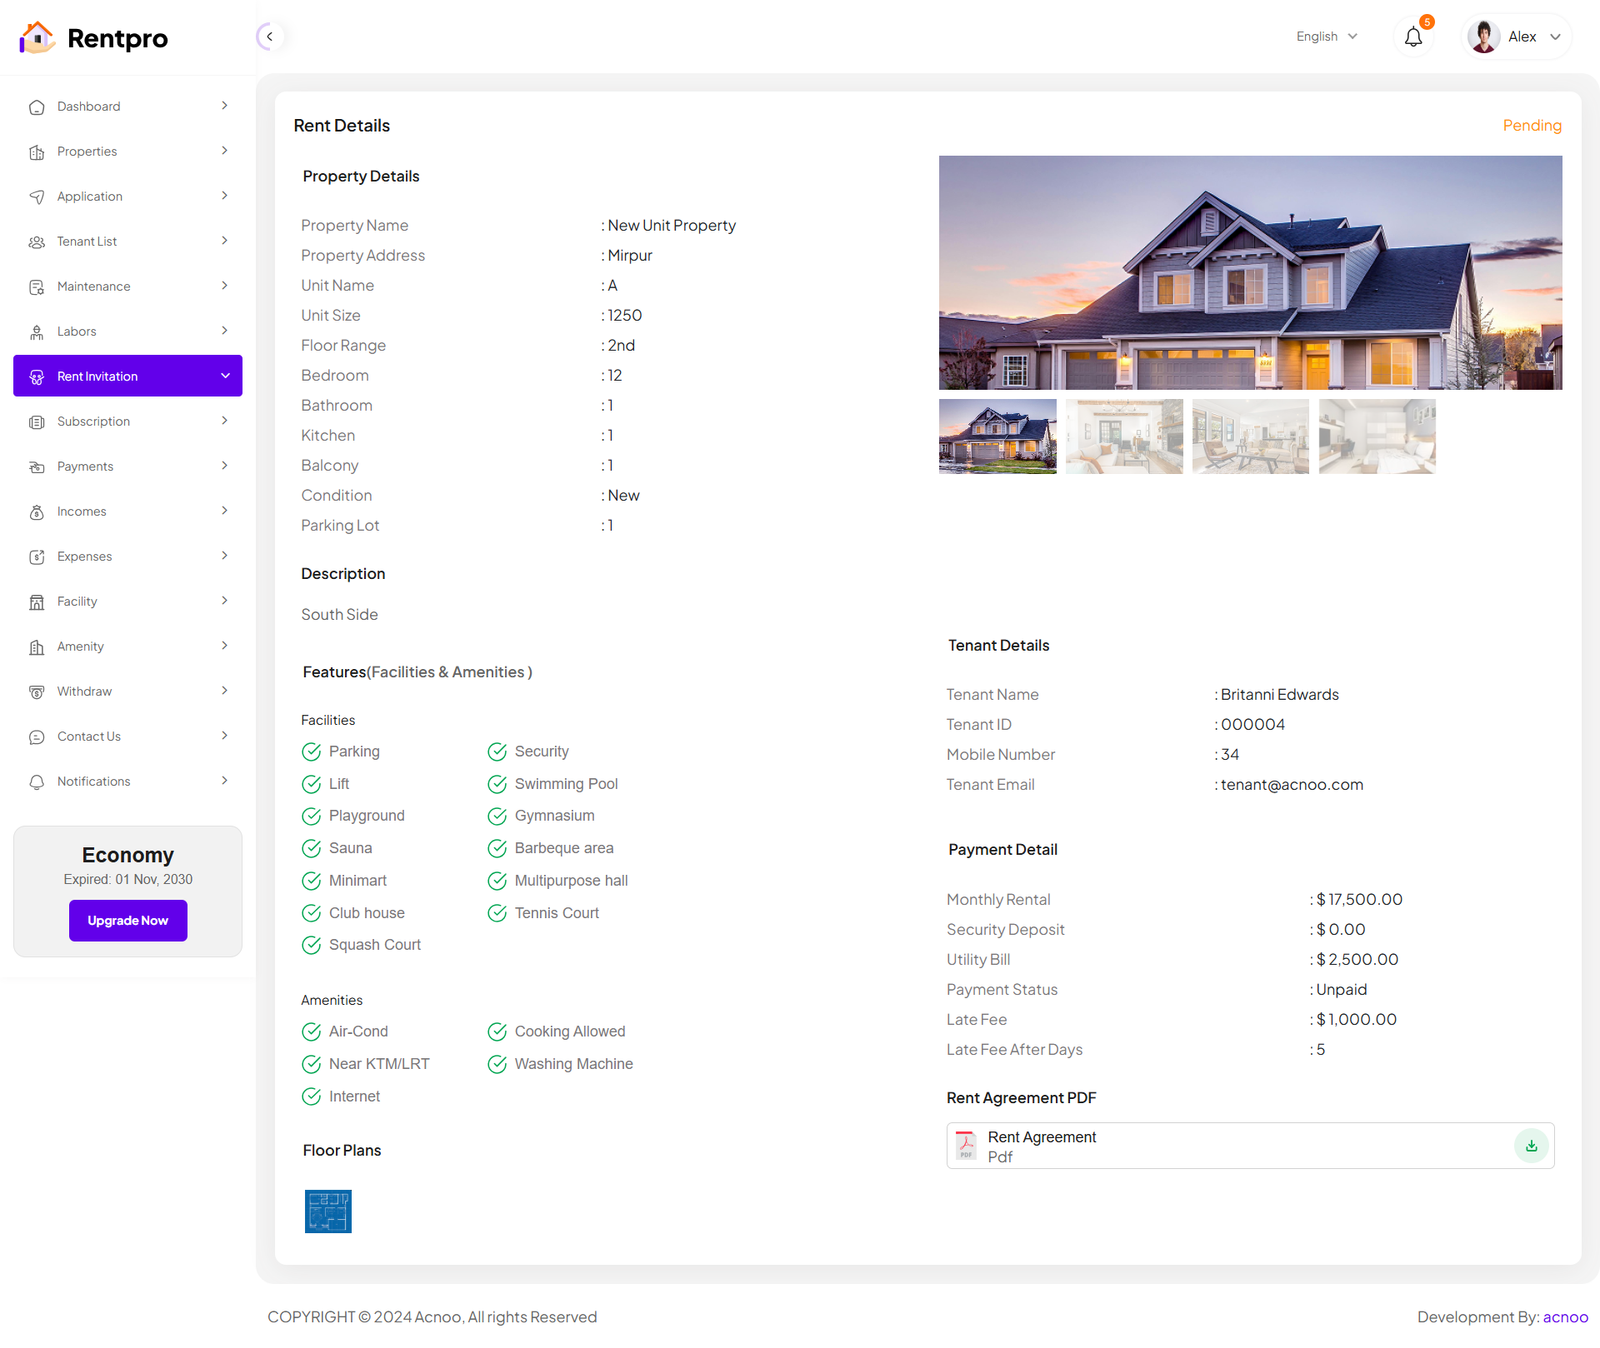
Rent Details
The "Rent Details" page provides a comprehensive, read-only view of a single rental invitation. It consolidates all information regarding a specific property, the prospective tenant, the financial terms, and associated documents into a single screen. This page is accessed by clicking the "View Details" button from the "Rent Invitation" list.
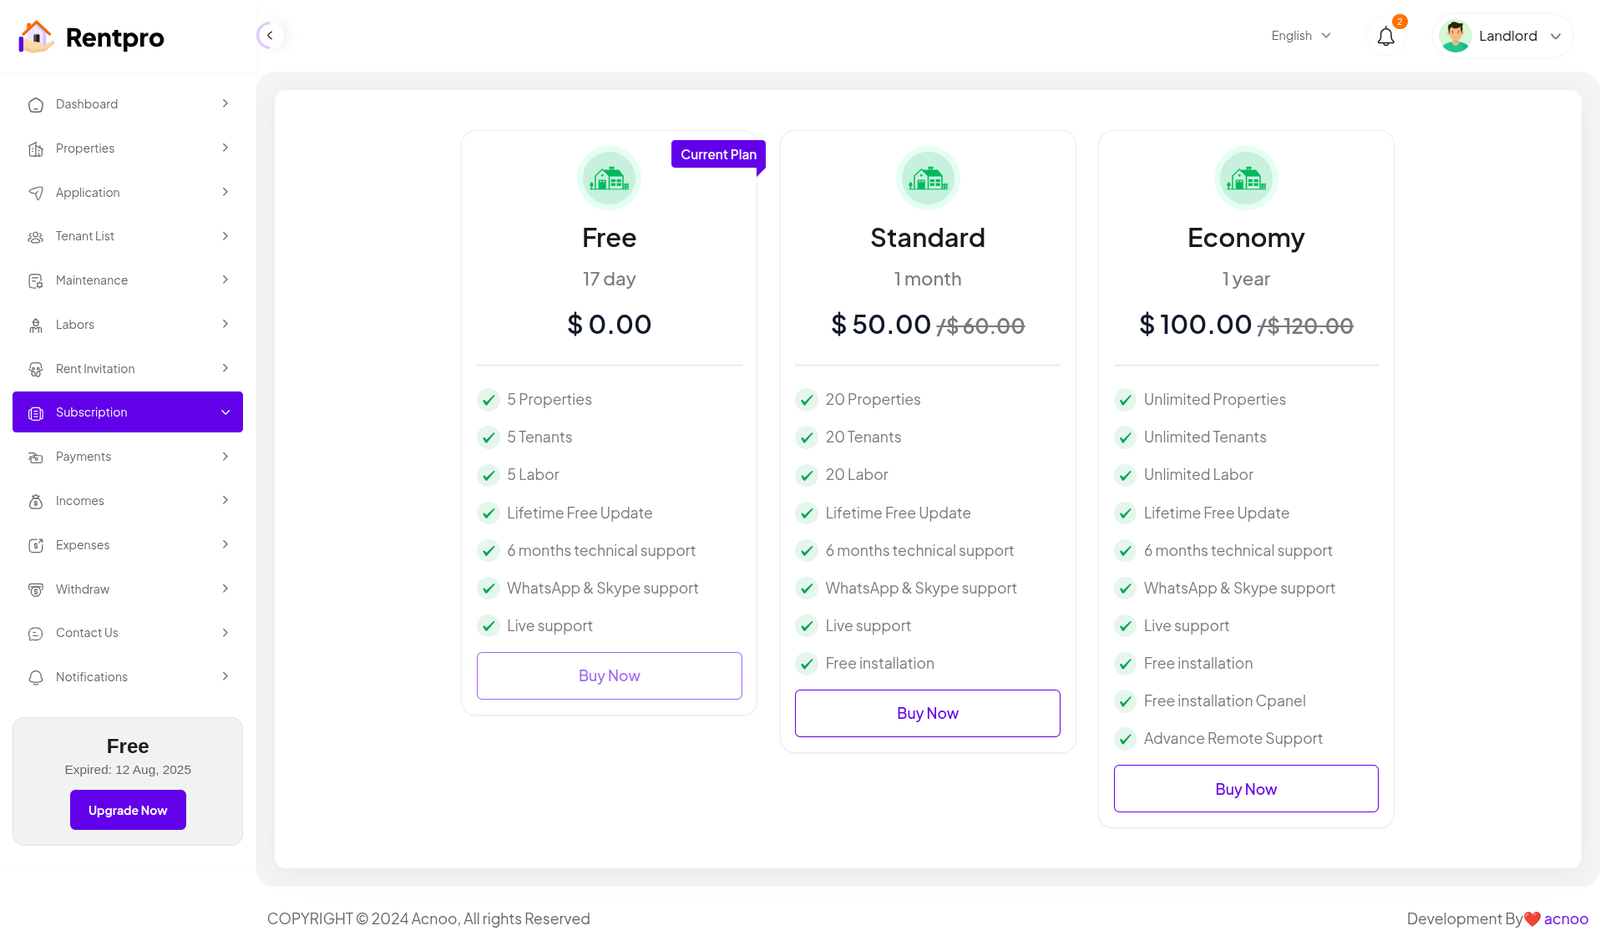
Subscription
The "Subscription" page is where users can manage their account plan, view the details of their current plan, and upgrade to a higher-tier subscription. This page is essential for users who want to unlock additional features and increase their usage limits within the Rentpro platform.
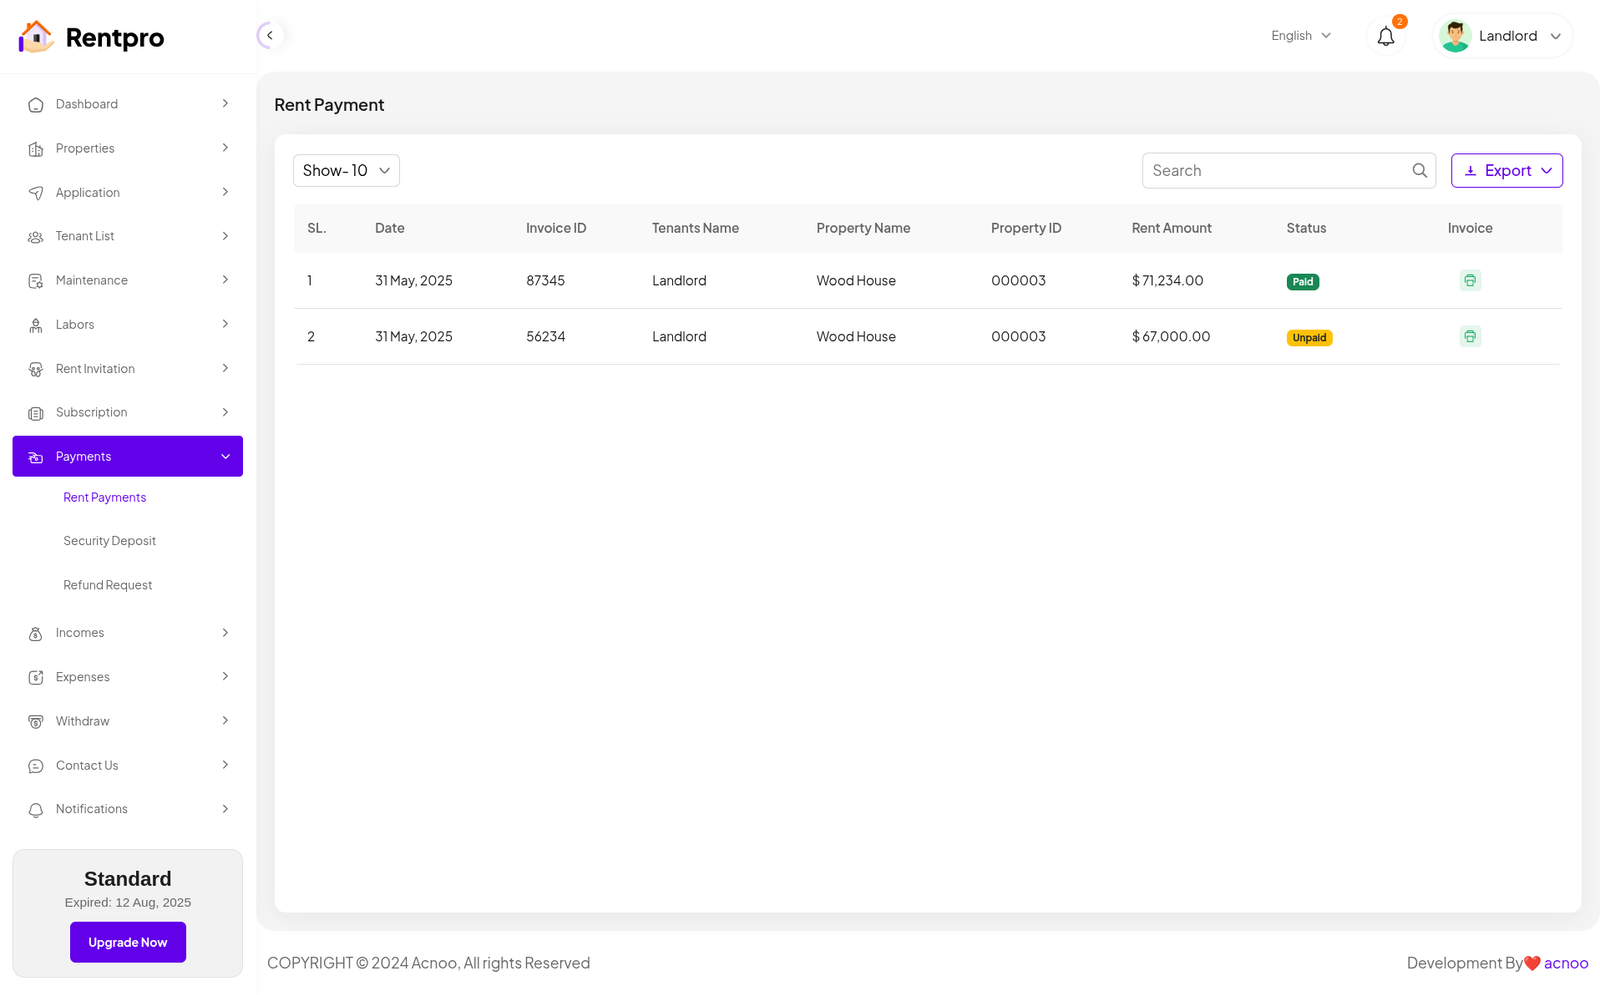
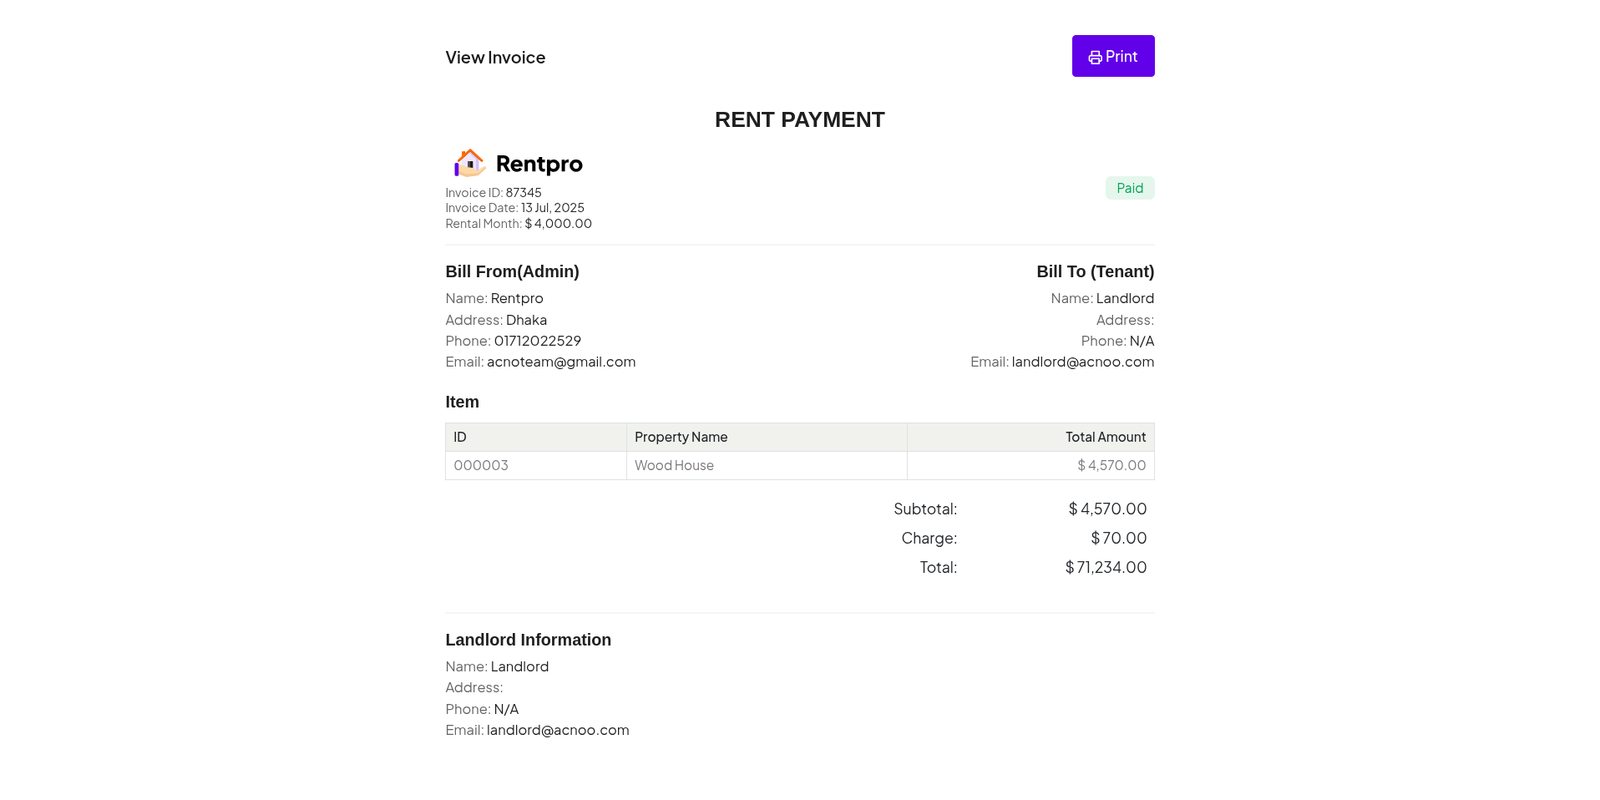
Rent Payments
The "Rent Payment" page provides an administrative overview of all rent payments. It allows a landlord or property manager to track rent invoices, monitor their payment status (paid or unpaid), and access the details of each invoice.
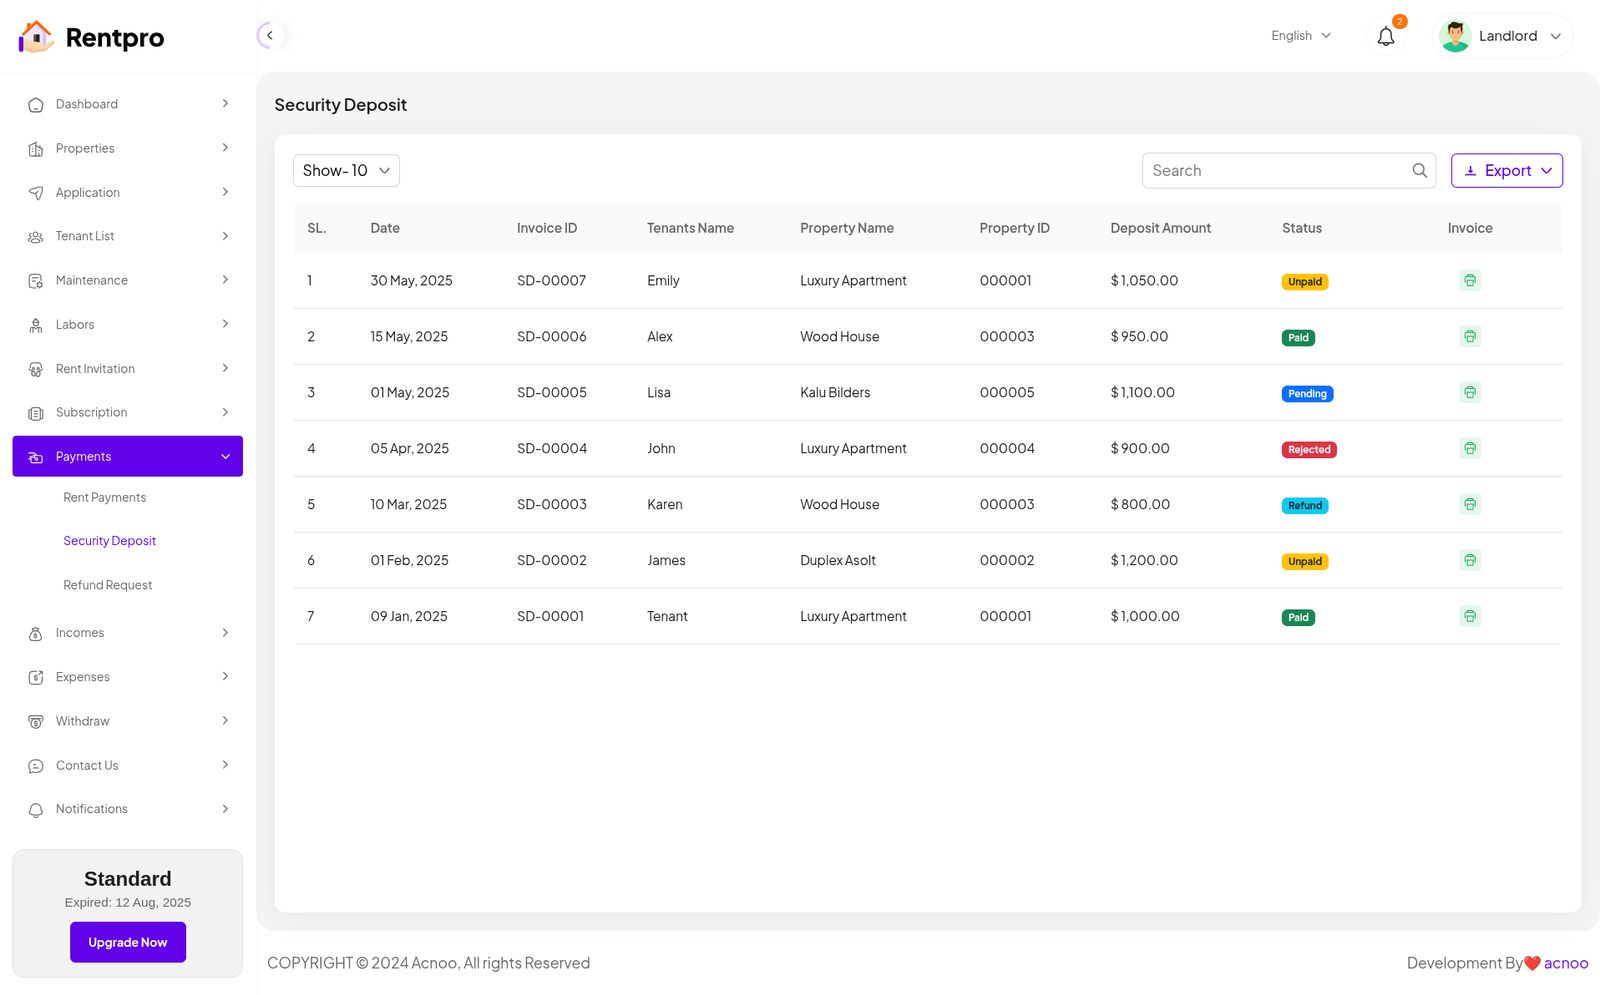
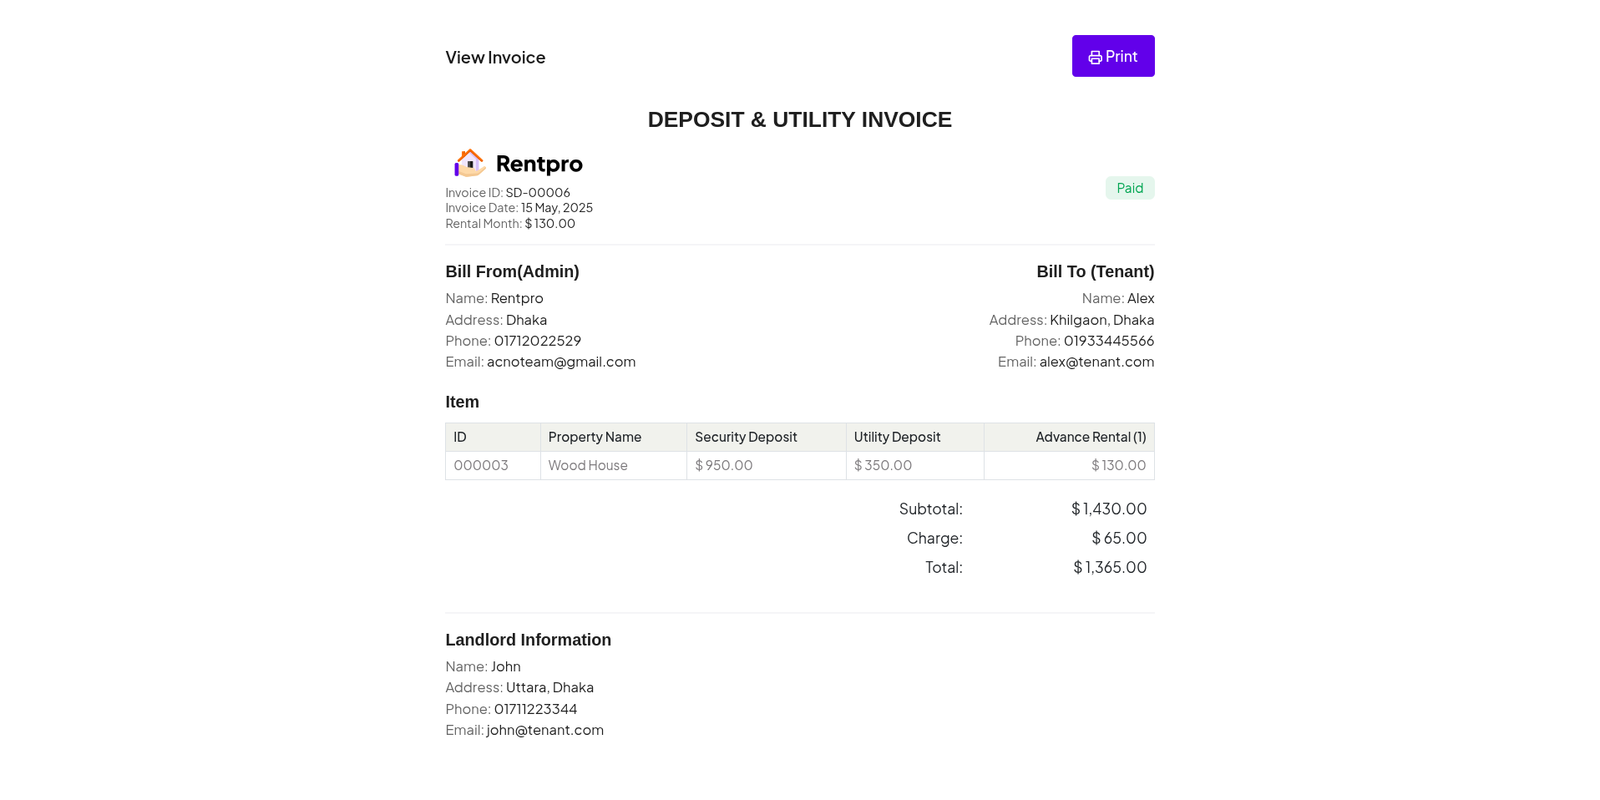
Security Deposit
The "Security Deposit" page provides a centralized list and status tracker for all security deposits. It allows a landlord or property manager to monitor the status of each deposit (paid, unpaid, pending, or refunded) and access the associated invoice. This is a critical financial management tool for landlords
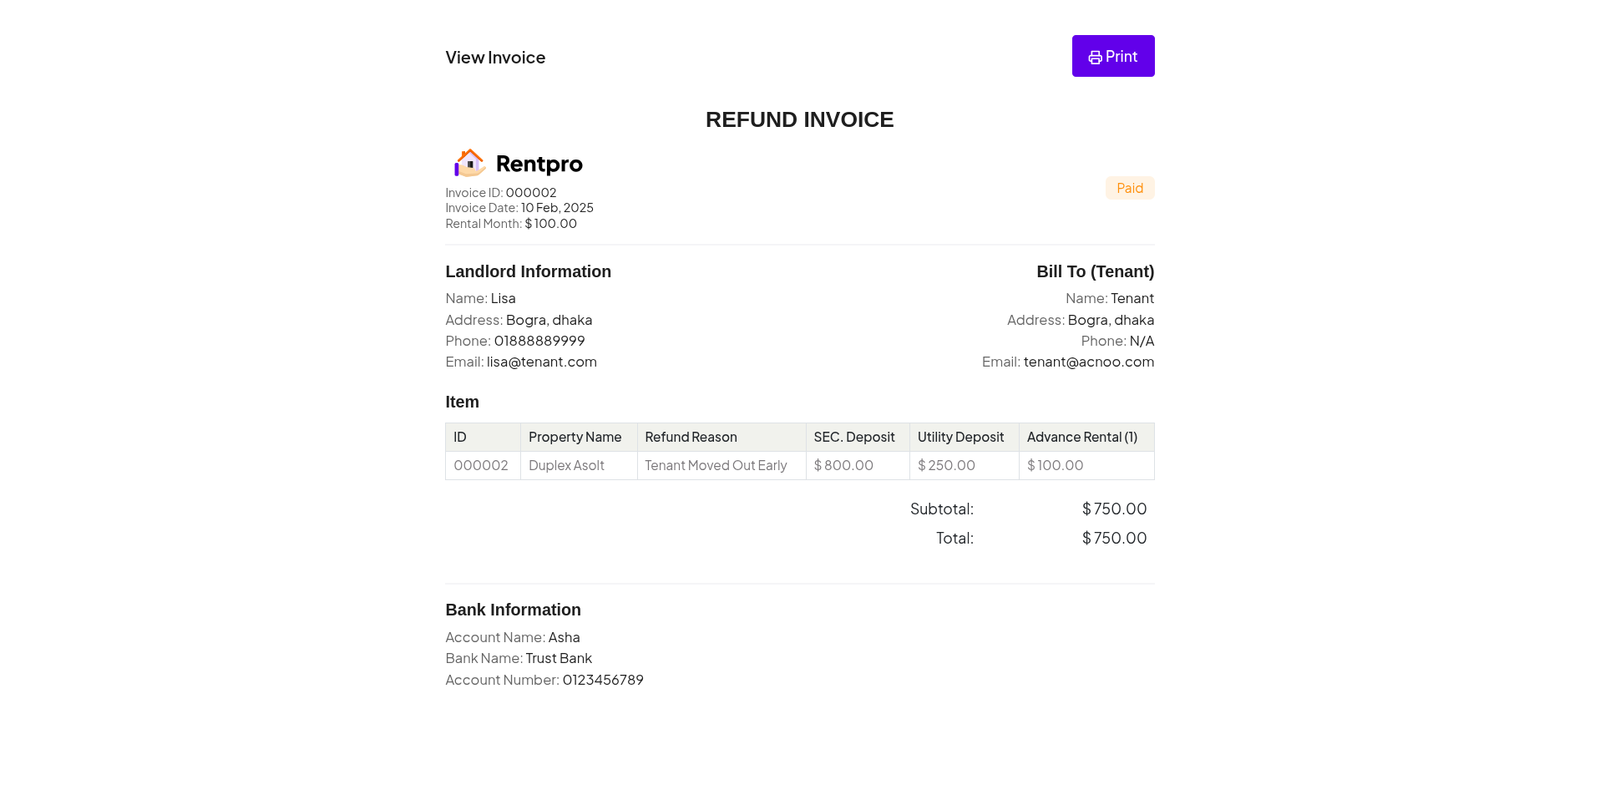
Refund Request
The "Refund Request" page provides an administrative list of all tenant-initiated refund requests, likely related to security deposits. It serves as a central hub for landlords or property managers to review, track, and manage these requests.

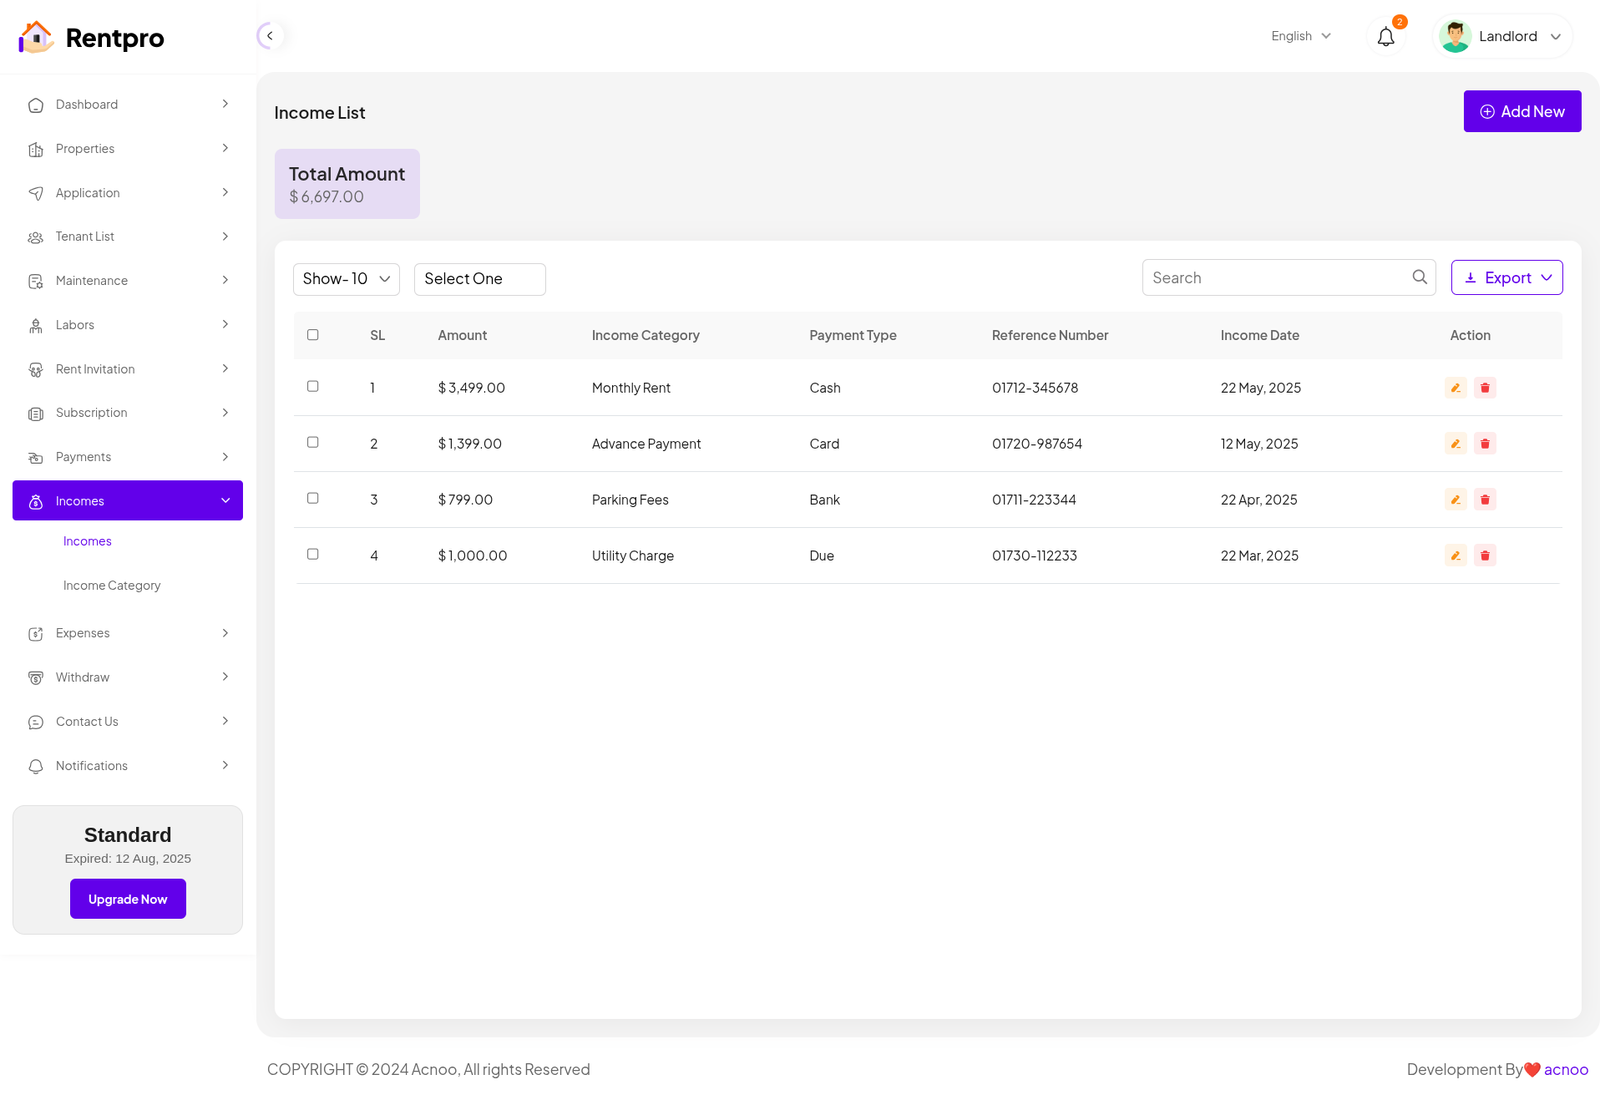
Income List
The "Income List" page provides a detailed record of all income generated by the platform. This is a crucial financial management tool that allows administrators to track revenue from various sources, such as rent, advance payments, fees, and utility charges.
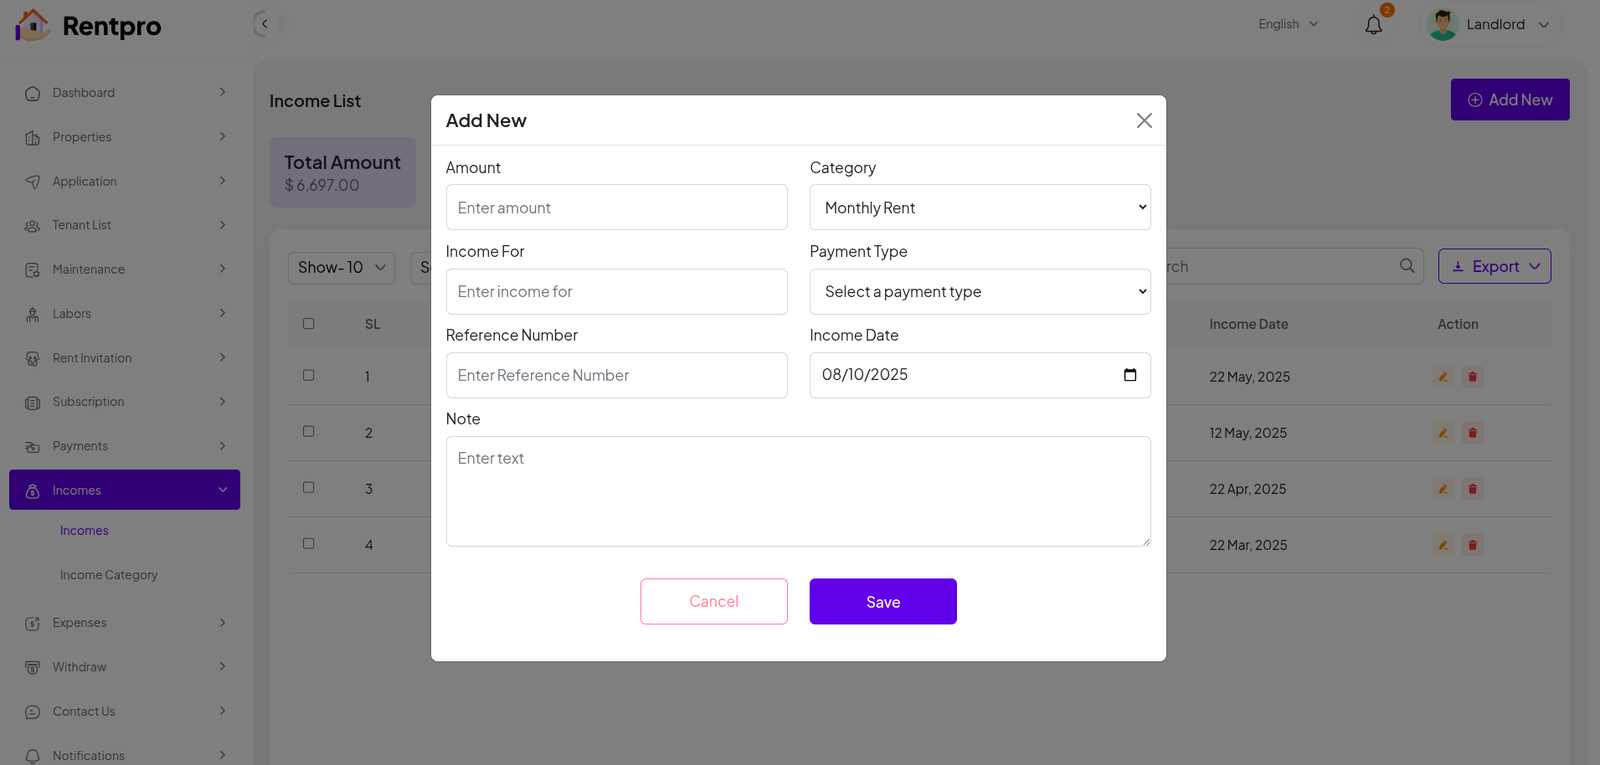
Add New Income
The "Add New" feature within the "Income" section of the Rentpro admin panel is used by administrators to manually record a new income transaction.
Income Category List
The "Income Categories List" page in the Rentpro admin panel is used to manage and define the different sources of income for the platform. This feature allows administrators to categorize all revenue streams for better financial tracking and reporting.

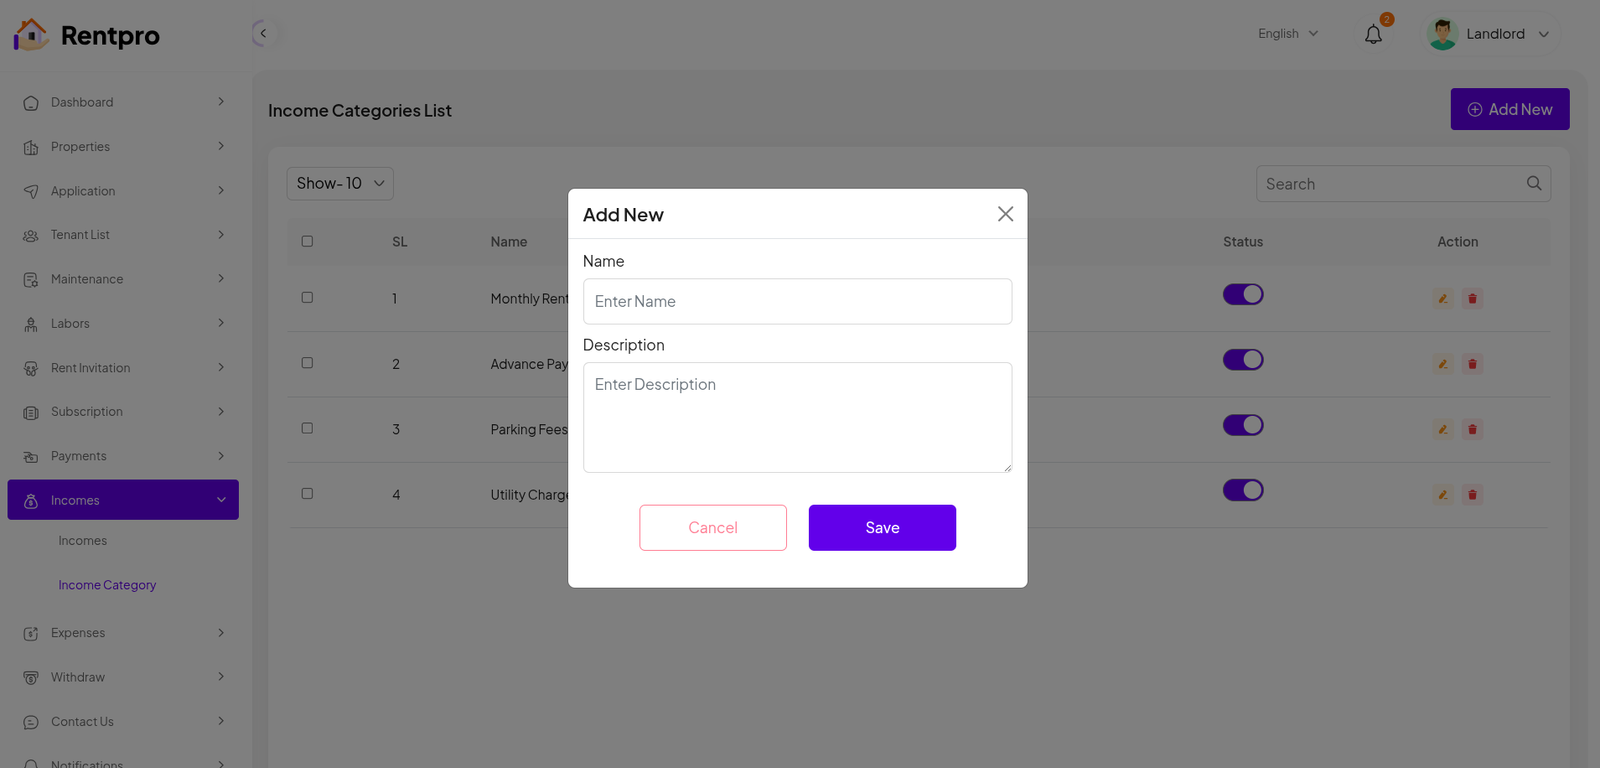
Add New Category
The "Add New" feature within the "Income Category" section of the Rentpro admin panel is used by administrators to manually record a new income Category.
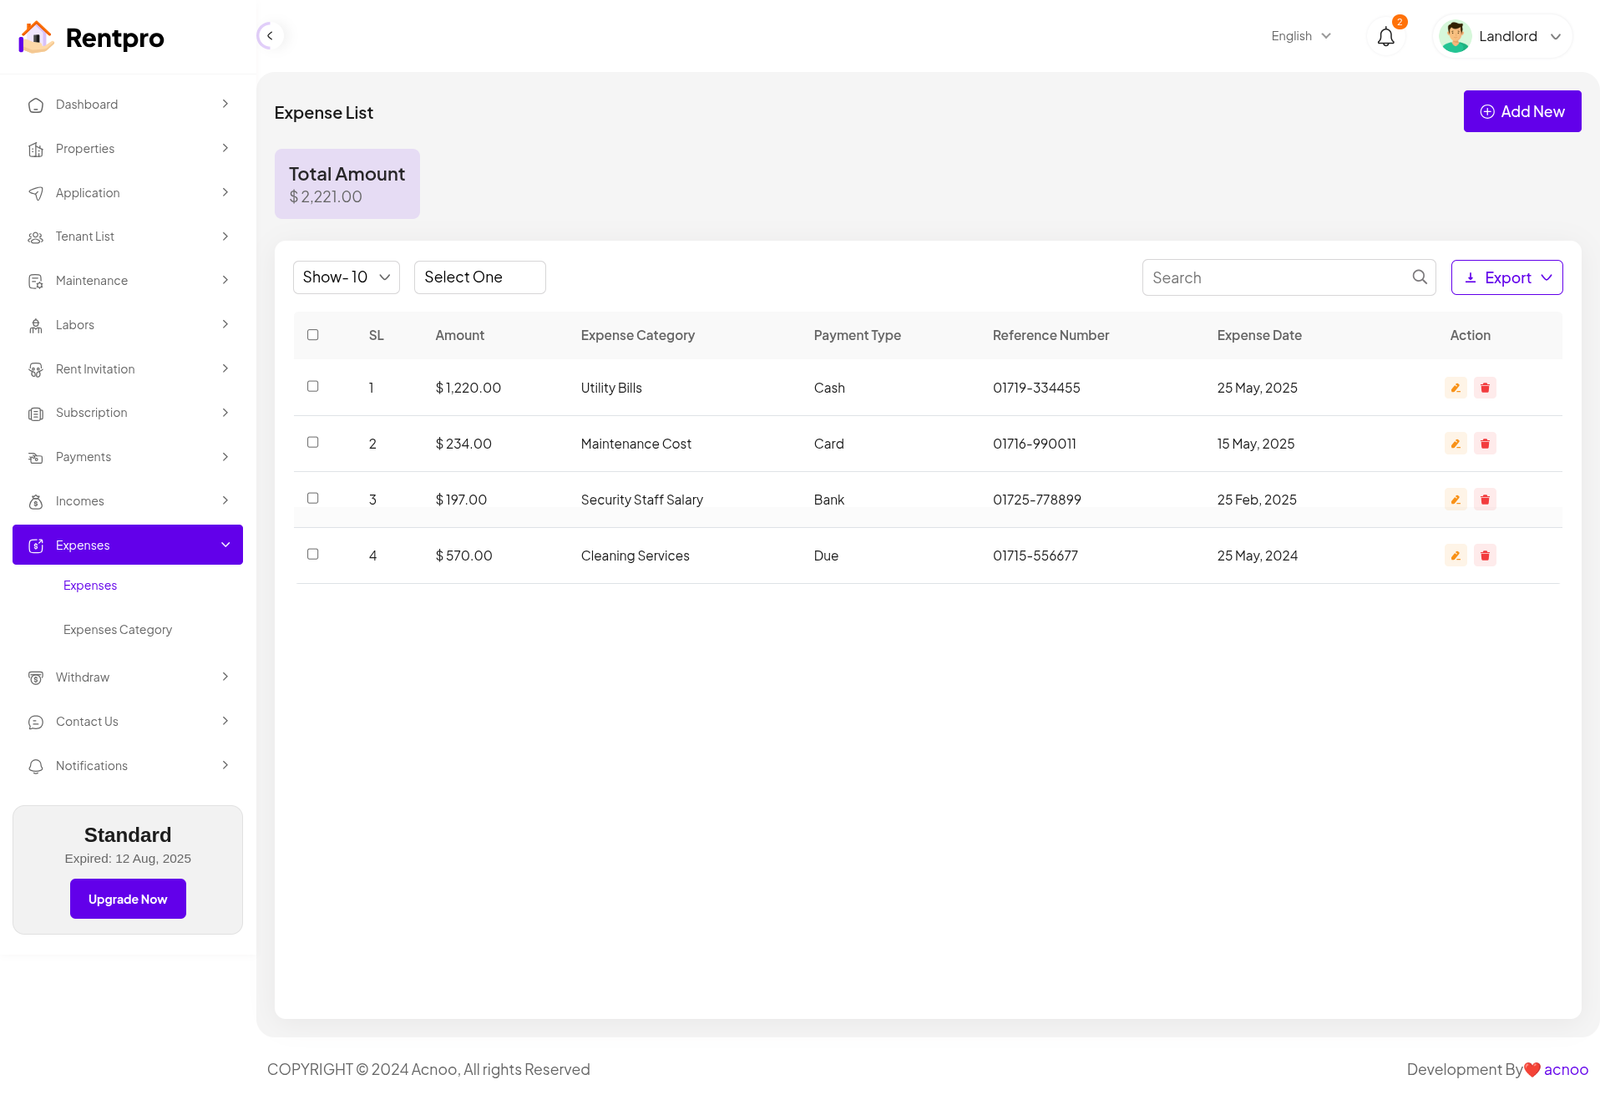
Expense List
The "Expense List" page provides a detailed record of all Expense generated by the platform. This is a crucial financial management tool that allows administrators to track revenue from various sources, such as rent, advance payments, fees, and utility charges.
Add New Expense
The "Add New" feature within the "Expense" section of the Rentpro admin panel is used by administrators to manually record a new income transaction.
Expense Category List
The "Expense Categories List" page in the Rentpro admin panel is used to manage and define the different sources of Expense for the platform. This feature allows administrators to categorize all revenue streams for better financial tracking and reporting.
Add New Category
The "Add New" feature within the "Expense Category" section of the Rentpro admin panel is used by administrators to manually record a new Expense Category.
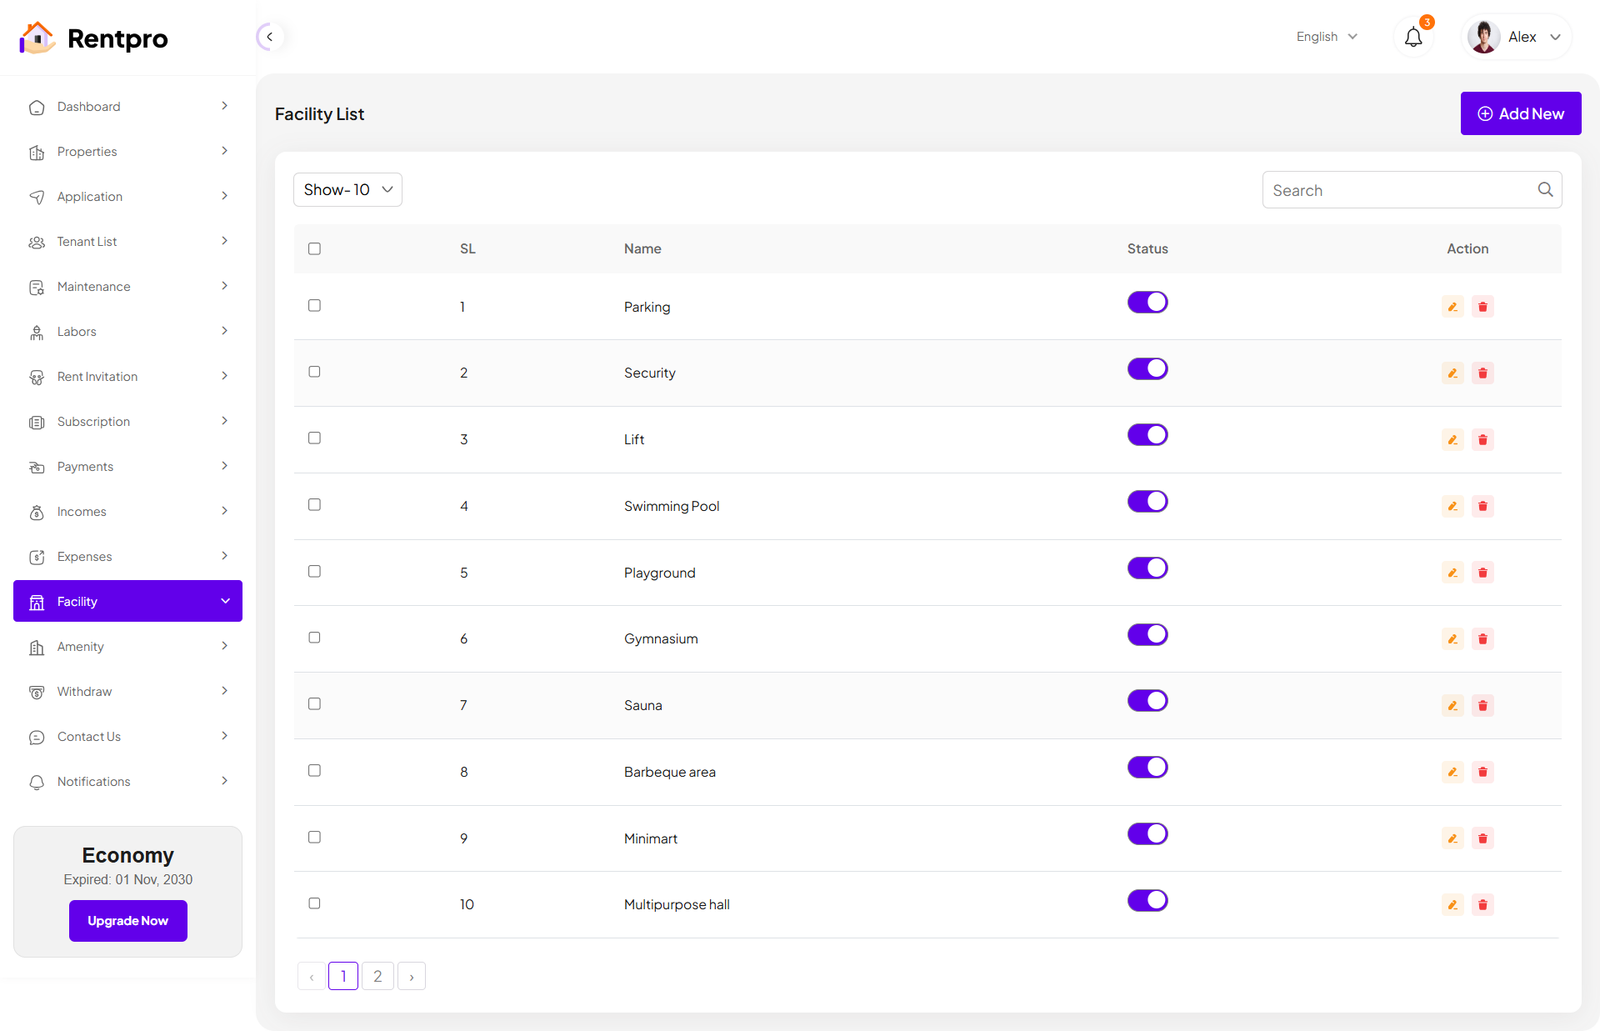
Facility List
The "Facility List" page allows administrators to manage and define all the available facilities for properties. Multiple facilities can be added here, and when creating or editing a property, users can select one or more of these facilities to accurately describe the property. This ensures consistent classification and helps users understand the facilities associated with each property. You can filter these facilities as needed, and also have the option to edit or delete them.
Add New Facility
The "Add New" feature within the "Facility" section of the Rentpro admin panel allows administrators to create new Facility for property listings. This ensures the platform's property classification system remains up-to-date and relevant.
Amenity List
The "Amenity List" page allows administrators to manage and define all the available amenities for properties. Multiple amenities can be added here, and when creating or editing a property, users can select one or more of these amenities to accurately describe the property. This ensures consistent classification and helps users understand the amenities associated with each property. You can filter these amenities as needed, and also have the option to edit or delete them.
Add New Amenity
The "Add New" feature within the "Amenity" section of the Rentpro admin panel allows administrators to create new Amenity for property listings. This ensures the platform's property classification system remains up-to-date and relevant.
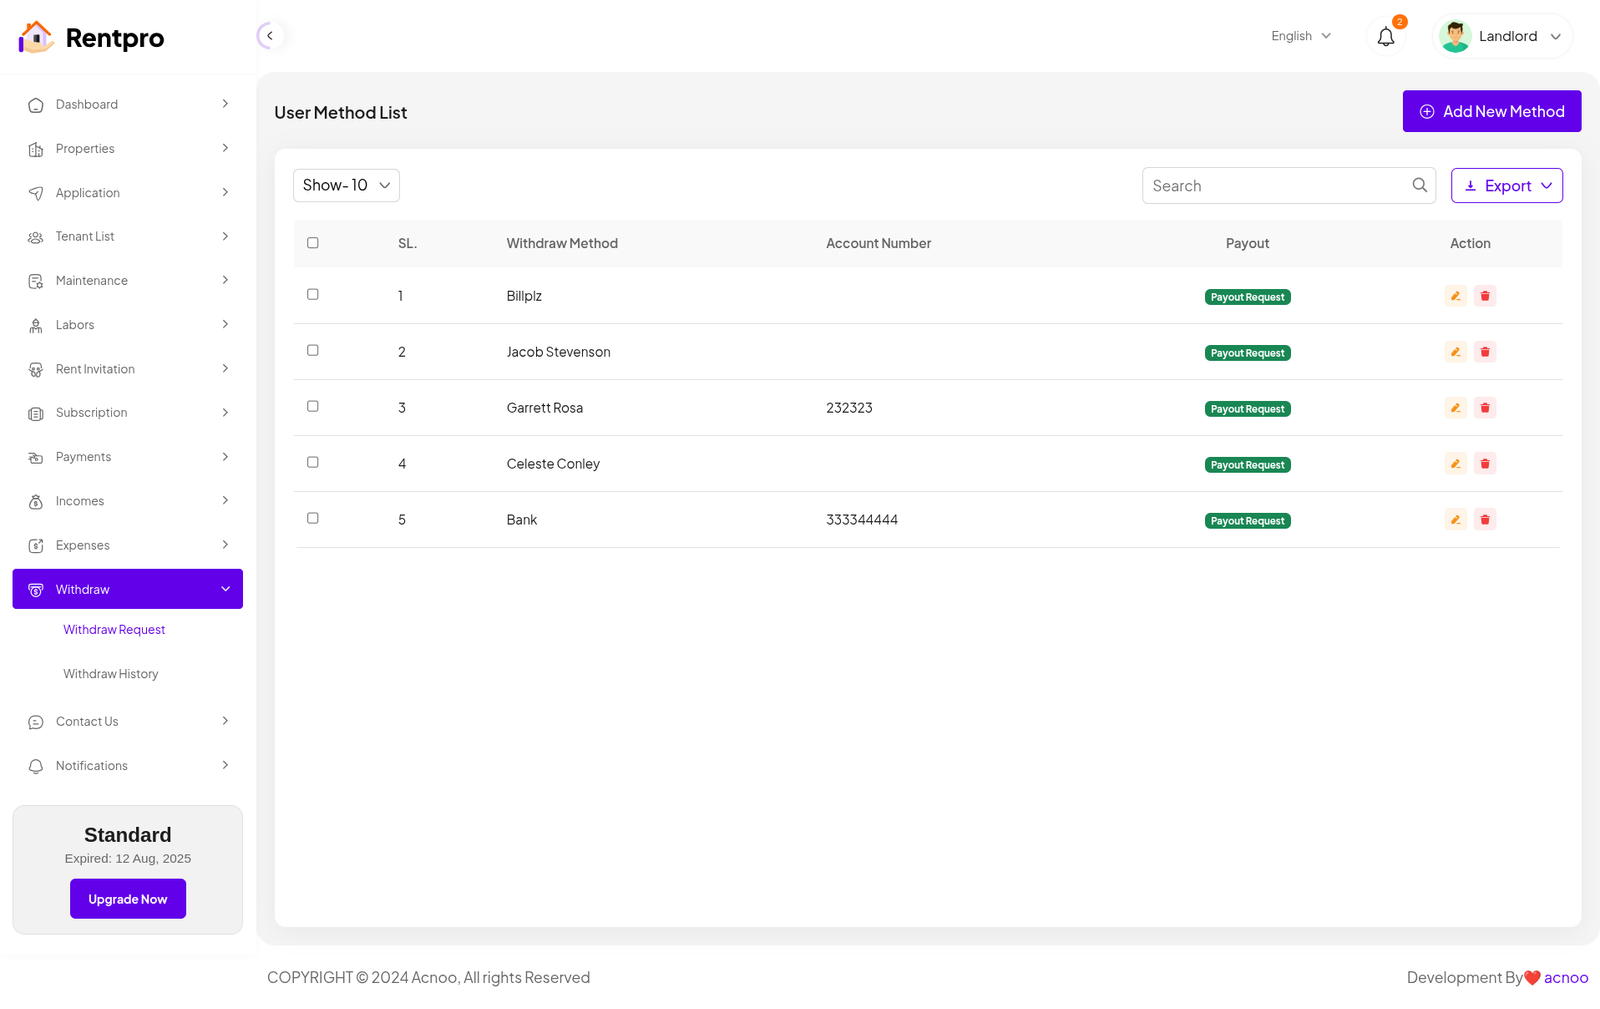
Withdraw Request
The "Withdraw Request" page is part of the financial management section of the Rentpro application. It provides a list of all withdrawal requests made by the landlord. This page allows the user to track the status of fund transfers from the Rentpro account to their own bank or payment method.
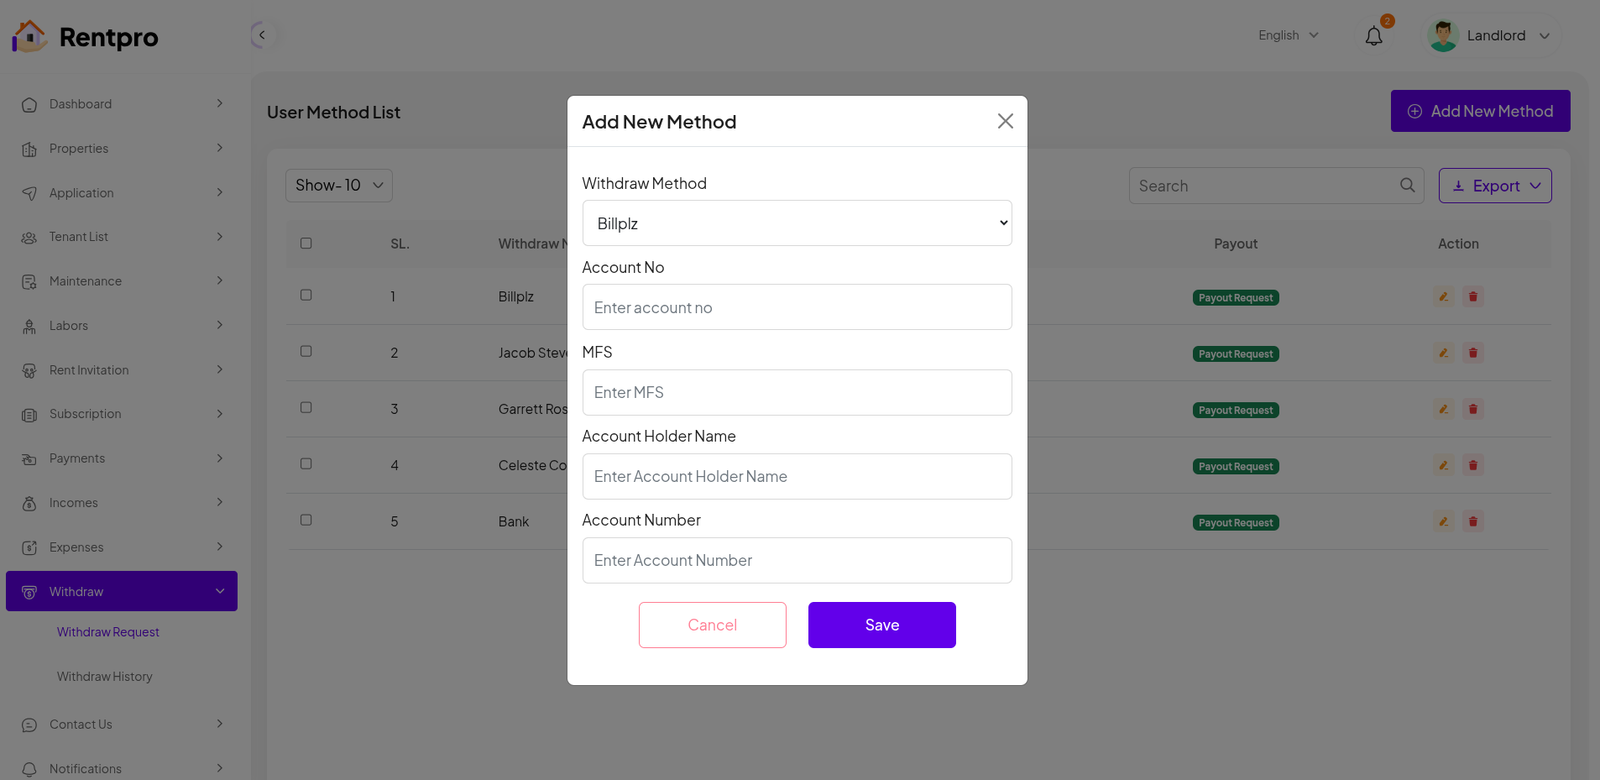
Add New Method
The "Add New Method" modal allows a user to securely add a new method for withdrawing funds from their Rentpro account. This is a critical step for a landlord to receive income from rent and other payments.
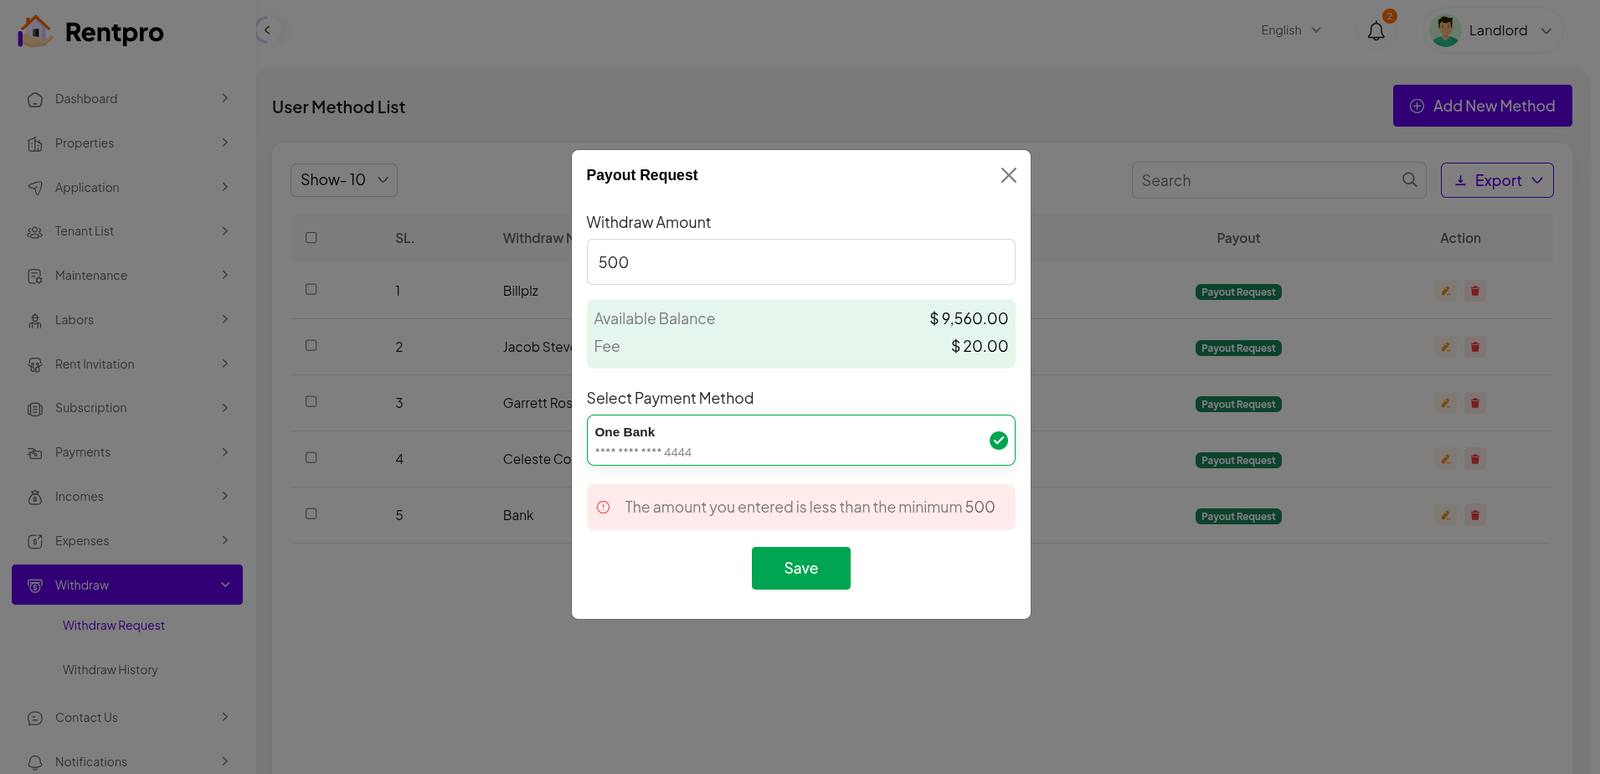
Payout Request
The "Payout Request" modal allows a user to initiate a withdrawal of funds from their available Rentpro balance. It provides a simple, secure way to transfer money to a pre-configured payment method, such as a bank account or digital wallet.
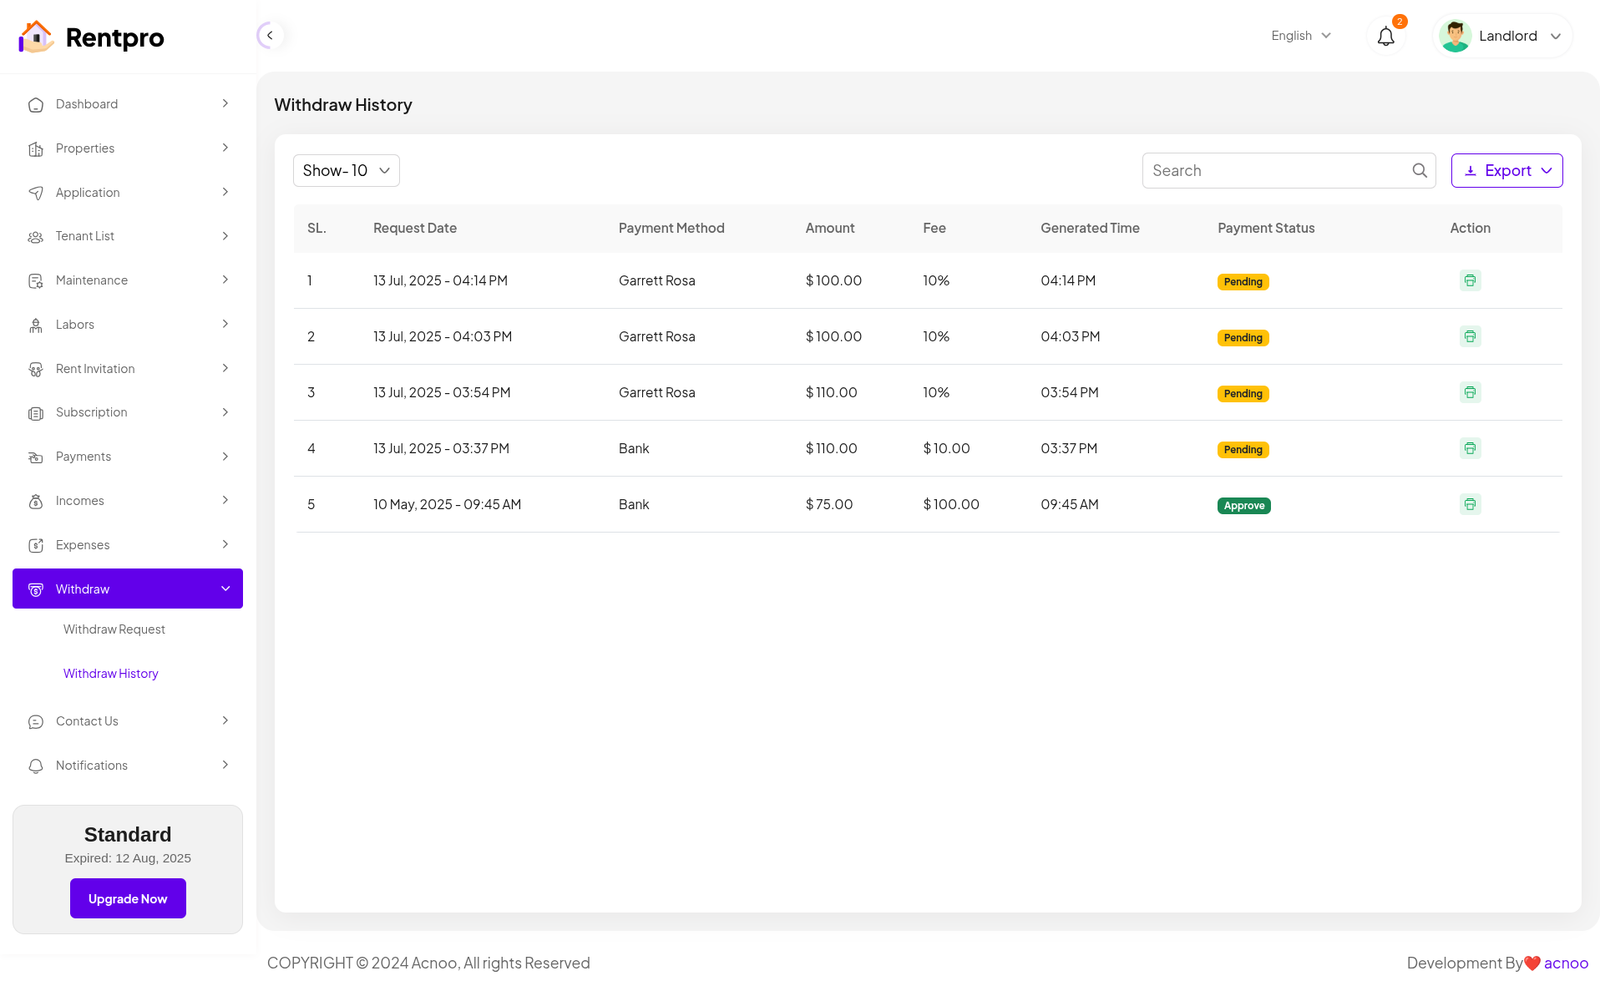
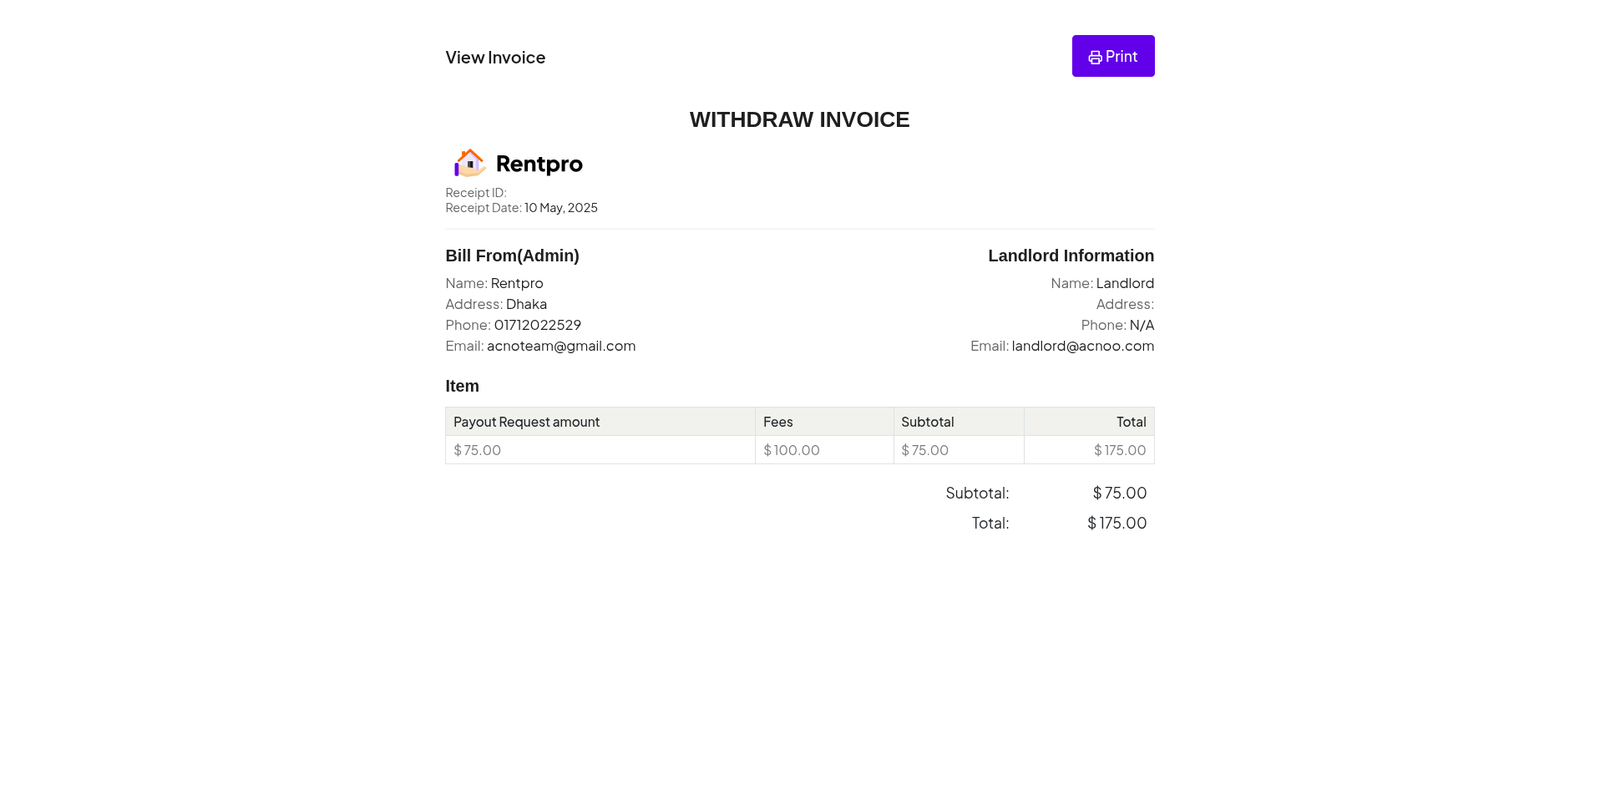
Withdraw History
The "Withdraw History" page provides a complete record of all past withdrawal requests, showing their status and key details. It allows a landlord or property manager to review the history of funds transferred out of their Rentpro account, providing a clear audit trail of their financial transactions.
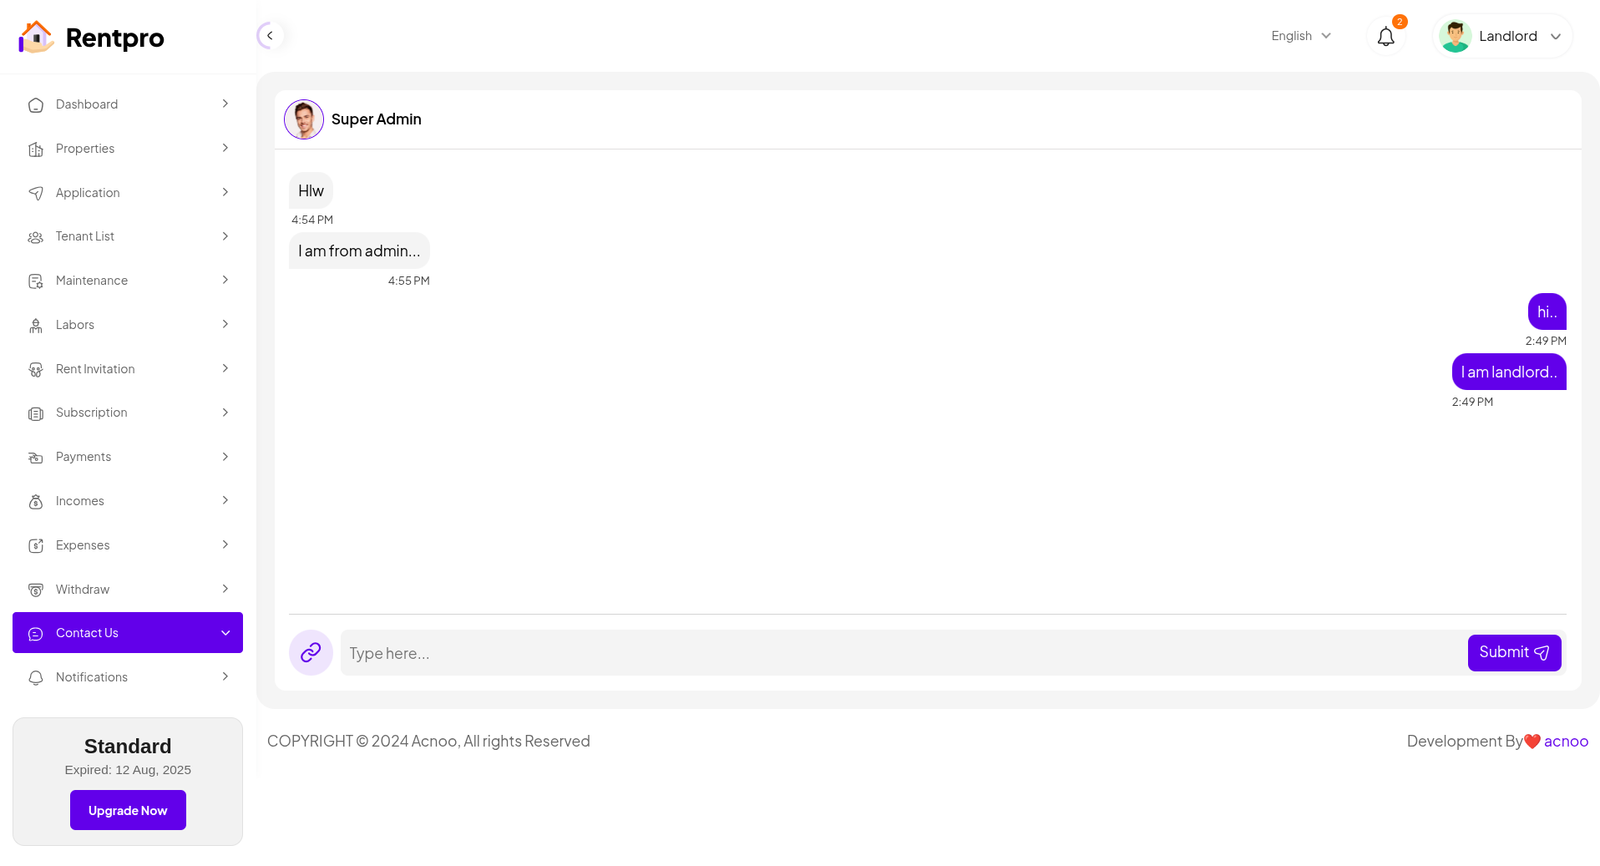
Contuct Us
The "Contact Us" page, which appears to function as a live chat system, provides a direct communication channel between the user (in this case, the Landlord) and an administrator or support team (referred to as "Super Admin"). This feature is crucial for resolving issues, getting support, and communicating with the application's staff.
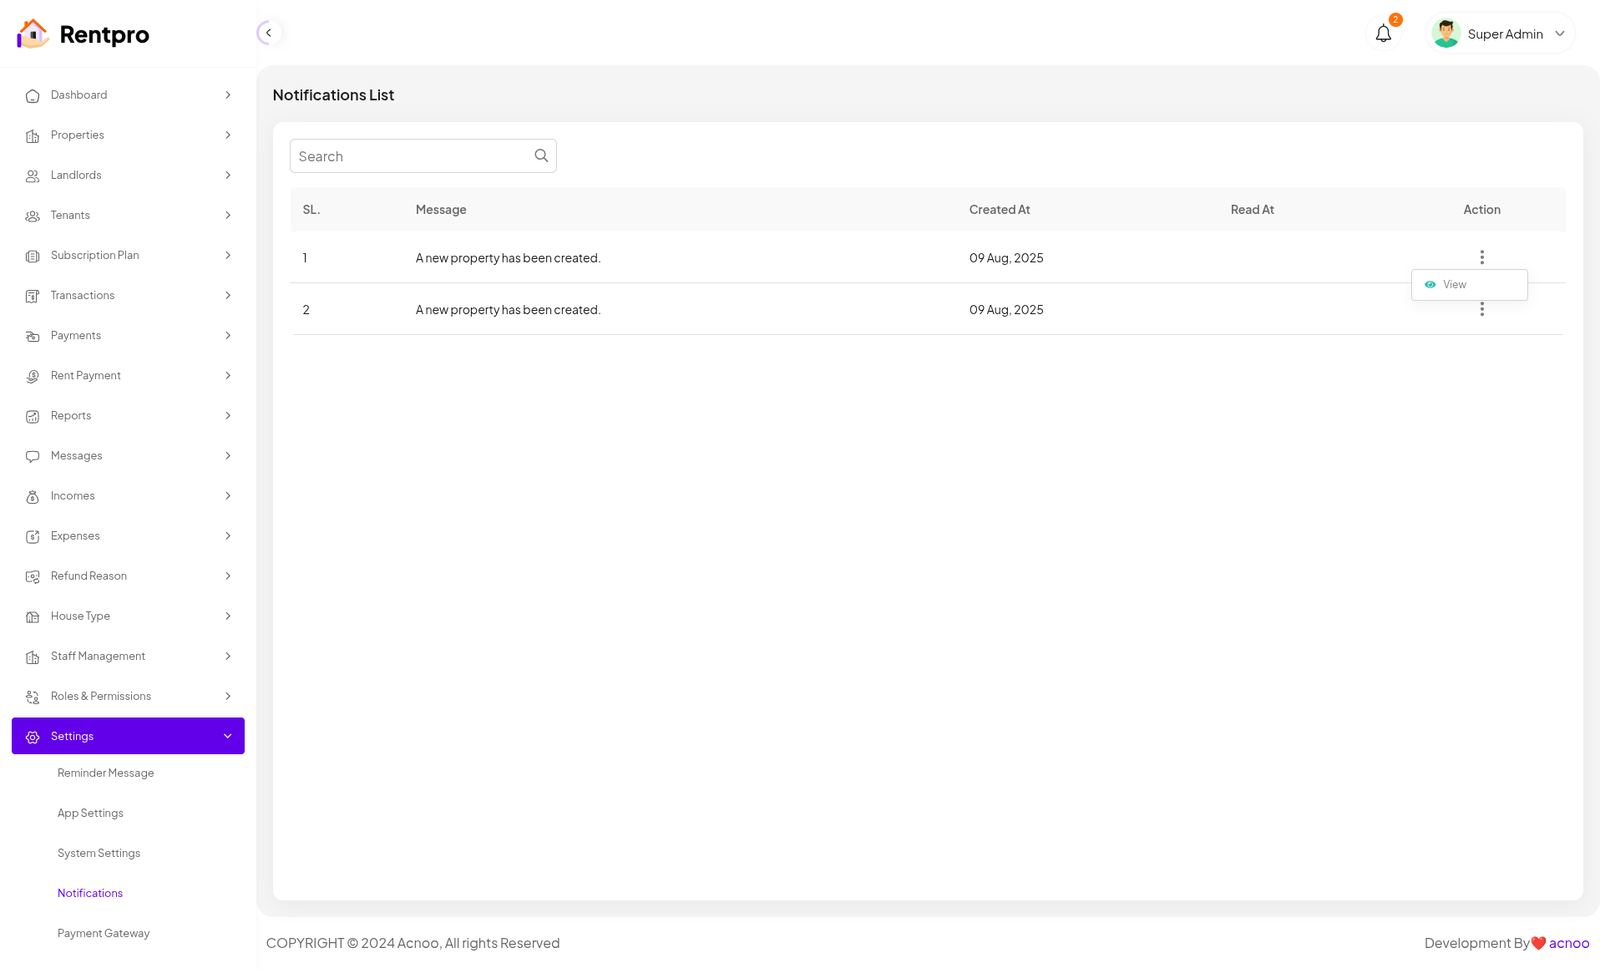
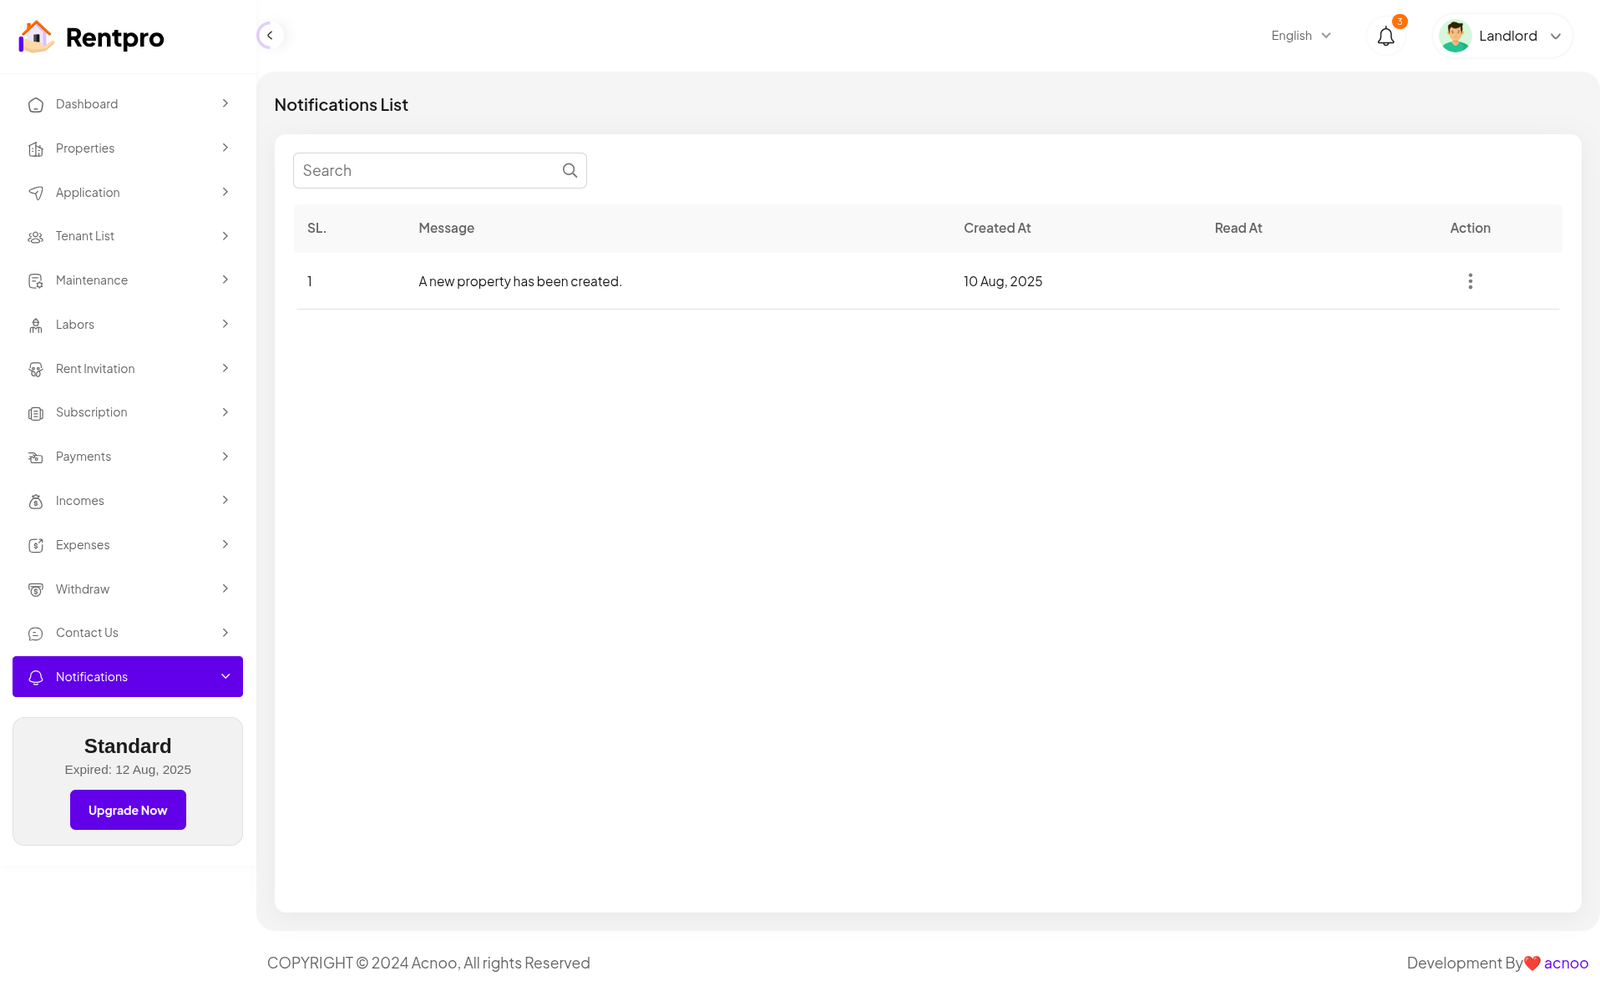
Notification
The "Notifications List" page serves as a centralized inbox for all system-generated notifications. It provides a historical record of important alerts and updates, ensuring that the user (landlord) is aware of key events within the application, such as new properties being created or other significant actions.
HELP & SUPPORT
Free support policy includes troubleshooting, technical assistance with the product only. It does not include any customization, additional features integration or concerns about third- party plugins compatibility. But, support is applied to plugin(s) we have developed and integrated ourselves. We appreciate your understanding!
If you need assistance and information on purchased product that is not covered in documentation, mail them on our support at
You can expect answer within 24-48 hours, usually as soon as possible in the order they were received.
Additionally, if any email has no response from the item owner for more than 7 days, that support email will be archived by default. However, if you need further assistance, you can mail us again.